Easy Wood Burning Patterns for Beginners
Wood burning, or pyrography, is a fun and creative hobby. It’s perfect for beginners who enjoy working with their hands.
Starting with simple patterns can help you get comfortable with the tools and techniques. Easy wood burning patterns allow you to practice and build confidence. You don’t need to be an artist to create beautiful designs. Basic shapes and lines can turn into amazing art.
Plus, wood burning is a relaxing activity. It’s a great way to unwind and express yourself. In this blog, we will explore some simple patterns ideal for beginners. Get ready to dive into the world of wood burning!
Getting Started
Getting started with wood burning can be fun and easy. Beginners can create beautiful designs with the right guidance. This section covers everything you need to start your wood burning journey.
Choosing Tools
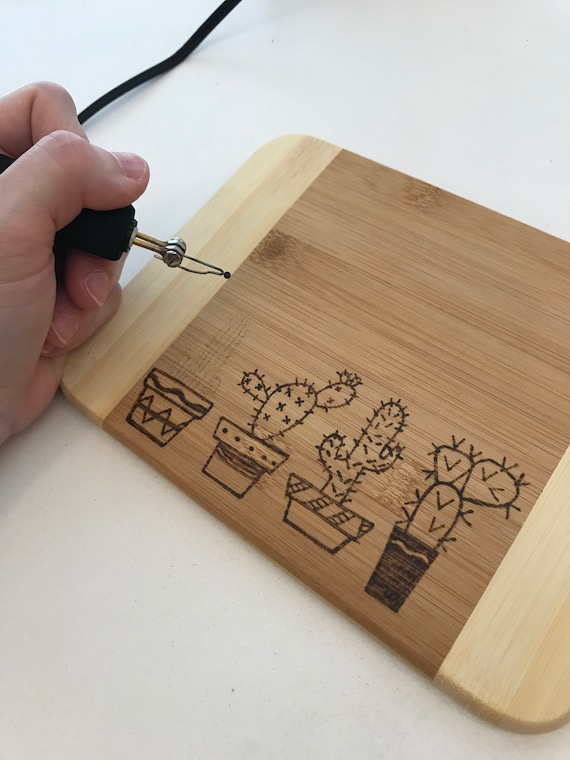
The first step is to choose the right tools. A wood burning pen is essential. It looks like a thick pen but heats up. You can find different tips for various patterns. Start with a basic tip. These are easier to control. Other tools include stencils and carbon paper. These help you trace designs on wood.
Preparing Wood
Next, prepare your wood. Soft woods like pine and basswood are best for beginners. They burn easier than hardwoods. Make sure the wood is smooth. Sand it with fine-grit sandpaper. This removes rough spots. Clean the surface with a damp cloth. Let it dry completely before burning.
Credit: www.etsy.com
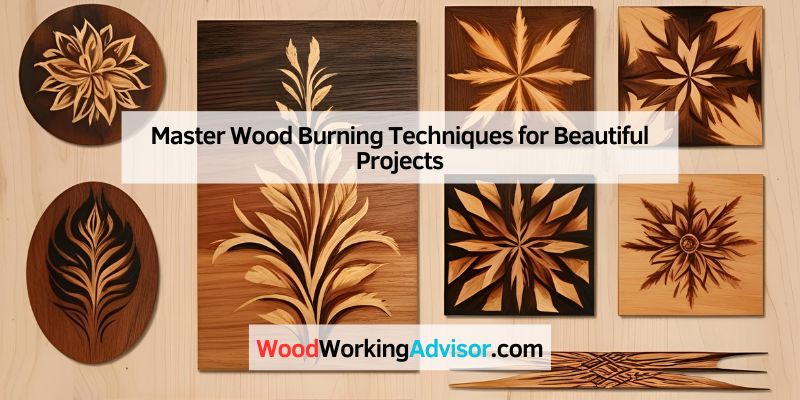
Simple Patterns
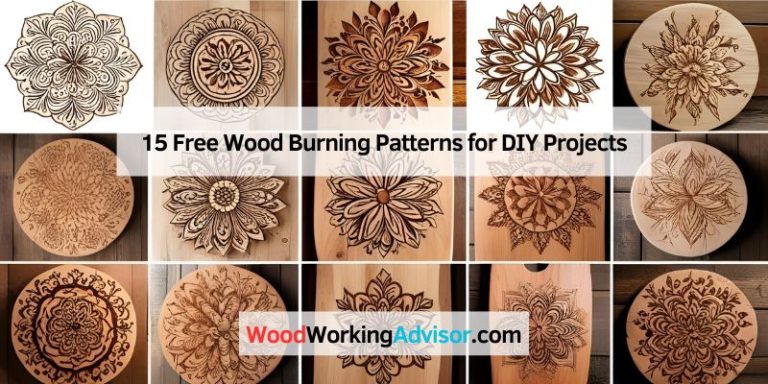
Wood burning, also known as pyrography, is a fun and creative hobby. Beginners can start with simple patterns. These patterns are easy to follow and help build confidence. With basic tools, anyone can create beautiful designs on wood.
Basic Shapes
Basic shapes are great for beginners. Circles, squares, and triangles are easy to draw and burn. Start with a simple circle. Trace it lightly on the wood. Use the wood burning tool to follow the outline. Fill in the circle with even strokes.
Next, try a square. Use a ruler to draw straight lines. Burn along the lines carefully. Remember to keep your hand steady. Triangles are also easy. Draw three lines to form a triangle. Burn along each line. Practice these shapes until you feel comfortable.
Easy Designs
Once you master basic shapes, try easy designs. Leaves are a good choice. Draw a simple leaf shape on the wood. Burn along the outline. Add veins inside the leaf. This adds detail to your design.
Stars are also simple and fun. Draw a star with five points. Burn along the edges. You can fill in the star or leave it hollow. Hearts are another easy design. Draw a heart shape. Burn along the outline. Fill it in with even strokes.
These easy designs help improve your skills. Practice makes perfect. Keep trying new patterns. Soon, you will create beautiful wood burning art.
Nature-inspired Patterns
Nature-inspired wood burning patterns offer an easy start for beginners. Simple designs like leaves, trees, and flowers can create beautiful artwork on wood.
Wood burning can be an enjoyable and relaxing hobby. Nature-inspired patterns are perfect for beginners. They connect you with the beauty of the outdoors while letting you practice your skills. ###
Leaves And Trees
Leaves and trees are great for learning wood burning. The shapes are simple, and you can easily find examples in your backyard or local park. Start with basic leaf shapes like ovals or teardrops. Practice adding veins to your leaves. This detail can make your designs pop. Try experimenting with different types of trees, like pine or oak. Each has unique textures and patterns. ###
Animals
Animals offer endless inspiration for wood burning. Start with easy shapes like birds or fish. These are manageable for beginners and still look impressive. Consider focusing on animal outlines. They are less detailed but still capture the essence of the creature. As you get more comfortable, add more details, like feathers or fur. Engage with the natural world. Look around you for inspiration. Have you ever seen a squirrel scampering up a tree? Imagine capturing that moment on wood. It’s a wonderful way to combine art with nature. What animal would you love to try next?
Geometric Designs
Geometric designs offer a simple and striking way to begin wood burning. Their clean lines and repetitive patterns make them ideal for beginners. They allow you to practice precision and control with your wood burning tool. Let’s explore two popular geometric designs: lines and angles, and symmetrical shapes.
Lines And Angles
Lines and angles form the backbone of many geometric patterns. Start with straight lines. They are the easiest to draw and will help you understand your tool’s movement. Try burning parallel lines. Keep them evenly spaced. This creates a pleasing pattern on the wood.
Next, practice angles. Simple triangles and zig-zags can create interesting designs. Focus on sharp, clean angles. You can also combine straight lines with angles. This forms more complex patterns like chevrons or herringbone.
Symmetrical Shapes
Symmetrical shapes bring balance and harmony to your wood burning projects. They are easy to replicate on both sides. Start with basic shapes like circles, squares, and triangles. Draw one half of the shape, then mirror it. This ensures symmetry.
You can also create patterns using symmetrical shapes. Try burning a series of concentric circles. Each circle inside another. It creates a hypnotic effect. Or, make a grid of squares. Fill each square with smaller shapes. This adds depth and interest to your design.
Experiment with different symmetrical shapes. The more you practice, the more confident you will become.
Lettering And Quotes
Lettering and quotes can add a personal touch to your wood burning projects. They allow you to express thoughts, names, or favorite sayings on your creations. Simple words can turn a plain piece of wood into a meaningful gift or decoration. Beginners can start with easy patterns and designs to build confidence.
Fonts And Styles
Choose a clear and simple font style. Basic fonts like Arial or Times New Roman are easy to trace and burn. Avoid intricate or cursive fonts at the beginning. They can be challenging for beginners. You can print your chosen text in your desired font size. This makes it easier to transfer to the wood surface.
Using bold letters can also help. They are easier to see and burn. Experiment with different sizes and styles to see what works best for you.
Placement Tips
Decide where you want the lettering to go. Think about the overall design. Do you want the quote in the center or at the top? Plan the space you need for the letters. Too cramped, and it will look messy. Too spaced, and it might look unfinished.
Use a pencil to lightly sketch the letters on the wood first. This will help you visualize the final look. Adjust as needed before you start burning. This step is crucial. It prevents mistakes and ensures your design looks clean and professional.
Creative Borders
Adding creative borders can make your wood burning projects stand out. They frame your artwork and give it a polished look. For beginners, starting with simple border patterns can be a great way to practice. Here are some easy ideas to get you started.
Framing Designs
Framing designs are a great way to outline your wood burning artwork. One popular option is the classic straight line border. It is easy to create and adds a clean look. You can also try zigzag lines for a bit more flair. Zigzag lines add a dynamic touch without being too complex.
Another idea is to use wavy lines. Wavy lines give a soft, flowing feel to your project. They are simple to make and look beautiful. If you want something more detailed, try drawing a series of small triangles. This creates a geometric border that is both modern and stylish.
Edge Patterns
Edge patterns can add an interesting finish to your wood burning projects. One easy pattern is the dotted edge. Simply burn small dots along the edge of your piece. This creates a delicate, decorative look.
Another simple pattern is the dashed line. Burn short, evenly spaced lines along the edge. This gives a stitched effect. For a nature-inspired border, try a leaf pattern. Draw small leaf shapes along the edge for a natural, organic feel.
If you enjoy more intricate designs, consider a scalloped edge. Draw a series of small, connected curves. This pattern looks elegant and adds a unique touch to your artwork.
Adding Color
Adding color to your wood burning projects can bring them to life. It makes your patterns stand out and adds depth. Beginners often find that adding color can transform simple designs. Let’s explore two simple methods to add color: using stains and colored pencils.
Using Stains
Stains are a great way to add rich color to your wood burning patterns. They penetrate the wood and highlight the grain. Choose a stain that complements your design. Apply the stain with a brush or cloth. Wipe off the excess for a lighter shade. You can layer stains for a deeper color. Always test stains on a scrap piece of wood first. This ensures you get the desired color.
Colored Pencils
Colored pencils offer a simple way to add vibrant color. They are easy to control and perfect for small details. Choose high-quality, soft-core colored pencils. These provide better coverage and blend well. Lightly layer the colors to build up the shade. Blend colors using a blending pencil or a cotton swab. Remember to seal your work with a clear finish. This protects the colors and enhances the overall look.

Credit: www.pinterest.com
Finishing Touches
Completing your wood burning project involves more than just the design. The finishing touches bring everything together. These steps can make your piece stand out. They add a professional look and feel to your artwork.
Sanding And Sealing
Sanding your work smooths out rough edges. It enhances the overall look. Start with fine-grit sandpaper. Gently rub the surface until it feels smooth to the touch. Be careful not to over-sand and damage your design.
Sealing your wood burning project is crucial. It protects the wood and keeps the design intact. Use a clear sealant for this step. Apply it evenly with a brush or spray. Let it dry completely before handling your artwork.
Displaying Art
Once your piece is ready, think about how to display it. You can frame smaller pieces for a polished look. Hang them on the wall or place them on a shelf.
Larger projects, like plaques or signs, can stand alone. Use sturdy hooks or brackets to secure them. Displaying your work properly adds to its charm.
Consider lighting to highlight your art. Proper lighting can enhance the details and make your work shine. Position lights to avoid glare and shadows.

Credit: www.amazon.com
Frequently Asked Questions
What Is The Easiest Wood To Burn?
Pine is the easiest wood to burn. It ignites quickly and burns hot, making it ideal for starting fires.
What Is The Difference Between Pyrography And Wood Burning?
Pyrography involves artistic designs on wood using heated tools. Wood burning is a broader term, including any technique that uses heat to mark wood.
How Do You Transfer Patterns To Wood For Wood Burning?
Transfer patterns to wood for wood burning using carbon paper. Place carbon paper between the design and wood. Trace over the design with a pen or pencil. The pattern transfers to the wood, making it ready for burning.
How To Get Smooth Lines When Wood Burning?
Use a steady hand and light pressure. Keep your wood burning tool clean and at a consistent temperature. Practice on scrap wood.
Conclusion
Wood burning patterns offer a fun and creative outlet. Beginners can start with simple designs. Practice regularly to improve your skills. Explore different wood types for varied effects. Use basic tools and follow safety guidelines. Patience and creativity are key.
Enjoy the process and let your imagination guide you. Remember, each piece is unique. Happy wood burning!