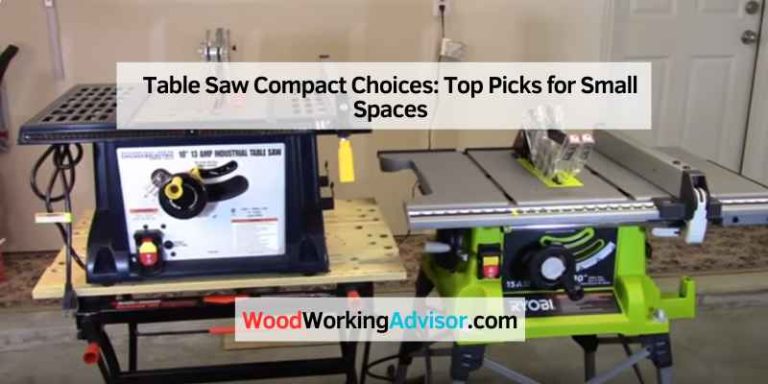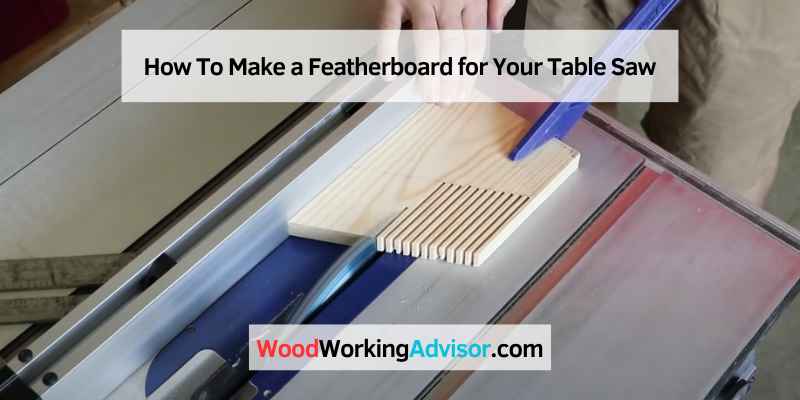
How To Make a Featherboard for Your Table Saw
A featherboard is an integral part of a table saw. It helps to keep the wood from moving when you are cutting it. You can make your weatherboard with a few wood pieces and screws.
DIY featherboard ~ how to make a fingerboard for a table saw | woodworking tutorial
A feather board is an excellent addition to any table saw. They help keep your workpiece from moving around and getting damaged while you’re working on it. Plus, they can help support long or wide boards when cutting them down to size.
Making your feather boards is a great way to save money and get the sizes and shapes you need for your projects.
Here’s a quick guide on how to make them:
1. Start by cutting some strips of wood about 3/4″ wide and 18″ long. These will be the rails for your feather boards.
2. Next, cut some shorter pieces that are about 3/4″ wide and 6″ long. These will be the posts that hold up the rails.
3. Drill holes in each posted piece, spacing them evenly apart so they’ll fit onto the rails snugly.
4 . To assemble, slip the posts onto the rails and then secure them with screws or nails.
That’s it! Your feather boards are now ready to use.
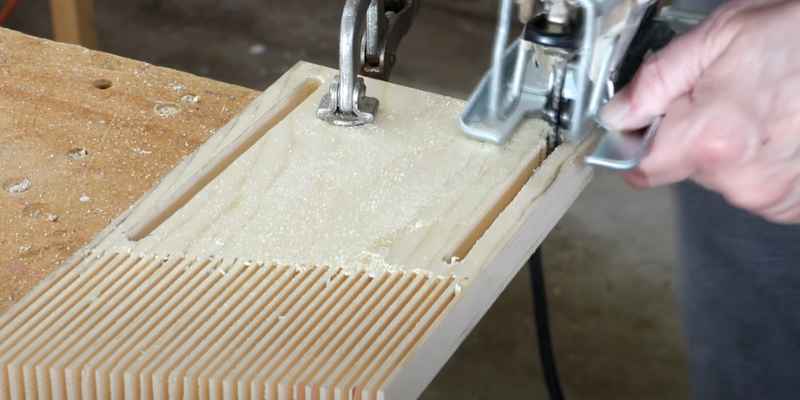
Table Saw Featherboard
A feather board is a must-have accessory for any table saw. It’s a simple device that helps keep your workpiece from moving around while you’re cutting it, and it can also help prevent kickback. There are a few different types of feather boards available on the market, but they all work similarly.
You attach the feather board to your table saw fence and place your workpiece against it. The blade’s pressure against the featherboard will hold your piece in place, so it doesn’t move around while cutting. One thing to remember when using a feather board is that it can change how your blade cuts.
So, if you’re making precision cuts, you’ll want to make a few practice cuts with scrap wood before cutting into your good lumber. That way, you can dial in the perfect amount for your project. I highly recommend getting one if you don’t already have a feather board for your table saw.
They’re relatively inexpensive and can help improve your cuts’ quality.
DIY Featherboard Plans
If you’re looking for a simple and elegant way to add storage to your home, DIY feather board plans might be just what you need. This shelving is perfect for displaying items like books, pottery, or even plants. Featherboards are named for their shape – they resemble large feathers with multiple shelves jutting out from the main body.
The shelves can be any size or shape, but they are typically rectangular. One of the great things about this shelving is that it’s relatively easy to build yourself. All you need is some wood (typically plywood), a saw, and basic carpentry skills.
Plenty of online tutorials and videos can walk you through the process step-by-step. Once your shelf is built, all that’s left to do is decide how you want to style it. This is where you can get creative and make the frame your own.
Add some paint or stain for a pop of color, arrange your items in an eye-catching way, or let the natural beauty of the wood shine through. Whether you’re looking for extra storage or just a unique addition to your home décor, building a DIY feather board is fun and rewarding. So grab some tools and start planning your design today!
DIY Featherboard Hold down
When it comes to woodworking, one of the most important things you can do is use a feather board. This simple tool helps keep your workpiece in place while working on it, and it’s easy to make your own!
Here’s what you’ll need:
-A piece of scrap wood (I used a 1×2) -A saw (I used a miter saw, but any type will work) -A drill
-1/4″ dowel rods (or whatever size fits your drill bit) -Sandpaper Start by cutting your scrap wood to size.
I made mine about 8″ long, but you can make yours whatever length you need. Next, drill holes for your dowel rods spaced about 2″ apart. The “fingers” of your feather board grip on the workpiece. Now it’s time to cut the dowels to length.
I made mine about 6″ long but adjusted it for your project. Once all the pieces are cut, sand everything smoothly, and you’re ready to use your new weatherboard!
Magnetic Featherboard for Table Saw
A magnetic feather board is a must-have if you’re looking for a great way to keep your fingers safe while working with power tools. Here’s everything you need to know about these handy devices. A magnetic feather board is a safety device that attaches to the table of your power saw.
It has a series of magnets that hold it in place, and its purpose is to keep your hands away from the blade while you’re working. There are two main types of magnetic feather boards: those that attach directly to the table saw and clamp onto the side of the table. Both types are effective at keeping your hands safe, but the direct-attach type is more convenient because you don’t have to worry about it slipping out of place.
Using a magnetic feather board, position it so that the magnets hold it firmly. Then, guide your workpiece against the fence while keeping your hands behind the panel. The committee will act as a barrier between your fingers and the blade, preventing accidents.
Magnetic feather boards are an essential safety device for anyone who uses power tools regularly. If you don’t already have one, be sure to pick one up before your next project!
DIY Feather Boards PVC
If you’re a fan of DIY and looking for a unique way to add character to your home, making your feather boards out of PVC pipe is a great option! They are relatively easy to make and look great when hung on the wall or used as decoration. To make your feather board, start by cutting several pieces of PVC pipe into different lengths.
You’ll want to have a variety of sizes so that your finished project has some dimension and depth. Once your pieces are cut, use sandpaper to smooth down any rough edges. Next, it’s time to start painting!
You can go with whatever colors you like, but we think white or light-colored feathers would look best against a dark background. To create the illusion of feathers, use a small paintbrush to add lines of varying thicknesses from the main shafts of each piece of PVC. Once you’re happy with how your feathers look, set them aside to dry.
Finally, it’s time to assemble your feather board! Start by attaching the most extended pieces of PVC first, followed by the shorter ones until all parts are in place. If you want, you can secure everything with glue or screws to be safe.
And that’s it – enjoy your new DIY feather board!

Credit: www.woodsmith.com
What is a Featherboard
A feather board is a tool to keep stock snug against the fence while you are sawing. It is beneficial when making repeated or precise cuts. A weatherboard consists of a base mounted on the table or workbench, and one or more spring-loaded fingers press against the stock.
The fingers can be adjusted to apply different amounts of pressure.
How Do You Make a Featherboard
There are a few different ways to make a feather board, but the most common way is to use a piece of plywood and some dowels. First, you need to cut your plywood into three parts: two side pieces about 6” wide and one middle piece about 4” wide. Then, mark out evenly spaced holes along the edges of the side pieces – these will be for your dowels.
Drill these holes, cut your dowels to size, and insert them into them. Now it’s time to assemble your feather board. Place the middle piece of plywood between the two side pieces, ensuring that the dowels line up with the holes in the side pieces.
Then, secure everything together with some screws or nails. And that’s it! Your feather board is now ready to use.
Why Would You Use a Featherboard on a Table Saw
A feather board is a safety device that helps to prevent kickback when using a table saw. It is placed against the saw’s fence and held with magnets or clamps. The board’s feathers help guide the workpiece into the blade, keeping it from being thrown back at the operator.
When Would You Use a Double-Sided Featherboard
A double-sided feather board is a handy tool that can be used in various ways to help stabilize your workpiece while working on it. Here are some situations where you might use one: -When routing or sanding a long, narrow piece of wood, attaching a double-sided feather board to your fence will help keep the workpiece from tipping over.
-If you are crosscutting a wide board on your table saw, a double-sided feather board clamped to the fence and the tabletop will help prevent the board from becoming warped as it is cut. -When ripping thin strips of wood on the table saw, attaching a FeatherBoard across the blade opening will help keep small pieces from being ejected at high speeds (possibly hitting you in the face!).
What are the Benefits of Using a Featherboard
A feather board is a simple device that holds your workpiece tight against the face of your table saw, router table, or other woodworking machinery. This simple pressure keeps your hands away from blades and bits while working. There are many benefits of using a feather board.
Perhaps the most obvious benefit is improved safety. You can avoid serious injury by keeping your hands away from sharp blades. Another advantage is increased accuracy.
When your workpiece is held snugly against the fence, it’s less likely to move around as you’re cutting or routing it. This means that you’ll get cleaner, more precise cuts and openings. Finally, using a feather board can help save wear and tear on your tools.
When a workpiece isn’t held tightly, it can shift during cutting or routing. This shifting puts extra strain on blades and bits, which can cause them to break or dull more quickly than if they were never moved out of position.
Conclusion
If you’re looking for a way to improve the accuracy and safety of your table or saw, then consider making your feather boards. Featherboards are boards with a series of fingers that grip the workpiece and help guide it through the blade. They can be used with push sticks or other guiding devices and are relatively easy to make.
This blog post will show you how to make feather boards using essential woodworking tools and materials. With a little effort, you can create a helpful accessory that will help you get better results from your table saw.