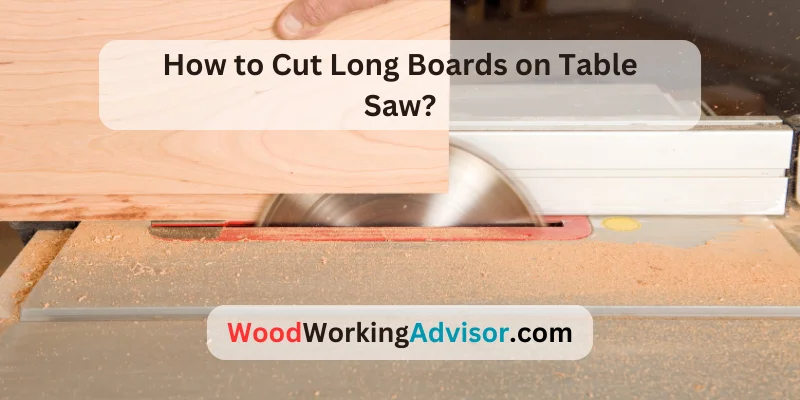
How to Cut Long Boards on a Table Saw (Safely)
Mastering the art of cutting long boards on a table saw is a valuable skill for woodworkers and DIY enthusiasts alike. Whether you’re building furniture or tackling home improvement projects, understanding the proper techniques for cutting long boards can make a significant difference in the quality and accuracy of your work.
Cutting long boards on a table saw requires proper technique and safety measures. Start by setting up proper support with sawhorses or a roller stand. Use a push stick for safety and ensure the board is securely positioned. Measure and mark the cut, then make slow, steady passes with the blade.
In this article, we will explore essential tips and step-by-step instructions to help you make precise cuts, avoid common mistakes, and ensure safety when using a table saw to cut long boards.
9 Steps To Cut Long Boards on Table Saw: Learn The Process
Quite a precise and tough task, the DIY project of cutting long boards with a table saw can be critical. To help you through the process, here is a detailed step-by-step guide that you can follow.
Step 1: Measure and mark the desired length on the longboard.
Before cutting, use a measuring tape to determine the specific length you want to cut from the longboard. Make a clear and precise mark using a pencil or marking tool.
Step 2: Set up the table saw, ensuring proper alignment and height of the blade.
Make sure your table saw is properly set up and adjusted for the cut. Check that the blade is aligned with the miter gauge slot and set it to the desired height. Adjustments can be made using the table saw’s controls or knobs.
Step 3: Prepare the board and ensure stability.
If the longboard is large, heavy, or difficult to manage, it’s important to take the necessary precautions. Consider using additional supports such as sawhorses or a table saw extension. Ensure the board is stable and won’t wobble or move during the cutting process.
Step 4: Position the board with the marked cut line against the fence.
Place the longboard flat on the table saw surface, aligning the marked cut line with the blade. Position the board against the fence, which acts as a guide to ensure a straight and accurate cut. The fence should be adjusted to the correct position before making the cut.
Step 5: Take necessary safety precautions, wearing safety gear and keeping hands clear of the blade.
Before starting the saw, prioritize safety. Wear appropriate safety gear such as safety goggles to protect your eyes and hearing protection to reduce noise exposure. Ensure your hands and fingers are clear of the blade’s path at all times.
Step 6: Start the saw and gently push the board through the blade, maintaining a steady forward motion.
Turn on the table saw and allow the blade to reach full speed before making the cut. Once ready, use a firm grip to guide the longboard through the blade. Apply gentle and consistent pressure, ensuring a smooth and controlled forward motion.
Step 7: Complete the cut, ensuring a straight and accurate cut.
Continue pushing the board until the entire length of the cut has been made. Pay attention to maintaining a straight line by keeping the board firmly against the fence. Take your time and avoid rushing the cut to ensure accuracy.
Step 8: Inspect the cut for any rough edges or splintering.
After completing the cut, examine the board to check for any rough edges or splintering. If necessary, use sandpaper or a router to smooth out any imperfections and create a clean, finished edge.
Step 9: Repeat the process for additional cuts on longboards, if needed.
If you need to make multiple cuts on longboards, repeat the entire process for each cut. Ensure proper measurements, alignment, and safety precautions for each new cut.
Outfeed and Infeed Support: The Step Most Guides Skip
The single biggest risk unique to long boards – as opposed to short stock – is losing control of the far end as it clears the table. An unsupported board that tips down at the back of the saw pulls your hands out of position and can bind against the blade, causing kickback. Before you make the cut, set up support for both ends of the board.
Outfeed Support Options Compared
| Method | Cost | Best For |
|---|---|---|
| Roller stand | $25-60 | Occasional long cuts, portable setups |
| Folding outfeed table | $80-200 | Frequent ripping, catches the full board width |
| DIY plywood extension | $15-30 in materials | Fixed shop setups, budget builds |
| A second person | Free | One-off cuts – have them support the far end only, never pull |
Set the outfeed support level with or just barely below the table surface – too high and it stops the cut, too low and the board still dips.
Tips For Rip and Crosscut Long Boards On Table Saw
Are you wondering how to make rip and crosscuts on long boards on a table saw? Here are some useful tips that you must consider while making these cuts.
Rip Cuts:
- Set the fence parallel to the blade for the desired width.
- Measure and mark the width on the board.
- Use a push stick for safety and feed the board into the blade, keeping it against the fence.
- Maintain control and a steady forward motion during the cut.
Crosscuts:
- Attach a miter gauge and set it to the desired angle (usually 90 degrees).
- Measure and mark the length on the board.
- Position the board against the miter gauge or fence.
- Hold the board securely and guide it through the blade.
- Complete the cut and ensure the blade has stopped before removing the board.

Angles and Bevel Cuts on Long Boards With Table Saw: Best Tips
Cutting angles and bevels on long boards uses the same miter gauge and blade-tilt fundamentals covered in our full guide to cutting angles on a table saw, with a few extra tips below for handling the added length safely.
Angle Cuts:
- Set up the blade: Adjust the table saw blade to the desired angle using the bevel adjustment mechanism. Refer to the table saw’s manual for instructions specific to your model.
- Measure and mark: Measure the angle you want to cut on the longboard. Use a protractor or angle finder to determine the precise angle and mark it on the board.
- Position the board: Place the long board against the miter gauge or the table saw’s fence, aligning the marked cut line with the blade.
- Make the cut: Turn on the table saw and gently guide the board through the blade, maintaining control and ensuring the board remains against the miter gauge or fence throughout the cut. Take your time to achieve a clean and accurate angle cut.
Bevel Cuts:
- Set up the blade: Adjust the table saw blade to the desired bevel angle using the bevel adjustment mechanism. This will tilt the blade in relation to the table surface.
- Measure and mark: Measure the bevel angle and the desired length on the longboard. Mark these measurements on the board using a measuring tape and pencil.
- Secure the board: Use clamps or other methods to securely hold the board in place to prevent movement during the cut.
- Make the cut: Turn on the table saw and carefully guide the board through the tilted blade. Keep your hands a safe distance away from the blade and maintain control over the board. Proceed slowly and steadily to achieve a precise bevel cut.

FAQs
What Is The Best Way To Cut Long Boards On A Table Saw?
The best way to cut long boards on a table saw is to use a technique called “ripping.” This involves making a straight cut along the length of the board. It’s important to use proper safety precautions and follow the steps carefully.
What Safety Measures Should I Take When Cutting Long Boards On A Table Saw?
When cutting long boards on a table saw, safety should be a top priority. Ensure that you wear safety goggles, hearing protection, and appropriate clothing. Keep your hands a safe distance from the blade, and use a push stick or push block to guide the board through the cut. Make sure the blade guard and splitter are in place and functioning properly.
What Are Some Tips For Achieving A Straight Cut on a Long Board on a Table Saw?
To achieve a straight and accurate cut when cutting long boards on a table saw, consider the following tips:
- Ensure the board is flat and free from any debris or obstructions.
- Use a feather board or a straight-edge guide to help keep the board steady and prevent it from wandering during the cut.
- Make sure the fence is securely locked in position and doesn’t move during the cut.
- Take your time and feed the board through the saw at a steady pace, maintaining consistent pressure.
What Type Of Blade Should I Use For Cutting Long Boards on a Table Saw?
When cutting long boards on a table saw, it’s essential to use a high-quality rip blade. Rip blades have fewer teeth and larger gullets, allowing them to efficiently remove material during the cut. This type of blade is specifically designed for ripping operations and will help you achieve cleaner and smoother cuts.
How Do I Prevent Tear-Out When Cutting Long Boards On Table Saw?
Tear-out refers to the splintering or chipping of wood fibers along the cut edge. To minimize tear-out when cutting long boards on a table saw, you can:
- Use a sharp blade: Dull blades can cause more tear-out, so ensure your blade is sharp.
- Apply masking tape: Placing masking tape along the cut line can help reduce tear-out.
- Score the cut line: Making a shallow scoring cut along the intended cut line before the full cut can help prevent tear-out.
Recommended Outfeed Support

Adjustable Roller Stand
Height-adjustable, folds flat for storage – the most practical outfeed support for most home shops.
Check Price on AmazonConclusion:
In conclusion, cutting long boards on a table saw requires careful preparation, adherence to safety measures, and the right techniques. By following the proper process mentioned above, you can achieve clean and accurate cuts.
Remember, safety should always be the top priority when working with power tools. With the right knowledge and precautions, you can confidently tackle cutting long boards on a table saw. Take help from the guide above and achieve the cut you want.