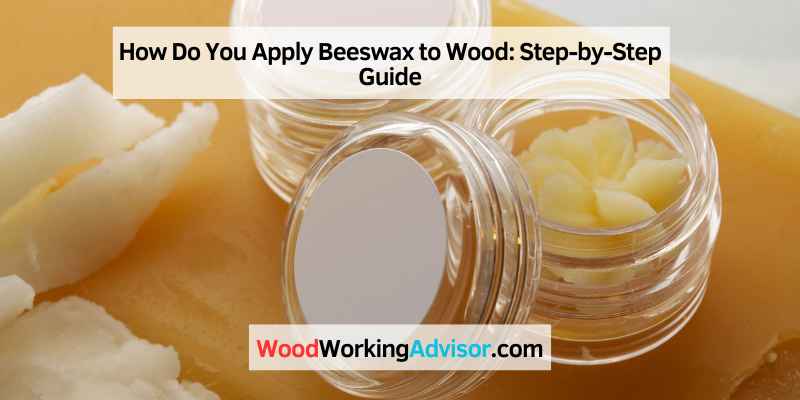
How Do You Apply Beeswax to Wood: Step-by-Step Guide
To apply beeswax to wood, compliment the wood’s natural color and go in the direction of the grain while applying a thin layer. Allow the wax to harden before buffing it gently.
If needed, apply another thin layer and repeat the process.
Why Use Beeswax On Wood
When it comes to enhancing the beauty of wood, protecting it against moisture, and creating a smooth finish, there’s no better natural solution than using beeswax. Let’s delve into why you should consider using beeswax on wood for a myriad of benefits it offers.
Enhances Natural Beauty
Applying beeswax to wood accentuates its natural color and grain, bringing out its inherent beauty. The warmth and richness of beeswax enhance the aesthetic appeal of wood, making it a popular choice for furniture and decor pieces.
Protects Against Moisture
Beeswax forms a protective barrier on wood surfaces, shielding them from moisture, humidity, and other environmental factors that could cause damage. By repelling water, beeswax helps to prevent wood from warping or cracking, ensuring its longevity.
Creates A Smooth Finish
When applied to wood, beeswax creates a smooth, satin-like finish that not only enhances the visual appeal but also softens the feel of the wood. The lustrous shine and silky touch achieved with beeswax make it a preferred choice for finishing various wood projects.
Preparing The Wood
To apply beeswax to wood, start by evenly spreading a thin layer along the grain. Allow the wax to harden before gently buffing for a natural finish. For additional nourishment, repeat the process with subsequent light coats, enhancing the wood’s natural beauty.
Clean The Surface
To ensure proper adhesion of beeswax to the wood, start by cleaning the surface. Use a damp cloth to wipe away any dust, dirt, or debris that may be present. This step is crucial in creating a smooth and clean surface for the beeswax application.
Sand The Wood
Next, sand the wood to create a smooth and even surface. Begin with a coarse-grit sandpaper to remove any imperfections and then progress to a finer-grit sandpaper for a polished finish. This process helps the beeswax to adhere evenly and enhances the overall appearance of the wood.
Remove Any Existing Finish
If the wood has an existing finish, it is essential to remove it before applying beeswax. Use a suitable finish remover or sandpaper to strip away the old finish, ensuring that the wood is completely free from any remnants. This step is crucial for the beeswax to penetrate the wood effectively and provide a long-lasting finish.
Overall, it’s important to have a clean and smooth surface for applying beeswax to ensure optimal adhesion and a polished final appearance. Proper preparation of the wood is essential for the successful application of beeswax, allowing it to penetrate and enhance the natural beauty of the wood.
Choosing The Right Beeswax
When it comes to applying beeswax to wood, choosing the right beeswax is crucial to achieving the desired outcome. There are several options to consider when selecting beeswax for wood applications, each with its own unique properties and benefits.
Pure Beeswax Vs. Beeswax Blends
Pure beeswax is a natural and traditional choice for wood finishing. It offers a rich, warm glow and is free from additives or chemicals. On the other hand, beeswax blends may contain additional components such as oils or resins, which can enhance certain characteristics of the wax, such as durability or ease of application. Pure beeswax is often preferred for its authentic, organic appeal, while beeswax blends offer versatility and tailored properties.
Colored Vs. Clear Beeswax
Colored beeswax can add depth and richness to the wood, enhancing its natural tones and providing a unique aesthetic appeal. Clear beeswax, on the other hand, preserves the original color and grain of the wood without altering its appearance. The choice between colored and clear beeswax depends on the desired look and feel of the finished wood surface, as well as personal preference for enhancing or maintaining the wood’s natural characteristics.
Scented Vs. Unscented Beeswax
Scented beeswax can impart a pleasant fragrance to the wood, adding an olfactory dimension to the finished piece. Unscented beeswax, however, allows the natural aroma of the wood to shine through without any additional scent. Whether to choose scented or unscented beeswax depends on individual preferences and the intended use of the wood item, considering factors such as the overall ambiance and atmosphere of the space where the wood is located.
TOP PICK FOR BEESWAX WOOD FINISHING
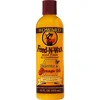 Howard Feed-N-Wax beeswax wood polish and conditioner
Howard Feed-N-Wax Beeswax Polish & Conditioner
A ready-to-use beeswax and orange oil blend that conditions and shines wood in one step.
- Best for: furniture, cabinets, and any finished wood needing a natural sheen
- Why we picked it: liquid formula spreads easily without melting or heating beeswax yourself
- Main drawback: needs periodic reapplication to maintain the finish
 Beeswax paste wax for wood finish and polish Beeswax paste wax for wood finish and polishBeeswax Paste Wax Traditional paste form for a deeper, buildable shine Check on Amazon |
 Lint free applicator pads for wood wax and finishes Lint free applicator pads for wood wax and finishesLint-Free Applicator Pads Buffs wax evenly without leaving fibers behind Check on Amazon |
As an Amazon Associate, we earn from qualifying purchases.
Applying Beeswax To Wood
When it comes to preserving the natural beauty and enhancing the longevity of wooden furniture, applying beeswax is a time-tested method. Beeswax offers a natural, protective finish and brings out the wood’s natural grain and color. Here’s a step-by-step guide on how to apply beeswax to wood:
Gently Heat The Beeswax
To ensure easy application, gently heat the beeswax using a low-heat source, such as a double boiler or a hair dryer set on low. Melting the wax slightly will make it easier to spread evenly onto the wood surface.
Apply The Beeswax To The Wood
Using a lint-free cloth or a natural bristle brush, apply the melted beeswax to the wood in the direction of the grain. Start with a small amount and gradually add more as needed to avoid over-application. The wax should be spread evenly across the entire wooden surface to ensure comprehensive coverage.
Spread The Beeswax Evenly
Using a circular motion, spread the beeswax evenly across the wood, ensuring it penetrates into the pores. This process helps in creating a uniform protective layer, enhancing the natural beauty of the wood while providing long-lasting protection against moisture and wear.
After applying the beeswax, allow it to dry for the recommended time as per the product guidelines before buffing it gently with a soft, clean cloth to achieve a lustrous sheen. Repeat the process if necessary until the desired finish is achieved.
Buffing The Beeswax
To apply beeswax to wood, start by applying a thin layer in the direction of the grain to enhance the natural color. Allow the wax to harden before gently buffing it to a shine. You can repeat the process for a deeper finish if needed.
Use A Soft Cloth Or Brush
When it comes to buffing beeswax onto wood, it’s essential to use a soft cloth or brush. This will help ensure that the wax is evenly distributed and adheres well to the surface. A soft cloth made from tightly-woven cotton, such as an old bed sheet, is ideal for this purpose. Avoid using abrasive materials that could potentially damage the wood.
Buff In Circular Motion
To achieve a smooth and polished finish, it’s important to buff the beeswax in a circular motion. This technique allows the wax to penetrate into the wood grain, nourishing and protecting it. When buffing in circular motions, make sure to apply gentle pressure to ensure even coverage. This method helps in bringing out the natural beauty of the wood.
Remove Excess Wax
After buffing the beeswax onto the wood, you may notice some excess wax remaining on the surface. It’s important to remove this excess to prevent buildup and maintain a clean finish. Use a dry cotton cloth to gently wipe away the excess wax. Make sure to focus on removing any visible whiteness that may have accumulated. If necessary, you can repeat the buffing process to achieve the desired shine.
Additional Tips And Tricks
Apply Multiple Coats If Desired
Applying multiple coats of beeswax to wood can enhance the protective and aesthetic qualities of the finish. When applying multiple coats, make sure to wait for each coat to dry completely before adding another layer.
Wait For Each Coat To Dry
Waiting for each coat of beeswax to dry is crucial to ensure proper adhesion and a smooth finish. Depending on the temperature and humidity, it may take anywhere from a few minutes to several hours for each coat to dry completely. Patience is key to achieving a beautiful and durable beeswax finish on wood.
Reapply Beeswax Periodically
Over time, the beeswax finish on wood may wear off or become less effective. To maintain the protective qualities and keep the wood looking its best, reapplying beeswax periodically is recommended. This will help to replenish the natural oils and protect the wood from moisture and other environmental factors.
Common Mistakes To Avoid
Common Mistakes to Avoid when Applying Beeswax to Wood:
Applying Too Much Wax
Ensure you apply a thin layer of beeswax on the wood surface to avoid over-saturation.
Not Letting The Wax Dry
Allow the applied beeswax to dry adequately before attempting to buff it to a shine.
Using The Wrong Type Of Cloth
Utilize tightly-woven cotton cloth for buffing to achieve a smooth finish without lint residue.
Alternative Uses For Beeswax
Enhance wood with a thin beeswax layer, following the grain direction. Allow wax to harden before gently buffing. For a deeper finish, add subsequent thin layers and repeat the process.
Beeswax, often associated with wood finishing, boasts versatile applications beyond that. From leather conditioning to candle making and even DIY skincare, beeswax proves itself to be a multi-purpose material. Let’s explore a few alternative uses for beeswax.
Beeswax for leather conditioning
When it comes to leather care, beeswax plays a valuable role in conditioning and protecting leather goods. It forms a protective barrier against moisture while nourishing the material and enhancing its natural shine. Melted beeswax can be applied onto the leather surface, followed by buffing to achieve a lustrous finish.
Beeswax for candle making
The high melting point and clean-burning nature of beeswax make it an ideal choice for crafting homemade candles. Beeswax candles emit a subtle honey scent and burn with little smoke, creating a warm and inviting ambiance. Furthermore, the natural golden hue of beeswax adds a charming touch to handmade candles.
Beeswax for DIY skincare
In DIY skincare products, beeswax serves as a natural emulsifier and humectant, aiding in the retention of moisture and creating a protective layer on the skin. Mixed with nourishing oils and essential oils, beeswax acts as a base for making lip balms, lotions, and salves, providing skin with hydration and protection from environmental stressors.
By uncovering these alternative uses for beeswax, it’s evident that this natural substance embodies versatility and practicality beyond its conventional application in wood finishing. Whether it’s conditioning leather, creating handmade candles, or formulating skincare products, beeswax continues to showcase its adaptability and usefulness in various domains.

Frequently Asked Questions For How Do You Apply Beeswax To Wood
How Is Beeswax Applied To Wood?
Apply a thin layer of beeswax on wood, going in the direction of the grain. Let it harden before gentle buffing. Repeat if the wood feels dry. Use a tightly-woven cotton cloth or your hand to apply, and buff to a shine.
Do You Melt Beeswax Before Applying To Wood?
Yes, you should melt beeswax before applying it to wood. Apply a thin layer in the direction of the grain and buff gently after it hardens. Allow it to dry for about five minutes before buffing to a shine with a dry cotton pad.
What Is The Best Cloth To Apply Beeswax?
To apply beeswax, use a tightly-woven cotton cloth or your hand. Apply a thin layer along the wood grain and buff gently after five minutes.
How Long Does It Take For Beeswax To Dry On Wood?
Beeswax typically takes around five minutes to dry on wood. Apply a thin layer in the direction of the grain, allowing it to harden before buffing gently. If the wood still feels dry, you can apply another thin layer and repeat the process.
Conclusion
Applying beeswax to wood involves a careful process for enhancing its natural beauty. Remember to follow the grain, apply thin layers, and allow time to cure before buffing. This method ensures a lasting finish that complements the wood’s color and texture.
Experience the magic of beeswax on your woodwork today!