How Does a Jointer Work? The Real Mechanics Behind a Flat Board
A jointer flattens one face or edge of a board by feeding it across a spinning cutterhead while the outfeed table sits exactly level with the top of the cutting arc – so the portion of the board that’s already been cut rides on that new, flat reference plane instead of following the wood’s original warp or cup. That infeed/outfeed height difference, not just “a spinning blade,” is the actual mechanism that produces a flat, straight result.
Still deciding if you even need one? See our breakdown of when a jointer earns a spot in your shop versus when a hand plane will do. Want the list of jobs a jointer handles? See what jointers are used for.
How A Jointer Actually Creates A Flat Surface
Best Beginner-Friendly Benchtop Pick
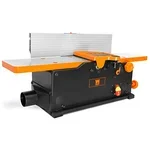 |
WEN JT630H 10-Amp 6-Inch Spiral Benchtop Jointer – $273.83 A compact way to put the infeed/outfeed mechanism explained below to work without a full-size stationary jointer.
|
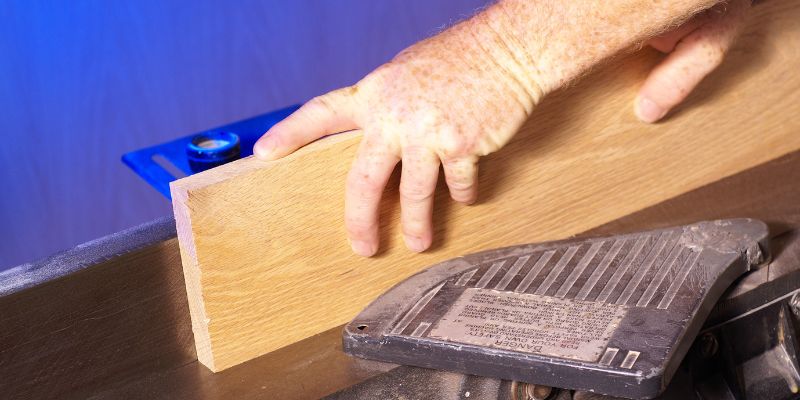
Here’s the part most explanations skip: a jointer’s two tables aren’t just a flat surface to slide wood across – their relative height is what does the actual flattening. The outfeed table is set exactly level with the top of the cutterhead’s cutting circle, while the infeed table sits slightly lower, by whatever depth of cut you’ve dialed in (often around 1/32″ to 1/16″ per pass). When you feed a warped or cupped board across the cutterhead, the knives shave off the high spots down to that outfeed-table height. As more of the board’s length clears the cutterhead, it’s riding on the outfeed table at the new, flat reference height – not on the infeed table, and not on the original curve of the wood. Take a few passes, and the entire face or edge ends up flat because it’s now been referenced against that fixed outfeed plane the whole way across.
This is also why jointer technique matters as much as the machine itself: press down on the infeed side at the start of a pass, then shift your pressure to the outfeed side once enough of the board has cleared the cutterhead – pressing down on the wrong table at the wrong moment just re-introduces the warp you’re trying to remove.
Jointer Vs. Planer: They’re Not The Same Job
This is the most common mix-up in woodworking forums, and it’s worth clearing up plainly: a jointer flattens one face or straightens one edge – it does not make the opposite face parallel to it, and it does not bring a board to a precise final thickness. That second job belongs to a planer.
A planer works differently: it references off whatever face is riding face-down on its bed (ideally the flat face your jointer just created) and shaves the top face until it’s parallel to that reference, at whatever thickness you’ve set. Feed an unflattened board straight through a planer without jointing it first, and the planer will happily produce a board that’s a uniform thickness – while still being warped, because it copied the warp of the bottom face all the way through. That’s why the standard shop sequence is jointer first (flatten one face and square one edge), then planer (mill the opposite face parallel and bring the board to final thickness).
Components Of A Jointer
Four parts work together to make the height-difference mechanism above actually happen:
| Component | What it does |
|---|---|
| Infeed table | Set lower than the outfeed table by the depth of cut – this is where the rough, unflattened stock starts its pass. |
| Cutterhead | A rotating cylinder holding several straight or spiral knives; its top cutting arc sets the height the outfeed table is calibrated to. |
| Outfeed table | Fixed level with the top of the cutterhead’s arc – the newly flattened wood rides here as the reference surface for the rest of the pass. |
| Fence | A vertical guide, usually square to the table by default and adjustable for bevels, that keeps an edge pass at 90° (or whatever angle you set). |
How To Use A Jointer Step By Step
With the mechanism and the machine’s parts covered, here’s how a pass actually goes in practice:
- Check the board first. Sight down its length for cup, bow, or twist, and set the concave (hollow) face down if there’s an obvious cup – that’s the face the jointer should touch first.
- Square the fence and set a light depth of cut. 1/32″ to 1/16″ per pass is typical; taking a lighter cut on a badly warped board takes more passes but is safer and leaves a cleaner surface than forcing a heavy cut.
- Feed with steady pressure, hands on top of the board, not near its edges. Start with downward pressure on the infeed side; as more of the board clears the cutterhead, shift your pressure to the outfeed side so you’re not fighting the machine’s own reference surface.
- Switch to a push block or push shoe for the last 6 inches of every pass, and for any board under about a foot long. The cutterhead is exposed on both the infeed and outfeed side wherever the workpiece isn’t currently covering it – that gap is real and unguarded, so hands should never pass directly over it. A push block keeps your palm on top of the wood while the block itself, not your fingers, is what’s closest to the blades.
- Take multiple light passes rather than one deep one until the full face or edge is flat and touching the outfeed table along its whole length, checking with a straightedge between passes.
Common Jointing Mistakes That Undo The Flat Reference
Even with the mechanism understood, a few habits quietly ruin the flat surface a jointer is supposed to create:
- Snipe at the ends: if you lift the board slightly as it enters or leaves the cutterhead, you’ll cut a small extra dip at that end. Keep even, level pressure through the whole pass, and support long boards with an outfeed roller so their own weight doesn’t tip the far end down.
- Taking too heavy a cut on a badly warped board: a deep pass on cupped stock can bog the motor down, cause chatter (visible ripples left by the knives), and leave a rougher surface than several light passes would. If the cutterhead sounds like it’s straining, back the depth of cut off.
- Skipping the straightedge check: a board can look flat and still be off by a hair. Laying a metal straightedge or another known-flat board across the face and checking for light gaps takes seconds and confirms the outfeed table has actually done its job before you move on to gluing or the next machining step.
- Jointing the wrong face first: always flatten the concave (hollow) side of a cupped board first. Jointing the convex side first just removes material without ever letting the board sit flat against the tables.
Frequently Asked Questions About How A Jointer Works
What Is A Jointer And How Does It Work?
A jointer flattens one face or straightens one edge of a board by feeding it across a spinning cutterhead. The outfeed table sits exactly level with the top of the cutterhead’s cutting arc while the infeed table sits slightly lower, so the flattened part of the board rides on that fixed outfeed height for the rest of the pass instead of following the wood’s original warp.
What Is The Difference Between A Jointer And A Planer?
Think of it as two separate jobs on two separate tools. The jointer’s only responsibility is creating one flat face or one straight edge as a reference surface. A planer then takes that reference face, rides it face-down on its bed, and mills the opposite face parallel to it at a set final thickness. Neither tool alone can guarantee both a flat face and a precise, parallel thickness, that split is why the two are typically used one after the other, not interchangeably.
Do I Really Need A Jointer?
If you’re working with rough-sawn lumber or boards with any cup, bow, or twist, yes, a jointer is what creates the flat reference face and square edge that everything else (planing to thickness, gluing panels, cutting joinery) depends on. See our full breakdown of when a jointer is worth it for project types where you can skip it.
How Do I Use A Jointer Safely?
The main hazard is the exposed cutterhead on the infeed and outfeed sides wherever the workpiece isn’t currently covering it. Feed with hands flat on top of the board, never alongside it near the blades, and switch to a push block or push shoe for the final few inches of every pass and for any short or narrow stock. Always feed against the direction of cutterhead rotation, and wear eye and hearing protection.
Conclusion
A jointer’s flattening power comes down to one deliberately engineered height difference: the outfeed table fixed level with the top of the cutterhead, the infeed table set slightly lower by the depth of cut. Understanding that relationship – not just “it spins and cuts” – is what makes it obvious why technique (shifting pressure from infeed to outfeed mid-pass) and safety (push blocks over that exposed cutterhead gap) both matter. Pair a jointer with a planer and you’ve got the full two-step process real shops use to turn rough lumber into flat, square, consistently-thicknessed stock.
Sponsored / affiliate links. As an Amazon Associate I earn from qualifying purchases. I may earn additional commission from eligible campaigns.