How Many Coats of Polycrylic: Achieve Flawless Protection
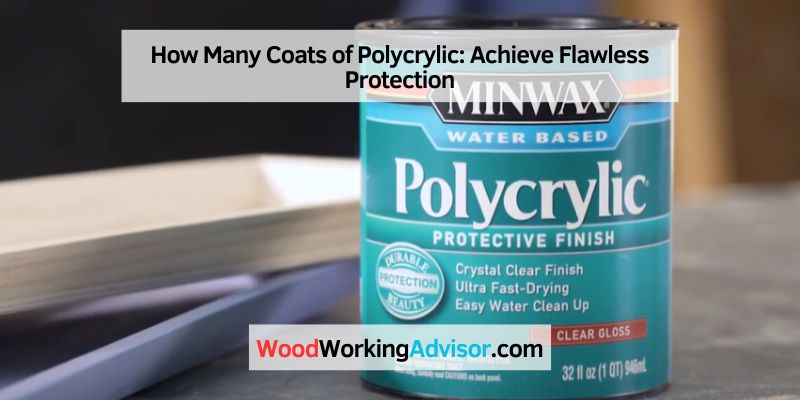
Apply a minimum of two coats of Polycrylic for optimum results. Polycrylic is a popular protective finish used for various surfaces.
It provides a clear and durable layer that enhances the appearance and longevity of wood, metal, and other materials. Applying two coats ensures a smooth and even finish that protects against moisture, UV rays, and wear-and-tear.
Choosing The Right Polycrylic Coats
When applying polycrylic, it’s important to consider the number of coats needed for proper coverage and protection. Generally, two to three coats of polycrylic are recommended to achieve a durable and long-lasting finish. Applying multiple thin coats, allowing proper drying time in between, ensures a smooth and even application.
Factors To Consider
Choosing the right number of coats of Polycrylic is crucial to achieve a flawless finish on your project. While applying more coats can provide added protection and durability, applying too many coats can result in an uneven or cloudy appearance. So, how do you determine the suitable quantity of Polycrylic coats for your project? Several factors come into play when making this decision.
Suitable Quantity
To determine the suitable quantity of Polycrylic coats for your project, consider the following factors:
- The type of surface: Porous surfaces such as bare wood may require more coats compared to non-porous surfaces like laminate or metal.
- The desired level of protection: If you anticipate the surface will be subject to heavy use, additional coats can provide enhanced durability.
- The application method: Spraying Polycrylic generally requires fewer coats compared to brushing or rolling.
- The environmental conditions: If you are working in a high-humidity or low-temperature environment, additional coats may be necessary for optimal results.
- The level of sheen desired: Different sheen levels, such as matte, satin, or gloss, may require varying numbers of coats to achieve the desired finish.
It is important to note that the manufacturer’s guidelines should always be followed when determining the suitable quantity of coats. These guidelines can provide specific information about drying times and recoating intervals, ensuring you achieve the best possible outcome for your project.
Conclusion
Choosing the right number of coats of Polycrylic involves considering factors like the type of surface, desired protection level, application method, environmental conditions, and desired sheen. By following the manufacturer’s guidelines and carefully assessing these factors, you can achieve a flawless finish that not only protects your project but also enhances its overall appearance.

Credit: www.powertownsend.com
Preparation For Application
Polycrylic application requires multiple coats for a smoother and more durable finish. Apply two to three coats, allowing each coat to dry thoroughly before applying the next for best results.
Before applying polycrylic, proper preparation is essential to ensure a smooth and flawless finish. This will not only enhance the appearance of your project but also improve the durability of the coating. Follow these guidelines for a successful application:
Surface Readiness
Prior to applying polycrylic, it is crucial to prepare the surface adequately. The following steps will help you achieve the best results:
- Clean the surface: Remove any dirt, dust, or grease from the surface using a mild detergent and water solution. This will promote better adhesion of the polycrylic.
- Smooth any imperfections: Sand the surface gently with fine-grit sandpaper to eliminate any rough spots or imperfections. This step ensures an even application and a flawless finish.
- Eliminate existing finishes: If there are previous coatings or finishes on the surface, such as paint or varnish, they must be completely removed. Use a suitable stripping agent or sander for this purpose.
- Remove sanding dust: After sanding, clean the surface thoroughly to remove any residual sanding dust. Use a tack cloth or a damp cloth to wipe away the dust completely. This is vital to achieve a smooth final result.
- Proper ventilation: Make sure you are working in a well-ventilated area to allow the polycrylic to dry properly without any hindrance. Good airflow will also prevent dust particles from settling on the wet finish.
Application Tools
Using the right tools for the application of polycrylic is essential to obtain an even and professional finish. Consider the following:
- High-quality brush: A synthetic bristle brush or foam brush is recommended for applying polycrylic. These brushes are known for their smooth application and minimal brushstrokes.
- Lint-free cloth: In addition to a brush, a lint-free cloth comes in handy for wiping away excess polycrylic during application. This ensures an even and streak-free finish.
- Paint tray or container: Pouring the required amount of polycrylic into a paint tray or container makes it easier to dip the brush and control the amount of product applied.
- Gloves and protective gear: To protect your hands from the chemicals in the polycrylic, wear disposable gloves. Additionally, consider using eye protection and a respiratory mask for your personal safety.
- Stir stick: Before application, stir the polycrylic gently with a stir stick to ensure the product is well-mixed. This will prevent any inconsistencies in the finish.
Applying The Coats
When applying polycrylic, it is recommended to use multiple coats for optimal results. By applying multiple coats, you can achieve a smooth and durable finish on your desired surface.
When it comes to applying polycrylic coats, the process is crucial in achieving a flawless finish. The number of coats and the application method can greatly affect the final result. Let’s dive into the details of applying the coats to achieve the best outcome.
First Coat
The first coat of polycrylic serves as the foundation for the subsequent layers. Before applying the first coat, ensure that the surface is clean and smooth. Use a high-quality brush to apply a thin and even layer. Work in the direction of the wood grain to minimize brush strokes.
Subsequent Coats
After the first coat has dried as per the manufacturer’s instructions, subsequent coats can be applied. Lightly sand the surface with fine-grit sandpaper between coats to ensure adhesion and a smooth finish. Apply each coat thinly and evenly, avoiding over-brushing to prevent streaks or bubbles.
Remember that proper drying time between coats is crucial for optimal results. Following these steps will result in a durable and professional-looking finish that enhances the beauty of the wood surface.
By following these guidelines, you can attain a professional-quality finish for your project, ensuring the longevity and aesthetic appeal of the coated surface.
Troubleshooting Common Issues
Polycrylic is a versatile and popular choice for protecting wood surfaces. However, like any coating, it can sometimes present its own set of challenges. Understanding and addressing these common issues will help ensure a successful and smooth finish.
Bubbles And Brush Marks
One of the frustrating issues that can occur when applying polycrylic is the presence of bubbles and brush marks on the surface. These imperfections can mar the overall appearance of the finish and detract from the smooth and professional result you desire.
- Ensure that you are using a high-quality brush with fine bristles for a smooth application.
- Don’t overload the brush with polycrylic, as this can lead to excessive brush marks.
- Apply thin coats, using smooth and even strokes in one direction to avoid brush marks.
- Check for air bubbles by gently tipping the surface to catch any trapped air and release it.
- If bubbles or brush marks appear, let the coat dry completely and then sand the surface lightly with fine-grit sandpaper before applying the next coat.
Yellowing
Another common issue with polycrylic is the potential for yellowing over time. This yellowing can alter the color of the finish and impact the overall aesthetic appeal. However, there are steps you can take to prevent or minimize yellowing:
- Choose a water-based polycrylic formulation, as these tend to yellow less than oil-based products.
- Avoid exposing the finished surface to direct sunlight, as UV rays can accelerate yellowing.
- Consider using a polyurethane topcoat specifically designed to resist yellowing, if you want a more durable alternative.
By following these tips, you can troubleshoot and overcome common issues that may arise when working with polycrylic. Whether you’re dealing with bubbles and brush marks or concerns about yellowing, understanding how to address these challenges will help you achieve the best possible results for your project.
Final Tips For Flawless Protection
When it comes to protecting your furniture or wood projects, applying the right number of coats of polycrylic is crucial. Not enough coats may leave your surfaces vulnerable to damage, while too many coats can result in an uneven, clumpy finish. So, how many coats of polycrylic should you apply? Let’s find out.
Drying And Curing Time
Before applying additional coats of polycrylic, it’s important to allow sufficient drying and curing time for each coat. Polycrylic typically dries within 2 hours, but it can take up to 24 hours for it to fully cure. To ensure flawless protection, it’s recommended to wait for at least 24 hours before applying another coat.
Maintenance
Once you’ve achieved the desired number of coats, proper maintenance is key to keeping your surfaces protected and looking their best. Here are some maintenance tips to ensure long-lasting results:
- Use coasters or placemats: Avoid placing hot or wet objects directly on polycrylic-coated surfaces to prevent heat or moisture damage.
- Regular dusting: Dust your furniture or wood projects regularly using a soft cloth or feather duster to prevent dirt and debris from scratching the protective coating.
- Gentle cleaning: When cleaning polycrylic-coated surfaces, use mild, non-abrasive cleaners and avoid harsh chemicals that can strip away the protective layer.
- Reapply as needed: Over time, the protective layer of polycrylic may wear off or become damaged. If you notice signs of wear or surface damage, consider reapplying a fresh coat of polycrylic to maintain optimal protection.
By following these maintenance tips, you can extend the lifespan of your polycrylic-coated surfaces and keep them looking flawless for years to come.

Credit: www.powertownsend.com
Frequently Asked Questions Of How Many Coats Of Polycrylic
Can You Apply Too Many Coats Of Polycrylic?
Applying too many coats of Polycrylic can result in a cloudy or milky appearance on the surface. It’s essential to follow the manufacturer’s instructions to avoid this issue. Sanding between coats can also help achieve a smooth finish.
Is It Necessary To Sand Between Coats Of Polycrylic?
Yes, it is necessary to sand between coats of Polycrylic. Sanding helps create a smooth surface for the next coat to adhere to, ensuring a professional finish.
How Long Does Polycrylic Take To Fully Cure?
Polycrylic typically takes about 24 hours to fully cure.
How Many Coats Of Polycrylic Over Chalk Paint?
Apply 2 to 3 coats of Polycrylic over chalk paint for durable protection and a smooth finish. It is essential to let each coat dry thoroughly before applying the next. This enhances the durability and longevity of your painted surface.
Conclusion
To wrap up, the number of coats of polycrylic you should apply depends on the level of protection and durability needed for your project. Whether you’re working on furniture, floors, or other wooden surfaces, understanding the best practices for applying polycrylic can result in a finished product that is protected and long-lasting.