How Many Coats of Stain on Pine: Mastering a Perfect Finish!
For pine wood, apply two coats of stain for optimal results. In order to achieve the best outcome on pine wood, it is recommended to use two coats of stain.
Staining pine wood can enhance its natural beauty while also protecting it from wear and tear. Choosing the right stain and properly applying it is crucial to achieve the desired look and durability. By applying two coats of stain, you ensure better color saturation and a more even finish.
However, make sure to allow sufficient drying time between each coat. Following these guidelines will help you achieve the desired outcome and showcase the unique characteristics of pine wood.
Credit: www.popularwoodworking.com
Understanding The Properties Of Pine Wood
Pine wood staining requires a careful approach to achieve the desired results. Understanding how many coats of stain to apply is crucial for enhancing the wood’s natural beauty and ensuring long-lasting durability.
Pine wood is a popular choice for various woodworking projects due to its unique properties. Before diving into the topic of staining pine, it’s essential to have a clear understanding of the natural qualities of this versatile wood. Here are some key points to consider:
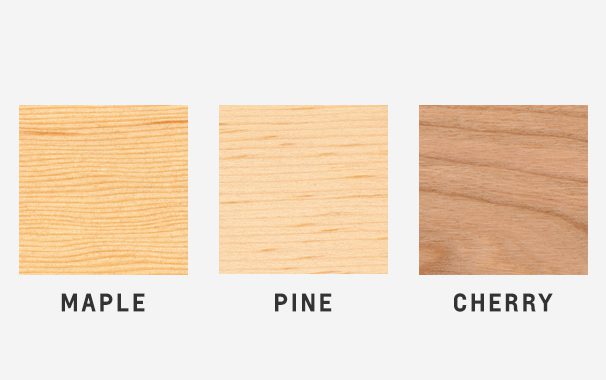
- Pine wood is light in color: Pine typically showcases a light, pale yellow to light brown color, which gives it a distinct aesthetic appeal.
- Softwood characteristics: As a softwood, pine is more prone to dents and scratches than hardwoods. However, this same softness makes it easier to work with, allowing for intricate designs and smooth finishes.
- Straight grain pattern: Pine wood usually features a straight grain pattern, adding to its visual appeal. This consistent pattern makes it ideal for achieving a uniform stain application.
- Resin pockets: Pine wood often contains resin pockets or knots, which are hardened deposits within the wood. These natural imperfections can create interesting visual elements and add character to the finished project.
- Dimensional stability: Pine does have a tendency to expand and contract in response to changes in temperature and humidity. Thus, it’s crucial to consider these factors when working with pine and applying stains.
Benefits Of Staining Pine:
Staining pine wood can enhance its natural beauty, increase its durability, and provide protection against everyday wear and tear. Here are some noteworthy advantages of staining pine:
- Enhances color and depth: Staining pine can transform its appearance by adding color and depth to the wood grain. It allows you to customize the color to achieve the desired look, whether you prefer a light or dark finish.
- Minimizes uneven coloration: Pine wood has a propensity for unevenly absorbing stain due to its softness and varying grain density. Staining helps to reduce this issue by providing a more uniform color distribution.
- Protects against moisture: Pine is susceptible to moisture damage, such as warping or rotting. Applying stain acts as a barrier, protecting the wood from excess moisture and increasing its longevity.
- Preserves natural beauty: Staining pine wood can enhance its natural patterns and highlight its unique characteristics. It preserves the natural beauty of the wood while adding a touch of refinement.
- Easy maintenance: Stained pine requires minimal maintenance compared to unfinished wood surfaces. Regular cleaning and occasional reapplication of stain can keep your pine wood looking beautiful for years to come.
Now that we have explored the properties of pine wood and the benefits of staining, we can delve further into the topic of how many coats of stain on pine to achieve the desired results. So let’s continue our journey into the world of pine wood staining.
Choosing The Right Stain For Pine Wood
Choosing the right stain for pine wood requires considering how many coats of stain are needed. The number of coats depends on the desired color intensity and depth. Experimenting with different coat applications can help achieve the perfect finish for your project.
Pine wood is a popular choice for furniture, flooring, and other woodworking projects due to its natural beauty and affordability. However, when it comes to staining pine, it is important to choose the right type of stain to achieve the desired outcome.
Here are some factors to consider and types of stains that are suitable for pine wood:
Types Of Stains Suitable For Pine
- Water-based stains: These stains are easy to apply and clean up, making them ideal for beginners. Water-based stains also have a low odor and dry quickly, allowing you to proceed with your project efficiently. They provide a more clear and natural finish, bringing out the natural grain of the pine wood.
- Oil-based stains: These stains are known for their durability and rich color. They penetrate deep into the wood fibers, providing a long-lasting finish. Oil-based stains require more drying time and proper ventilation due to their strong odor. They are available in a variety of colors, allowing you to achieve a desired darker or richer tone.
Factors To Consider In Stain Selection For Pine
- Wood grain: Pine wood has a distinctive grain pattern that can affect the appearance of the stain. If you want to enhance the grain and create a rustic look, choose a stain with a transparent or semi-transparent finish. If you prefer a more uniform look, opt for a solid or gel stain that will even out the wood grain.
- Prepping the surface: Before applying stain to pine wood, it is essential to prepare the surface properly. Sanding the wood with progressively finer grit sandpaper will help smooth out any imperfections and open up the pores of the wood for better stain penetration. Pre-stain conditioners can also be applied to pine wood to help prevent blotchiness and ensure an even stain application.
- Desired color: The color of the stain is a crucial factor in selecting a stain for pine wood. It is advisable to test the stain on a small, inconspicuous area of the wood to see how it interacts with the tannins in the pine. Pine has a tendency to absorb stain unevenly, resulting in blotchy patches. In such cases, using a pre-stain conditioner or a gel stain can help achieve a more consistent color.
- Application method: The method of applying the stain can also affect the final result. Whether you choose to use a brush, rag, or sprayer, make sure to follow the manufacturer’s instructions for the best outcome. Applying multiple thin coats of stain, rather than one heavy coat, will help achieve a more even and professional finish.
When it comes to staining pine wood, choosing the right stain is crucial to achieving the desired result. Consider the type of stain and factors such as wood grain, prepping the surface, desired color, and application method to ensure a beautiful and long-lasting finish.
How Many Coats Of Stain Are Needed For Pine?
Staining pine requires at least two coats for optimal results, as the wood tends to absorb the stain unevenly. Applying multiple coats ensures a consistent and deep color penetration.
When it comes to staining pine wood, finding the optimal number of coats is crucial to achieving a perfect finish. The number of coats needed can vary depending on several factors, including the condition of the wood and the desired depth of color.
We will explore how to evaluate the condition of pine wood, the factors that influence the number of coats needed, and ultimately, how to find the ideal number of coats for a flawless result.
Evaluating The Condition Of The Wood:
- Examine the surface of the pine wood for any defects or imperfections such as scratches, dents, or color variations.
- Determine if the wood is knotty or has uneven grain patterns, as these characteristics can affect the absorption and distribution of the stain.
- Consider the moisture content of the wood, as excessively dry or wet pine may require additional steps to ensure proper stain penetration.
- Sand the wood to create a smooth and even surface, ensuring that any previous finishes or coatings have been completely removed.
Factors Influencing The Number Of Coats Needed:
- The type and quality of the stain being used can influence the number of coats required. Thicker or more pigmented stains may require fewer coats compared to lighter or less concentrated ones.
- The desired depth of color also plays a role in determining the number of coats needed. If a rich and dark hue is desired, multiple coats may be necessary to achieve the desired result.
- The porosity of the pine wood affects how well it absorbs the stain. Less porous wood may require more coats to achieve a consistent and vibrant color.
- Ambient temperature and humidity can impact the drying and curing time of the stain. In humid conditions, additional coats may be necessary to achieve proper adhesion and durability.
Finding The Optimal Number Of Coats For A Perfect Finish:
- Start by applying a single coat of stain to a small, inconspicuous area of the wood to assess the color intensity and coverage.
- Evaluate the result and determine if additional coats are required to achieve the desired color and uniformity.
- Apply subsequent coats of stain, allowing sufficient drying time between each application as per the manufacturer’s instructions.
- Use a technique called “wiping off excess” to control the color depth. Wiping off any excess stain immediately after application can help achieve a more even and consistent finish.
- Continuously assess the color and coverage after each coat to determine if additional coats are needed.
- Remember, it is always better to start with fewer coats and gradually build up to the desired result, rather than applying too much stain at once.
Finding the perfect number of coats for staining pine wood is an important step in achieving a beautiful and professional finish. By evaluating the condition of the wood, considering the various factors that influence the number of coats needed, and taking a systematic approach to finding the ideal number of coats, you can ensure a stunning result that enhances the natural beauty of pine.
Properly Preparing Pine For Stain Application
To properly prepare pine for stain application, it is important to determine the desired number of coats based on the desired color intensity or coverage. Multiple thin coats can help achieve a more even and consistent finish on pine.
Before applying stain to pine wood, it is crucial to properly prepare the surface for optimum results. With the right preparation, the stain will penetrate evenly, resulting in a beautiful finish. This section will guide you through the steps to ensure your pine wood is ready for the staining process.
Sanding And Smoothing The Surface:
Sanding the pine wood surface is essential to create a smooth and even texture, as pine can often have inconsistencies. Follow these steps to prepare the wood surface for stain application:
- Start by using a medium-grit sandpaper (around 120-grit) to remove any rough spots, imperfections, or raised grain on the surface.
- Sand the wood in the direction of the grain to avoid creating scratches or swirl marks.
- Gradually progress to a finer sandpaper grit (around 220-grit) for a smoother finish.
- Once the wood feels smooth to the touch, use a tack cloth or a soft brush to remove any dust and particles from the surface, ensuring the stain adheres evenly.
Applying A Pre-Stain Conditioner:
To prevent the stain from being absorbed unevenly and to minimize blotching on pine wood, applying a pre-stain conditioner is highly recommended. Here’s how to use a pre-stain conditioner effectively:
- First, ensure your work area is properly ventilated.
- With a clean brush or cloth, apply a generous coat of pre-stain conditioner to the surface of the pine wood.
- Allow the conditioner to penetrate the wood for the recommended time indicated on the product label.
- Once the recommended time has passed, wipe off any excess conditioner with a cloth.
- The pre-stain conditioner will help the stain to absorb more uniformly, improving the overall appearance of the wood.
Ensuring A Clean And Dust-Free Surface:
Before applying stain, it is crucial to ensure the pine wood surface is clean, free from any dust, and ready for stain application. Follow these steps to achieve a clean surface:
- Use a soft, lint-free cloth or a vacuum cleaner with a brush attachment to remove any loose dust or particles from the wood surface.
- For more stubborn debris, you can use a slightly damp cloth to gently wipe the surface clean.
- Ensure the wood is completely dry before proceeding with the staining process.
By following these steps, you can properly prepare your pine wood for stain application, ensuring an even, attractive finish. Remember to sand the surface, apply a pre-stain conditioner, and clean the wood thoroughly before beginning the staining process. With the right preparation, you can achieve beautiful results that will bring out the natural beauty of the pine wood.
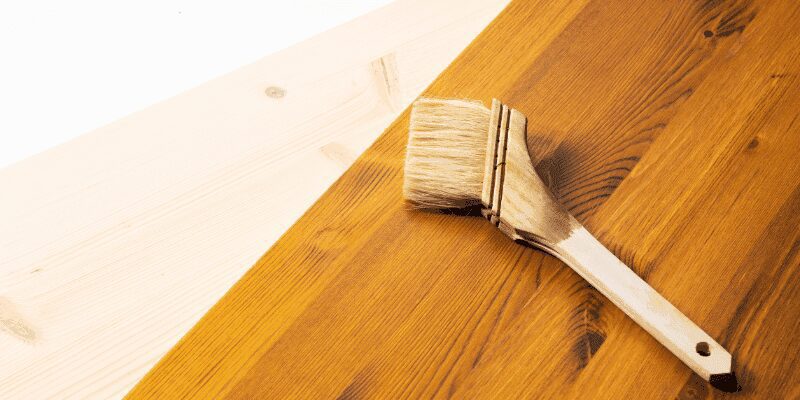
Applying The First Coat Of Stain
Applying the first coat of stain on pine wood is crucial to achieve the desired color and finish. Multiple coats may be required depending on the desired depth of color and the absorption of the wood. Take the time to apply an even coat and allow for proper drying before adding additional coats.
Applying Stain Using A Brush Or Cloth:
When it comes to applying the first coat of stain on pine, you have a couple of options – using a brush or a cloth. Both methods have their advantages and it ultimately depends on your personal preference and the desired outcome.
Here are some points to consider:
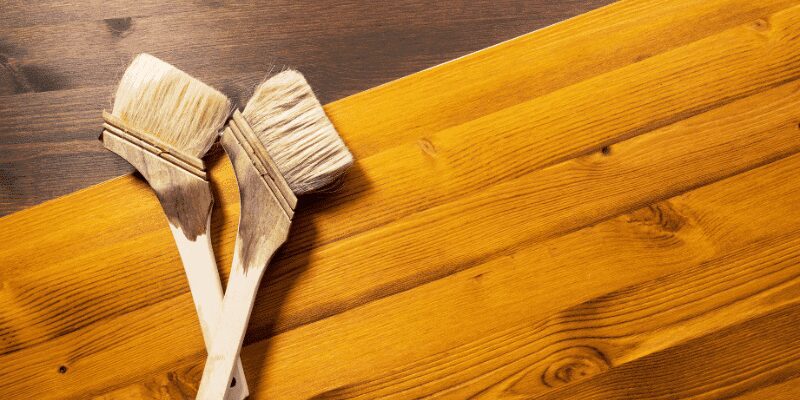
Brush application: Using a brush is a common and popular method for applying stain on pine. It allows for better control and coverage, especially in hard-to-reach corners and crevices. Here’s how to do it effectively:
- Start by dipping the brush in the stain, ensuring the bristles are well saturated.
- Apply the stain in long, smooth strokes, following the grain of the wood.
- Work in small sections, ensuring even coverage.
- Pay attention to any excess stain that may accumulate, smoothing it out with the brush.
- Avoid over-brushing, as it can lead to uneven results.
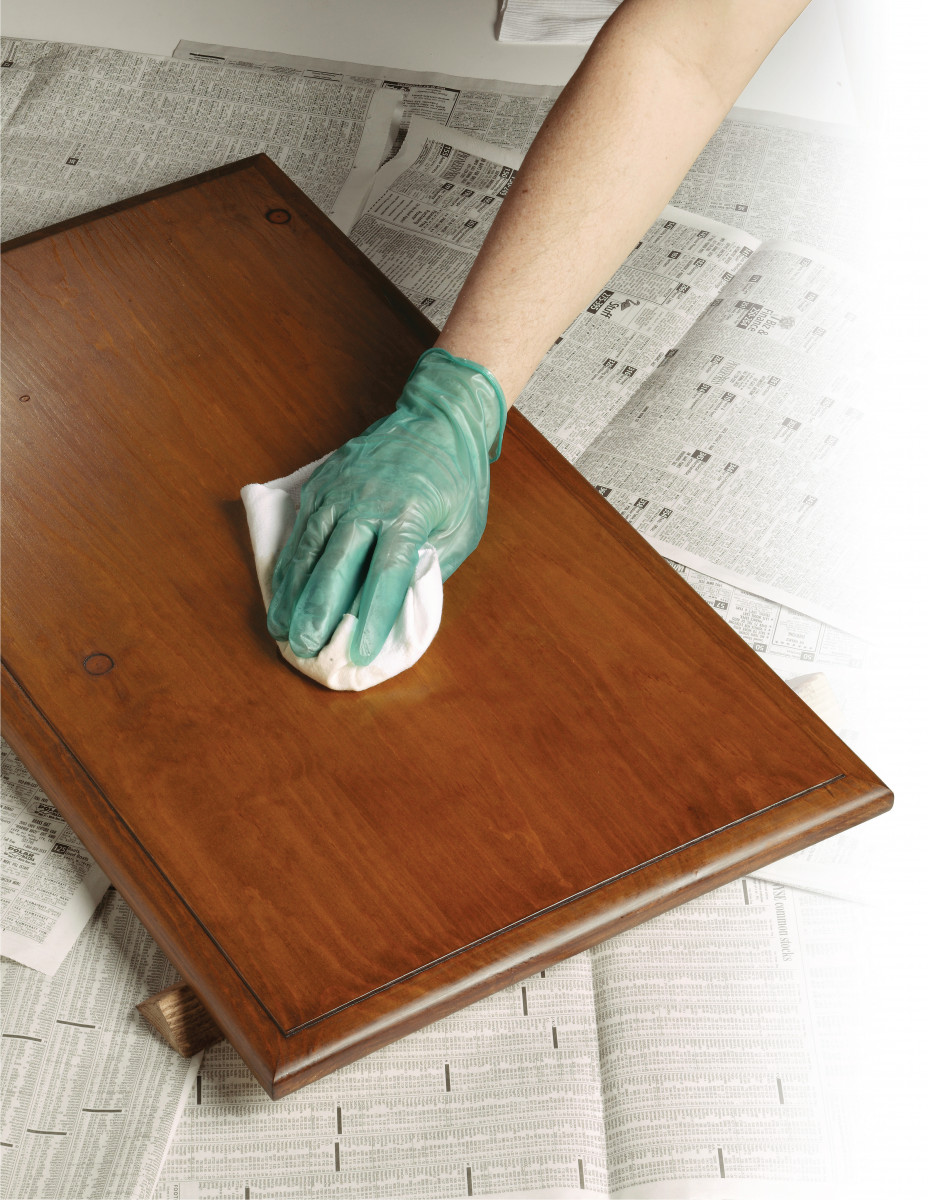
Cloth application: Using a cloth can create a different look and feel compared to a brush. It offers a more subtle and nuanced application, highlighting the natural texture of the wood. Here’s how to apply stain using a cloth:
- Start by pouring some stain onto a clean, lint-free cloth.
- Begin at one end of the wood and apply the stain in the direction of the grain.
- Rub the cloth in a circular motion, ensuring the stain is distributed evenly.
- Keep a close eye on any drips or excess stain, wiping them away with a clean cloth.
- Remember to wear gloves when using this method to protect your hands.
Techniques For Even Application:
Achieving an even application of stain is crucial to ensure a beautiful and consistent finish on your pine project. Here are some techniques to help you achieve just that:
- Preparation is key: Before applying the first coat of stain, make sure the surface of the pine is clean, dry, and free from any dust or debris. Sanding the wood beforehand can help create a smooth and even surface.
- Apply evenly: Whether you’re using a brush or cloth, the key is to apply the stain evenly across the entire surface. This helps prevent blotches or streaks from appearing once the stain dries. Take your time, work in small sections, and pay attention to any areas that may require extra attention.
- Wipe off excess: After applying the stain, it’s important to wipe off any excess that hasn’t seeped into the wood. This helps prevent uneven drying and sticky residue. Use a clean cloth or paper towel to gently wipe away the excess stain, following the direction of the grain.
- Allow for drying time: Once you’ve applied the first coat of stain, give it ample time to dry before assessing the color and deciding if another coat is needed. Follow the manufacturer’s instructions for drying time, as it can vary depending on the type of stain you’re using.
- Assess the color: After the stain has dried, take a step back and assess the color. If you’re satisfied with the depth and tone, you might not need an additional coat. However, if you feel the color is too light or uneven, you can proceed with applying another coat following the same techniques mentioned above.
Remember, practice makes perfect when it comes to applying stain on pine. Don’t be discouraged if you don’t achieve the desired results on your first try. With time, patience, and a bit of experimentation, you’ll be able to master the art of staining pine and create beautiful, long-lasting finishes for your projects.
Assessing The First Coat And Deciding On Additional Coats
Assessing the first coat is crucial in determining how many additional coats of stain are needed for pine. By carefully evaluating the coverage and color saturation, you can decide whether one or more coats are necessary to achieve the desired finish.
Examining The Appearance Of The First Coat
The first coat of stain on pine can significantly impact the overall result of your staining project. By carefully examining the appearance of the first coat, you can determine whether additional coats are necessary to achieve your desired result.
Here are some factors to consider when examining the appearance of the first coat:
- Evenness: Check if the stain is evenly applied across the entire surface of the pine. Uneven coverage may require an additional coat to create a consistent appearance.
- Color saturation: Assess how deep the color appears after the initial coat. If you desire a darker or richer color, an additional coat may be needed to achieve the desired level of saturation.
- Wood grain visibility: Evaluate how much of the wood grain is still visible after the first coat. If you prefer a more pronounced wood grain, one coat may be sufficient. However, if you want a smoother and more opaque finish, additional coats may be necessary.
How To Determine If Additional Coats Are Necessary
Deciding on whether to apply additional coats of stain on pine can be crucial in achieving the desired end result. Here are some ways to determine if additional coats are necessary:
- Transparency: If the first coat of stain has left the surface too transparent, and you desire a more opaque finish, you may need to apply an additional coat.
- Coverage: Inspect the coverage of the first coat. If there are areas where the stain appears lighter or uneven, additional coats can help achieve an even and consistent color.
- Intensity of color: If the color of the first coat is not as intense as desired, additional coats can deepen the color and provide the desired richness.
Remember, the decision to apply additional coats should be based on your personal preference and the specific look you want to achieve with your pine staining project.
By carefully examining the appearance of the first coat and considering factors such as evenness, color saturation, and wood grain visibility, you can make an informed decision on whether or not additional coats of stain are necessary. Take note of transparency, coverage, and the intensity of color to determine whether another coat is needed.
Applying Additional Coats Of Stain, If Needed
Apply additional coats of stain on pine as needed to achieve the desired color depth and coverage. Ensure each coat is applied evenly and allow proper drying time between coats for optimal results.
When it comes to staining pine, achieving the desired color and finish may require multiple coats. Whether you want a deeper, richer color or you simply missed some spots during the initial application, applying additional coats of stain can help you achieve a more satisfying result.
Let’s explore the process of adding more coats of stain on pine and the factors to consider for a successful outcome.
Sanding Between Coats:
To ensure a smooth and even finish, it’s essential to sand the pine between coats of stain. Here’s why sanding is crucial:
- Use fine-grit sandpaper (220-grit is recommended) to gently sand the previously stained surface.
- Sanding removes any imperfections, such as raised wood grain or brush strokes, and creates a better surface for the next coat of stain.
- By sanding, you also create a slight roughness on the surface, allowing the subsequent coat of stain to penetrate deeper into the wood for more vibrant color.
Applying Subsequent Coats For Enhanced Color:
Here are the steps to follow when applying additional coats of stain to achieve the desired color:
- Begin by making sure the previous coat of stain is completely dry. Follow the manufacturer’s instructions for drying time.
- Gently stir the stain to ensure consistent color and texture, as settling may occur over time.
- Apply a thin and even coat of stain using a brush, roller, or cloth, depending on your preference.
- Allow the stain to penetrate the wood for the recommended amount of time. This may vary depending on the product and manufacturer’s guidelines.
- After the recommended time, wipe off any excess stain with a clean cloth, following the wood grain.
- Repeat the process for additional coats, ensuring each coat is completely dry before applying the next one.
Factors to consider for multiple coats:
Before adding multiple coats of stain, take the following factors into account:
- Type of stain: Some stains are designed to be applied in a single coat, while others are formulated for layering. Check the product label or consult with a professional to determine if it’s suitable for multiple coats.
- Desired color intensity: If you want a more vibrant color, multiple coats of stain may be necessary. Keep in mind that the color will deepen with each coat, so test a small, inconspicuous area first to ensure you achieve the desired hue.
- Drying time: Each coat of stain must be allowed to dry completely before adding subsequent coats. Failure to do so can result in uneven color or a tacky finish.
Remember, the process of applying additional coats of stain requires patience and attention to detail. By following the proper techniques, including sanding between coats and considering the factors mentioned above, you can achieve a beautiful and professional-looking finish on your pine project.
Achieving A Perfect Finish: Tips And Tricks
Achieving the perfect finish on pine requires careful staining. Follow these tips for applying the right amount of coats to achieve the desired outcome.
Enhancing the stain color with a topcoat:
- A topcoat is an additional layer of protective finish that can enhance the color and appearance of your stained pine. Here’s how it can help you achieve the perfect finish:
- Increased depth: Applying a topcoat can deepen the color of the stain, giving your pine a richer and more vibrant look.
- Added sheen: Depending on your preference, you can choose a topcoat with a glossy, satin, or matte finish to further enhance the appearance of the stained surface.
- Long-lasting protection: Not only does a topcoat enhance the aesthetic appeal of your stained pine, but it also provides a protective barrier against scratches, moisture, and UV damage.
Importance of proper ventilation:
- When working with stain on pine, proper ventilation is crucial for a successful staining process. Consider the following points to ensure your safety and the best results:
- Health and safety: Stains often contain volatile organic compounds (VOCs) that can be harmful when inhaled. Adequate ventilation helps to minimize exposure and protect your respiratory system.
- Avoid uneven drying: Insufficient airflow can lead to uneven drying of the stain, resulting in an inconsistent finish. Proper ventilation helps the stain dry evenly, preventing unsightly patchy spots.
- Efficient application: With proper ventilation, the stain is less likely to become thick and sticky as it dries. This allows for smoother and easier application, ensuring a more professional-looking finish.
Preventing common staining mistakes:
- Staining pine can be tricky, but by avoiding these common mistakes, you can achieve a flawless result:
- Uneven absorption: Due to its uneven porosity, pine tends to absorb stain unevenly. Pre-conditioning the wood with a wood conditioner or sanding sealer can help minimize this issue.
- Over-application: Applying too much stain at once can lead to blotching and streaking. Apply the stain in thin layers and wipe off any excess to prevent these problems.
- Inadequate drying time: Rushing the drying process can lead to smearing or lifting of the stain. Ensure you allow sufficient drying time between coats and before applying a topcoat.
- Inconsistent sanding: Inadequate sanding can cause the stain to appear patchy or blotchy. Take your time to sand the pine thoroughly and evenly before applying the stain.
Remember, achieving a perfect finish on pine with stain requires patience, attention to detail, and the right techniques. By following these tips and tricks, you’ll be well on your way to showcasing the natural beauty of pine with a stunning stained finish.
Maintaining The Stained Pine Wood
To effectively maintain stained pine wood, it is recommended to apply multiple coats of stain for a richer and more even color. Applying at least two coats allows the stain to penetrate deeply into the wood grain, resulting in a more durable and aesthetically pleasing finish.
Staining pine wood can enhance its natural beauty and provide long-lasting protection. However, to ensure that the stain stays vibrant and the wood remains in good condition, regular cleaning and maintenance are essential. By following a few simple steps, you can preserve the quality and appearance of your stained pine wood for years to come.
Regular Cleaning And Maintenance For Long-Lasting Finish
To maintain the stained pine wood’s beauty and protect it from wear and tear, you should:
- Dust the surface regularly using a soft cloth or feather duster to remove any dirt or debris.
- Wipe spills immediately with a damp cloth to prevent stains from setting in.
- Avoid using harsh cleaning agents or abrasive materials, as they can damage the stain and the wood.
- Use mild soap or wood cleaner diluted in water to clean the surface gently. Apply the solution with a soft cloth or sponge, and then wipe dry with a clean cloth.
- Apply a high-quality furniture polish or wax to protect the stain and enhance the wood’s natural shine. Follow the product instructions for best results.
- Avoid placing hot objects directly on the stained wood surface to prevent heat damage.
Maintaining regular cleaning and care of the stained pine wood will help extend its longevity and preserve its appealing appearance.
Re-Staining And Refinishing Options
Over time, the stain on pine wood may start to fade or wear off. When this happens, re-staining or refinishing the wood can revive its beauty. Consider the following options:
- Re-staining: If the stain on your pine wood has faded or become patchy, you can re-stain it to restore its original color and vibrancy. Before re-staining, make sure to remove any existing stain or finish using sandpaper or a paint stripper. Clean the surface thoroughly, apply the new stain evenly, and then seal it with a polyurethane varnish.
- Refinishing: If the stained pine wood has deep scratches, water damage, or other significant flaws, refinishing may be necessary. This process involves stripping off the existing stain and finish, sanding the surface to remove imperfections, and then applying a new stain and protective finish.
When re-staining or refinishing pine wood, it’s essential to follow the manufacturer’s instructions and take the necessary safety precautions. It’s also recommended to test the stain or finish on a small, inconspicuous area first to ensure you achieve the desired result.
By staying proactive with regular cleaning and maintenance, and knowing your re-staining and refinishing options, you can keep your stained pine wood looking beautiful and well-preserved for years to come.
Frequently Asked Questions For How Many Coats Of Stain On Pine
Should You Put Two Coats Of Stain On Pine?
Yes, two coats of stain should be applied to pine for optimal results.
Is 3 Coats Of Stain Too Much?
No, 3 coats of stain is not too much. Applying multiple coats can enhance the color and protection of the wood.
Will 2 Coats Of Stain Make It Darker?
Applying 2 coats of stain may darken the color, but results may vary depending on the type of wood and the stain used.
What Stain Looks Best On Pine?
The best stain for pine is subjective, but popular choices include dark walnut, golden oak, and weathered gray.
Conclusion
Understanding the number of coats of stain needed on pine is essential for achieving the desired finish. It is important to consider the type and quality of stain, as well as the condition and absorbency of the pine wood. While the general rule of thumb is to apply two coats, this can vary depending on personal preference and the desired level of depth and richness.
Applying multiple thin coats allows for better control and prevents the wood from becoming overly saturated. Additionally, proper surface preparation, such as sanding and cleaning, ensures a smooth and even application. Remember to always test the stain on a small, inconspicuous area before proceeding with the final application.
By following these guidelines, you can achieve a beautiful and long-lasting stain finish on your pine projects.