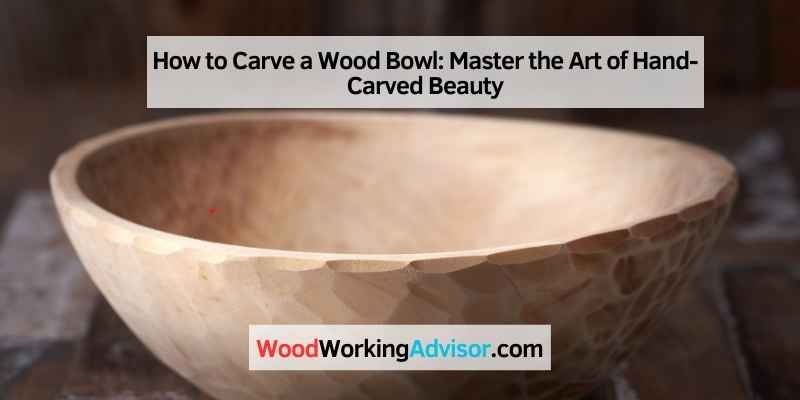
How to Carve a Wood Bowl: Master the Art of Hand-Carved Beauty
To carve a wood bowl, cut the block to size, clamp it, carve into a round shape, smooth rough areas, sand, and seal the wood. Carving a wooden bowl involves using basic hand tools.
It’s a satisfying and creative process that allows you to shape a natural piece of wood into a functional and beautiful bowl. Utilizing carving axe, hollowing adze, and sloyd knife, you can create unique designs and patterns on the wooden surface.
Choosing the right type of wood, such as Maple, Cherry, or Black Walnut, is essential for achieving a durable and aesthetically pleasing finish. Whether you are a beginner or an experienced woodworker, carving a wood bowl can be a fulfilling and enjoyable woodworking project.
The Art Of Carving
Wood bowl carving is a traditional craft that demands skill, precision, and patience. It is more than just shaping wood; it is a meditative process that connects the artist with the natural material. The art of carving wooden bowls goes beyond just creating objects; it encapsulates the essence of craftsmanship, history, and cultural significance.
Understanding The Essence Of Wooden Bowl Carving
Carving wooden bowls is an ancient art that has been passed down through generations, embodying the heritage and mastery of woodworking. The process involves transforming a raw piece of wood into a functional and aesthetically pleasing vessel, utilizing specific techniques and tools to achieve the desired form and finish.
Exploring The Cultural Significance
The act of carving wooden bowls holds cultural significance in various societies, symbolizing craftsmanship, sustainability, and the harmony between man and nature. Different cultures have their unique styles and methods of bowl carving, reflecting their traditions and values through the intricate designs and patterns carved into the wood.
What Tools Do You Need To Carve A Wooden Bowl?
- Carving axe
- Hollowing adze
- Sloyd knife
How To Carve A Wood Bowl (beginner Level)
- Cut the large block down to size.
- Clamp the block and start carving.
- Carve the sides into a round shape.
- Smooth all the rough areas with a sander.
- Hand sand additional areas if needed.
- Seal the wood.
Tools And Materials
In the process of hand-carving a wooden bowl, having the right tools and materials is essential to achieving a beautiful and functional piece. Let’s delve into the key components that will aid you in this woodworking journey.
Essential Tools For Hand-carved Wooden Bowl Making
- Carving axe
- Hollowing adze
- Sloyd knife
Choosing The Right Wood For Carving
When it comes to selecting the wood for your bowl, opt for hardwood varieties like cherry, maple, or walnut. These woods are durable and lend themselves well to carving.
Mastering The Techniques
Learn the techniques to carve a wood bowl with precision and skill. Discover the step-by-step process from selecting the right wood to finishing the final product that will leave you with a beautifully handcrafted wooden bowl.
Preparing The Wood Blank
Before you can begin carving a wood bowl, you need to start with a suitable wood blank. Choose a piece of hardwood, like maple or cherry, that is free from defects and has a straight grain pattern. Begin by cutting the block down to the desired size using a saw. It’s important to work with a block that is larger than the final bowl size to allow for shaping and refining. Once you have your wood blank, clamp it securely to your work surface to prevent any movement during carving.
Step-by-step Guide To Carving The Bowl Interior
- Begin by drawing the shape of the bowl on the top surface of the wood blank using a pencil. This will act as a guide as you carve.
- Using a carving axe or adze, start hollowing out the interior of the bowl. Work from the center outwards, removing small chips of wood at a time. Take care to maintain a consistent thickness and smooth curves.
- As you progress, use a gouge and Alastair Dargue to refine the shape of the bowl. This will help you achieve the desired depth and curvature.
- Continue hollowing with the adze, smoothing out any uneven areas and making sure to remove all traces of the original block shape.
- Finally, use different tools like a twca cam hollow or a kestrel blade rim to add detail and texture to the interior of the bowl.
Shaping And Refining The Bowl Exterior
- Once you’re satisfied with the shape and depth of the bowl interior, it’s time to focus on the exterior.
- Use a saw to remove any excess material from the sides and create a rough outline of the bowl shape.
- With the help of an axing tool like a Kalthoff axe, start removing the wood from the sides of the bowl, carefully following the grain pattern.
- Switch to a Magnus Sundelin knife to refine the rim of the bowl and create smooth curves.
- Take your time to sand the outside of the bowl, removing any rough areas and ensuring a smooth finish.
- If desired, you can add additional details like fluting or texturing to the exterior of the bowl using specialized carving tools.
- Finish off the wood bowl by sealing it with an appropriate wood finish or oil to protect it and bring out the natural beauty of the wood grain.
Finishing Touches
To add the finishing touches when carving a wood bowl, focus on smoothing rough areas with a sander and hand-sand any additional spots for a polished look. Seal the wood after carving to protect and enhance the natural beauty of the finished piece.
Sanding And Smoothing For A Flawless Finish
Once you have carved the basic shape of your wood bowl, it’s time to move on to the finishing touches. One of the most important steps in achieving a flawless finish is sanding and smoothing the surface. This process not only enhances the overall appearance of the bowl but also ensures a comfortable experience for anyone using it.
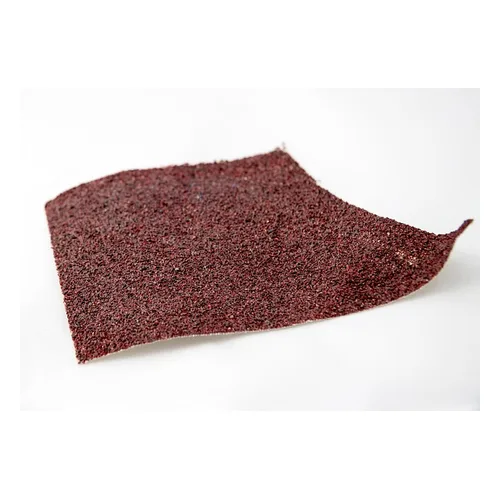
In order to sand your wood bowl effectively, you’ll need to gather a few essential tools: sandpaper, sanding blocks, and possibly a powered sander for larger bowls. Start by using a coarse-grit sandpaper to remove any rough areas or tool marks. Then, gradually move to finer-grit sandpapers for a smooth and polished result.
When sanding your wood bowl, make sure to apply even pressure and sand in the direction of the grain. This will prevent any scratches or tear-outs that can spoil the final look. Take your time and pay attention to every curve and crevice of the bowl, ensuring that each area is properly sanded.
Moreover, to achieve an extra level of smoothness, consider using sanding blocks. These handy tools provide a consistent and even pressure, resulting in a more uniform finish. Gently sand the entire surface of the bowl with the sanding block, rotating it as needed to reach all angles.
Applying Natural Sealants And Finishes
Once you have achieved the desired smoothness, the next step is to protect your wood bowl with a natural sealant or finish. This serves two purposes: it enhances the beauty of the wood grains and provides a protective layer against moisture and stains.
There are several options for natural sealants and finishes to choose from. Two popular choices are beeswax and mineral oil. Beeswax creates a lustrous and warm finish, while mineral oil penetrates the wood, bringing out its natural color and grain pattern. Both options are non-toxic, food-safe, and easy to apply.
To apply the sealant or finish, start by cleaning the bowl to remove any dust or debris. Then, using a soft cloth or brush, evenly apply the chosen sealant or finish to the entire surface of the bowl. Allow it to soak in for a few minutes, and then wipe off any excess with a clean cloth.
Keep in mind that multiple coats may be necessary to achieve the desired level of protection and sheen. Allow each coat to dry completely before applying the next one. Once you are satisfied with the finish, let the bowl cure for the recommended amount of time before using it.
With these finishing touches of sanding and applying natural sealants and finishes, your wood bowl will be transformed into a beautiful and durable piece of art. Enjoy the satisfaction of creating something unique and functional with your own hands.
Inspiration And Creativity
Wood bowl carving offers a canvas for unique artistic designs and patterns, allowing craftsmen to showcase their creativity.
Inspiration can be drawn from the intricate patterns found in nature and heritage, adding a personal touch to each carved wood bowl.
Tips And Tricks
Learn the art of wood bowl carving with these helpful tips and tricks. Start by selecting the right wood and use carving tools such as a carving axe, hollowing adze, and a sloyd knife. Shape the bowl, smooth rough areas, hand sand if necessary, and seal the wood for a beautiful finish.
Expert Advice For Beginners
Embrace guidance from seasoned carvers, beginning your bowl carvings with essential knowledge.
Avoiding Common Pitfalls In Bowl Carving
- Choose the right wood: Select a wood type suitable for carving.
- Tools matter: Invest in quality carving tools for precision.
- Start small: Begin with simpler designs before tackling complex patterns.
- Patience is key: Take your time to ensure each cut is deliberate and accurate.
- Seal the wood: Protect your wooden bowl with proper sealing to prevent damage.
Exploring Further
Learn the art of wood bowl carving with these beginner-friendly steps. Cut the block to size, shape the sides into a round form, and smooth rough areas with a sander. Finish it off with some hand sanding and seal the wood for a beautifully crafted creation.
The World Of Hand-carved Wooden Bowls
When it comes to the art of wood carving, hand-carved wooden bowls hold a special place. These bowls not only serve a functional purpose but also showcase the skill and craftsmanship of the artisans who create them. Hand-carved wooden bowls are a unique combination of art and utility, and they have the ability to add a touch of nature’s beauty to any space.
Visiting Renowned Bowl Carving Artisans
If you are interested in learning more about the world of hand-carved wooden bowls, there is no better way than to visit renowned bowl carving artisans. These artisans have spent years honing their craft and have developed their own unique style and techniques. By observing their work up close, you can gain a deeper understanding of the intricacies of bowl carving and the different tools and methods used.
Ensuring Each Heading Adheres To Html Syntax
Frequently Asked Questions Of How To Carve A Wood Bowl
What Tools Do You Need To Carve A Wooden Bowl?
Carve a wooden bowl with bowl carving tools like a carving axe, hollowing adze, and Sloyd knife.
How Do You Make A Wooden Carved Bowl?
To make a wooden carved bowl, follow these steps:
1. Cut a large block of wood into the desired size.
2. Clamp the block and begin carving the bowl shape.
3. Carve the sides into a round shape.
4. Smooth any rough areas with a sander and hand sand other areas if needed.
5. Seal the wood for a finished look. Remember to use the right tools such as a carving axe, hollowing adze, and sloyd knife.
What Is The Best Wood For Bowl Carving?
The best wood for bowl carving is Maple, Cherry, or Black Walnut. These hardwoods provide a sturdy and durable material for carving. Make sure to use all-natural finishes for a natural look. You can hand-carve the bowl using chisels and gouges.
Can You Hand Carve A Bowl?
Yes, you can hand carve a bowl using tools like chisels and gouges for shaping wood.
Conclusion
In crafting a wooden bowl, use hand tools to carve, smooth, and finish your creation. Ensure to select the right wood for the best results. Embrace the creative process step by step and enjoy the satisfaction of handcrafted beauty. Let your imagination shape the perfect wooden bowl.