
How to Transform Wood with Color: A Step-by-Step Guide
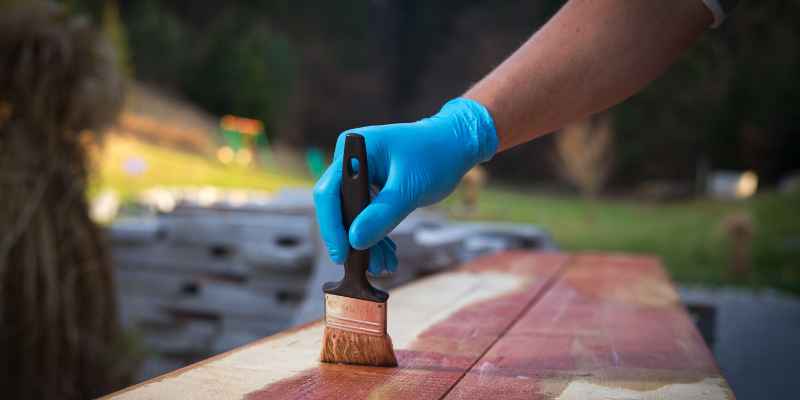
To change the color of wood, apply wood stain or paint using a brush or rag. Sanding the wood before painting ensures better adhesion and absorption of the color.
Wood is a versatile material that can be transformed with new colors to match different aesthetics and design preferences. Whether you want to give old furniture a fresh look or personalize a new piece, changing the color of wood can make a big impact.
By following simple steps and using the right techniques, you can easily update the appearance of wood surfaces. In this guide, we will explore the various methods and tips for changing the color of wood effectively and efficiently.
Choosing The Right Wood
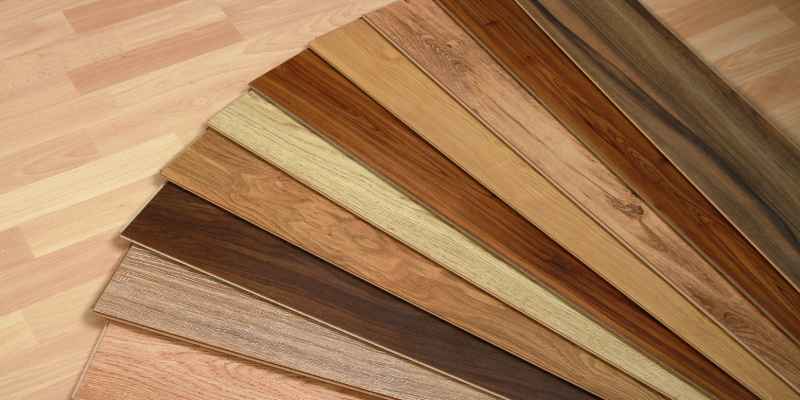
Choosing the right type of wood is essential when wanting to change its color. Different wood species and grains react differently to stains and dyes. Here, we’ll explore how to select the appropriate wood for coloring to achieve the desired results.
Consider The Wood Species
When choosing the right wood for coloring, it’s important to consider the species. Different wood species absorb colors differently due to their natural properties. Some woods, such as oak and maple, are porous and absorb color deeply, while others like cherry and pine are less absorbent. Evaluating the characteristics of various wood species is crucial in achieving the desired color result.
Evaluate The Wood Grain
The wood grain has a significant impact on the color transformation process. Open-grained woods, like oak and mahogany, may require different coloring techniques compared to close-grained woods such as maple and cherry. The direction of the grain also affects how the wood absorbs color, so it’s important to consider the grain pattern when selecting a wood for coloring.
Preparation
Before changing the color of wood, it is crucial to focus on the preparation process. This step plays a vital role in achieving a smooth and even finish.
Sanding The Wood Surface
To start, sanding the wood surface is essential to remove any existing finish and create a smooth base for the new color.
Cleaning The Wood Surface
Next, thoroughly clean the wood surface to ensure there is no dust, dirt, or residue that could impact the color application.
Selecting The Appropriate Color
When it comes to changing the color of wood, selecting the right shade can make all the difference. Whether you want to highlight the natural beauty of the wood or completely transform its appearance, choosing the appropriate color is essential. In this blog post, we will discuss two main options: understanding different wood stains and choosing the right paint. Let’s dive in!
Understanding Different Wood Stains
Wood stains are an excellent choice if you want to enhance the natural grain and texture of the wood while providing long-lasting protection. There are various types of wood stains available, including oil-based, water-based, and gel stains. Here are a few key points to consider:
- Oil-based stains: These stains penetrate deeply into the wood, enhancing its color and richness. They are known for their durability and resistance to wear and tear.
- Water-based stains: Ideal for those seeking a eco-friendly option, water-based stains offer quick drying times and are low in VOCs (volatile organic compounds).
- Gel stains: These stains have a thick consistency, making them perfect for vertical surfaces such as doors and cabinets. They don’t penetrate as deeply as oil-based stains, but they provide a smooth finish and excellent coverage.
Before applying any wood stain, it’s essential to test it on a small, inconspicuous area to ensure the desired color is achieved.
Choosing The Right Paint
If you prefer a more opaque and solid color finish, painting the wood is a great option. Paint can completely transform the look of the wood, allowing you to match it with your existing decor or create a unique statement piece. Here’s what you need to know when choosing the right paint:
- Latex paint: This type of paint is incredibly versatile and commonly used on wood surfaces. It dries relatively quickly, has low odor, and is easy to clean up. Latex paint comes in a wide range of colors, allowing you to easily find the perfect shade for your project.
- Oil-based paint: Offering a durable and long-lasting finish, oil-based paint is an excellent choice for high-traffic areas. However, it requires more time to dry and has a strong odor, so proper ventilation is crucial.
Remember, when painting wood, it’s essential to properly prepare the surface by sanding and filling any imperfections. This ensures a smooth and flawless finish.
By understanding the different wood stains available and choosing the right paint, you can achieve the desired color for your wood project. Whether you want a natural and subtle look or a bold and vibrant statement, selecting the appropriate color will bring your vision to life.
Applying The Color
Once you have prepared the wood surface and chosen the color for your project, it’s time to apply the color. In this step, we will discuss two common methods: using stain for a natural look and applying paint for a solid color. Whether you want to enhance the natural beauty of the wood or create a bold statement with a vibrant hue, these methods will help you achieve the desired result.
Using Stain For A Natural Look:
Staining wood is an excellent way to preserve its natural beauty while adding a touch of color. Stains come in a variety of shades, ranging from light to dark, allowing you to choose the perfect tone for your project. Follow these steps to apply stain to your wood:
- Prepare the wood by sanding it to create a smooth surface.
- Apply a pre-stain conditioner to the wood. This step helps the stain penetrate evenly and prevents blotching.
- Use a brush, cloth, or sponge to apply the stain, working with the grain of the wood.
- Allow the stain to penetrate the wood for the recommended time specified by the manufacturer.
- Wipe off any excess stain with a clean cloth.
- Once the stain is dry, apply a protective finish such as varnish or polyurethane to seal and protect the wood.
Applying Paint For Solid Color:
If you prefer a bold, opaque finish, using paint is the way to go. With paint, you have endless color options and the ability to completely transform the appearance of the wood. Follow these steps to apply paint to your wood:
- Prepare the wood by sanding it to create a smooth surface.
- Apply a primer to the wood. This step helps the paint adhere better and provides a more even finish.
- Choose a high-quality paint suitable for wood surfaces.
- Use a brush, roller, or sprayer to apply the paint, ensuring even coverage.
- Allow the paint to dry completely between coats, following the recommended drying time specified by the manufacturer.
- Apply additional coats if necessary, until you achieve the desired opacity.
- Once the paint is dry, you can optionally apply a clear sealant for added protection and durability.
Techniques For Adding Depth
If you want to enhance the appearance of wood while adding depth to its color, there are several techniques you can use. Below, we explore the methods for achieving this through the use of stains and distressing effects.
Using Multiple Layers Of Stain
Apply different shades of stain sequentially to achieve a layered effect. Start with a light-colored stain as the base and gradually build up the color with darker stains. Ensure each layer is fully dried before applying the next one.
Creating Distressed Effects
To create distressed effects, you can use various tools like sandpaper, chains, or nails to roughen up the surface of the wood. Once distressed, apply stain unevenly to highlight the imperfections and create a weathered look.
Protecting The Color
Protecting the color of wood is essential to maintain its beauty and longevity. By applying a wood finish, you can safeguard the color of the wood and enhance its natural appeal. Whether you are working on an indoor or outdoor project, it’s crucial to consider certain factors that can affect the color of the wood over time.
Applying A Wood Finish
When it comes to protecting the color of wood, applying a suitable wood finish is a crucial step. A wood finish acts as a protective barrier, shielding the wood from exposure to moisture, UV rays, and other damaging elements. It not only preserves the natural color of the wood but also enhances its texture and grain patterns.
There are various types of wood finishes available in the market, such as varnish, lacquer, shellac, and polyurethane. Each has its own unique characteristics and application methods. Before deciding on a particular wood finish, consider factors like the type of wood, the intended use of the finished piece, and your personal preference.
Before applying the wood finish, make sure to properly prepare the wood surface. Sand the wood to achieve a smooth and even surface, removing any previous finish or blemishes. Clean the surface thoroughly to remove any dust or debris that may prevent the proper adhesion of the wood finish. Apply the wood finish according to the manufacturer’s instructions, ensuring even coverage and allowing sufficient drying time between coats.
Considerations For Outdoor Use
If you are working on a wood project that will be used outdoors, there are additional considerations to keep in mind to protect the color of the wood. Outdoor wood is exposed to harsh weather conditions, fluctuations in temperature, and moisture. Without proper protection, the color of the wood can fade, become gray, or even rot.
To protect the color of wood that will be used outdoors, consider using a wood finish specifically designed for outdoor use. Exterior-grade finishes, such as outdoor varnishes or polyurethane, are formulated to withstand the rigors of the elements. They provide enhanced UV resistance and moisture protection, allowing the natural beauty of the wood to shine through for years to come.
Regular maintenance is also crucial for preserving the color of outdoor wood. Periodically inspect the wood and reapply the wood finish as needed. Clean the surface gently with a mild soap solution and a soft brush to remove dirt and debris. Avoid using harsh chemicals or abrasive cleaners that can damage the wood or strip off the finish.
With proper care and the right wood finish, you can protect the color of wood and enjoy its natural beauty for years to come. Whether you are working on an indoor or outdoor project, applying a wood finish and considering the specific requirements of your project will help ensure the longevity and vibrancy of the wood’s color.
Troubleshooting And Fixes
Even with careful application, changing the color of wood can sometimes result in unexpected outcomes. In this section, we will address some common issues that may arise and provide effective solutions to ensure your project turns out just as you envisioned.
Dealing With Uneven Color Absorption
Uneven color absorption can occur when certain areas of the wood soak up more stain or paint compared to others. This can leave your project looking blotchy and inconsistent. But fret not, as there are a few steps you can take to rectify this problem:
- Inspect the wood surface closely to identify the areas that are absorbing more color and those that are not.
- Lightly sand the areas that absorbed less color to remove any remaining coating and allow for better absorption.
- Before applying more color, ensure the wood is clean and free from any sanding residue or dust particles.
- Apply an additional coat of stain or paint to the entire surface, using long, smooth strokes to ensure even coverage.
- Allow the wood to dry thoroughly before assessing the color. If needed, repeat the process until the color appears uniform.
Addressing Drips And Runs
Drips and runs in the color can occur if the stain or paint is too thick or if it is applied too heavily. These imperfections can mar the overall appearance of your wood project. Follow these steps to fix this issue:
- Carefully inspect the wood surface for any drips or runs.
- If the drips are still wet, gently wipe them away using a clean cloth or sponge.
- If the drips have already dried, lightly sand the affected area to smooth out the imperfections.
- Clean the sanded area to remove any dust or debris.
- Reapply a thin, even coat of stain or paint to the entire surface, making sure to blend it seamlessly with the rest of the wood.
- Allow the surface to dry completely before assessing the final result.
By following these troubleshooting tips, you can achieve an even and flawless color change on your wood surfaces. Remember to take your time, practice patience, and let your creativity shine in the process.
Final Touches And Recommendations
Adding A Clear Coat For Gloss
Enhance the appearance of your wood by applying a clear coat to achieve a glossy finish.
Tips For Maintenance
Maintain the longevity of your colored wood with these essential maintenance tips:
- Regularly dust and wipe the surface with a soft cloth.
- Avoid placing hot or wet items directly on the wood.
- Use furniture polish or wax to protect the finish.
- Inspect for any wear and tear and promptly address it.
Frequently Asked Questions Of How To Change Color Of Wood
How Can I Change The Color Of Wood Without Sanding It?
To change wood color without sanding, use a wood stain or dye directly on the surface. Wipe off excess and let it dry for a new color finish.
Can I Stain Wood A Different Color?
Yes, you can stain wood a different color using wood stain products. Prep the wood surface and apply the new stain for a fresh look.
How Do You Turn Dark Wood Into Light Wood?
To lighten dark wood, sand it to remove the existing finish and color. Apply a wood bleaching product and let it dry. Sand the wood again to remove any remaining dark stain. Finally, apply a light-colored wood stain or paint to achieve the desired lighter shade.
How Do You Lighten Wood Without Bleach?
Lighten wood without bleach by using a mixture of hydrogen peroxide and vinegar. Apply the solution, let it sit, and then wipe it off for a lighter wood finish.
Conclusion
Enhancing the color of wood can transform your space. Whether staining or painting, it’s a simple yet effective way to refresh your furniture or decor. Remember to choose the right technique and products for a flawless finish. Experiment and have fun with different hues to create a personalized touch.