How to Master Crown Molding Corners: Expert Tips for Miter Saw Success
To cut crown molding corners with a miter saw, position the molding upside down, measure and mark the angles, set the miter saw to the correct angles, and make the cuts following the marked lines. Cutting crown molding corners with a miter saw can be a precise and efficient process when done correctly.
Plus, it ensures that the corners fit seamlessly and create a professional finish. By following a few steps and using the right tools, you can achieve clean and accurate cuts for your crown molding corners. Now, let’s dive into the details of how to cut crown molding corners with a miter saw.
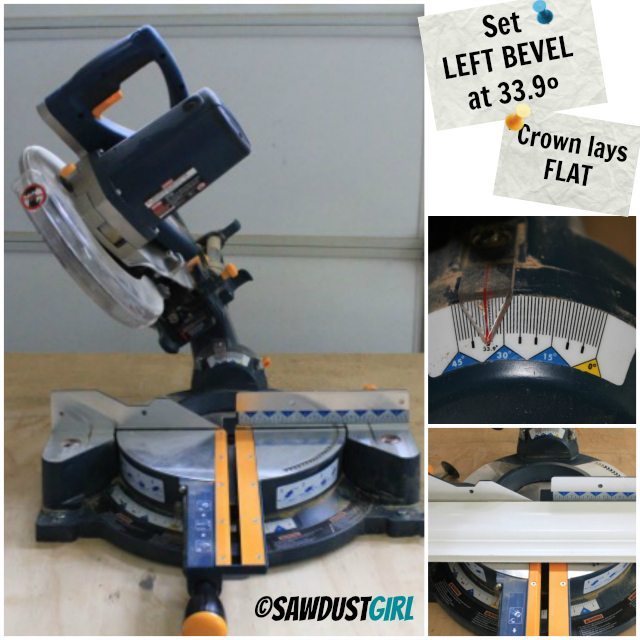
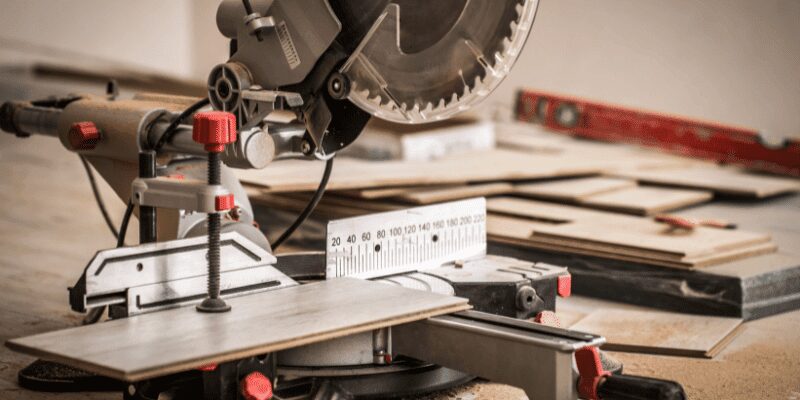
Credit: sawdustgirl.com
The Importance Of Mastering Crown Molding Corners
Mastering crown molding corners is essential for a professional finish. Learn how to cut crown molding corners effectively with a miter saw to achieve precise and seamless results.
Cutting crown molding corners can be a challenging task, but it is crucial to master this skill to achieve seamless transitions and enhance the overall appearance of your crown molding installation. In this section, we will discuss the importance of mastering crown molding corners and how it can significantly impact the final look of your project.
Achieving Seamless Transitions:
- Precise angles: Mastering crown molding corners allows you to achieve precise angles, ensuring a seamless transition between two pieces of molding. This attention to detail can make a significant difference in achieving a professional and polished look.
- Seamlessness: By cutting corners accurately, you can eliminate unsightly gaps or overlaps between the molding pieces. This creates a harmonious flow and gives your project a cohesive and visually appealing finish.
- Professional craftsmanship: Learning how to cut crown molding corners demonstrates your expertise and attention to detail. It showcases your ability to deliver high-quality work, which can earn you a reputation for professionalism and craftsmanship.
Enhancing The Overall Appearance:
- Professional finish: Properly cut crown molding corners create a finished and refined appearance. It adds architectural interest to a room and enhances the overall aesthetics. When corners are seamless and precise, it elevates the visual appeal of any space.
- Attention to detail: Mastering crown molding corners showcases your commitment to detail-oriented craftsmanship. It highlights your ability to pay close attention to even the smallest aspects of your work, which can impress clients and make them more likely to choose you for future projects.
- Increased value: A well-executed crown molding installation can significantly increase the value of a home or property. By mastering crown molding corners, you can elevate the overall look and feel of any space, instantly boosting its appeal and perceived value.
Mastering crown molding corners is an essential skill for any professional or DIY enthusiast looking to transform the look of their space. With precise angles and seamless transitions, you can achieve a professional finish that adds value and aesthetic appeal to any room.
So, put in the effort to learn and practice this skill, and you’ll be rewarded with stunning results.
Essential Tools For Mastering Crown Molding Corners
Mastering crown molding corners requires the right tools, and a miter saw is essential for cutting precise angles. With its ability to make accurate cuts, a miter saw can help you achieve seamless corners for a professional finish.
Miter Saw: Your Best Friend For Precision Cuts
A miter saw is an indispensable tool when it comes to cutting crown molding corners with precision. It allows you to make accurate angled cuts, ensuring a seamless fit for your crown molding. Here’s why a miter saw should be your go-to tool:
- Versatility: Miter saws are designed to cut through various materials, making them perfect for crown molding made from different types of wood or other materials.
- Precise Angled Cuts: With its adjustable blade and built-in protractor, a miter saw enables you to easily set the desired cutting angles, resulting in precise corner cuts.
- Speed and Efficiency: The efficiency of a miter saw allows you to cut through crown molding quickly and smoothly, saving you time and effort.
- Safety Features: Most modern miter saws come with safety features like blade guards and arbor locks for secure operation.
Measuring And Marking Tools: Ensuring Accuracy
Accurate measurements and markings are crucial when cutting crown molding corners to achieve a perfect fit. Here are the essential measuring and marking tools you should have:
- Tape Measure: A reliable tape measure helps you take accurate measurements of the crown molding length, ensuring precise cuts.
- Carpenter’s Square: A carpenter’s square is crucial for measuring and marking the interior and exterior angles of the corners. It ensures that your cuts are perfectly aligned.
- Pencil or Marking Knife: Using a pencil or a marking knife, mark the measurement lines precisely on the crown molding to guide your cuts.
- Angle Finder: An angle finder is a handy tool for accurately determining the angles of the corners, allowing you to set the miter saw to the correct degree.
Clamps And Jigs: Keeping Pieces Secure
To ensure the stability of the crown molding during the cutting process, using clamps and jigs is essential. These tools help keep the pieces in place, eliminating the risk of inaccuracies and potential accidents. Here’s why clamps and jigs are crucial:
- Corner Clamps: Corner clamps securely hold the crown molding in place, maintaining the desired angle and preventing any movement during cutting.
- Bench Vise: A bench vise is beneficial when you need to stabilize the crown molding for more intricate cuts or when creating repetitive angles.
- Miter Saw Jigs: Jigs specifically designed for miter saws provide additional support and stability for cutting crown molding, ensuring accurate and consistent results.
By having these essential tools at your disposal, you’ll be ready to master cutting crown molding corners with a miter saw. Remember to take precise measurements, secure the pieces with clamps, and let the miter saw work its magic for flawless results.
Happy cutting!
How To Measure And Cut Crown Molding For Corners
Learn how to accurately measure and cut crown molding for corners using a miter saw. This step-by-step guide will help you achieve clean and professional-looking results.
Determining The Angles: Inside And Outside Corners
- Inside corners are where two walls meet, creating an angle facing the room’s interior. Outside corners, on the other hand, are where two walls meet, facing the room’s exterior.
- To measure the angles for crown molding, use a sliding bevel or a digital angle finder to determine the exact degree for each corner.
- Remember to measure both the wall and the ceiling angles separately to ensure precision.
Setting Up The Miter Saw: Blade Angles And Bevels
- Adjust the miter saw’s blade angle to match the angles measured for the crown molding corners.
- A standard miter saw has preset stops at common angles like 45 degrees, but if your corner angles differ, use the saw’s bevel adjustment to fine-tune the cut.
- It’s crucial to practice using scrap wood before making cuts on the actual crown molding to avoid mistakes.
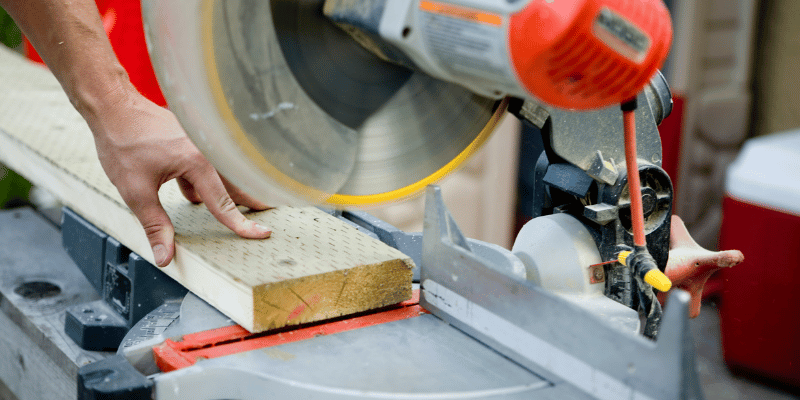
Cutting Techniques: Proper Positioning And Safety Measures
- When cutting crown molding, it’s best to have someone assist you to hold the molding in place securely.
- Position the molding upside down on the miter saw’s fence, with the bottom against the fence and the top angled away from it.
- Align the blade with the edge of the molding, making sure it matches the desired angle.
- Safety measures are essential, so wear protective goggles and gloves to protect yourself from any potential hazards.
- Take your time and make slow, precise cuts, ensuring that the blade goes entirely through the molding.
With these steps in mind, you can now proceed confidently to measure and cut crown molding for corners using a miter saw. Remember to prioritize accuracy and safety throughout the process. Happy molding!
Tips For Achieving Perfect Inside Corner Joints
Learn the secrets to achieving perfect inside corner joints when cutting crown molding corners with a miter saw. Discover tips and techniques for precise cuts that will result in seamless and professional-looking finishes.
Achieving perfect inside corner joints is crucial for a professional-looking finish when cutting crown molding corners with a miter saw. To help you achieve seamless results, we’ll explore three effective methods: the coping method, using templates and jigs, and fine-tuning your cuts through sanding and filling.
Coping Method: Creating A Custom Fit With Hand Tools
Mastering the coping method allows you to create custom-fit inside corner joints without the need for complex calculations or miter cuts. Here’s how to do it:
- Start by making a 45-degree miter cut on one end of the first molding piece.
- Use a coping saw to carefully cut around the profile of the molding, following the shape of the mitered end.
- Smooth out any rough edges or imperfections with a fine-grit sandpaper or a file.
- Fit the coped end against the previously installed molding piece, ensuring a snug fit.
- Secure both pieces with nails or adhesive, and repeat the process for subsequent corners.
Using this method will provide seamless connections between molding pieces, creating visually appealing inside corner joints.
Using Templates And Jigs: Streamlining The Process
Templates and jigs can significantly simplify the process of cutting crown molding corners. Here’s how to streamline your work:
- Create a template by cutting a scrap piece of molding with the desired corner angle.
- Use the template as a guide to make accurate cuts on your actual crown molding pieces.
- Secure the crown molding firmly against a jig, such as an adjustable fence or crown molding jig, to ensure precise and consistent cuts.
- Utilize the appropriate angle settings on your miter saw to match the corner angles required for your project.
- Repeat the process for each corner, ensuring uniformity across all joints.
By using templates and jigs, you can save time and effort while achieving precise inside corner joints.
Fine-Tuning Your Cuts: Sanding And Filling For Seamless Results
Even with careful cutting, small imperfections might still appear on your inside corner joints. Here’s how to fine-tune your cuts for flawless results:
- Inspect the joints for any gaps or unevenness. Fill small gaps using wood filler or putty that matches the color of the molding.
- After the filler has dried, lightly sand the joint surfaces to achieve a smooth finish.
- Use a sanding block or sponge to maintain an even pressure throughout the sanding process.
- Wipe away any dust or debris before applying paint or stain for a flawless finish.
Taking the time to sand and fill any imperfections will ensure seamless inside corner joints that add a touch of elegance to your crown molding installation.
With these tips in mind, you can confidently cut crown molding corners with a miter saw and achieve perfect inside corner joints. Whether you opt for the coping method, templates and jigs, or fine-tuning your cuts, following these techniques will help you attain professional-looking results that are sure to impress.
Secrets To Success With Outside Corner Joints
Discover the secrets to achieving success with outside corner joints and mastering the art of cutting crown molding corners with a miter saw. Learn the tips, techniques, and best practices that will help you achieve seamless and professional-looking results. Enhance your woodworking skills and elevate your projects to the next level.
Creating a Perfect Miter Cut: Measuring and Marking Techniques:
- Before cutting crown molding corners with a miter saw, accurate measurements and markings are crucial for a perfect fit.
- Use a measuring tape to determine the length of each wall and the angle of the corner. Write down these measurements for reference.
- To ensure a precise miter cut, use a miter saw protractor to set the correct angle on the saw. Double-check the angle before making any cuts.
- Mark the molding with a pencil or a piece of tape to indicate where the cut should be made. Make sure the marks are visible and accurate before proceeding with the cut process.
Ensuring a Tight Fit: Using Caulk and Glue:
- Even with precise miter cuts, some gaps may still appear when installing crown molding. To ensure a tight fit and a seamless look, caulk and glue can be used.
- Apply a bead of caulk along the inside and outside of the mitered corner joint. Smooth it with a fingertip or caulk finishing tool to achieve a neat finish.
- Use a small brush or a glue applicator to apply wood glue to the mitered surfaces before joining them together. Be sure not to use too much glue, as it may result in messy drips.
- Press the mitered corners firmly together and wipe away any excess glue immediately with a damp cloth. Allow the glue to dry completely before applying any paint or finishing touches.
Concealing Gaps and Imperfections: Tips for Effective Trim Placement:
- Even with the tightest mitered corners, there may still be minuscule gaps or imperfections that need to be concealed during the installation process.
- Place the crown molding trim against the wall and ceiling, ensuring it fits snugly into the installed corners.
- Use a brad nailer to attach the trim to the wall and ceiling, positioning the nails at intervals along the length of the molding.
- In case of larger gaps, use filler material such as wood putty or caulk to fill them in. Smooth out the filler material for a seamless finish that matches the surrounding trim.
- After filling any gaps, sand the filled areas gently to create a smooth and even surface before applying the final coat of paint or stain.
With these secrets to success for cutting outside corner joints in crown molding, achieving professional-looking results is well within reach. By mastering the art of accurate measurements, utilizing caulk and glue for a tight fit, and strategically placing trim, you’ll be able to cut crown molding corners with a miter saw like a pro.
Happy molding installation!
Troubleshooting Common Challenges With Crown Molding Corners
Learn how to effectively troubleshoot and overcome common challenges when cutting crown molding corners with a miter saw. Master the art of achieving precise cuts and flawless joints for a seamless crown molding installation.
Dealing With Gaps: Causes And Solutions
When it comes to cutting crown molding corners with a miter saw, one of the most common challenges you may encounter is dealing with gaps between the molding pieces. These gaps can be unsightly and can affect the overall finish of your project.
Understanding the causes of these gaps and knowing how to fix them is crucial in achieving seamless crown molding corners. Here are some causes and solutions to help you troubleshoot this issue:
- Corner Angle Discrepancies: If the angles on the corners of your molding pieces are not cut accurately or are slightly off, it can result in visible gaps. Ensure that you accurately measure and cut your molding at the correct angles to minimize this issue.
- Uneven Walls and Ceilings: Another cause of gaps in crown molding corners is uneven walls or ceilings. If your walls or ceilings are not perfectly squared or level, it can affect the alignment of your molding pieces. Use a level and shim if necessary to ensure a tight fit between the molding and the wall/ceiling.
- Insufficient Caulking: In some cases, the gaps may be due to insufficient caulking. Even if your corners are cut accurately, there may still be small gaps that need to be filled. Apply a bead of caulk along the joints and use a putty knife or your finger to smooth it out for a seamless finish.
- Shrinkage and Expansion: Wood crown molding can shrink or expand depending on the humidity levels in your environment. This can lead to small gaps appearing over time. To prevent this, allow your molding to acclimate to the room’s conditions before installation and leave an appropriate gap for expansion.
- Painter’s Caulk: If you have small gaps between your crown molding corners, using painter’s caulk can help. It’s a flexible and paintable solution that can fill in those gaps and create a smooth transition. Apply the caulk with a caulk gun and smooth it out with a damp cloth or your finger.
Remember, troubleshooting gaps in crown molding corners is a normal part of the installation process. By understanding the causes and implementing the suggested solutions, you’ll be able to achieve professional-looking results.
Handling Uneven Walls And Ceilings: Adjusting Angles Accordingly
If you’re encountering uneven walls or ceilings while cutting crown molding corners with a miter saw, it’s important to adjust the angles accordingly to ensure a seamless installation.
Here are some tips to help you handle this common challenge:
- Measure and Adjust: Start by measuring the angles of your walls and ceilings using an angle finder. If you find discrepancies, make adjustments to your cutting angles accordingly. By customizing each angle to fit the specific wall or ceiling, you can mitigate any unevenness and achieve better results.
- Create Mock-Ups: To ensure accuracy before making any cuts on your actual crown molding, it can be helpful to create mock-ups using scrap pieces of molding. This will allow you to test the fit against the walls and ceilings to identify any necessary adjustments before cutting the final pieces.
- Use an Adjustable Miter Saw: An adjustable miter saw can be a valuable tool when dealing with uneven walls and ceilings. This type of saw allows you to easily change the bevel and miter angles, accommodating the specific angles required for a tight fit.
- Make Small Incremental Cuts: If you’re uncertain about the angles and need to make adjustments, it’s best to start with small incremental cuts rather than cutting off large portions of your crown molding. This way, you can gradually refine the angles until you achieve the desired fit.
Handling uneven walls and ceilings when cutting crown molding corners requires patience and precision. By following these tips and techniques, you’ll be able to adapt the angles to match your specific installation environment.
Pro Tips For Fixing Misaligned Joints: Sanding And Shimming Techniques
Misaligned joints can be a frustrating challenge when cutting crown molding corners, but fear not!
Here are some pro tips for fixing misaligned joints to achieve flawless results:
- Sanding Techniques: If you notice minor misalignments in your crown molding corners, sanding can help create a more seamless joint. Use a fine-grit sandpaper and gently sand the edges of the molding pieces to remove any imperfections or irregularities. This will allow for a better fit and disguise any slight misalignments.
- Shimming Techniques: For more significant misalignments, shimming can effectively correct the issue. A shim is a thin material, such as cardboard or veneer, that can be inserted behind the molding to adjust the angle and close any gaps. Carefully insert the shim in the gap and secure it in place with adhesive or fasteners. Trim off any excess shim material to ensure a smooth finish.
- Test Fit and Adjust: Before permanently attaching your crown molding, always perform a test fit to check for misaligned joints. If you notice any gaps or misalignments, make the necessary adjustments using sanding or shimming techniques. Trust your eyes and take the time to achieve a precise fit before proceeding.
- Paint and Caulk: Once you have fixed the misaligned joints, it’s essential to paint and caulk the crown molding. This will further enhance the seamless appearance and ensure a professional finish. Use a high-quality paint that matches your desired aesthetic and apply a smooth layer. Finish the job by caulking any remaining gaps for a flawless end result.
When it comes to cutting crown molding corners with a miter saw, misaligned joints can be corrected with the right techniques. By employing these pro tips, you’ll be able to achieve a visually pleasing result that will leave your crown molding corners looking impeccable.
Finishing Touches: Sanding, Priming, And Painting Crown Molding
Learn the essential steps of sanding, priming, and painting crown molding to achieve a flawless finish. Discover how to cut crown molding corners effortlessly using a miter saw for precise results.
Smoothing Out Imperfections: Proper Sanding Techniques
- Start by inspecting the crown molding for any imperfections or rough areas.
- Use a 120-grit sandpaper to gently sand the surfaces of the molding.
- Sand in the direction of the grain, applying light pressure to avoid creating deep scratches.
- Pay close attention to the edges and corners, ensuring they are smooth and free from any roughness.
- Once the initial sanding is complete, switch to a finer grit sandpaper, such as 220-grit, for a final smoothing.
- Continue sanding until the entire surface of the crown molding feels smooth to the touch.
- Wipe away any dust or debris using a clean, dry cloth before proceeding to the next step.
Priming For Optimum Paint Adhesion: The Importance Of Prep
- Before painting, it is crucial to apply a primer to the crown molding to enhance paint adhesion.
- Choose a high-quality primer that is specifically designed for wood surfaces.
- Apply the primer using a paintbrush or a roller, ensuring even coverage across the entire surface of the molding.
- Allow the primer to dry completely according to the manufacturer’s instructions before moving on to painting.
- Priming not only helps paint adhere better but also prevents stains or discoloration from bleeding through the paint.
Achieving A Flawless Finish: Tips For Painting Crown Molding
- Select a paint color that complements your room’s decor and consider using a semi-gloss or high-gloss finish for added durability.
- Stir the paint thoroughly to ensure an even consistency before application.
- Use a high-quality paintbrush or a small roller specifically designed for trim and molding.
- Apply the paint using smooth, even strokes, following the grain of the wood.
- Start from one end and work your way to the other, maintaining a wet edge to avoid visible brush or roller marks.
- For more intricate detailing, a small angled brush can help reach tight corners and crevices.
- Allow the first coat to dry completely before applying additional coats, if necessary, based on your desired level of coverage.
- Lightly sand the painted surface between coats using a fine-grit sandpaper to remove any imperfections or brush marks.
- Once the final coat is applied and dried, inspect the crown molding for any touch-ups or missed spots.
- Clean your tools thoroughly with soap and water after completing the painting process to maintain their lifespan.
By following these sanding, priming, and painting techniques, you can achieve a professional and flawless finish on your crown molding, enhancing the overall aesthetic appeal of your space.
Honing Your Crown Molding Skills: Practice Makes Perfect
Learn the art of cutting crown molding corners with a miter saw to perfect your craftsmanship. With practice, you can master this skill and achieve flawless results for your interior design projects.
Whether you’re a beginner or already have some experience with crown molding, honing your skills is essential for achieving clean and polished results. Practice is the key to mastering the art of cutting crown molding corners with a miter saw.
By starting with small projects to build confidence, learning from mistakes to analyze and correct errors, and taking on more challenging projects to push your boundaries, you can refine your technique and become an expert in no time.
Starting With Small Projects: Building Confidence
- Begin with simple crown molding projects to build your confidence and get a feel for the process.
- Practice cutting various types of corners, such as inside and outside corners, at different angles.
- Use scrap pieces of crown molding to practice making angled cuts and joining the corners.
- Pay attention to the alignment and fit of the corners to ensure a seamless look.
- Start with small rooms or less visible areas to minimize the pressure of perfection.
Learning From Mistakes: Analyzing And Correcting Errors
- Analyze any mistakes or imperfections in your crown molding corners to identify the areas that need improvement.
- Carefully examine the measurements, angles, and cuts to pinpoint the possible causes of errors.
- Identify common mistakes like inaccurate measurements, incorrect angles, or misaligned cuts.
- Adjust the miter saw settings and practice making precise cuts without removing too much material.
- Invest in a coping saw to fix any small gaps or imperfections in the corners.
Taking On More Challenging Projects: Pushing Your Boundaries
- Once you have gained confidence and improved your skills, challenge yourself with more complex crown molding projects.
- Experiment with different types of crown molding profiles and sizes to expand your repertoire.
- Tackle rooms with challenging layouts, such as sloped ceilings or irregular corners, to test your problem-solving skills.
- Seek inspiration from various sources like online tutorials, books, or videos to learn new techniques and design ideas.
- Don’t be afraid to take risks and embrace creativity in your crown molding projects.
By continuously practicing and pushing your boundaries, you will gradually enhance your ability to cut crown molding corners with precision and finesse. Remember, practice does make perfect, and with perseverance, you’ll soon be creating flawless crown molding installations that will truly elevate the look of any room.
Conclusion: Becoming A Crown Molding Corner Master
Learn how to cut crown molding corners with a miter saw and become a master of crown molding installation. Mastering this technique will help you achieve professional-looking results and elevate the elegance of any room.
Recap Of Key Tips And Techniques:
- Measure twice, cut once: Always ensure accurate measurements before cutting crown molding. This will save you from costly mistakes.
- Use proper tools: Invest in a high-quality miter saw with a sharp blade that can make clean and precise cuts.
- Understand the angle: Crown molding corners require compound miter cuts, which involve bevel and miter angles. Make sure you know the correct angles for the specific corner you’re working on.
- Practice with scrap wood: Before cutting the actual crown molding, practice with scrap wood to get comfortable with the saw and angles required.
- Use a crown molding jig: A jig can help support and stabilize the crown molding while cutting, reducing the risk of mistakes and ensuring accuracy.
- Take it slow: Don’t rush the cutting process. Take your time to ensure each cut is accurate and clean.
- Label the pieces: To avoid confusion during installation, label each piece of crown molding, indicating which corner it is meant for.
- Avoid over-cutting: It’s better to make multiple small cuts and shave off more if needed, rather than cutting off too much right away.
- Sand and touch up: After cutting the corners, sand the edges to smooth them out and touch up any imperfections with paint or stain.
By following these key tips and techniques, you will become a crown molding corner master in no time. Embrace the artistry and craftsmanship of crown molding, and enjoy the satisfaction of beautifully finished corners in your home. Happy cutting!
Related Questions Of How To Cut Crown Molding Corners With A Miter Saw
How Do You Cut Crown Molding Corners With A Miter Saw?
To cut crown molding corners with a miter saw, use a compound miter saw, set it at the appropriate angle, and make the cuts. Remember to position the molding to match the ceiling angle, and always test-fit the corners before securing them.
What Angle Do You Cut Crown Molding Corners On A Miter Saw?
To cut crown molding corners on a miter saw, set the miter angle to half the spring angle of the molding. For example, if the molding has a 45-degree spring angle, set the miter saw at 22. 5 degrees.
Should Crown Molding Corners Be Coped Or Mitered?
Coping crown molding corners is recommended over mitering. Coping involves cutting a profile on the end of one piece and fitting it against the profile of the adjacent piece, providing a better fit and hiding imperfections caused by out-of-square corners.
Can I Cut Crown Molding Without A Compound Miter Saw?
While it is possible to cut crown molding without a compound miter saw, a compound miter saw will make the task much easier and more accurate. It allows for precise angle adjustments required to create seamless corner joints.
Final Thoughts
Cutting crown molding corners with a miter saw may seem challenging at first, but with the right technique and practice, it can be mastered. Remember to measure and mark accurately, use the appropriate miter and bevel angles, and take your time to ensure precise cuts.
Additionally, always wear safety gear and follow the manufacturer’s instructions for your specific miter saw model. By following these steps, you’ll be able to achieve professional-looking crown molding corners for your home improvement projects. Whether you’re a DIY enthusiast or a professional carpenter, mastering this skill will elevate the overall look and feel of any room.
So don’t shy away from installing crown molding and give your space that added touch of elegance it deserves. Happy sawing!