How to Easily Cut Pavers With a Circular Saw: Step-by-Step Guide
To cut pavers with a circular saw, follow these steps: measure and mark the paver, attach a diamond blade to your circular saw, set the blade depth to the thickness of the paver, make your cut along the marked line, and wear appropriate safety gear. Cutting pavers with a circular saw is a common task during DIY projects involving paving stones.
Whether you need to resize a paver or create a specific shape, using a circular saw can make the job easier and more precise. We will guide you through the steps of cutting pavers with a circular saw, ensuring you achieve clean and accurate cuts every time.
Preparing For Precise Cuts
When cutting pavers with a circular saw, precise preparation is crucial for accurate results. By following these guidelines, you can ensure a smooth and effective cutting process.
Importance Of Accurate Measurements
Ensuring accurate measurements is the key to achieving precise cuts when working with pavers. Taking the time to measure each paver carefully ensures that you will achieve clean and professional-looking cuts, without any unsightly gaps or misaligned edges. Plus, accurate measurements will help you determine the exact size of the cuts, allowing you to calculate the number of pavers you’ll need for your project. With precise measurements, you can save time and money by avoiding mistakes or costly re-dos.
Choosing The Right Blade For Pavers
When it comes to cutting pavers with a circular saw, selecting the right blade is crucial. A diamond blade specifically designed for cutting concrete or stone pavers is the best choice. These blades have a tough diamond grit coating that allows them to easily slice through the hard surfaces of the pavers. Diamond blades are available in different sizes, so be sure to choose one that matches the thickness of the pavers you’re working with. Keep in mind that using the wrong blade can result in uneven cuts, chipping, and even damage to your circular saw.
Marking The Pavers Accurately
Before cutting, marking the pavers accurately is essential to achieve precise cuts. Start by cleaning each paver thoroughly, removing any dirt or debris that may interfere with accurate marking. Use a straight edge, such as a ruler or a square, to line up your marks. For straight cuts, draw a line across the surface of the paver, ensuring it is perpendicular to its edges. Use a pencil or a chalk to make your marks since they can be easily erased later. If you are making curved cuts, use a flexible object such as a hose or a flexible ruler to create your desired curve. Remember, taking the time to mark each paver accurately will result in cleaner, more professional-looking cuts.
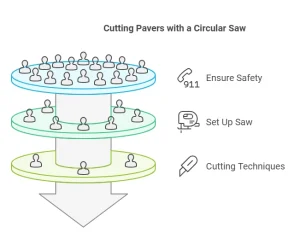
Safety First: Gear Up
When it comes to cutting pavers with a circular saw, safety should always be your top priority. Before you even think about firing up that saw, it’s important to gear up properly to protect yourself from potential hazards. Proper personal protective equipment (PPE), equipment safety checks, and a safe workspace setup are essential for a smooth and accident-free cutting process.
Essential Personal Protective Equipment (PPE)
Before you begin cutting pavers, it’s crucial to don the necessary personal protective equipment (PPE) to safeguard yourself from potential injuries. Here’s a list to ensure you have everything you need:
| Item | Description |
|---|---|
| 1. | Safety goggles/face shield |
| 2. | Ear protection |
| 3. | Dust mask |
| 4. | Heavy-duty work gloves |
| 5. | Long-sleeved shirt |
| 6. | Pants |
| 7. | Steel-toed boots |
By equipping yourself with the appropriate PPE, you’ll create a reliable barrier against the potential hazards that come with cutting pavers.
Equipment Safety Checks Before Cutting
Checking the safety of your equipment may be the difference between a successful paver cutting task and a disaster waiting to happen. Before you start cutting, follow this equipment safety checklist:
- Inspect the Circular Saw: Ensure the saw is in good working condition, the blade is sharp, and all parts are intact.
- Check the Safety Guard: Make sure the safety guard is in place and functioning properly.
- Secure the Circular Saw Blade: Ensure the blade is securely fastened and not loose.
- Check the Power Cord: Inspect the power cord for any frays or damage, and ensure it is in good condition.
- Confirm the Power Source: Ensure the power source and outlet are compatible, and double-check if the saw is unplugged before performing any maintenance tasks.
By following these equipment safety checks, you’ll minimize the risk of accidents and ensure smooth operation throughout the cutting process.
Safe Workspace Setup
Setting up a safe workspace is crucial to prevent accidents and injuries while cutting pavers. Follow these guidelines to create a safe working environment:
- Clear the Area: Remove any obstacles, debris, or tripping hazards in the work area.
- Secure the Pavers: Use clamps or a non-slip surface to secure the pavers in place, preventing them from shifting during cutting.
- Establish a Distraction-free Zone: Ensure a distraction-free zone by keeping bystanders, children, and pets away from the work area.
- Provide Adequate Lighting: Ensure the workspace is well-lit to enhance visibility and reduce the risk of accidental slips or misjudgments.
By adhering to these safe workspace setup guidelines, you’ll create a conducive environment for precise and accident-free paver cutting.

Setting Up The Circular Saw
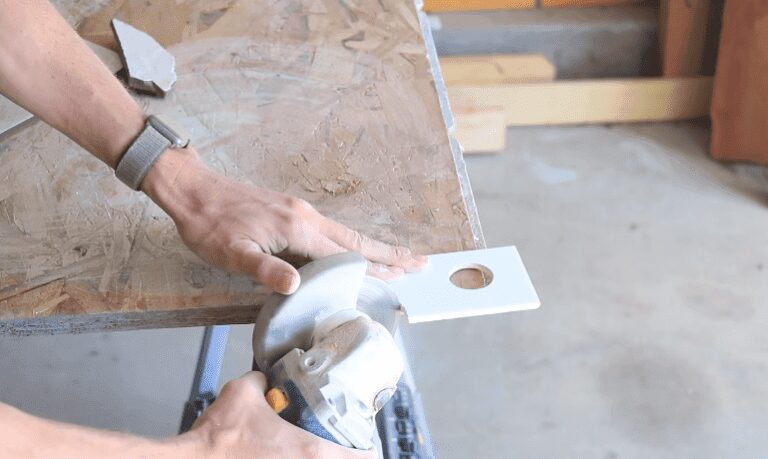
When it comes to cutting pavers, a circular saw can be a great tool to achieve precise and clean cuts. However, before you start cutting, it is important to properly set up your circular saw to ensure safety and accuracy. This section will guide you through the necessary steps to attach a diamond blade, adjust the saw for the correct depth, and ensure stability for precision.
Attaching The Diamond Blade
The first step in setting up your circular saw is to attach the diamond blade. The diamond blade is specially designed to cut through tough materials such as concrete and pavers. Follow these steps to securely attach the blade:
- Make sure the saw is unplugged or the battery is removed if it is cordless.
- Locate the blade lock button on the saw, typically found near the blade housing.
- Press the blade lock button and rotate the blade housing until the lock engages, preventing the blade from spinning.
- Use a wrench to loosen the arbor nut that holds the current blade in place. Typically, turning the nut counterclockwise will loosen it.
- Remove the old blade and replace it with the diamond blade, ensuring that the blade’s direction arrows match the direction of rotation on the saw.
- Tighten the arbor nut with the wrench, making sure it is securely fastened.
- Release the blade lock button, allowing the blade to spin freely.
Adjusting The Saw For Correct Depth
After attaching the diamond blade, the next step is to adjust the saw for the correct depth of cut. This ensures that you cut through the paver without damaging the underlying surface. Follow these steps to adjust the depth:
- Locate the depth adjustment lever or knob on the saw. It is usually found near the base or on the side of the saw.
- Loosen the lever or knob to unlock the depth adjustment.
- Carefully slide the base of the saw up or down to adjust the cutting depth. Refer to the manufacturer’s guidelines or your desired cutting depth.
- Once you have set the desired depth, tighten the lever or knob to secure the adjustment.
Ensuring Stability For Precision
Stability is crucial when cutting pavers with a circular saw to maintain precision and avoid accidents. Use these tips to ensure stability during the cutting process:
- Place the paver on a stable work surface, such as a workbench or sawhorses.
- If cutting on the ground, use a sturdy and flat piece of plywood as a base to prevent the saw from sinking into the soil or shifting during the cut.
- Ensure your body is balanced and your stance is firm while operating the saw to minimize any unwanted movement.
- Hold the saw with both hands, using the front handle for stability and the rear handle for control.
- Apply gentle and consistent pressure as you guide the saw along the cutting line to achieve a smooth and accurate cut.
- Wear appropriate safety gear, including safety glasses, gloves, and ear protection, to protect yourself from any potential hazards.
Circular Saw Techniques For Pavers
When it comes to cutting pavers, a circular saw can be a handy tool that makes the job a lot easier. With the right technique and a few safety precautions, you can achieve clean and precise cuts for your paver projects. In this article, we will discuss the essential circular saw techniques for cutting pavers, including a guide for straight cuts, managing dust and debris, and tips for achieving smooth cutting results.
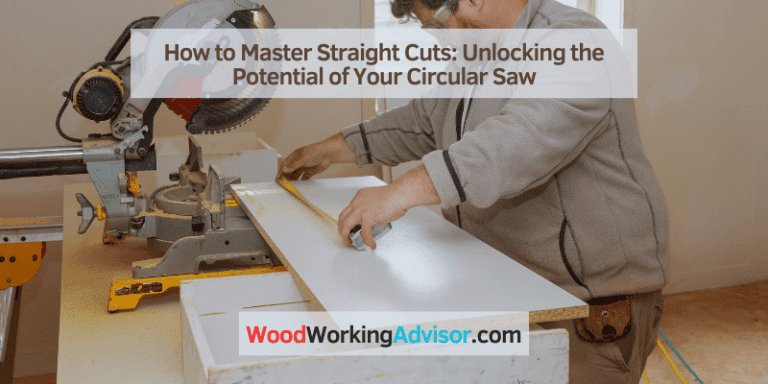
Guide For Straight Cuts
If you want to create straight cuts on your pavers, following a guide is imperative. Using a straightedge or a chalk line can help you achieve precise and accurate cuts. Here’s a simple guide to make straight cuts with a circular saw:
- Measure and mark the desired cut line on your paver using a measuring tape and a pencil.
- Attach a straightedge to the paver, aligning it with the marked cut line.
- Secure the straightedge in place, ensuring it doesn’t move during the cutting process.
- Adjust the cutting depth of the circular saw to ensure it’s slightly deeper than the thickness of the paver.
- Carefully position the circular saw against the straightedge and start the saw.
- Slowly guide the saw along the straightedge, applying gentle pressure to cut through the paver.
- Repeat the process for each cut, always ensuring the saw remains aligned with the straightedge.
Managing Dust And Debris
When cutting pavers with a circular saw, it’s essential to manage the dust and debris generated during the process. Not only does this promote safety and visibility, but it also helps maintain the longevity of your saw. Here are a few tips to effectively manage dust and debris:
- Wear a dust mask and safety goggles to protect yourself from airborne particles.
- Connect a vacuum or use a dust collection bag specifically designed for circular saws.
- Position the saw in a way that allows the dust and debris to be directed away from you.
- Regularly clean the saw blade to prevent any build-up that may affect cutting performance.
Tips For Smooth Cutting
Smooth cutting is vital to ensure the pavers fit together seamlessly. Here are a few tips to achieve smooth cutting results:
- Choose a diamond or masonry blade specifically designed for cutting pavers.
- Apply light pressure when cutting to avoid chipping or damaging the paver.
- Keep a steady pace as you guide the saw along the cut line to maintain consistency.
- Cool the blade occasionally by dipping it into water to prevent overheating.
By following these circular saw techniques for cutting pavers, you can confidently tackle your paver projects with precision and efficiency. Remember to always prioritize safety and take the necessary precautions when operating power tools. With practice, you’ll master the art of cutting pavers and achieve professional-looking results in no time!
Finishing And Placement Tips
Welcome back! In our previous sections, we discussed the steps involved in cutting pavers with a circular saw. Now that you have successfully cut your pavers, it’s time to focus on the finishing touches and proper placement to ensure a polished look and a long-lasting installation. In this section, we will provide you with some valuable tips on smoothing rough edges, handling and placing cut pavers correctly, as well as the importance of cleanup and tool maintenance. Let’s get started!
Smoothing Rough Edges After Cutting
Once you have made your cuts with the circular saw, it’s common to have some rough or jagged edges on the pavers. These rough edges not only compromise the aesthetics of your project but can also pose a tripping hazard. Fortunately, there are a few techniques you can use to smooth those edges and achieve a professional finish.
- First, put on a pair of safety glasses and gloves to protect yourself from any potential injury.
- Using a hand file or a brick rubbing stone, gently file down the rough edges until they become smooth and even.
- Take your time and work in small sections, checking the progress frequently to ensure an even surface.
- Finally, use a brush to remove any debris left from the filing process.
By following these steps, you can transform rough edges into seamless transitions, ultimately enhancing the overall look of your paved area.
Proper Handling And Placing Of Cut Pavers
Now that your pavers are ready, it’s essential to handle and place them properly to guarantee a stable and durable installation. Here are some guidelines to keep in mind:
- Always lift the pavers by bending your knees and using your legs rather than your back. This will prevent strain or injuries.
- Plan your layout ahead of time, visualizing how the cut pavers will fit into the overall design. This will save you time and effort during the installation process.
- When placing the cut pavers, make sure they are securely seated and level with the surrounding pavers. Use a rubber mallet to tap them gently into place.
- Leave a small gap, usually between 1/16 to 1/8 inch, between each paver to allow for thermal expansion and contraction. This will prevent them from pushing against each other and potentially causing damage.
- Regularly step back and assess the alignment and spacing of the pavers to ensure a uniform appearance. Adjust as needed.
By adhering to these handling and placement tips, you can achieve a visually appealing and structurally sound installation that will withstand the test of time.
Cleanup And Tool Maintenance
Once your project is complete, it’s crucial to take the time to clean up and properly maintain your tools. This will not only prolong the life of your equipment but also ensure they are in good working condition for future projects.
Start by removing all the debris and dust from the work area. Use a broom or a leaf blower to clear away any loose particles. Dispose of the waste responsibly.
Next, clean your circular saw thoroughly to prevent any buildup of dirt or residue. Follow the manufacturer’s instructions for proper cleaning and maintenance. Additionally, inspect the blade for any signs of wear or damage. Replace the blade if necessary to maintain optimal cutting performance.
Lastly, store your tools in a dry and secure location, protecting them from moisture and potential damage.
Remember, by incorporating regular cleanup and tool maintenance into your routine, you’ll be able to enjoy the benefits of a well-functioning circular saw for many projects to come.
Frequently Asked Questions Of How To Cut Pavers With A Circular Saw
Can You Cut Pavers With A Circular Saw?
Yes, you can cut pavers with a circular saw. Using a diamond or masonry blade, make multiple passes to create a clean and precise cut. Ensure you have the right safety equipment, such as goggles and gloves, and follow proper cutting techniques for a professional-looking result.
What Type Of Blade Do You Need For Cutting Pavers With A Circular Saw?
For cutting pavers with a circular saw, you need a diamond or masonry blade. These blades have strong and durable materials that can cut through hard surfaces like concrete, bricks, and pavers. Ensure the blade is the correct size for your saw and has a high diamond concentration for optimal performance.
How Do You Cut Curves In Pavers With A Circular Saw?
To cut curves in pavers with a circular saw, use a technique called “piecing. ” Start by marking the curve you want to cut on the paver. Then, make multiple straight cuts along the curve, leaving small gaps between the cuts.
Finally, use a chisel or hammer to break off the small sections between the cuts, creating a smooth curve.
Conclusion
Cutting pavers with a circular saw may seem daunting, but with the right technique, it can be a breeze. By following these simple steps and safety precautions, you can achieve precise cuts and create beautiful projects for your outdoor spaces.
Remember to practice on scrap pieces first and always prioritize safety. With the right tools and knowledge, you can master this skill and enjoy the satisfaction of a job well done. Happy cutting!