
How to Master the Art of Cutting with a Circular Saw
To cut with a circular saw, place the wood on a stable surface, align the blade with the mark, and slowly push the saw through the material. Cutting wood with a circular saw can be a straightforward and efficient process if done correctly.
Whether you’re a professional or a DIY enthusiast, knowing how to use this powerful tool can make your woodworking projects easier and more precise. By following the right steps and using the proper safety precautions, you can achieve clean and accurate cuts with a circular saw.
We will guide you through the process of cutting with a circular saw, providing you with tips and techniques to get the best possible results. So, let’s dive in and explore the fundamentals of using a circular saw for cutting wood.
Mastering Cutting With A Circular Saw
The circular saw is a versatile and powerful tool that can make precise and efficient cuts in various materials. Whether you are a seasoned woodworker or a DIY enthusiast, mastering the usage of a circular saw is essential for any project. In this guide, we will walk you through the process of cutting with a circular saw, covering everything from safety measures to pre-cut checks. By the end of this article, you will have the knowledge and confidence to handle a circular saw like a pro.
Safety First: Protective Gear And Workspace Setup
Before you even think of cutting with a circular saw, it’s crucial to prioritize safety. By following the right safety measures and setting up an appropriate workspace, you can minimize the risk of accidents and injuries. Here are some steps to ensure your safety:
- Wear protective gear: Always wear safety goggles, ear protection, and a dust mask to safeguard your eyes, ears, and lungs from potential hazards.
- Secure your workspace: Ensure that your workspace is clean, well-lit, and free from any clutter. This will provide a stable and safe environment for operating the circular saw.
- Use a stable work surface: Make sure your work surface is stable and properly secured. It’s advisable to use sawhorses or a workbench to provide a sturdy and level platform for cutting.
- Secure the material: If you’re cutting a large piece of material, secure it firmly using clamps and supports. This will prevent the material from shifting during the cutting process.
- Maintain a safe distance: Keep a safe distance between your body and the cutting area to avoid accidental contact with the saw blade. Maintain a clear path for the material to prevent kickback.
- Disconnect the power: When not in use, always unplug the circular saw from the power source. This prevents accidental startups and ensures your safety.
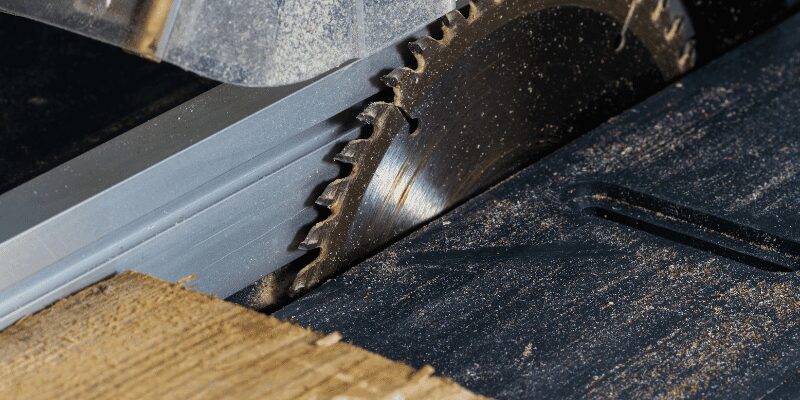
Understanding Your Tool: Parts And Specifications
Before you start cutting with a circular saw, it’s essential to familiarize yourself with its parts and specifications. Knowing how the tool works and understanding its components will help you operate it efficiently. Here are the main parts of a circular saw:
| Part | Description |
|---|---|
| Blade | The circular blade that cuts through the material. It’s crucial to use the appropriate blade for the material you are working with. |
| Motor | The power source that drives the blade. Circular saws are available in different motor sizes, usually measured in amps. |
| Base Plate | Also known as the shoe, the base plate provides stability and support for the saw during operation. |
| Depth Adjustment | This feature allows you to adjust the depth of the blade, controlling the depth of the cut. |
| Bevel Adjustment | Some circular saws have a bevel adjustment, which allows you to tilt the blade, enabling angled cuts. |
| Handle | The handle provides a comfortable grip for precise control and maneuverability of the circular saw. |
Understanding these parts and their functions will enable you to make adjustments and operate the circular saw effectively.
Pre-cut Checks: Ensuring Blade Sharpness And Alignment
Prior to cutting with a circular saw, it’s crucial to perform some pre-cut checks to ensure that your blade is sharp and properly aligned. Here’s what you need to do:
- Check blade sharpness: A sharp blade is essential for clean and accurate cuts. Examine the blade for any signs of dullness or damage. If necessary, remove and sharpen the blade or replace it with a new one.
- Align the blade: Make sure the blade is aligned with the cutting line. Adjust the base plate and the bevel angle if required. A misaligned blade can result in inaccurate cuts and potential safety hazards.
By conducting these quick checks, you can ensure that your circular saw is in optimal condition for cutting.
Circular Saw Cutting Techniques
Learn the essential circular saw cutting techniques to accurately and efficiently cut with a circular saw. Master the proper use of this powerful tool and achieve clean and precise cuts for your woodworking projects.
Preparing Materials For Cutting
When it comes to cutting materials with a circular saw, proper preparation is key. By taking the time to prepare your materials, you can ensure clean, precise cuts and avoid splintering or shifting. In this section, we will discuss different materials and appropriate blades, securing materials to prevent shifting or splintering, and adjusting speeds for optimal results.
Different Materials And Appropriate Blades
Before you begin cutting, it’s important to consider the type of material you’re working with. Different materials require different types of blades for optimal cutting performance. Here are some common materials and the appropriate blades to use:
| Material | Appropriate Blade |
|---|---|
| Wood | Carbide-tipped or combination blade |
| Metal | Carbide-tipped or abrasive blade |
| Plywood or MDF | Fine-toothed blade with more teeth per inch (TPI) |
| Plastic or acrylic | Triple-chip or modified triple-chip blade |
Securing Materials To Prevent Shifting Or Splintering
When cutting materials with a circular saw, it’s important to secure them properly to prevent shifting or splintering. This will help you achieve clean, accurate cuts. Here are some tips to ensure your materials stay in place:
- Use clamps or a workbench to secure your material.
- Apply double-sided tape to the underside of the material to provide extra stability.
- Place a sacrificial backing material, such as scrap wood, behind the workpiece to prevent splintering.
- Mark the cutting line with a pencil or masking tape to guide your saw’s path.
Adjusting Speeds For Material Types
Another important aspect of preparing materials for cutting is adjusting the circular saw’s speed based on the type of material you’re working with. This will help prevent overheating and ensure clean cuts. Here are some general guidelines for adjusting speeds:
- Slow down the blade speed when cutting through harder materials, such as metal or dense wood.
- Increase the blade speed when cutting through softer materials, such as plywood or plastic.
- Refer to the manufacturer’s instructions for specific speed recommendations for different materials.
By understanding different materials and the appropriate blades, securing your materials properly, and adjusting speeds accordingly, you can ensure successful cuts with your circular saw. Taking the time to prepare your materials will not only result in professional-looking projects but also contribute to your safety while working with power tools.
Making The Cut
Learn how to cut with a circular saw effectively and safely with our step-by-step guide. Discover the right techniques and precautions to achieve precise cuts for your woodworking projects.
Best Practices For Starting And Ending A Cut
When it comes to using a circular saw, knowing how to start and end a cut properly can make all the difference in achieving a clean and precise result. Here are some best practices to follow:
- Measure and mark: Before starting a cut, measure the intended length and mark it clearly on the material. This will help you stay on track and avoid any mistakes.
- Align the saw: Position the circular saw blade at a point slightly away from the material’s edge, ensuring that the blade is parallel to the marked line.
- Apply gentle pressure: While maintaining a firm grip on the saw, apply gentle pressure to start the cut. Let the saw’s blade gradually sink into the material as you guide it along the marked line.
- Complete the cut: Once you reach the end of the cut, release the trigger to stop the blade. Ensure that the blade is clear of the material before moving the saw away.
Managing Kickback: Techniques For Safe Handling
Kickback, the sudden and forceful backward movement of the saw, can be dangerous if not properly managed. Here are some essential techniques for handling kickback safely:
- Maintain a firm stance: Stand with your feet shoulder-width apart and keep a stable and balanced posture throughout the cut. This will help you maintain control and minimize the risk of kickback.
- Use both hands: Always grip the circular saw with both hands firmly. The front hand should be on the main handle, while the other hand should stabilize the saw from the side.
- Watch the cut line: Keep a sharp focus on the marked line while cutting, as this will help you guide the saw accurately and prevent the blade from binding.
- Allow the saw to do the work: Avoid forcing the saw through the material. Instead, maintain a steady pace and let the saw’s blade gradually cut through the material without exerting excessive pressure.
Maintaining Control For Smooth, Straight Lines
To achieve smooth and straight cuts with a circular saw, maintaining control is crucial. Consider the following tips:
- Use a guide: Using a straightedge or a clamped guide can help you maintain a consistent and straight cutting line. This will prevent the saw from veering off course.
- Keep a steady hand: Focus on maintaining a steady grip and hand movement while cutting. Avoid sudden jerks or movements that can compromise the quality of the cut.
- Adjust the saw’s speed: Depending on the material and thickness, adjusting the speed of the circular saw can enhance precision and control. Experiment with different speeds to find the optimal setting for your project.
Troubleshooting Common Cutting Issues
Even with the best techniques, occasional cutting issues may arise. Here are some common problems and how to troubleshoot them:
| Problem | Solution |
|---|---|
| Blade binding or getting stuck | Ensure the saw is properly aligned and the blade is sharp. Take short breaks during long cuts to prevent overheating or binding. |
| Rough or jagged edges | Check the blade for any damage or dullness. Consider using a finer tooth blade for smoother cuts. |
| Material splintering | Place masking tape along the cut line before starting the cut. This can help prevent splintering and provide cleaner edges. |
| Inaccurate cuts | Double-check your measurements and ensure the material is properly secured. If necessary, use a guide or mark multiple reference points for improved accuracy. |
Perfecting Your Circular Saw Skills
When it comes to cutting through wood and other materials, a circular saw is an essential tool for any DIY enthusiast or professional. However, like any power tool, using a circular saw requires skill and practice to achieve precision and safety. In this section, we will explore advanced cutting techniques, maintenance tips, and practice projects that can enhance your cutting prowess with a circular saw.
Graduating To Advanced Cutting Techniques
If you are already familiar with the basic cuts using a circular saw, it’s time to take your skills to the next level. Here are some advanced cutting techniques to consider:
- Ripping boards: Ripping refers to cutting a board lengthwise, parallel to the grain. To achieve clean and accurate rip cuts, ensure you have a sharp blade and use a straight guide or fence to guide the saw along the desired cut line.
- Cross-cutting: Cross-cutting involves cutting a board across the grain. To make precise cross-cuts, utilize a square or speed square as a guide for accuracy. Additionally, consider using a clamp to secure the workpiece and minimize movement during the cut.
- Bevel cuts: Bevel cuts are angled cuts that add versatility to your project. Mastering bevel cuts requires adjusting the saw’s baseplate angle and using a bevel guide or protractor to establish the desired angle. Remember to make practice cuts and double-check the settings before tackling your project.
Tips For Maintaining Your Circular Saw
To ensure optimal performance and longevity of your circular saw, it is essential to keep it well-maintained. Here are some crucial maintenance tips:
- Regular blade inspection: Inspect the blade before each use to ensure it is sharp, clean, and free from any damage. Replace any dull or damaged blades promptly to avoid compromising the quality of your cuts.
- Lubrication: Apply a small amount of lubricating oil to the saw’s moving parts, including the blade arbor and adjustment mechanisms, periodically. This helps reduce friction and ensures smooth operation.
- Keep it clean: After each use, remove any sawdust or debris from the saw’s housing, blade guard, and adjustment knobs. Regular cleaning prevents build-up that can affect the saw’s performance and safety.
Practice Projects To Enhance Your Cutting Prowess
Practice makes perfect, and the more you use your circular saw, the better you’ll become. Here are some practice projects that can help you refine your cutting skills:
- Cutting plywood: Plywood is versatile and readily available. Experiment with making straight cuts, cross-cuts, and bevel cuts on different thicknesses of plywood. This will help you develop your accuracy and precision.
- Creating angled joints: Practice cutting angles and bevels to create joints, such as miter and compound miter joints. By mastering these techniques, you’ll be ready to tackle woodworking projects that require precise joints and angles.
- Building a simple bookshelf: Constructing a small bookshelf is an excellent way to apply your newfound skills. It involves making various types of cuts and assembling the pieces together, giving you hands-on experience with using your circular saw.
By practicing these advanced cutting techniques, maintaining your circular saw properly, and completing practice projects, you’ll soon enhance your cutting prowess and achieve satisfying results in your woodworking endeavors.
Frequently Asked Questions Of How To Cut With A Circular Saw
How Do You Safely Use A Circular Saw?
To safely use a circular saw, start by wearing protective gear such as safety glasses and gloves. Ensure the workpiece is securely clamped before cutting and position yourself to the side of the saw, not in front. Use a sawdust extractor or wear a mask to avoid inhaling debris.
Always follow the manufacturer’s instructions and use the appropriate blade for the material being cut.
Can You Cut Metal With A Circular Saw?
Yes, you can cut metal with a circular saw by using a metal-cutting blade. Make sure to use a blade with the appropriate tooth configuration and tooth count for cutting metal. Additionally, use cutting oil to lubricate the blade and prevent overheating.
Take precautions to secure the metal firmly and be aware of potential sparks.
How Deep Can A Circular Saw Cut?
The depth of cut for a circular saw depends on the size of the blade and the maximum depth of cut specified by the manufacturer. Common circular saw blade diameters range from 6. 5 to 10 inches. Smaller blades typically have a maximum cut depth of around 2 inches, while larger blades can cut up to 3 inches or more.
Consult the manufacturer’s guidelines for precise measurements. For example, a 6.5-inch blade — one of the most common sizes — tops out around 2-1/4 inches at 90 degrees; see our full depth breakdown for 6.5-inch circular saws for real specs by model.
Conclusion
Learning how to cut with a circular saw is an essential skill for any DIY enthusiast or professional woodworker. By following proper safety precautions and using the correct technique, you can make precise cuts with ease. Remember to choose the right blade for the job and always wear protective gear.
With practice and patience, you’ll become proficient in using a circular saw to create beautiful and accurate cuts in your woodworking projects. So grab your saw, put on your safety glasses, and start cutting like a pro!