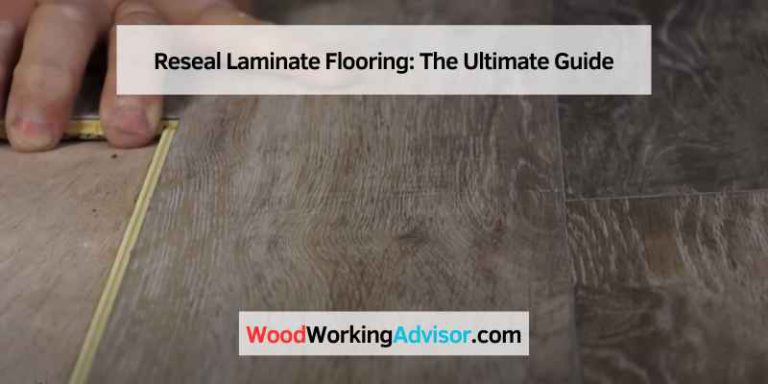
How to Seamlessly End Laminate Flooring at Doorways: A Step-by-Step Guide
To end laminate flooring at doorways, use a T-molding transition piece for a seamless and professional look. Laminate flooring is a popular and cost-effective choice for many homeowners.
Its durability, easy installation, and variety of designs make it an attractive option. However, when it comes to doorways, it’s important to properly finish the flooring for a polished appearance. One way to achieve this is by using a T-molding transition piece, which bridges the gap between two sections of laminate flooring.
This creates a smooth transition and helps to prevent tripping hazards. We will explore the process of ending laminate flooring at doorways, providing you with helpful tips and instructions for a flawless finish. So, let’s get started!
Step 1: Prepare The Doorway
Prepare the doorway by carefully following the necessary steps to end your laminate flooring seamlessly.
When it comes to installing laminate flooring, ending it at doorways can be a tricky task. But with proper preparation and a step-by-step approach, you can achieve a seamless transition that not only looks great but also ensures the longevity of your flooring. In this guide, we’ll walk you through the first step: preparing the doorway.
Measure And Mark
Measure the width of the doorway to determine the length of the transition strip needed. Use a measuring tape and record the measurement accurately. It’s essential to measure both the width of the doorway opening and the thickness of your laminate flooring.
Mark the centerline of the doorway using a straightedge or a chalk line. This will serve as a guide when installing the transition strip, ensuring it is properly aligned and centered.
Cut The Doorway Transition Strip
Now that you have the measurements, it’s time to cut the transition strip to the appropriate length. Use a miter saw or a utility knife with a sharp blade to make a clean and precise cut.
Place the transition strip against the doorway, aligning it with the centerline you marked earlier. Ensure that the strip extends slightly beyond the edge of the laminate flooring on either side.
Using a pencil, mark the required notch on the transition strip to accommodate the height of the laminate flooring. This will allow for a smooth and flush transition without any gaps.
Summary
Preparing the doorway is the first step in ending laminate flooring at doorways. By accurately measuring and marking the location, as well as cutting the transition strip to fit, you’ll be well on your way to achieving a seamless and professional appearance.
Step 2: Install The Transition Strip
Now that you have prepared the doorway for the transition strip, it’s time to install it. The transition strip helps create a smooth and seamless transition between two different flooring types and also adds stability to the laminate flooring. Follow these steps to properly install the transition strip:
Position The Strip
- Begin by placing the transition strip on the floor, ensuring that it extends from one end of the doorway to the other.
- Make sure the strip is centered between the two flooring types, allowing for an equal overlap on both sides. This will provide a balanced and visually appealing transition.
- Measure and mark the location where the strip needs to be cut, ensuring that it fits perfectly within the doorway.
Attach The Strip
Once you have positioned the transition strip correctly, it’s time to attach it securely to the floor. Follow these steps to ensure a sturdy installation:
- Apply a line of construction adhesive along the bottom side of the transition strip.
- Place the strip back into position, making sure it aligns with the markings. Press it firmly to allow for proper adhesion.
- Use finishing nails or screws to further secure the strip into place. Make sure they are evenly spaced and driven into the subfloor, providing additional stability.
- For a flawless finish, use a nail set to sink the nails slightly below the surface of the strip, allowing for later filling and concealment.
- Repeat the process for any remaining transition strips required for your project.
By following these simple steps, you can ensure a professional and seamless end to your laminate flooring at doorways. Remember, proper installation of the transition strip not only enhances the overall appearance but also adds durability and stability to your flooring. Next, we’ll move on to Step 3: Finishing Touches, where we’ll cover some additional tips to complete your project with finesse.
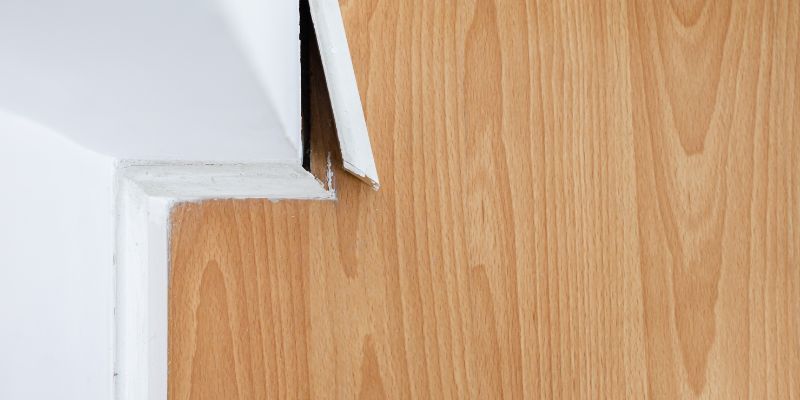
Step 3: Fill The Gap
Step 3: Fill the Gap is an essential step when ending laminate flooring at doorways. By carefully following the guidelines, this process can be completed seamlessly, ensuring a professional and polished finish for your flooring project.
When installing laminate flooring at doorways, filling the gap is crucial to achieve a seamless and professional finish. Not only does it enhance the appearance of your flooring, but it also helps to prevent dirt, debris, and moisture from collecting in the gap. To fill the gap effectively, follow these simple steps:
Fill The Gap With Sealant
To fill the gap between the laminate flooring and the doorway, you will need a high-quality sealant suitable for this purpose. Choose a color that matches your flooring to ensure a seamless look. Here’s how to proceed:
- Ensure the doorways are clean and dry before you begin.
- Apply a continuous bead of sealant along the edge of the laminate flooring where it meets the doorway.
- Make sure the sealant fills the entire gap, leaving no spaces or voids.
- Use a putty knife or your finger to smoothen the sealant.
Smooth The Sealant
Once you’ve filled the gap, it’s time to ensure a smooth finish. Follow these steps to achieve a professional look:
- While the sealant is still wet, use a damp cloth or sponge to remove any excess sealant from the laminate flooring surface.
- Run the cloth or sponge along the edge to create a neat and clean appearance.
- Allow the sealant to dry completely as per the manufacturer’s instructions.
By following these steps and filling the gap with sealant, you can successfully end your laminate flooring at doorways with a clean and professional finish. Remember to choose a high-quality sealant and ensure it matches your flooring color. With the right techniques, your flooring will not only look amazing but also be protected from potential damage caused by dirt and moisture.
Conclusion
Properly finishing laminate flooring at doorways is essential for a seamless and professional look in your home. By following these simple steps, you can achieve a clean transition and ensure the longevity of your flooring. Remember to measure, cut, and install the transition pieces carefully, and always use the appropriate tools and techniques.
With attention to detail and careful execution, you can achieve a flawless end result that will enhance the overall aesthetic of your living space.