How to Seamlessly Install Laminate Flooring around Kitchen Cabinets: Expert Tips
To install laminate flooring around kitchen cabinets, carefully measure and cut the laminate to fit around the cabinets, then install it according to the manufacturer’s instructions. Are you looking to upgrade your kitchen flooring?
Laminate flooring is a popular choice due to its durability and affordability. When it comes to installing laminate flooring around kitchen cabinets, you’ll need to follow a few steps to ensure a seamless and professional finish. By measuring and cutting the laminate to fit around the cabinets, and then using adhesive or click-lock installation methods, you can easily create a cohesive look in your kitchen.
In this guide, we’ll walk you through the process of installing laminate flooring around your kitchen cabinets, so you can enjoy a beautiful and functional space.
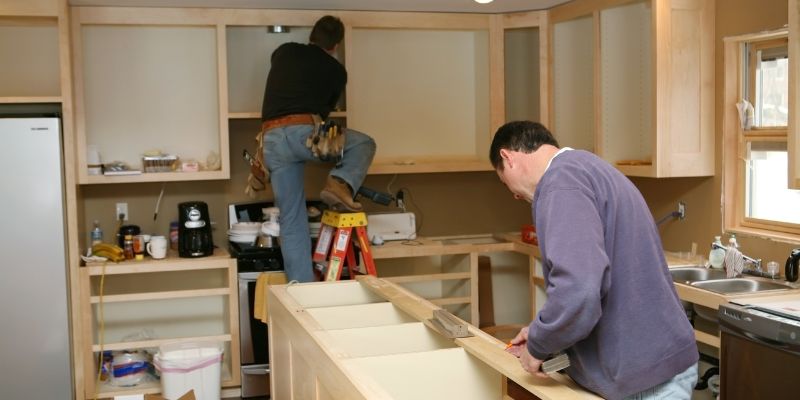
1. Preparing The Kitchen Cabinets
Preparing the kitchen cabinets for laminate flooring installation requires careful attention to detail. Follow these steps to ensure a seamless and professional look for your kitchen.
Before you start installing laminate flooring in your kitchen, you need to properly prepare the kitchen cabinets. This step is crucial to ensure a seamless and professional-looking installation. In this section, we will cover everything you need to do to prepare the kitchen cabinets for laminate flooring installation
1.1 Removing The Baseboard
The first step is to remove the baseboards around the kitchen cabinets. By removing the baseboards, you create a clean and smooth surface for the laminate flooring to be installed. Carefully use a pry bar or a putty knife to detach the baseboards from the wall. Be gentle to avoid damaging the surrounding areas. Once the baseboards are removed, set them aside for reinstallation later.
1.2 Clearing The Area
Next, clear the area around the kitchen cabinets. Remove any furniture, appliances, or other items that may obstruct the installation process. This will make it easier for you to work and ensure that the laminate flooring can be installed evenly and without any obstacles. Keep the workspace tidy and organized throughout the installation process to avoid any accidents or mishaps.
1.3 Measuring The Layout
Now it’s time to measure the layout of the kitchen cabinets. Accurate measurements are crucial to ensure that the laminate flooring fits perfectly around the cabinets. Use a measuring tape to measure the dimensions of the space where the flooring will be installed. Take into account any corners, angles, or irregularities in the layout. Remember to measure twice to ensure accuracy before proceeding to cut the laminate flooring planks.
In conclusion, preparing the kitchen cabinets is an essential step before installing laminate flooring. By removing the baseboards, clearing the area, and measuring the layout accurately, you create a solid foundation for a successful installation. Take your time to complete these tasks meticulously, and you’ll be on your way to a beautifully finished kitchen with laminate flooring that seamlessly extends around the cabinets.
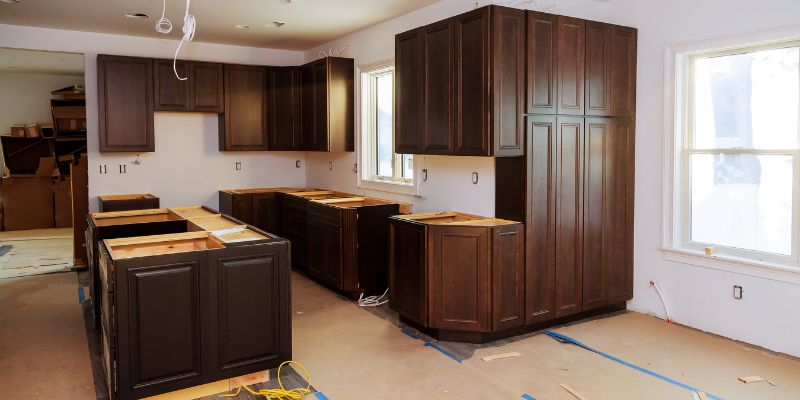
2. Cutting And Installing The Laminate Flooring
Now that you have prepared the kitchen cabinets, it’s time to move on to the next step – cutting and installing the laminate flooring. This process requires a bit of precision and patience, but with the right tools and techniques, you’ll have beautiful flooring in no time.
2.1 Cutting The Planks
The first step in installing laminate flooring around kitchen cabinets is cutting the planks. Measure the space between the wall and the nearest cabinet, and subtract the expansion gap. This will give you the width of the plank you need to cut. Use a circular saw or a table saw to make a straight cut along the marked line. Remember to wear safety goggles and follow all manufacturer guidelines when using power tools.
2.2 Laying The First Row
Once you have the planks cut to size, it’s time to lay the first row of laminate flooring. Start by placing spacers along the wall to create an expansion gap. This gap allows the flooring to expand and contract with changes in temperature and humidity. Then, place the first plank against the spacers, ensuring the tongue side is facing the wall. Use a tapping block and a hammer to gently tap the planks into place, creating a secure fit. Repeat this process for the rest of the first row.
2.3 Installing The Rest Of The Flooring
With the first row in place, it’s time to install the rest of the laminate flooring. Start with the second row, using the offcut from the first row as the starting plank. This ensures a staggered pattern, which adds strength and stability to the floor. Apply a small amount of wood glue to the tongue side of each plank before connecting them together. Use a tapping block and a hammer to gently tap the planks into place, ensuring a tight fit. Continue this process until you reach the last row, making any necessary cuts to fit the remaining space.
Remember to leave an expansion gap along the opposite wall and any other fixed objects in the room. Once the laminate flooring is fully installed, remove the spacers and install the baseboards or quarter round molding to cover the expansion gap. Use finishing nails or an adhesive to secure the molding to the wall or cabinet base.
Now that you know how to cut and install laminate flooring around kitchen cabinets, you’re ready to transform your kitchen with a beautiful and durable floor. Remember to follow manufacturer instructions and take your time to ensure a professional-looking result. Happy flooring!
3. Finishing Touches And Cleaning Up
Discover the essential steps for installing laminate flooring around your kitchen cabinets. Learn how to add finishing touches and achieve a polished look by cleaning up meticulously.
Once you have successfully installed the laminate flooring around your kitchen cabinets, it’s time to focus on the finishing touches and cleaning up. These final steps are essential to ensure a polished and seamless appearance for your newly installed flooring. In this section, we will guide you through three crucial tasks: reattaching the baseboards, filling in the gaps, and cleaning the installed laminate flooring.
3.1 Reattaching The Baseboards
With the laminate flooring in place, it’s necessary to reattach the baseboards to complete the overall look. Remove any debris or adhesive residue from the baseboards and carefully align them with the wall. Secure the baseboards by using finishing nails or a brad nailer. Make sure to countersink the nails slightly for a seamless appearance. Once all the baseboards are securely reattached, give them a quick wipe down with a damp cloth to remove any dirt or marks.
3.2 Filling In The Gaps
While installing laminate flooring, you may encounter small gaps between the planks or between the flooring and the cabinets. These gaps can be easily addressed to achieve a flawless finish. Choose a matching color of wood filler or laminate putty that blends seamlessly with your installed flooring. Apply a small amount of the filler or putty to a putty knife and carefully fill in the gaps. Smooth out the surface with the putty knife and wipe away any excess filler. Allow the filler to dry completely before proceeding.
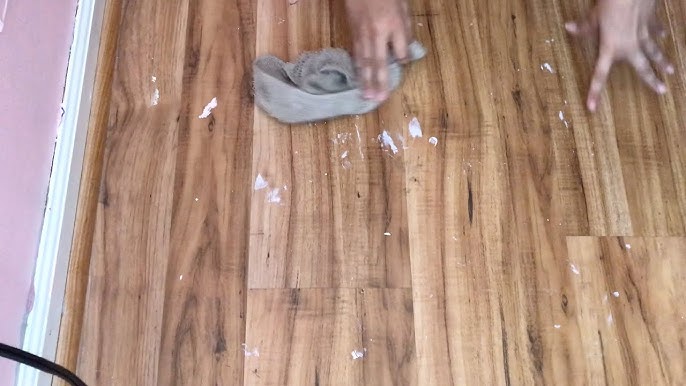
3.3 Cleaning The Installed Laminate Flooring
Now that the baseboards are reattached and the gaps are filled, it’s time to give your newly installed laminate flooring a thorough cleaning. Start by removing any dust or debris using a broom or vacuum cleaner with a soft brush attachment. Be gentle to avoid scratching the surface. Next, dampen a microfiber mop or cloth with water and a mild laminate floor cleaner. Wring out any excess water to prevent over-saturation. Wipe the entire floor surface in a smooth, back-and-forth motion. For stubborn marks or stains, use a non-abrasive scrub pad or a cloth dampened with a mixture of vinegar and water. Finally, allow the floor to air dry completely before placing furniture or walking on it.
Conclusion
Installing laminate flooring around kitchen cabinets can be a daunting task, but with the right approach, it can be accomplished seamlessly. By following the step-by-step guide provided in this blog post, you can ensure a successful installation that will enhance the overall aesthetic appeal of your kitchen.
Remember to measure accurately, cut precisely, and take your time to complete each step with precision. With these tips in mind, you can enjoy a beautiful, durable, and functional laminate flooring that complements your kitchen cabinets perfectly.