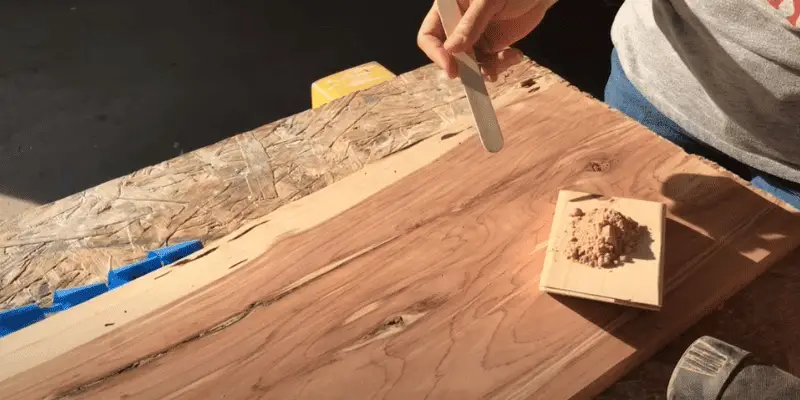
To fill holes in wood with sawdust, mix the sawdust with wood glue and fill the holes with the mixture. Apply pressure to pack the mixture tightly and allow it to dry.
Filling holes in wood with sawdust is a simple and effective solution that can help restore the appearance and integrity of wooden surfaces. Whether you’re working on furniture, flooring, or other wooden items, knowing how to fill holes with sawdust can be a valuable skill.
In this guide, we’ll provide step-by-step instructions on how to fill holes in wood with sawdust, including the supplies needed and the best techniques to achieve a seamless finish. By following these tips, you can easily repair and rejuvenate your wooden pieces, giving them a fresh and polished look.
Understanding Wood Hole Filling
Xylophiles and DIY enthusiasts alike adore the natural allure of wood. Yet, even the most skilled craftsmen encounter the occasional hole that needs filling. Understanding the nuances of wood hole filling can elevate your woodworking prowess and breathe new life into damaged wooden surfaces. From small nail holes to larger cracks and gouges, this guide will equip you with the knowledge to expertly fill holes in wood using sawdust.
Importance Of Filling Holes In Wood
Before delving into the how-tos, it’s crucial to comprehend the importance of filling holes in wood. Unfilled holes not only detract from the aesthetic appeal of wood but also compromise its structural integrity. Leaving holes unfilled can lead to moisture penetration, which in turn can cause wood to swell, warp, or rot over time. By filling holes, you can uphold the wood’s strength and appearance, ensuring its longevity and beauty.
Types Of Wood Holes
Wood holes come in various forms, each requiring a specific approach for filling. The common types of wood holes include nail holes, cracks, gaps, and voids. Nail holes are typically small and superficial, while cracks and voids may delve deeper into the wood. Understanding the specific type of hole you are dealing with is crucial for determining the suitable filling technique and materials.

Collecting And Preparing Sawdust
To fill holes in wood with sawdust, start by collecting fine sawdust from the same wood you will be filling. Before using it, make sure to prepare the sawdust by mixing it with wood glue to create a thick paste.
Apply the paste into the hole and sand it smooth after it dries to seamlessly fill the gap.
Sourcing Quality Sawdust
If you don’t have access to your own sawdust, you can procure it from a local woodworking shop or lumberyard. They may be able to provide you with a small amount of sawdust for your project. Make sure to collect sawdust from the same type of wood as the piece you are repairing, as this will ensure a better color match.
Preparing Sawdust For Filling
Once sifted, it’s important to mix the sawdust with wood glue to create a thick paste that can be easily applied to the holes. The ratio of sawdust to wood glue can vary, but a good starting point is equal parts sawdust and wood glue. Stir the mixture thoroughly until it forms a uniform paste.
After the sawdust and wood glue are mixed, allow the paste to sit for a few minutes to ensure the sawdust has absorbed the glue. This will create a more cohesive and durable filling compound.
Techniques For Filling Wood Holes With Sawdust
Woodworking enthusiasts often encounter the need to fill unsightly holes in wood surfaces. Thankfully, filling these imperfections with sawdust is an effective and affordable solution that seamlessly blends with the surrounding wood. In this guide, we’ll explore basic and advanced techniques for filling wood holes with sawdust, enabling you to achieve professional-looking results with minimal effort.
Basic Sawdust Filling Process
When it comes to filling wood holes with sawdust, the basic process involves mixing sawdust with an adhesive to create a paste-like substance that matches the color of the wood. Follow these steps for a straightforward sawdust filling method:
- Collect fine sawdust from the same wood species or use a sawdust filler kit for a convenient option.
- Mix the sawdust with an appropriate wood glue or epoxy resin in a small container until a thick paste is formed.
- Apply the sawdust paste to the hole with a putty knife, ensuring it overfills slightly to account for shrinkage.
- Allow the sawdust filler to dry completely before sanding the surface to achieve a smooth finish.
Advanced Sawdust Filling Methods
For advanced woodworking projects or when necessitated by the specific requirements of the wood and finish, several innovative methods enhance the effectiveness of filling wood holes with sawdust:
- Oil-based Sawdust Fillers: Mixing sawdust with a suitable oil-based finish, such as linseed oil, can yield a durable and natural-looking filler.
- Colored Sawdust Fillers: Using artist’s pigments or wood dye to tint the sawdust can produce a custom-colored filler that blends seamlessly with the wood.
- Heated Sawdust Fillers: By heating the sawdust and adhesive mixture, superior adhesion and color-matching capabilities can be achieved, particularly on hardwoods.
Expert Tips For Finishing And Sanding
When it comes to the art of woodworking, achieving a flawless finish is essential. Whether you are filling holes in wood or working on a craft project, the finishing and sanding process is a crucial step that can make a significant difference in the overall appearance of the wood. Here, we’ll delve into expert tips for finishing and sanding wood with sawdust, ensuring a seamless and polished end result.
Smoothing The Filled Holes
After filling the holes in wood with sawdust, it’s essential to ensure that the surface is smooth and free of any imperfections. For small holes, using a putty knife to level off the sawdust mixture is effective. However, for larger holes, consider using a sanding block or sandpaper to gently sand the filled area until it is flush with the surrounding wood. Be mindful of the pressure applied during sanding to avoid creating an uneven surface.
Achieving Seamless Finish With Sawdust
When aiming for a seamless finish with sawdust, it’s crucial to mix the sawdust with an appropriate wood glue or filler to create a paste that closely resembles the color and grain of the wood. This will help in seamlessly blending the filled area with the surrounding wood, creating a natural and unnoticeable repair. Additionally, using finer sawdust can contribute to achieving a smoother texture and a more integrated finish.
Aftercare And Maintenance
After filling holes in wood with sawdust, it’s important to understand the necessary aftercare and maintenance to ensure the longevity and stability of the filled areas. Implementing a proper maintenance routine will help preserve the aesthetic appeal of the wood and prevent any potential issues that may arise if the filled holes are not adequately cared for.
Ensuring Longevity Of The Filled Wood Holes
Proper aftercare is vital in maintaining the integrity of the filled wood holes. Here are some key steps to ensure the longevity of the repaired areas:
- Keep the filled areas free from excessive moisture exposure, as this can lead to deterioration over time.
- Regularly inspect the filled holes for any signs of wear or damage, and address any issues promptly.
- Apply a protective sealant or finish over the filled areas to provide an extra layer of protection against external elements.
Regular Inspection And Touch-ups
Regularly inspecting the filled wood holes is crucial for maintaining their condition and addressing any potential issues. Here’s how to effectively conduct regular inspections and touch-ups:
- Use a flashlight to closely examine the filled areas for any signs of shrinking, cracking, or other forms of damage.
- If any issues are identified, carefully remove the existing filler and sawdust mixture, and reapply a fresh batch to fill the holes.
- After touch-ups, allow the filled areas to dry thoroughly before applying any additional protective finishes or coatings.
Frequently Asked Questions Of How To Fill Holes In Wood With Sawdust
Can You Use Sawdust To Fill Holes In Wood?
Yes, sawdust can be used to fill holes in wood. Mix sawdust with wood glue and pack it into the hole. Sand down the excess for a smooth finish.
Is Sawdust And Glue Better Than Wood Filler?
Sawdust and glue are not always better than wood filler. It depends on the specific project. Each has its pros and cons. Sawdust and glue can be more cost-effective but may not provide as smooth a finish as wood filler.
Choose based on your project’s needs.
How Long Does Sawdust And Glue Take To Dry?
Sawdust and glue usually take around 24 hours to dry completely. In some cases, it may take longer depending on the humidity and thickness of the mixture. Ensure proper ventilation for faster drying.
What Is The Best Filler For Holes In Wood?
The best filler for holes in wood is wood filler or epoxy. Wood filler is made from sawdust and a binder, while epoxy is a resin that hardens. Both options are durable and blend well with the wood for a seamless finish.
Conclusion
Filling wood holes with sawdust is a simple and effective solution for DIY enthusiasts. By following the steps outlined in this guide, you can seamlessly repair and restore the appearance of your wooden furniture and surfaces. With minimal cost and effort, this technique provides a sustainable and eco-friendly approach to woodworking projects.


3 thoughts on “How to Fill Holes in Wood With Sawdust: Expert Tips”