How to Fill Holes in Wood: Easy Solutions
To fill holes in wood, first, select a suitable wood filler based on the size of the hole. Clean the area around the hole, then apply the wood filler and let it dry.
Sand the filled area until smooth, and finish with stain or paint if desired. Filling holes in wood is a common task for anyone who works with wood, whether it’s for home repairs or DIY projects. Small imperfections and holes can easily be filled to restore the wood’s appearance.
There are various methods and products available to fill wood holes, depending on the size and type of the hole. By learning how to fill holes in wood, you can ensure your woodworking projects or household repairs look professional and neat. This guide will provide you with useful tips and techniques to effectively fill holes in wood, leaving you with a seamless finish.
Identifying Wood Holes To Fill
Understanding Different Hole Sizes
When dealing with wood repair, it’s crucial to understand the different sizes of holes that may need filling. Small holes can include nail or pin-sized punctures, while medium-sized holes might result from screws or small insect activity. Large holes, on the other hand, could indicate structural damage or decay. Each size requires a specific approach to ensure a seamless repair.
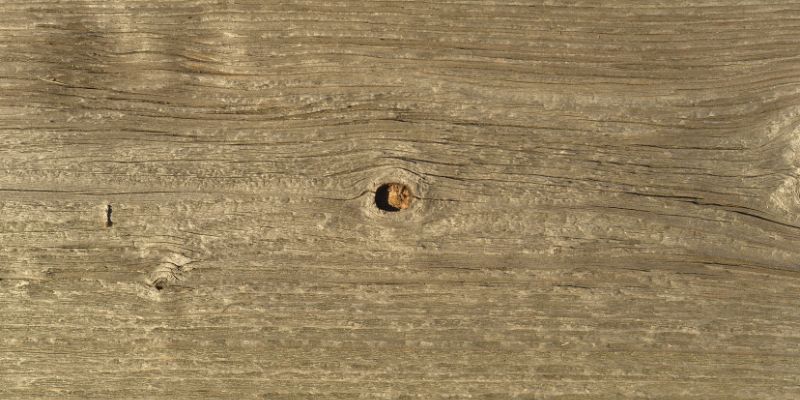
Recognizing Wood Damage
Wood damage can manifest in various forms, making it essential to identify the type of damage before attempting repairs. Whether it be surface scratches, cracks, or deep cavities, understanding the nature of the damage will determine the most effective approach to fill the holes.
Types Of Wood Imperfections
- Surface imperfections
- Deep holes and cracks
- Insect damage
- Water or moisture-related damage
Wood imperfections encompass a range of issues that may require filling. Surface imperfections such as minor scratches can be easily addressed with wood fillers, while deep holes and cracks may necessitate a more comprehensive repair approach. Insect damage, often characterized by small, irregularly shaped holes, requires specialized treatment, while water or moisture-related damage could lead to rot and extensive decay.
Choosing The Right Filler Material
Choosing the right filler material is crucial when it comes to filling holes in wood. The type of wood, color matching, and the advantages of various filler options play a significant role in achieving a seamless and professional finish.
Considerations Based On Wood Type
When selecting a filler for wood, it’s important to consider the type of wood you’re working with. Hardwoods such as oak or maple may require a different type of filler compared to softwoods like pine or cedar. Consider the grain pattern and density of the wood to determine the best filler for the job. For porous woods, it’s essential to choose a filler that can effectively bond with the surface and provide long-lasting results.
Matching The Wood Color With Filler
Matching the filler color with the wood is crucial for achieving a seamless repair. Whether you’re dealing with light or dark wood, there are fillers available in various shades to closely match the natural color of the wood. Paying attention to the color matching process ensures that the filled holes blend in seamlessly with the surrounding wood, creating a polished look.
Advantages Of Various Filler Options
There are several options when it comes to fillers for wood, each with its own set of advantages. Wood putty is an excellent choice for smaller holes and minor imperfections, offering ease of application and sanding. Epoxy fillers provide strong, durable repairs and are suitable for larger holes and structural repairs. Another popular option is latex wood filler, known for its flexibility and suitability for a wide range of wood types. It’s important to consider the specific requirements of your project when choosing the right filler material to ensure the best results.
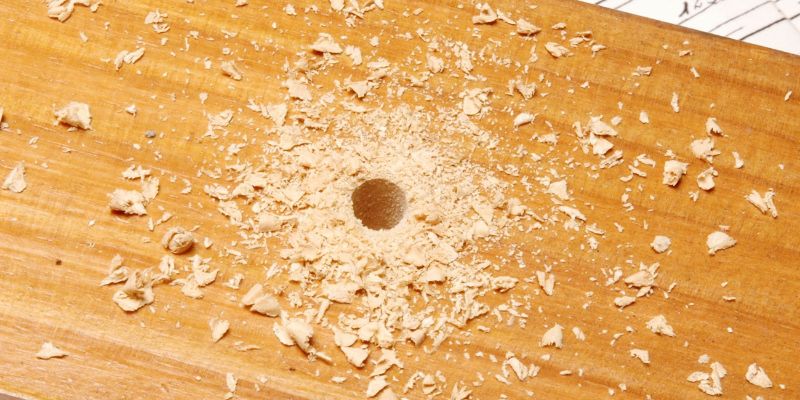
Preparing The Wood For Filling
Before filling the holes in wood, it’s crucial to prepare the surface properly to ensure a seamless and durable repair. This involves thorough cleaning, sanding techniques to create a smooth base, and removing debris from the holes. Let’s delve into each step to effectively prepare the wood for filling.
Cleaning The Affected Area
Start by cleaning the affected area using a soft cloth or a brush to remove any dirt, dust, or loose particles. Ensure that the surface is completely free of any contaminants as they can affect the adhesion and finish of the filling material.
Sanding Techniques For A Smooth Base
Use sandpaper to sand the area around the holes gently. The aim is to create a smooth, even surface that allows the filler to adhere properly. Begin with a coarse grit sandpaper to level the surface, then gradually move to finer grits for a smoother finish.
Removing Debris From Holes
After sanding, it’s important to remove any debris from the holes. You can use a vacuum cleaner or compressed air to clear out the dust and wood particles from the holes. This step ensures that the filling material can bond effectively with the wood.
How To Fill Holes In Wood: Easy Application
If you’re a DIY enthusiast or a woodwork hobbyist, you may find yourself needing to fill holes in wood from time to time. Whether it’s to repair a damaged piece of furniture or to achieve a seamless finish on a woodworking project, knowing how to fill holes in wood can be a valuable skill. In this guide, we’ll focus on the easy application of wood fillers to achieve professional-looking results.
Step-by-step Guide To Applying Filler
- Prepare the surface: Ensure the wood surface is clean and free of any debris or dust.
- Select the appropriate filler: Choose a wood filler that matches the color and type of the wood.
- Apply the filler: Using a putty knife, press the filler into the hole, ensuring it’s slightly overfilled.
- Smooth the surface: Once the filler is dry, sand it down to achieve a flush finish with the surrounding wood.
- Finish the wood: Apply a suitable finish, such as paint or varnish, to complete the repair.

Tools Needed For Filler Application
When filling holes in wood, it’s essential to have the right tools at your disposal. Here are some essential tools required for filling wood:
| Tools | Usage |
|---|---|
| Putty knife | For applying and smoothing the filler |
| Sanding block or sandpaper | To achieve a smooth finish |
| Wood filler | To fill the holes |
Tips To Ensure A Flush Finish
- Choose the right filler: Select a wood filler that matches the color and type of the wood for a seamless blend.
- Overfill the hole: Slightly overfill the hole with the filler to compensate for any shrinkage during drying.
- Use fine-grit sandpaper: When sanding the filler, use fine-grit sandpaper to achieve a smooth and flush finish.
Finishing Touches After Filling
After filling the holes in wood, it’s important to focus on the finishing touches to achieve a seamless and professional look. The final steps of sanding, staining or painting, and protecting the repaired wood surface are crucial in completing the repair process, ensuring the results are visually appealing and long-lasting.
Sanding For A Seamless Look
Sanding the filled areas is essential to achieve a seamless finish. Start with a coarse-grit sandpaper to level the filled surface with the surrounding wood. Gradually progress to finer-grit sandpaper to smoothen the texture and blend the filled areas with the rest of the wood. Ensure thorough sanding for a uniform and cohesive appearance.
Staining Or Painting Filled Areas
Whether you choose to stain or paint the filled areas, it’s important to match the color and finish of the surrounding wood. Carefully apply the stain or paint in thin layers, allowing each coat to dry completely before applying the next, to achieve an even and natural look. Select a high-quality stain or paint to ensure durability and a seamless, professional finish.
Protecting The Repaired Wood Surface
Protecting the repaired wood surface is vital to maintain the integrity of the repair and safeguard it against future damage. Apply a clear wood sealer or varnish to the filled areas and surrounding wood to provide protection from moisture, UV rays, and general wear and tear. This step not only enhances the appearance of the wood but also ensures the longevity of the repair.
Frequently Asked Questions Of How To Fill Holes In Wood
What Is The Best Way To Fill Holes In Wood?
The best way to fill holes in wood is to use wood filler or putty. Clean the area, apply the filler, and let it dry. Sand the surface smooth and finish with paint or stain for a seamless look.
What Material Is Used To Fill Holes In Wood?
Wood filler made of epoxy, putty, or latex is commonly used to fill holes in wood.
Should I Use Wood Putty Or Wood Filler?
Both wood putty and wood filler are used to fill in imperfections in wood. Use wood putty for small repairs and wood filler for larger areas. Wood filler is better for filling cracks and gaps, while wood putty is best for nail holes and small blemishes.
How Big Of A Hole Can You Fill With Wood Filler?
Wood filler can be used to fill small to medium-sized holes and cracks, typically up to around 3/8 inch deep. For larger holes, it’s better to use wood putty or wood patches for a more effective and durable solution.
Conclusion
Filling holes in wood is a simple yet crucial skill that every DIY enthusiast should master. By following the right techniques and using the appropriate materials, you can seamlessly restore the appearance and functionality of your wooden surfaces. With a patient approach and the right tools, you can achieve professional-looking results that will enhance the beauty and durability of your wood projects.