How To Fix A Bad Stain Job: Expert Tips for a Flawless Finish
To fix a bad stain job, sand the surface to remove the existing stain and ensure the wood is clean and smooth. Then, reapply the stain, following the manufacturer’s instructions carefully.
Are you frustrated with a bad stain job on your wood surface? Don’t worry, we have the solution for you. Whether it’s an uneven application, blotchy spots, or an overall unsightly appearance, there is a way to fix it. We will guide you through the simple steps you need to take to correct a bad stain job and restore your wood’s natural beauty.
By following our expert advice, you’ll be able to achieve a professional-looking finish that you can be proud of. So, let’s dive in and learn how to remedy a bad stain job effectively.
Common Staining Mistakes
When it comes to staining wood, mistakes can happen. Whether you’re a DIY enthusiast or a professional, everyone can make errors during the staining process. However, being aware of these common staining mistakes can help you avoid them in the future. Let’s take a look at three common staining mistakes and learn how to fix them.
Using The Wrong Stain
One of the biggest staining mistakes is using the wrong type of stain. The kind of stain you choose depends on the type of wood you’re working with and the desired outcome. Opting for an oil-based stain when a water-based stain is more suitable can lead to poor results. Similarly, using a dark stain on a light wood can result in an uneven and unattractive finish.
To avoid this mistake, it’s essential to do your research and select the appropriate stain for your project. Consider the type of wood, its grain, and the final look you want to achieve. This will help you choose between oil-based, water-based, or gel stains and ensure a beautiful and durable finish.
Poor Preparation
Inadequate preparation is another common mistake that can ruin your staining job. It’s crucial to prepare the wood surface properly before applying the stain. Skipping this step can result in uneven color absorption and adhesion issues.
To prepare the wood, start by sanding it with the appropriate grit sandpaper. This will remove any imperfections, rough patches, or existing finishes that may affect the stain’s application. After sanding, make sure to clean the surface thoroughly to remove all dust and debris. This will ensure a smooth and even stain application, resulting in a professional-looking finish.
Uneven Application
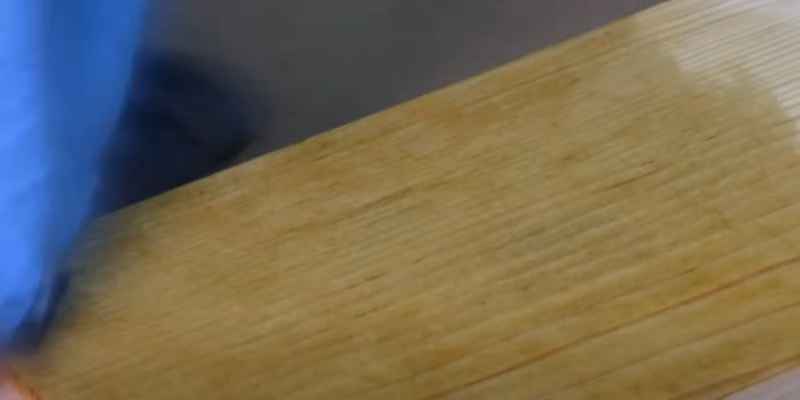
Uneven application is another common issue when it comes to staining wood. When applying the stain, it’s important to do it evenly and consistently to achieve a uniform finish.
To avoid uneven application, start by stirring the stain properly to ensure it’s well-mixed. Using a quality brush or a cloth, apply the stain in the direction of the wood grain, working in small sections. Be sure to spread the stain evenly, without leaving any excessive or sparse areas. If necessary, wipe off any excess stain to prevent pooling and blotchy spots.
Additionally, consider applying a second coat if the desired color intensity is not achieved with the first coat. However, make sure to follow the manufacturer’s guidelines and allow adequate drying time between coats.
By recognizing these common staining mistakes and taking the necessary precautions, you can fix any issues that may arise during your staining project. Whether it’s using the wrong stain, poor preparation, or uneven application, these mistakes can be easily mitigated with proper knowledge and attention to detail.

Assessing The Damage
Assessing the Damage is a helpful guide on how to fix a bad stain job. It provides step-by-step instructions and expert tips to rectify the problem, ensuring a smooth and even finish. With easy-to-understand explanations, this resource will help you restore your project to perfection.
Identifying Stain Issues
Assessing the damage after a bad stain job is crucial before attempting any fixes. Identifying the specific issues with the stained surface will help you determine the best course of action. Here are a few common stain problems to look out for:
- Inconsistent coloration: Check if the stain is uneven or patchy, with some areas darker or lighter than others.
- Bleeding or blotchy appearance: Look for areas where the stain has seeped into the wood unevenly, creating splotches or streaks.
- Blistering or peeling: Examine the surface for any signs of the stain blistering or peeling off the wood.
- Cracking or flaking: Notice whether there are cracks or flakes in the stained surface, indicating poor adhesion.
Determining The Severity
Once you have identified the stain issues, it’s crucial to determine the severity of the damage. This will help you understand the level of effort required to fix the problem. Consider the following factors:
- Extent of the problem: Assess the size and spread of the stain issues. Is it localized or widespread?
- Penetration depth: Determine how deeply the stain has penetrated the wood. Has it only affected the surface or gone deep into the grain?
- Type of stain: Consider the type of stain used and its specific characteristics. Different stain formulas may require different approaches for fixing.
By evaluating these factors, you can gauge the severity of the issue and choose the appropriate methods to rectify it.
Stripping The Old Stain
Revamp your stain job with expert advice on stripping old stains. Learn how to fix a bad stain job and achieve a flawless finish easily. Find out the essential steps to remove old stain and give your project a fresh start.
Choosing The Right Stripping Method
When it comes to fixing a bad stain job, the first step is to strip off the old stain. But before you start, it’s important to choose the right stripping method for the task at hand. The method you choose will depend on the type of stain, the wood surface, and the level of stubbornness of the old stain.
Here are some popular stripping methods:
- Sandpaper: If the old stain is not too deep or stubborn, sandpaper can be an effective choice. Start with a coarse-grit sandpaper to remove the top layer of the stain, then switch to a finer-grit sandpaper for a smooth finish. Always sand in the direction of the wood grain to avoid damaging the wood surface.
- Chemical strippers: Chemical strippers are a great option for tough stains or large areas. These products usually come in liquid or gel form and work by softening the old stain, making it easier to remove. It’s important to follow the manufacturer’s instructions and wear protective gloves and eyewear when using chemical strippers.
- Heat gun: A heat gun can be used to soften and scrape off the old stain. This method is particularly useful for intricate woodwork or hard-to-reach areas. However, caution must be exercised when working with heat as excessive heat can damage the wood.
Applying The Stripper
Once you have chosen the right stripping method for your project, it’s time to apply the stripper. Follow these steps to ensure an effective and efficient process:
- Prepare the work area: Before applying the stripper, make sure the work area is well-ventilated and protected. Lay down drop cloths or plastic sheets to catch any dripping or falling residue.
- Wear protective gear: Always wear gloves, safety goggles, and a mask when applying the stripper to protect yourself from harmful fumes and chemicals.
- Apply the stripper: Using a paintbrush or roller, apply a thick and even layer of the stripper onto the wood surface. Make sure to work in small sections to prevent the stripper from drying before you can remove it.
- Let it work: Allow the stripper to sit on the wood surface for the recommended time specified by the manufacturer. This will give it enough time to soften and loosen the old stain.
- Scrape off the old stain: Using a scraper or putty knife, gently scrape off the softened old stain. Be careful not to gouge or damage the wood surface. If needed, you can use a soft-bristle brush to remove any stubborn residue.
- Clean the wood: After removing the old stain, clean the wood surface thoroughly with a clean cloth dampened in mineral spirits or a similar cleaning solution. This will help remove any remaining stripper residue and prepare the wood for the new stain.
Remember, stripping the old stain can be a messy and time-consuming process, but it’s an essential step in achieving a beautiful and flawless finish. By choosing the right stripping method and following the proper application techniques, you can effectively fix a bad stain job and restore the natural beauty of your wood.
Repairing The Surfaces
When it comes to fixing a bad stain job, repairing the surfaces is a crucial step. The quality of your repairs will determine the final outcome of your project. In this section, we will explore two important techniques to repair the surfaces effectively: sanding the wood and filling the cracks and holes. Let’s dive in!
Sanding The Wood
Before you can repair a bad stain job, it’s essential to start with a smooth surface. Sanding the wood will remove any existing finish or uneven spots, providing a clean canvas to work with. Here’s how you can do it:
- Start by gathering the necessary tools – sandpaper (in various grits), sanding block, and a dust mask.
- Protect yourself by wearing a dust mask to avoid inhaling particles during the sanding process.
- Begin sanding the wood in the direction of the grain, using long even strokes.
- Start with coarse-grit sandpaper to remove the existing finish or stains, and gradually move to finer-grit sandpaper for a smoother finish.
- Wipe away the dust using a clean cloth or vacuum.
- Inspect the surface to ensure it’s smooth and no imperfections are visible. If necessary, repeat the sanding process until you achieve the desired result.
By following these steps, you’ll create a smooth surface ready for the next step – filling the cracks and holes.
Filling The Cracks And Holes
After sanding, it’s common to discover cracks and holes that need to be filled. These imperfections can significantly impact the final appearance of your stained wood. Here’s how to fill them:
- Identify the cracks and holes that need to be filled.
- Clean the area by removing any debris or loose wood particles with a brush or cloth.
- Choose an appropriate wood filler that matches the color and texture of your wood.
- Using a putty knife, apply the wood filler into the cracks and holes, ensuring it fills them completely.
- Smooth out the surface of the filler using the putty knife or a sanding block.
- Allow the wood filler to dry completely, following the manufacturer’s instructions.
- Once dry, sand the filled areas until they are level with the surrounding wood surface.
- Wipe away any dust or debris, and perform a final inspection to ensure a seamless result.
By following these steps, you’ll effectively repair the surfaces, creating an even and flawless base for the rest of your stain job.
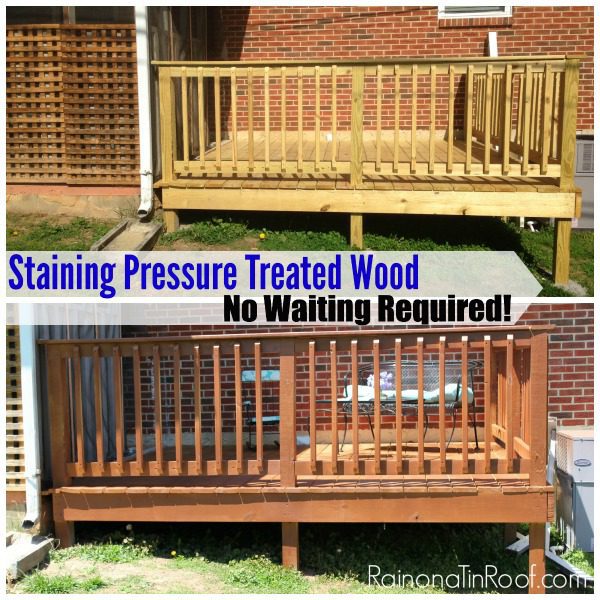
Applying The New Stain
Applying a new stain can be an effective way to fix a bad stain job and restore the beauty of your wood surface. However, it’s important to apply the new stain correctly to achieve the desired results. This section will cover two crucial aspects of applying a new stain: selecting the correct stain and using proper application techniques.
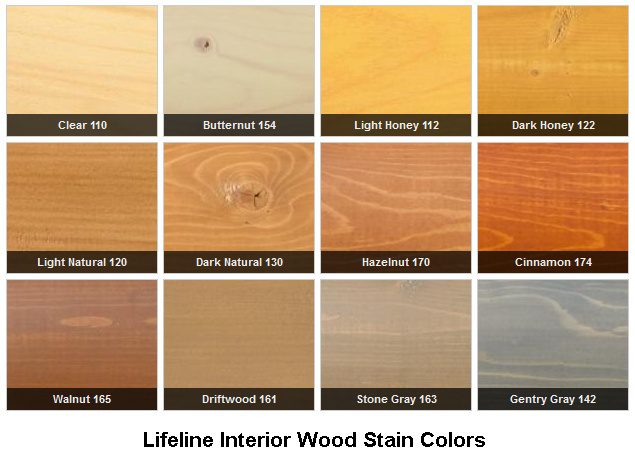
Selecting The Correct Stain
Choosing the right stain is the first step towards fixing a bad stain job. Here’s what you need to consider:
- Color and Shade: Assess the current stain color and determine if you want to maintain or change it. Select a stain shade that complements your wood and desired aesthetic.
- Type of Stain: Decide whether an oil-based or water-based stain is more appropriate for your project. Oil-based stains typically offer deeper penetration and richer color, while water-based stains dry faster and have a lower odor.
- Compatibility: Ensure the new stain is compatible with the previous stain or finish on your wood surface. Test a small, inconspicuous area first to check for any adverse reactions.
- Sample Testing: Before applying the new stain to the entire surface, it’s advisable to test it on a small area to ensure you achieve the desired color and finish.
Proper Application Techniques
Now that you have selected the correct stain, it’s time to apply it properly. Follow these techniques for the best results:
- Surface Preparation: Clean the wood surface thoroughly, removing any dirt, grease, or previous stain residue. Sand the area lightly to create a smooth surface.
- Stirring: Before applying the stain, make sure to stir it well to ensure even distribution of color pigments. This step is essential for achieving a consistent finish.
- Application Method: Choose an appropriate application method based on your project and the size of the surface, such as brush, rag, or sprayer. Apply the stain in the direction of the wood grain for a professional-looking result.
- Even Application: Work in small sections, applying the stain evenly and consistently. Avoid over saturating the wood, as it can lead to blotching or uneven coloring.
- Wipe Off Excess: After applying the stain, use a clean cloth to wipe off any excess stain. This step helps achieve a smooth and uniform finish.
- Drying and Curing: Allow the stain to dry completely according to the manufacturer’s instructions. Depending on the type of stain, this may take several hours or even days. Avoid placing any objects on the newly stained surface until it has fully cured.
By selecting the correct stain and following proper application techniques, you can fix a bad stain job and achieve a beautifully finished wood surface. Take your time, follow the steps carefully, and enjoy the transformation.
Conclusion
Fixing a bad stain job is not as daunting as it may seem. By following the steps outlined in this blog post, you can quickly and easily rectify any mistakes and achieve a beautiful and professional finish. Remember to prepare the surface properly, invest in quality materials, and take your time to ensure uniformity.
With a little patience and the right techniques, even the worst stain job can be salvaged.