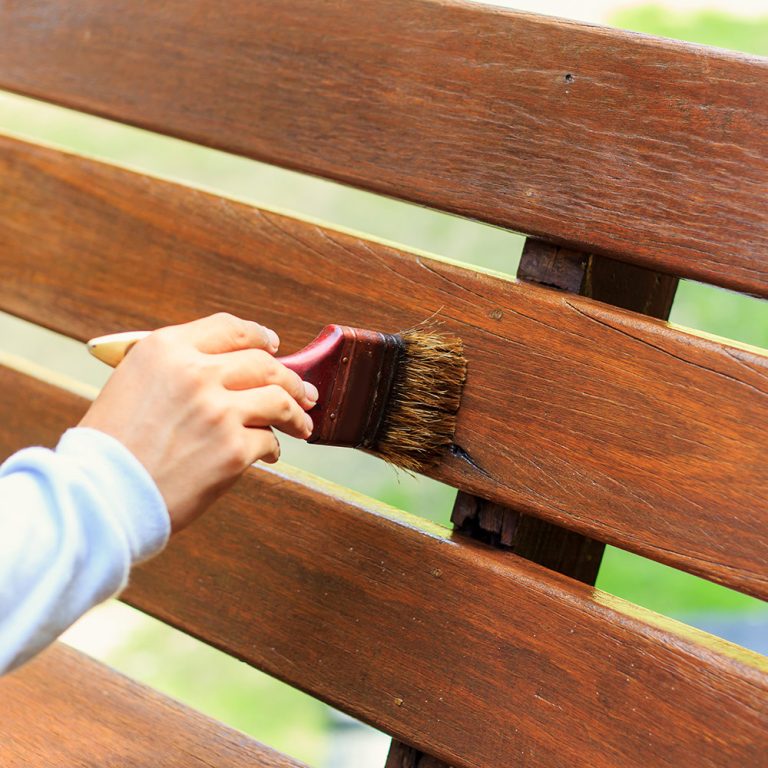
How to Fix Dark Spots on Stained Wood Without Stripping It
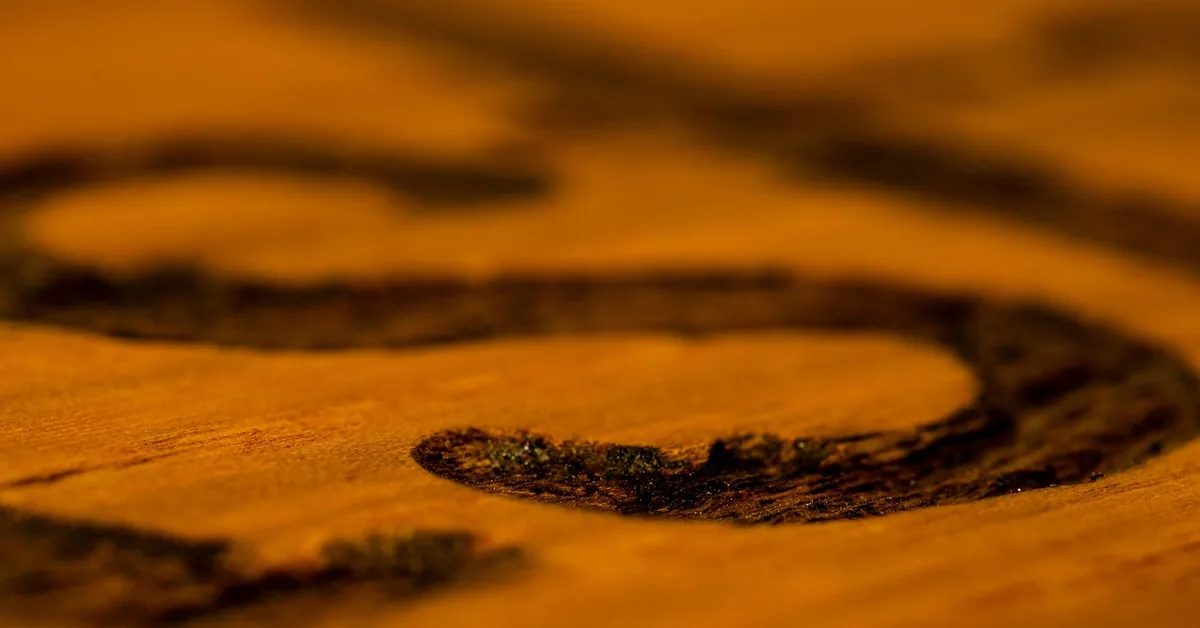
Dark spots on stained wood are almost always iron reacting with tannin in the wood, not surface dirt sitting on top. Sanding alone will not remove it, and the wrong bleach can strip the surrounding color too. This guide covers the oxalic acid ratio that actually dissolves the stain, how long to let it sit, and how to blend the repair into your existing stain without redoing the whole piece.
Quick Answer
Sand the spot, then treat it with oxalic acid mixed at roughly 60g per liter of warm water. Fresh stains lighten in 15-20 minutes; old stains on oak or walnut may need up to an hour, plus a second application the next day. Neutralize, let it dry 24 hours, then blend in matching stain before resealing.

Tools and Materials You Will Need
- 120-grit and 220-grit sandpaper
- Oxalic acid crystals or a two-part wood bleach kit
- A stiff-bristle or acid-safe brush for application
- Baking soda (to neutralize the acid) and clean water for rinsing
- Rubber gloves, eye protection, and a respirator mask
- Stain that matches your existing finish, plus a topcoat (poly, varnish, or wax)
- Tack cloth or lint-free rags
Best Dark Spot Removal Kit Pick
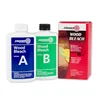
Zinsser Wood Bleach Kit
A pre-measured two-part bleach kit for lightening dark spots and evening out blotchy stain before you re-finish.
- Best for: beginners who do not want to weigh out oxalic acid crystals themselves
- Why we picked it: pre-measured parts remove the guesswork on concentration
- Main drawback: more expensive per treatment than raw oxalic acid crystals
Compare more dark spot removal options
 Option 1 Ecoxall Oxalic Acid Powder, 99% Pure
|
 Option 2 xixisusu Oxalic Acid Wood Bleach
|
 Option 3 Weiman Wood and Cabinet Restorer 3-in-1
|
As an Amazon Associate we earn from qualifying purchases.
What Causes Dark Spots on Stained Wood?
An iron-tannin stain is a chemical reaction between iron (from a nail, staple, tool, or hard water) and the natural tannins inside the wood, and it only needs moisture to trigger it. Oak, walnut, and cherry carry the most tannin, which is why stained wood made from these species spots the easiest. The reaction bonds inside the wood fibers rather than sitting on the surface, which is exactly why wiping or light cleaning never makes it budge.
Water rings and heat marks are a different, shallower problem: they cloud the finish itself rather than staining the wood underneath, which is why they usually respond to gentler fixes covered later in this guide. Mold is different again — it sits on top of the wood in a fuzzy or slightly raised patch rather than being bonded into the grain.
Dark Spot, Mold, or Rot? How to Tell the Difference
Before you reach for sandpaper or bleach, confirm what you are actually dealing with. Dab the spot with a damp cloth and a little mild soap. If it wipes away and does not return, it was surface dirt. If it smears, has a fuzzy or slightly raised texture, or comes back after cleaning, it is mold or mildew and needs a fungicidal cleaner, not a bleach treatment. A true iron-tannin stain is flat, dry, and part of the wood itself — you cannot feel any texture difference between the spot and the surrounding surface.
Rot is a separate concern entirely. Press the spot with a screwdriver tip or your thumbnail. If the wood feels soft, spongy, or crumbles instead of holding firm, that is rot, and no amount of bleaching or restaining will fix it — the section needs to be dug out and replaced or built back up with an epoxy wood filler.
How to Fix Dark Spots on Stained Wood (Step-by-Step)
- Confirm the stain type: Use the wipe test above. Only proceed with sanding and acid if the spot is a true iron-tannin stain, not dirt, mold, or rot.
- Sand the immediate spot: Work with the grain using 120-grit sandpaper directly over the dark area, then blend the edges outward with 220-grit so there is no hard line between old and new wood (see our guide on sanding wood for staining for grit progression on larger areas).
- Mix the oxalic acid: Dissolve oxalic acid crystals at roughly 60g per liter of warm water (about a quarter cup per quart). Wear gloves, eye protection, and a respirator, and work in a ventilated space.
- Apply and keep it wet: Brush the solution directly onto the bare, sanded spot. Keep the surface visibly wet for 15 to 20 minutes on a fresh stain, or up to an hour on an old, deep stain in high-tannin wood like oak or walnut.
- Neutralize and rinse: Wipe the area with a baking soda and water solution to stop the acid reaction, then rinse with clean water and let the wood dry fully for 24 hours.
- Repeat if needed: If any shadow of the stain remains on oak or walnut after drying, apply a second oxalic acid treatment — deep stains in high-tannin species often need two rounds.
- Blend the stain and reseal: Once the spot is gone and the wood is fully dry, feather matching stain into the repaired area in thin coats, then reseal the entire section with a topcoat that matches the surrounding sheen.
“Oxalic acid only dissolves the iron-tannin reaction — it will not lighten stain color that isn’t caused by iron. If you’re not sure the mark is a mineral stain and not just old dirt or a different dye, test it on a hidden scrap first so you don’t bleach a patch that never needed it.”

Fixing Specific Spot Types
Water Rings and Heat Marks
These sit in the finish, not the wood, so they usually respond without any sanding. For a water ring, mix equal parts baking soda and non-gel white toothpaste, rub it into the ring in a circular motion with a soft cloth, then wipe clean. For a heat mark, lay a clean white cloth over the mark and press a warm (not hot) iron over it in short circular passes for 15 to 20 seconds at a time, checking often, then apply a matching wood polish once the mark lifts.
Ink, Grease, and Household Stains
Blot ink with a cotton swab dampened in isopropyl alcohol rather than rubbing, which can push it deeper into the grain. For grease or oil, dampen a cloth with equal parts vinegar and water, and if residue remains, sprinkle on baking soda, let it sit a few minutes, then wipe it away. Both methods work on the finish surface and do not require the oxalic acid process above unless the stain has already soaked into bare wood.
Protecting the Repair So Spots Do Not Come Back
A repaired spot is only as durable as the wood sealer you finish it with. Since iron-tannin stains need both metal contact and moisture to form, sealing the wood cuts off the moisture half of that reaction going forward.
| Sealant | Finish Options | Best For |
|---|---|---|
| Polyurethane | Gloss, semi-gloss, satin, matte | General furniture and floors, good moisture resistance |
| Varnish | Gloss, satin | Outdoor-exposed pieces needing UV resistance |
| Lacquer | Gloss, satin | Fast-drying cabinetry and trim |
| Shellac | Gloss, satin | Antique restoration, easy spot repairs later |
Beyond sealing, a few habits keep spots from forming again: use coasters and placemats so drink rings and hot dishes never touch bare finish, wipe up spills as soon as they happen instead of letting them sit, and keep metal hardware, tools, and fasteners from resting directly on unsealed wood in damp areas. For a full walkthrough of choosing and applying a finish, see our wood finishing guide.
If the mark you are dealing with is actually a ring left by a wet glass rather than a bonded iron stain, our dedicated guide on how to get water rings out of wood covers that specific repair in more depth. And if you are trying to remove a stain color entirely rather than spot-treat it — stripping the piece back toward bare wood — see our guide on how to remove dark stain from wood instead; that is a different, bigger job than the spot repair covered here.
Frequently Asked Questions
What causes dark spots on stained wood?
Most dark spots are an iron-tannin reaction: iron from a nail, staple, tool, or hard water reacts with natural tannins in the wood whenever moisture is present. High-tannin species like oak, walnut, and cherry show it most often. The stain is bonded inside the wood fibers, which is why cleaning or light sanding alone will not remove it.
Is oxalic acid safe to use on all wood species?
It is safe on most species when diluted correctly and used with gloves, eye protection, and ventilation, but cedar and cypress are the exception — their natural oils react with chlorine-based bleaches and can leave a gray residue. Oxalic acid itself (not chlorine bleach) is the safer, more universal choice for iron-tannin spots specifically.
How long do you leave oxalic acid on a wood stain?
Fresh iron-tannin stains typically lighten in 15 to 20 minutes. Older, deeper stains in high-tannin wood like oak or walnut can take up to an hour, and may need a second application after the wood dries for 24 hours. Keep the surface wet throughout the treatment for the reaction to keep working.
Can dark spots be fixed without sanding?
Surface stains like water rings and heat marks often lift without sanding, using a baking soda and toothpaste paste or a warm iron over a cloth. True iron-tannin stains bonded into the wood almost always need at least light sanding to expose bare wood before oxalic acid can reach and dissolve the stain underneath.
How do you fix wood stain blotches?
Lightly sand the blotchy area to remove the uneven color, then apply a sanding sealer or wood conditioner so the wood absorbs stain more evenly. Reapply the stain in thin, even coats, wiping away excess as you go, then finish with a clear protective topcoat once the color matches.
Can dark stained wood be lightened?
Yes. Sand off the top layer of stain, then apply a wood brightener or oxalic acid solution to lift the remaining color before restaining with a lighter shade. Full color removal down to bare wood is a bigger project than a spot repair — see the stain-removal guide linked above if that is your goal.
Dark spots on stained wood almost always trace back to iron reacting with tannin, and that single fact is what decides the fix: sand to bare wood, treat with the right oxalic acid ratio and dwell time for your wood species, then blend the stain back in before resealing. Skip the full strip-and-restain unless the spot has spread across the whole piece — a targeted repair usually gets the same result in a fraction of the time.