How to stain wood?
Wood stain colors offer a wide range of options to enhance the appearance of wood while preserving its natural beauty. Stains come in various shades, from light to dark, and can be categorized into three primary types: transparent, semi-transparent, and solid color stains.
Staining wood is a multi-step process that involves preparing the surface, selecting an appropriate wood stain, applying the stain, and finishing for a polished look. Surface preparation includes sanding and cleaning the wood. Choosing the right stain, applying it, and weeping perfectly is crucial.
The choice of color depends on your personal preference, the type of wood, and the desired aesthetic for your project, whether it’s a natural, rustic look or a vibrant, solid hue.
Can you Stain Treated Wood?
Yes, you can stain treated wood, but it’s crucial to prepare the wood properly beforehand for the best results. Treated wood is often saturated with chemicals, making it necessary to allow sufficient time for the wood to dry and weather.
This process can take several weeks to months, depending on the type of treatment and local climate conditions. Perform a water droplet test to check if the wood is ready for staining; if it absorbs the water, it’s likely ready.
Choose a high-quality, oil-based wood stain, and follow the manufacturer’s instructions. Properly stained treated wood can enhance its appearance and provide protection against weathering and decay.
How to Apply Wood Stain?
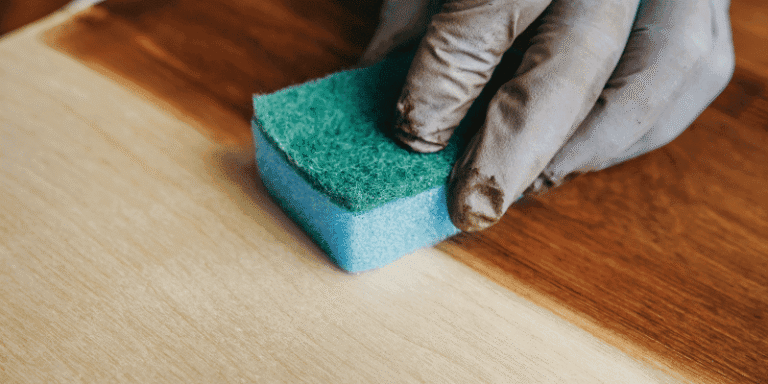
To apply wood stain effectively, follow these steps for a professional finish. First, prepare the wood surface by sanding it to a smooth and clean state, removing any imperfections and ensuring it’s free of dust. Stir the stain thoroughly to achieve an even color distribution. Choose the right application tool, whether it’s a brush, cloth, or foam applicator, depending on your project size and complexity.
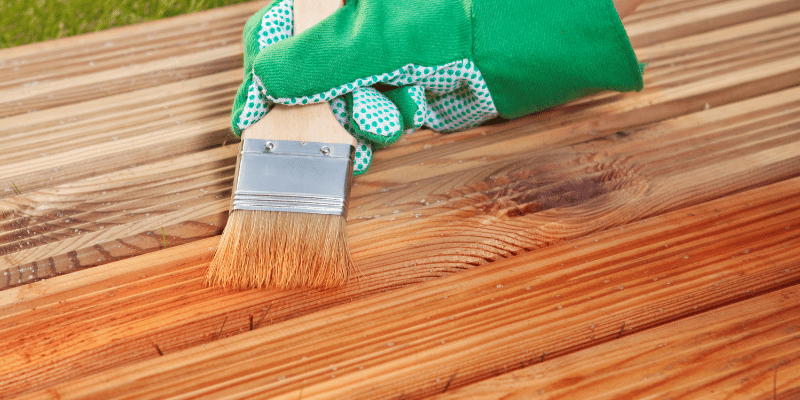
Always apply the stain in the direction of the wood grain to avoid streaks or blotches. Work in manageable sections, keeping the stain well-saturated but not overly soaked. Afterward, wipe off any excess stain with a clean cloth to prevent an uneven, sticky finish.
Follow the recommended drying time specified by the stain manufacturer before adding additional coats or protective finishes. These steps, when executed carefully, result in a beautifully stained and well-protected wood surface.

Coffee Stains on Wood?
Coffee stains on wood can be unsightly, but you can often remove them with these steps. Start by blotting the spill with a clean, dry cloth to absorb as much liquid as possible.
Next, mix a solution of equal parts white vinegar and water and gently rub the stained area with a cloth. If the stain persists, you can create a paste from baking soda and water, apply it to the stain, and rub gently.
Wipe clean and repeat as needed. Finally, to restore the wood’s shine, consider applying a wood polish or wax. As always, test any cleaning method in an inconspicuous area first to ensure it won’t damage the wood finish.

Best Way to Apply Wood Stain?
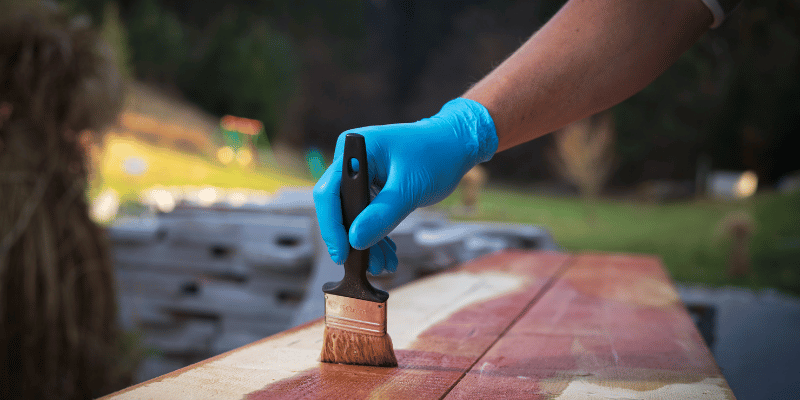
The best way to apply wood stain involves several essential steps for a professional finish. First, prepare the wood by sanding it to a smooth surface and ensuring it’s clean and free of dust. Stir the stain thoroughly to distribute color evenly. Select a high-quality brush, cloth, or foam applicator depending on the project’s size and complexity.
Always apply the stain in the direction of the wood grain to avoid streaks or blotches. Work in manageable sections, keeping the stain well-saturated but not overly soaked. Wipe off excess stains with a clean cloth to prevent an uneven, sticky finish.
Follow the manufacturer’s recommended drying time before adding additional coats or protective finishes. These steps, when executed with care, result in a beautifully stained and well-protected wood surface.

Best Way to Apply Stain to Wood?
The application of wood stain is a crucial step in enhancing the beauty and protection of wooden surfaces. To achieve the best results, start by thoroughly preparing the wood, ensuring it’s clean and smooth.
Choosing the right tools, such as a brush, cloth, or foam applicator, is essential, and applying the stain in the direction of the wood grain helps create a seamless finish. Working in small sections and wiping off excess stain prevents unevenness and sticky residue.
Patience is key, as allowing the stain to dry properly ensures a lasting and attractive result. By following these steps, you can transform your wooden projects into beautifully stained and well-protected works of art.
How to Get Water Stains Out of Wood?
Water stains on wood can be quite stubborn, but there are effective methods to address them. For fresh stains, gently blot the area with a dry cloth to absorb excess moisture.
Older stains may require more targeted approaches, such as using a warm, dry iron over a cloth to lift the moisture, or applying a mixture of white vinegar and water to the affected area.
Non-gel toothpaste can also serve as a mild abrasive to help remove water stains. In some cases, refinishing the affected area with wood finish or polish might be necessary. It’s crucial to test these methods in an inconspicuous area first to avoid causing any damage to the wood.
Outdoor Stains for Wood?
Outdoor stains for wood are specifically designed to protect and enhance the appearance of wood surfaces exposed to the elements, such as decks, fences, and outdoor furniture. There are two primary types: transparent and solid color stains.
Transparent stains allow the wood’s natural grain to show through while providing some protection against UV rays and moisture. Solid color stains offer more comprehensive protection and come in a wide range of colors to cover the wood entirely, masking imperfections.
Look for outdoor stains that are water-repellent and UV-resistant to prevent fading and water damage. Proper surface preparation and regular maintenance are essential for extending the life and appearance of your outdoor wood structures.
Staining Wood Cabinets?
Staining wood cabinets can be a great way to refresh their look and bring new life to your kitchen or bathroom. To ensure a successful staining process, start by removing the cabinet doors and hardware. Clean the surfaces thoroughly to remove any dirt or grease.
Sand the cabinets gently to create a smooth and even surface for the stain to adhere to. Apply a wood conditioner to help the stain absorb evenly. Choose a high-quality wood stain that complements your desired finish, and apply it evenly in the direction of the wood grain.
Finally, seal the stained cabinets with a durable, clear topcoat to protect the wood and enhance its appearance.
FAQ
Can you Stain Pressure Treated Wood?
Yes, you can stain pressure-treated wood, but it’s essential to prepare the wood properly for the best results. Pressure-treated wood contains moisture and chemicals that can interfere with the staining process, so it’s crucial to allow it to weather and dry out.
Depending on factors like the type of pressure treatment and local weather conditions, this may take a few weeks to several months. To check if the wood is ready, perform a water droplet test; if the wood absorbs the water, it’s likely ready to be stained.
Choose a high-quality, oil-based wood stain and follow the manufacturer’s instructions for the best outcome. Properly stained pressure-treated wood can enhance its appearance and provide protection against the elements.
How to Get Rid of Water Stains on Wood?
Water stains on wood can be quite frustrating, but there are effective methods to address them. If you notice a water stain on your wood furniture or surface, the first step is to blot it with a clean, dry cloth to absorb as much moisture as possible.
For older stains or those that don’t respond to blotting, a common solution is to use a mixture of equal parts white vinegar and water. Gently rub this mixture over the stain with a soft cloth and wipe it dry. If that doesn’t work, you can try non-gel toothpaste as a mild abrasive to remove the stain.
In more stubborn cases, you may need to consider refinishing the affected area with a wood finish or polish to restore its appearance. Always test any method in an inconspicuous area first to avoid further damage.
Can you Paint Over Stained Wood?
Yes, you can paint over stained wood, but there are some important steps to follow for a successful result. First, you’ll need to prepare the surface by sanding it to remove any gloss and ensure better paint adhesion. Next, clean the wood to remove dust and residue.
Apply a quality primer designed for use on stained surfaces to create a smooth and uniform base for the paint. Once the primer is dry, you can paint with your desired color.
Keep in mind that the stain may affect the final paint color, so consider using a paint with good coverage or applying multiple coats if needed. Proper preparation is key to achieving a durable and attractive painted finish over stained wood.
When Can you Stain Pressure Treated Wood?
You can typically stain pressure-treated wood once it has had the opportunity to dry and weather properly. This drying period usually ranges from a few weeks to several months, depending on factors like the type of wood, the treatment process, and local climate conditions.
To determine when it’s ready, perform a water droplet test; if water beads up on the wood’s surface, it’s not yet ready for staining. When the wood absorbs water, it’s usually a good indication that it’s sufficiently dry.
Follow the stain manufacturer’s instructions for the specific product you’re using, but as a general guideline, waiting a few months is often recommended for the best results.
What Happens if you Stain Treated Wood Too Soon?
Staining treated wood too soon can result in a variety of issues. The moisture and chemicals present in fresh pressure-treated wood can prevent proper adhesion and penetration of the stain, leading to an uneven finish, peeling, or flaking.
The natural oils and resins in the wood may not have had sufficient time to settle, causing discoloration or blotchy appearances. Premature staining can also interfere with the effectiveness of the treatment, potentially reducing its ability to protect the wood from decay and insect damage.
Waiting for the appropriate drying time ensures a more successful and long-lasting stain application, preserving the wood’s appearance and durability.
How Long To Wait To Stain Pressure Treated Wood?
It’s generally recommended to wait at least a few weeks before staining pressure-treated wood. The exact time frame can vary depending on factors like the type of pressure treatment and local weather conditions.
Allowing the wood to weather and dry out is crucial because freshly treated wood contains moisture and chemicals that can interfere with the staining process. To check if the wood is ready, perform a simple water droplet test: sprinkle some water on the surface, and if it absorbs into the wood, it’s likely ready to be stained.
Be sure to follow the manufacturer’s recommendations for your specific stain product, as they may have specific guidelines for timing and preparation.