
How to Install a Sliding Glass Patio Door (Sill Pan First)
A sliding glass patio door only stays dry if the sill pan and flashing go in before the frame, and the rough opening clearance depends on your manufacturer: 1/2 inch to 1 inch in the guides we read. Skip either detail and water finds the sill first. This guide covers the sill pan, setting the frame, hanging both panels, sealing, and when to hire it out.
What You Need to Install a Sliding Glass Door
Best Sill Flashing Tape Pick
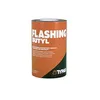 |
Typar Butyl Flashing Tape, 9 in x 75 ft – $42.99 A 9 inch wide butyl tape is the width Lincoln’s patio door instructions call for as the minimum for sill and head flashing, which is the sill step this guide treats as non-negotiable.
|
As an Amazon Associate we earn from qualifying purchases.
Every manufacturer guide we read lists broadly the same kit. Your own door’s instruction sheet decides the exact fasteners, sealant and flashing, so read it end to end before buying anything.
Tools Required
- Level (International Window recommends a 6 foot level), tape measure and carpenter’s square
- Caulk gun, utility knife, putty knife and a drill or screw gun
- Pry bar and hammer for the old door and trim
- Glass suction cups, which Loewen lists as a required tool for panel installation
- Safety glasses and cut-resistant gloves
Materials Required
- Sill pan (rigid, flexible or rubber) and window and door flashing tape
- Window and door sealant that your door and flashing maker both approve
- High impact composite shims; Loewen specifies composite, not wood, and Lincoln recommends rot-proof shims under the sill
- 1 1/2 or 2 inch #8 screws (Loewen suggests stainless steel)
- Low-expansion, closed-cell foam made for doors and windows
- Interior trim
Rough Opening: What Manufacturers Actually Say
Many how-to pages, including the earlier version of this one, say to leave 1 to 2 inches of extra room around a patio door. None of the three installation guides we read says that. Loewen asks for a rough opening 3/4 inch to 1 inch larger than the door in width and height, while International Window asks for 1/2 inch larger. The numbers differ because the frames differ, which is the whole point: use the rough opening your unit’s paperwork publishes.
| Detail | Loewen (wood, flanged) | International Window 5600 (vinyl) | Lincoln (aluminum clad, flanged) |
|---|---|---|---|
| Rough opening vs unit | 3/4 to 1 inch larger in width and height | 1/2 inch larger in width and height | Published openings allow clearance on all sides; follow the printed size |
| Sill pan edges | At least 1/2 inch interior dam, 2 inch exterior down-turn, 6 inch upturn at jamb ends | Rigid pan with interior wall and end dams, sealed at corners | 1 inch upturned legs on the sides and back, sealed watertight at the corners |
| Drainage gaps in sealant | 2 inch void about 2 inches from each end | Two 1 inch gaps about 6 inches from each jamb | 1 to 2 inch gaps every 15 to 18 inches |
| Flashing width | 6 inch tape recommended | Barrier-coated flashing, 24 hour water test (ASTM D-779) | At least 9 inches wide |
| Frame fasteners | 2 inch screws, every other flange hole | #8 x 2 inch truss head screws | Fasteners that penetrate the framing at least 1 inch |
We could not open the Pella and Milgard instruction PDFs while researching this (their servers blocked the download), so those brands are not in the table. If you own one, get the sheet that shipped in the box. Sources: Loewen, International Window, Lincoln.
Check the Opening Before You Order
Measure the opening at the corners and at the center points, then compare the two diagonals. Lincoln’s method is simple: corner to opposite corner both ways, and equal readings mean the opening is square. Put a level on both sides for plumb and on the sill for level.
If you are cutting a brand-new opening in a wall, the header is a structural member, and its size depends on the span, the roof load above it and local code. Loewen’s guide simply says to make sure a proper header is in place and the roof is loaded before installing. We are not engineers and this guide is not engineering advice: get the header specified by your building department or a structural professional, and pull a permit where your jurisdiction requires one.
Safety: Glass Weight and Handling
Door panels are heavy and the glass is safety glazing, so this is the part of the job where people get hurt. International Window’s sheet says two people are required to lift the panels, and Loewen says two or more people are needed to set the door frame into the opening. Nobody should lift a panel alone.
- Wear safety glasses and gloves, and clear the floor and the path to the opening before you carry anything.
- Keep panels near vertical and protected from weather until installation, as International Window directs. Remove shipping blocks and staples first, as Loewen directs.
- Use suction cups for glass, and use them to take the panel’s weight while you adjust the rollers; Loewen says to relieve the weight by hand or with suction cups during roller adjustment.
- Building code treats sliding door glass as a hazardous location that needs safety glazing such as tempered or laminated glass (IRC R308.4), so a cracked panel is not a repair-it-later problem.
- If the house is older, lead paint may be on the old trim. Lincoln points readers to the EPA lead guidance before removal.

How to Install a Sliding Glass Door, Step by Step
The order below follows the manufacturer guides, with the water management work first. It describes a flanged (nail-fin) door set into a framed opening. A non-flanged unit uses backer rod and sealant instead of the flange, per Loewen, so check which type you bought.
Step 1: Remove the Old Door and Trim
Pry off the interior and exterior trim, lift out the old panels, then remove the old frame. Probe the sill and the framing around it for soft wood. If you find rot, repair it before anything else: our guide to fixing a damaged door frame and the epoxy rot repair guide cover the framing side. A new door on a rotten sill just moves the leak.
Step 2: Install the Sill Pan
This is the step that decides whether the door leaks. Loewen’s guide states that sill pans are mandatory in any door installation, and Lincoln requires one under all of its doors. The pan catches water that gets past the threshold and sends it back outside.
- Check that the rough sill is level. If it is not, shim it level and support the whole sill so it cannot sag (Lincoln and International Window both say this).
- Seal and slope the pan toward the exterior. Fine Homebuilding describes sloping the sill and flashing it, leaving a flap turned up toward the interior for a back dam installed later.
- Bed the pan in sealant, then run the sealant beads per your guide, leaving the drainage gaps open. Those gaps are on purpose: they let incidental water escape, and sealing them shut defeats the pan.
- Seal the pan corners and the fastener heads, and check the pan is straight and level before the sealant sets.
International Window adds a test worth stealing: before installation, the sill track must be able to hold water for 15 minutes without leaking to the interior. Details on sill flashing are also in Fine Homebuilding.
Step 3: Prepare the Weather Barrier and Flash the Jambs
Cut the house wrap so it is out of the rough opening. Loewen says no weather-resistant barrier should be brought into the opening, and suggests a temporary flap at the head cut on a 45 degree angle and taped up out of the way. Run sealant on the sheathing where the screws will pass through, as Loewen directs. After the frame is in, flash the jambs first, then the head, so each layer laps over the one below it and water always runs outward. Press the tape down with a J-roller to remove air pockets.
Step 4: Set the Frame Plumb, Level and Square
- Put shims at both jamb locations on the pan so the frame sits level and just proud of the pan.
- With a helper, tilt the frame out at the top, set the bottom into the sill pan, then tilt the top tight to the sealant (Loewen).
- Drive one screw at an upper corner, then check plumb, level and square again. Measure the diagonals; equal diagonals mean a square frame.
- Continue fastening per your guide. Keep the lock-side jamb perfectly straight: Loewen warns not to bow it, and says wide openings tend to bow and may need anchoring at the center of the head and sill.
- At the head, International Window leaves about 1/2 inch of gap between the frame and the rough opening for deflection, so do not over-tighten and distort it.
Step 5: Hang the Panels
Fixed panel first, then the sliding panel. On the International Window unit, the fixed panel goes in from the exterior and rests on a metal setting chair, and the sliding panel goes in from the interior with the roller wheels retracted. Loewen’s version: keep an even vertical lift until the bottom of the panel clears the sill track, then confirm it is seated on the rollers, with the weatherstrip tight against the sill, before you slide it. If the panel sits wrong, take it out and reinstall rather than forcing it.

Step 6: Adjust the Rollers, Strike Plate and Hardware
Roller screws are usually reached through holes at the bottom of the panel. Loewen turns them clockwise to raise the panel and counterclockwise to lower it, and cautions against raising it too high because the weatherstripping then cannot seal against the sill. Its guidance is to raise both rollers approximately 3/8 inch, test, and fine tune. Then align the strike plate with the hardware pin and anchor it, shimming the latch-side jamb behind it. International Window specifies that the lead stile on its panel should penetrate the vent jamb 5/8 inch,.
Step 7: Seal, Insulate and Trim
Use low-expansion, closed-cell foam, or a foam the door maker names, in the gap between the frame and the rough opening. Standard foam can push a frame out of true. Loewen also keeps the foam back from the flange by pulling shims about 1 to 2 inches back from the exterior flange, so the foam makes a continuous seal. Finally, seal the bottom edge of the sill pan to the door sill, run the exterior sealant, and fit the interior and exterior trim.
📊 Sill pans are mandatory in any door installation, according to Loewen’s installation guide. Source: Loewen Sliding Patio Door Installation Guide
Six Mistakes That Make a New Sliding Door Leak or Stick
- No sill pan, or a pan with the drainage gaps sealed shut. Pan plus open weep gaps is the design.
- Tucking house wrap into the opening. Loewen says none should enter the rough opening.
- High-expansion foam. Use low-expansion, closed-cell foam, since standard foam can bow the frame.
- Over-raising the rollers. A panel lifted too high loses its weatherstrip seal at the sill.
DIY or Hire a Pro?
A like-for-like replacement into a sound, correctly sized opening is a realistic weekend job for two capable people. Hire out if you are cutting a new opening or changing the header, if the framing is rotted, or if the door is a large multi-panel unit that will be difficult to lift. Cost depends on door size, frame material, whether the opening changes, and your local labor market, so get at least two written quotes rather than trusting a national average. If you want to protect the opening afterwards, see our guides to a sliding glass door security gate, and to boarding up a sliding glass door if the glass is ever broken.
Not sure a slider is the right door? A hinged exterior door is a different job: see installing a steel door in a wood frame, or how to make a wood door if you would rather build one.
Frequently Asked Questions
Can I install a sliding glass door myself?
Yes, if the opening is sound and you have a helper. The guides we read require two people for lifting, and they treat the sill pan, flashing and plumb frame as the parts that cannot be skipped. A new opening or header change is a job for a professional or at least a permit and an engineer.
How long does it take to install a sliding glass door?
The manufacturers we read give no time estimate. As our own planning estimate, allow a full day for a straightforward replacement, and longer if you find rot or have to adjust the opening.
What goes under a sliding glass door?
A sloped, sealed sill pan, often with flashing tape under it. Loewen calls sill pans mandatory in any door installation. The pan is sealed at the corners and sloped to the exterior, with deliberate gaps in the sealant so water can drain out.
What is the rough opening for a sliding glass door?
It is the door size plus clearance set by the manufacturer. Loewen specifies 3/4 to 1 inch larger in width and height, while International Window specifies 1/2 inch. Use the published rough opening in your own unit’s instructions rather than a generic number.
Do I need a permit to install a sliding glass door?
Often yes if you change the opening, add a header or do structural work, and sometimes for a replacement as well. Requirements vary by city and county, so call your local building department before you start. Local code overrides manufacturer instructions.
Should you use low-expansion or regular spray foam around a door frame?
Use low-expansion, closed-cell foam. Loewen specifies low-expansion closed-cell foam that does not absorb moisture. Regular expanding foam can push on the frame and distort it, which makes the panels bind.
Conclusion
Treat the water path as the real job: a level, sealed sill pan, flashing lapped from the bottom up, a plumb and square frame, and low-expansion foam. Then lift the panels with two people, adjust the rollers a little at a time, and check each step against your own door’s instructions. This is general guidance, not engineering advice, and local building code always takes precedence, so confirm permit and header requirements with your building department.
Sponsored / affiliate links. As an Amazon Associate I earn from qualifying purchases. I may earn additional commission from eligible campaigns.