How to Join Two Pieces of Wood: Seamless Techniques
To join two pieces of wood, you can use wood glue and clamps for a strong bond. Alternatively, you can use screws or nails for a secure connection.
Joining two pieces of wood is a fundamental skill for any DIY enthusiast or woodworking hobbyist. Whether you’re building furniture, framing a structure, or working on a smaller project, knowing how to effectively join two pieces of wood together is essential.
There are various methods to achieve this, each with its own advantages and considerations. Understanding the different techniques and choosing the right method for your project can make a significant difference in the strength and durability of the finished product. In this guide, we’ll explore some common and reliable ways to join two pieces of wood, empowering you to tackle your woodworking tasks with confidence and precision.
Introduction To Wood Joinery
The Art And Science Behind Joining Wood
Wood joinery is the method of connecting two or more pieces of wood to create a larger structure or form. It is both an art and a science, requiring precision and a deep understanding of the characteristics of wood. The artistry lies in creating seamless, aesthetically pleasing joints, while the science involves knowledge of the best techniques for maximizing strength and durability.
Tools And Materials Needed For Effective Joining
Effective wood joining requires specific tools and materials to ensure the integrity of the final structure. Basic tools such as saws, chisels, hammers, and clamps are essential for creating precise cuts, shaping, and securing the joints. Additionally, materials such as wood glue, screws, dowels, and biscuits are commonly used to reinforce and strengthen the connections between the pieces of wood.
Preparing The Wood
In order to join two pieces of wood effectively, it is important to prepare the wood properly. This involves selecting the right type of wood and using cutting and sanding techniques to achieve a smooth finish. By following these steps, you can ensure a strong and seamless connection between the two pieces of wood.
Selecting The Right Type Of Wood
When selecting wood for your project, it is crucial to consider the type of joinery you will be using. Different types of wood have varying levels of strength and durability, so choosing the right wood will ensure a long-lasting joint. Some popular choices for joining wood include:
- Hardwood: Known for its strength and durability, hardwoods like oak, walnut, and maple are ideal for joining projects that require sturdy connections.
- Softwood: Softwoods such as pine and cedar are more affordable and easier to work with, making them suitable for less demanding joinery projects.
- Plywood: Plywood is a versatile option that consists of thin layers of wood glued together, providing stability and strength for various joinery applications.
Cutting And Sanding Techniques For A Smooth Finish
Once you have selected the appropriate wood, it is important to prepare the surfaces that will be joined. This involves using cutting and sanding techniques to achieve a smooth finish for a tight and secure connection.
Cutting: When cutting the wood, ensure that the edges are straight and even. This can be achieved by using a table saw, circular saw, or hand saw with a straight edge guide. Take your time and make precise cuts to ensure a clean joint.
Sanding: After cutting the wood, sanding is essential to create a smooth surface. Start with coarse-grit sandpaper to remove any roughness or imperfections, and gradually move to finer-grit sandpaper for a polished finish. Sand in the direction of the wood grain to avoid scratches and maintain a consistent surface.
By selecting the right type of wood and using proper cutting and sanding techniques, you can ensure that the pieces of wood are well-prepared for joining. This will result in a strong and visually appealing connection that enhances the overall quality of your woodworking project.
Basic Joining Techniques
Basic joining techniques are essential skills for woodworking enthusiasts. Whether you’re a novice or an experienced woodworker, knowing how to join two pieces of wood is crucial for creating durable and visually appealing projects. In this guide, we’ll explore two fundamental joining techniques: butt joints and dowel joints.
Butt Joints: Simple Yet Strong
A butt joint is one of the simplest and most common methods of joining two pieces of wood. It involves joining the edges or ends of two boards together. This technique is straightforward and requires minimal tools, making it suitable for beginners. To create a secure butt joint, glue and screws or nails are commonly used to reinforce the connection. However, for a seamless appearance, pocket hole joinery can be employed.
Dowel Joints For Invisible Seams
When a seamless and invisible connection is desired, dowel joints are a preferred choice. This technique involves drilling corresponding holes into the mating surfaces of the two pieces of wood and inserting dowels to create a strong bond. Dowel joints are popular for creating clean and elegant furniture pieces, as they eliminate the need for visible fasteners or hardware. They provide excellent structural support and are relatively simple to execute with the aid of a doweling jig.
Advanced Wood Joining Methods
When it comes to woodworking, there are various methods to join two pieces of wood together. While basic techniques like nails and screws work well for simple projects, advanced wood joining methods offer greater strength, durability, and aesthetics. In this article, we will explore two popular advanced wood joining techniques: Mortise and Tenon and Dovetail Joints.
Mortise And Tenon: The Classic Approach
The Mortise and Tenon joint is a classic wood joining technique that has been used for centuries. It involves creating a slot (mortise) in one piece of wood and a corresponding projection (tenon) on the other piece. This method ensures a strong connection and is commonly used in furniture making and cabinetry.
To create a Mortise and Tenon joint, follow these steps:
- Create a rectangular or square hole (mortise) in one piece of wood.
- Shape a matching projection (tenon) on the end of the other piece of wood.
- Insert the tenon into the mortise, ensuring a snug fit.
- Secure the joint with glue or additional fasteners if needed.
Dovetail Joints For Extra Strength And Aesthetics
Dovetail joints are known for their exceptional strength, durability, and aesthetic appeal. They are commonly used in fine woodworking, such as cabinet making and high-end furniture construction. The distinctive interlocking shape of dovetail joints prevents the pieces from separating under stress, making them ideal for heavy-duty applications.
To create a Dovetail joint, follow these steps:
- Mark out the shape of the dovetail on both pieces of wood.
- Cut the tails on one piece and the pins on the other, ensuring they interlock perfectly.
- Fit the tails into the corresponding pins, creating a secure and visually appealing joint.
- Glue and clamp the joint for added strength.
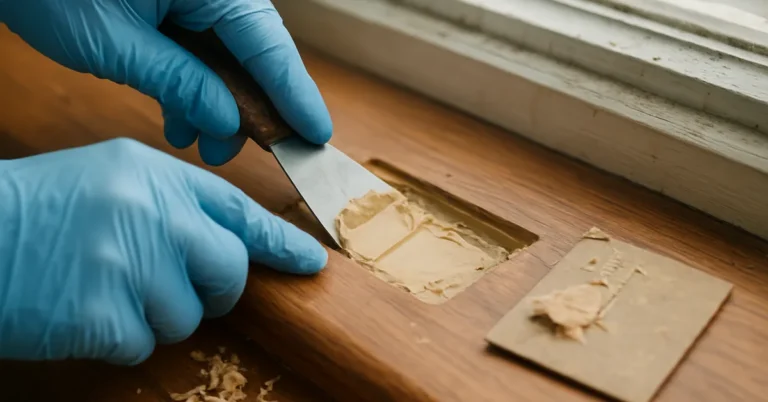
Using Adhesives And Clamps
When it comes to woodworking, joining two pieces of wood is a common task. While there are many ways to do this, using adhesives and clamps is a popular method due to its simplicity and effectiveness. In this article, we will discuss the steps to join two pieces of wood using adhesives and clamps, focusing on the subheading: Using Adhesives and Clamps.
Choosing The Right Glue
Choosing the right glue is crucial for a strong and durable bond. There are many types of glues available, each with their own strengths and weaknesses. Here are some of the most common types of glue used for woodworking:
| Type of Glue | Pros | Cons |
|---|---|---|
| PVA (white glue) | – Easy to use – Dries clear – Water-resistant |
– Not suitable for outdoor use – Long drying time – Not as strong as other types of glue |
| Polyurethane glue | – Waterproof – Bonds well to a variety of surfaces – Expands to fill gaps |
– Can be messy to work with – Requires moisture to cure – Expensive |
| Cyanoacrylate glue (super glue) | – Dries quickly – Bonds well to a variety of surfaces |
– Not suitable for larger joints – Can be brittle |
When choosing a glue, consider the size and type of joint, the materials being joined, and the conditions the joint will be exposed to.
Clamping Strategies For A Secure Bond
Clamping the joint is important to ensure a secure bond. Here are some clamping strategies to consider:
- Use enough clamps to distribute pressure evenly across the joint
- Apply clamps perpendicular to the joint for maximum pressure
- Avoid over-tightening the clamps, as this can squeeze out too much glue and weaken the joint
- Place a scrap piece of wood between the clamp and the workpiece to prevent damage to the wood
Once the glue is applied and the pieces are clamped together, allow the glue to dry according to the manufacturer’s instructions. After the glue has dried, remove the clamps and sand the joint smooth.
Finishing Techniques For Joined Wood
Explore various finishing techniques for joined wood to seamlessly blend two pieces together. From using wood glue and clamps to dowels and biscuits, master the art of creating strong and visually appealing wood joints.
Sanding And Planing For An Even Surface
Before applying finishing touches, sanding and planing are crucial for achieving a smooth and level surface.
Stains And Varnishes For Protection And Beauty
Stains enhance the natural color of wood, while varnishes provide protection against wear and tear.
Troubleshooting Common Joinery Problems
Joining two pieces of wood can sometimes lead to common issues that may affect the quality of the final product. Here are some solutions to troubleshoot these problems:
Fixing Gaps And Misalignments
Fill gaps with wood putty for seamless finish.
Use clamps to realign pieces for precise fit.
Sand down uneven edges for smooth connection.
Dealing With Wood Expansion And Contraction
Allow space for wood movement to prevent warping.
Use moisture-resistant glue to withstand changes.
Add wooden splines to reinforce joints against shifting.
Inspiring Projects To Practice Your Skills
Practice your woodworking skills by joining two pieces of wood with inspiring DIY projects. From simple butt joints to more complex dovetail and mortise-and-tenon joints, these projects will help you master the art of wood joinery.
Simple Furniture Making
Decorative Woodwork Ideas
Looking to hone your woodworking skills? Dive into these inspiring projects.
Frequently Asked Questions
How Can I Join Two Pieces Of Wood Without Screws?
One of the easiest ways to join two pieces of wood without screws is by using wood glue. Apply the glue to the joining surface of the wood, clamp the pieces together, and let the glue dry for a few hours or overnight.
Another option is using dowels or biscuits to align and secure the pieces.
What Is The Best Type Of Wood Joint For Joining Two Pieces Of Wood?
The best type of wood joint for joining two pieces of wood depends on the intended use and strength required. Some popular joints include the butt joint, the lap joint, the mortise and tenon joint, and the dovetail joint. Each joint has its own advantages and disadvantages.
Can I Use Nails Instead Of Screws To Join Two Pieces Of Wood?
Yes, nails can be used to join two pieces of wood. However, nails provide less holding power than screws and may not be suitable for heavy-duty applications. Additionally, the type and size of nails used should be appropriate for the thickness and type of wood being joined.
How Do I Ensure A Strong Wood Joint When Joining Two Pieces Of Wood?
To ensure a strong wood joint when joining two pieces of wood, it is important to choose the right joint for the application, use high-quality wood, and properly prepare the wood surfaces. Applying glue evenly and using clamps to hold the pieces together while the glue dries will also help create a strong joint.
Conclusion
Mastering the art of joining wood is a valuable skill for DIY enthusiasts. By following the right techniques and using the appropriate tools, you can create strong and durable connections. Remember to practice safety measures and take your time to ensure precise and professional results.