How to Join Wood Without a Jointer: Expert Tips & Tricks
Joining wood without a jointer can be achieved using alternative methods such as a table saw or a router. These methods involve carefully cutting and shaping the wood to create strong and seamless joints, allowing you to join wood effectively without the need for a jointer.
By exploring these alternative techniques, you can achieve professional-looking joinery without the expense of a dedicated jointer machine. This article dives into the details of how to join wood without a jointer, providing step-by-step instructions and helpful tips to ensure successful results.
Whether you are a beginner or an experienced woodworker, these methods will enable you to create sturdy and attractive wood joints without the need for a jointer. So, let’s get started!
Essentials Of Woodworking Without A Jointer
When it comes to woodworking, a jointer is an essential tool for creating smooth and flat surfaces on boards. It helps to remove imperfections and square up the edges, making it easier to join pieces of wood together. However, not everyone has access to a jointer. Whether you’re a beginner woodworker starting out or working on a project at home without the necessary tools, it’s still possible to join wood effectively without a jointer. In this article, we will explore alternative methods for joining wood and the importance of a jointer in traditional woodworking.
Importance Of A Jointer In Traditional Woodworking
In traditional woodworking, a jointer is considered a fundamental tool. It allows woodworkers to flatten the face of a board, ensuring that it is level and free from any twists or warps. Additionally, a jointer is crucial for creating square edges, which are necessary for joining pieces of wood together seamlessly. With a jointer, you can achieve precise and accurate results, resulting in professional-looking woodworking projects.
Alternative Methods To Join Wood Effectively
Even without a jointer, there are alternative methods you can use to join wood effectively. These methods may require a bit more effort and attention to detail, but they can still produce excellent results. Here are some alternatives to consider:
1. Hand Planing:
Hand planing involves using a hand plane to flatten the surface and square the edges of the wood. It requires patience and skill, but it is an effective way to achieve similar results to a jointer. Start by marking any areas that need leveling or squaring, then use the hand plane to carefully remove material until the desired flatness and squareness are achieved.
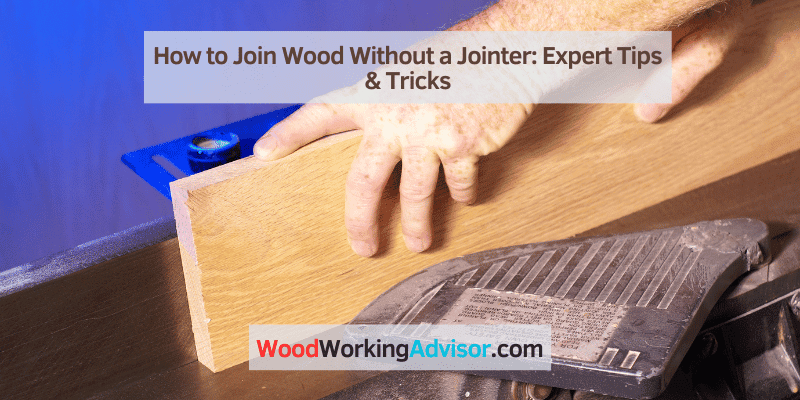
2. Router and Straight Edge:
If you have access to a router, you can utilize it along with a straight edge to achieve straight and square edges. Attach a straight edge to the wood and use a router with a straight bit to follow along the edge, removing any excess material. This method requires precision and control, but it can yield accurate results.
3. Table Saw and Miter Gauge:
A table saw with a miter gauge can be used to create square edges on wood. Set the miter gauge to the desired angle and carefully guide the wood through the saw blade, ensuring that the edge remains in contact with the miter gauge. This method requires caution and accuracy, as the saw blade can be dangerous.
In conclusion, while a jointer is an invaluable tool for woodworking, it is still possible to join wood effectively without one. By utilizing alternative methods such as hand planing, a router with a straight edge, or a table saw with a miter gauge, you can achieve similar results. These methods may require more effort and attention, but with practice, you can become proficient in joining wood without a jointer.

Choosing The Right Wood
When it comes to joining wood without a jointer, one of the key considerations is selecting the right type of wood for your project. The type and quality of wood you choose can greatly impact the success of your joinery efforts. In this section, we will explore the important factors that affect wood selection and provide you with the necessary information to make an informed decision.
Factors Affecting Wood Selection
Choosing the right wood involves considering various factors that can influence the end result of your woodworking project. Here are some key factors to keep in mind:
1. Wood species:
The species of wood plays a significant role in determining the strength, durability, and appearance of your finished piece. Different wood species have different characteristics, such as hardness, grain patterns, and color variation. Popular hardwood species include oak, maple, and walnut, while softwood species include pine and cedar.
2. Wood grade:
Wood is often classified into different grades based on its quality. Grades indicate the presence of defects such as knots, splits, or other imperfections. Selecting high-grade wood ensures a smoother, more visually appealing surface for joining.
3. Wood moisture content:
The moisture content of wood is an essential consideration in joinery. Wood with high moisture content can shrink or warp after joining, compromising the overall integrity of your project. It is important to use wood with a moisture content that is suitable for your specific joinery technique.
Preparing Wood Surfaces For Joining Without A Jointer
Before joining wood without a jointer, it is crucial to properly prepare the wood surfaces to ensure a strong and secure bond. Here are some recommended steps to follow:
- Step 1: Clean the wood surfaces: Remove any dirt, dust, or debris from the wood using a clean cloth or vacuum cleaner. This will enable better adhesion between the wood pieces.
- Step 2: Smooth the surfaces: Use sandpaper or a hand planer to smooth out any rough patches or irregularities on the wood surfaces. This will help create a flush joint and improve the overall finish of your project.
- Step 3: Apply glue: Apply an appropriate woodworking adhesive or wood glue evenly along the joint surfaces. Be sure to follow the manufacturer’s instructions for the specific glue being used.
- Step 4: Clamp the joints: Use clamps to hold the wood pieces together firmly while the glue dries. This will ensure a tight and secure bond between the joined pieces.
- Step 5: Allow drying time: Give the glue sufficient time to dry and cure according to the manufacturer’s recommendations. Avoid removing the clamps too soon, as this can compromise the strength of the joint.
By following these steps and preparing the wood surfaces properly, you can achieve strong and durable joints without the need for a jointer. Remember to choose the right wood and pay attention to the surface preparation to ensure successful joinery.
Crafting Wood Joints Manually
Crafting wood joints manually is a skill that can be mastered without the need for a jointer. By following simple techniques and using basic hand tools, you can create strong and seamless wood connections that will enhance any woodworking project.
Step-by-step instructions and tips on how to join wood without a jointer can be found in this informative article.
When it comes to woodworking, one of the essential skills you need to learn is how to join wood without a jointer. While a jointer is a great tool for achieving perfectly flat and smooth surfaces, not everyone has access to one or can afford to buy one. However, don’t let that stop you from pursuing your woodworking projects!
Crafting wood joints manually is a skill that every woodworker should have in their toolkit. It allows you to create strong and precise connections between pieces of wood, giving your projects the stability and longevity they need.
Hand Planing Techniques
Hand planing is an age-old technique that has been used by woodworkers for centuries. It involves using a hand plane, a tool with a sharp blade, to shave off thin layers of wood from the surface, creating a smooth and even finish. Here are some hand planing techniques you can use to join wood without a jointer:
- Edge Jointing: When joining two boards edge-to-edge, start by marking the joint line and secure the boards firmly. Use a hand plane to remove any unevenness along the edges, working in small, controlled strokes. Continuously check the joint with a straight edge to ensure it remains straight and flat.
- Face Jointing: In cases where the faces of the boards need to be joined, clamp the boards together face-to-face. Use a hand plane to flatten and smooth out the surface, working across the grain. Check for any high or low spots using a straight edge and adjust as needed.
Using Woodworking Tools For Precision
While hand planing is a versatile and effective technique, sometimes you may need to use woodworking tools for more precise joinery. Here are a few tools that can help you achieve accurate wood joints:
| Tool | Application |
|---|---|
| Chisels | Used for cutting and shaping wood to create precise joints such as mortise and tenon, dovetail, and box joints. |
| Saw | Used for making accurate cuts along the grain or across the grain, depending on the type of joint you want to create. |
| Router | Equipped with different bits, routers can be used to create various joint types, including rabbets, dados, and tongue and groove joints. |
By combining hand planing techniques with the appropriate woodworking tools, you can achieve precise and professional-looking wood joints without the need for a jointer. Practice and patience are key to mastering these techniques, so don’t be afraid to experiment and refine your skills. Happy woodworking!
Join Wood Without A Jointer: Expert Tricks
Learn expert tricks on how to join wood without a jointer and achieve seamless results. Discover innovative techniques that eliminate the need for specialized tools and make woodworking accessible to everyone.
When it comes to woodworking, joining pieces of wood together is a crucial step. While a jointer is a popular tool for creating smooth and accurate edges, not everyone has access to one. But fear not! There are expert tricks you can employ to join wood without a jointer. In this article, we will cover two common methods: doweling and biscuit joinery, as well as the implementation of pocket-hole joinery.
Doweling
Doweling is a simple yet effective method of joining two pieces of wood together. It involves creating holes in both pieces and using wooden dowels to connect them. Here’s how you can do it:
- Measure and mark the desired locations on both pieces of wood where the dowels will be inserted.
- Using a drill and a proper-sized drill bit, drill holes at the marked locations. Make sure the holes are deep enough to accommodate the length of the dowels.
- Apply some wood glue to the holes and on the dowels.
- Insert the dowels into one of the pieces of wood and then slide the other piece onto the dowels, ensuring a tight fit.
- Clamp the two pieces together and let the glue dry completely.
Biscuit Joinery
Biscuit joinery is another method that allows you to join wood without a jointer. It involves using small, oval-shaped wooden biscuits to connect two pieces of wood. Here’s how you can utilize this technique:
- Position the two pieces of wood in their desired alignment.
- Use a pencil or a marking knife to mark the locations where the biscuit slots will be created.
- With a biscuit joiner, cut slots into both pieces of wood at the marked locations.
- Apply some wood glue inside the slots and on the biscuits.
- Insert the biscuits into one piece of wood and then join the other piece on top, ensuring the slots align.
- Use clamps to secure the joint and allow the glue to dry completely.
Pocket-hole Joinery
If you’re looking for a fast and efficient way to join wood without a jointer, pocket-hole joinery might be the answer. This method involves creating angled holes, called pocket holes, in one piece of wood and using screws to connect it to another piece. Here’s how you can implement pocket-hole joinery:
- Measure and mark the desired location for the pocket holes on one of the pieces of wood.
- Using a pocket-hole jig and a drill, create pocket holes at the marked locations.
- Apply some wood glue to the mating surfaces of both pieces.
- Align the two pieces of wood and secure them temporarily with clamps.
- Drive screws through the pocket holes, creating a strong and secure joint.
Pocket-hole joinery is not only easy to learn but also provides a sturdy connection that can be hidden from view, making it ideal for projects where aesthetics are important.
By utilizing these expert tricks of doweling, biscuit joinery, and pocket-hole joinery, you can achieve strong and seamless wood joints even without a jointer. Experiment with these methods, and you’ll be amazed at the professional results you can achieve in your woodworking projects.
Precision With Router Tables
Learn how to join wood without a jointer using precision router tables for accurate and professional results every time. Master the art of woodworking without the need for expensive machinery with these easy-to-follow techniques.
Router Table Setup For Edge Joining
When it comes to precision in wood joining, router tables are an indispensable tool for any woodworking enthusiast. These tables offer a versatile and controlled way to achieve seamless joints in your woodworking projects. By using a router table, you can easily achieve precision cuts, accurate measurements, and consistent results.
Setting up your router table for edge joining requires careful attention to detail. Here’s a step-by-step guide to help you get started:
-
- Step 1: Choosing the right router bits
Before you begin, make sure to select the appropriate router bits for edge joining. Straight bits are most commonly used for this technique. These bits have a flat bottom that allows for smooth and even cutting along the edges of the wood.
-
- Step 2: Adjusting the fence
Next, adjust the fence on your router table to ensure it is parallel to the router bit. This will help you achieve accurate and consistent cuts. Use a straightedge or a specialized router table setup gauge to check the alignment of the fence.
-
- Step 3: Fine-tuning the height
Now, it’s time to set the height of the router bit. The bit should be slightly higher than the thickness of your wood to ensure a perfect joint. Use a router table height gauge or a scrap piece of wood to fine-tune the height until you achieve the desired results.
-
- Step 4: Safety precautions
Before you start using your router table, don’t forget to prioritize safety. Wear protective goggles, use a push stick or push block to guide the wood, and make sure your hands are clear of the router bit at all times.
-
- Step 5: Test cuts and adjustments
Once your router table is set up, it’s a good idea to make a few test cuts on scrap wood before proceeding with your actual project. This will give you a chance to fine-tune any adjustments and ensure the perfect edge joint.
Using Straight Bits And Sleds For Seamless Joints
When it comes to achieving seamless joints with a router table, utilizing straight bits and sleds can significantly enhance your woodworking skills. These tools help you achieve clean, precise, and seamless results that will elevate the quality of your finished projects.
| Sled Type | Benefits |
|---|---|
| Straight Edge Sled | A straight edge sled is a simple but effective tool for guiding your wood along the router table. It provides a straight and stable surface for your workpiece, minimizing the risk of wobbling or slipping during the cutting process. This ensures a seamless joint that fits perfectly without any gaps. |
| Miter Sled | A miter sled is ideal for creating angled edge joints, such as for picture frames or moldings. By using a miter sled, you can achieve precise angles and miters that seamlessly connect the corners of your woodworking projects. |
When using straight bits and sleds, remember to always secure your wood firmly to prevent any movement during the cutting process. Additionally, make sure to move the wood steadily and consistently to maintain a uniform cut.
By following these techniques and utilizing the precision of router tables, you can join wood without a jointer and achieve professional-looking results. With practice and attention to detail, you’ll be able to create seamless joints that will impress even the most discerning eye.
Clamping And Gluing Strategies
When it comes to woodworking, one of the key challenges faced by many enthusiasts is joining wood without a jointer. While a jointer is a useful tool for creating smooth and precise edges, it may not always be readily available or affordable for everyone. However, there are effective clamping and gluing strategies that you can employ to achieve sturdy and seamless joints. In this section, we will explore these techniques in detail.
Effective Gluing Techniques For Sturdy Joints
Glue plays a crucial role in creating strong and durable wood joints. To ensure that your joints withstand the test of time, follow these effective gluing techniques:
- Select the right adhesive: Choosing the right type of glue is essential for a successful joint. Consider factors such as the type of wood you are working with and the intended use of the project. Popular options include PVA glue, epoxy, and polyurethane glue.
- Apply even pressure: Before applying the glue, ensure that the surfaces to be joined are clean and free from dust or debris. Apply a thin and even layer of glue to both surfaces, making sure to cover the entire area that will be joined.
- Clamp the joint: Apply clamping pressure to hold the pieces together while the glue dries. This will help create a strong bond between the wood surfaces. Use appropriate clamps, such as bar clamps or pipe clamps, to ensure even pressure distribution along the joint.
- Wipe off excess glue: Once the joint is clamped, use a damp cloth to wipe off any excess glue that may have squeezed out. This will prevent unwanted glue stains and ensure a neat finish.
Various Clamping Methods To Ensure Alignment
Proper alignment is crucial for a successful wood joint. Here are several clamping methods you can use to ensure alignment:
- Band clamps: Band clamps are versatile and can be adjusted to fit various lengths. They are particularly useful for holding irregular or odd-shaped pieces together.
- Parallel clamps: These clamps have a large jaw capacity and can exert strong, even pressure. They are ideal for aligning and clamping long, flat pieces of wood.
- Spring clamps: Spring clamps provide quick and easy clamping for smaller projects or when a temporary hold is needed. They are lightweight and convenient to use.
- Cabinetmaker’s triangles: These triangular-shaped clamps are designed to hold pieces at a precise 90-degree angle, ensuring accurate alignment during glue-up.
By employing these clamping methods, you can ensure that your wood pieces are evenly aligned, resulting in strong and professional-looking joints.
Final Touches For Joined Wood
Discover how to join wood without a jointer by applying the final touches for a seamless finish. Learn techniques and tricks to achieve professional results in your woodworking projects.
Sanding And Finishing Joined Wood Surfaces
Once you’ve successfully joined your wood pieces without a jointer, it’s important to give your project those final touches that will truly make it shine. One crucial step in achieving a polished look is sanding. Sanding not only smooths out any rough edges or imperfections in the wood, but it also helps to create a consistent surface for finishing.
To get started, gather a variety of sandpapers with different grits, ranging from coarse to fine. Begin with the coarsest grit sandpaper and gradually work your way up to the finest grit. This will ensure that you remove any major imperfections first and then gradually smooth out the surface.
When sanding, it’s important to move in the direction of the wood grain to avoid leaving scratches or marks. Use long, even strokes and apply consistent pressure. Focus on the areas where the wood pieces meet, making sure to blend them seamlessly.
Once you’ve completed the sanding process, it’s time to move on to finishing. Finishing not only protects the wood but also enhances its natural beauty. There are various options to choose from when it comes to finishing joined wood surfaces. Some popular choices include stain, paint, varnish, or even oil finishes.
Before applying any finish, make sure to clean off any sanding residue with a tack cloth or a soft brush. Applying an even coat of finish with a brush or a rag, following the manufacturer’s instructions, is key to achieving a professional look. Allow the finish to dry completely before applying any additional coats, if necessary.
Maintaining Joined Wood Over Time
Once your joined wood project is complete, it’s important to properly care for and maintain it to ensure its longevity. Here are some tips to help you keep your joined wood in top shape:
- Regularly dust your joined wood surfaces with a soft cloth or a feather duster. This will help prevent any buildup of dirt or debris that can potentially scratch the wood or diminish its appearance.
- Avoid placing hot or wet items directly on the joined wood surface. Use coasters or trivets to protect the wood from heat or moisture damage.
- Protect your joined wood from direct sunlight, as prolonged exposure can cause fading or discoloration. Consider using curtains, blinds, or UV-filtering films on windows to minimize the effects of sunlight.
- Inspect the joined wood periodically for any signs of wear or damage. If you notice any cracks, scratches, or loose joints, address them promptly to prevent further deterioration.
- Consider applying a fresh coat of finish or polish to your joined wood surfaces every few years to maintain their luster and protect them from daily wear and tear.
By following these simple maintenance tips, you can keep your joined wood looking as beautiful as the day it was finished. Remember, proper care and attention will ensure that your joined wood project stands the test of time.
Frequently Asked Questions On How To Join Wood Without A Jointer
What To Do If You Don’t Have A Jointer?
To compensate for not having a jointer, you can try using other woodworking tools such as a hand plane, table saw, router, or a planer sled. These alternatives can help you achieve smooth and straight edges on your wood projects.
Experiment with different techniques and find what works best for you.
What Can You Use In Place Of A Jointer?
Some alternatives to a jointer include a planer, hand planes, a table saw with a jointing jig, and a router with a straight edge guide. These tools can help achieve smooth and flat surfaces in woodworking projects without needing a dedicated jointer.
What Is The Easiest Way To Joint Wood?
The easiest way to join wood is by using wood glue. Apply the glue to the edges that will be connected, press them together firmly, and leave them to dry. This method provides a strong and durable bond between the pieces of wood.
Do I Really Need A Jointer?
Yes, a jointer is essential for woodworking. It helps create smooth and flat surfaces, enabling precise and accurate cuts. A jointer also ensures tight and seamless joints, improving the overall quality of your projects. Consider investing in a jointer for professional and precise woodworking results.
Conclusion
Mastering the art of joining wood without a jointer is an invaluable skill for any woodworker. By following the practical techniques and using alternative tools discussed in this blog post, you can achieve seamless and sturdy connections in your woodworking projects.
Remember to prioritize accuracy and precision, and with practice, you’ll be able to create impressive and professional-looking joints effortlessly. Happy woodworking!