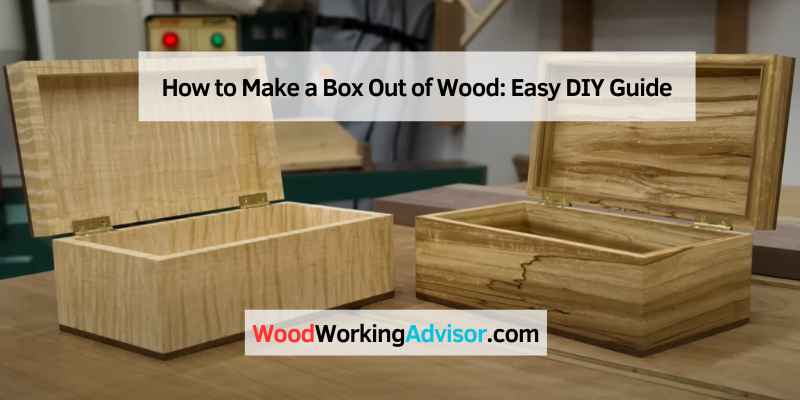
How to Make a Box Out of Wood: Easy DIY Guide
To make a box out of wood, measure and cut wood pieces, assemble using nails or screws. Creating a wooden box can be a fun and rewarding DIY project for woodworking enthusiasts.
Whether you are a beginner or an experienced woodworker, making a box out of wood is a great way to showcase your skills and creativity. In this guide, we will walk you through the steps to create a simple wooden box using basic tools and materials.
By following these instructions, you can craft a beautiful and functional wooden box that can be used for storage, decoration, or as a handmade gift for someone special. Let’s dive into the process of making a box out of wood and unleash your woodworking talents.
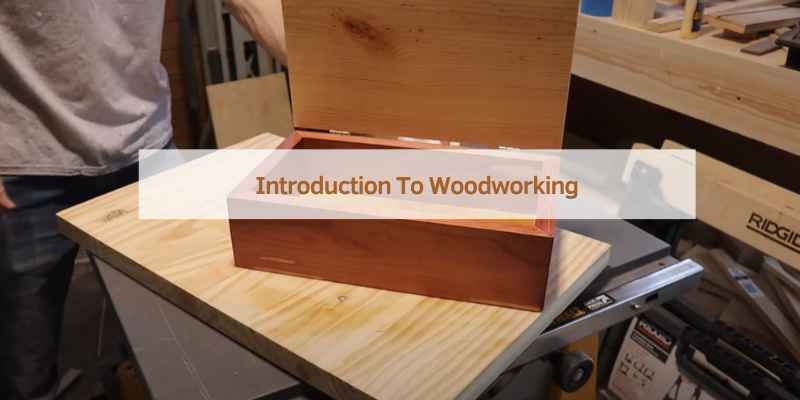
Introduction To Woodworking
Discover the art of woodworking by crafting a wooden box. Learn how to create a beautiful box using wood materials. Master the basics of woodworking techniques to construct your very own custom wooden box.
Welcome to the fascinating world of woodworking! Whether you’re a beginner or an experienced DIY enthusiast, learning how to work with wood can be a rewarding and fulfilling experience. Woodworking allows you to create beautiful and functional items from scratch, using your own hands and creativity. In this blog post, we will guide you through the process of making a box out of wood, starting with the basics of woodworking.
Choosing Your Wood
When it comes to woodworking, choosing the right type of wood is essential. The type of wood you select will determine the strength, durability, and appearance of your final project. Here are some popular choices:
| Type of Wood | Characteristics |
|---|---|
| Oak | Durable and attractive with prominent grain patterns. |
| Pine | Lightweight and affordable, ideal for beginners. |
| Maple | Hardwood with a smooth finish, perfect for furniture making. |
Essential Tools
To get started with woodworking, you’ll need a few essential tools. These tools will help you measure, cut, shape, and assemble your wooden box. Here’s a list of must-have tools:
- A measuring tape or ruler to ensure accurate dimensions.
- A saw, such as a handsaw or circular saw, for cutting the wood.
- A chisel for carving and shaping the wood.
- A drill with different drill bits for making holes.
- A sander or sandpaper to smooth the surfaces.
- A hammer and nails or screws for assembly.
These tools are readily available at most hardware stores and will serve you well throughout your woodworking journey.
Designing Your Box
Making a wooden box involves several key steps, and the first of these is designing the box. This is where you can unleash your creativity and plan out the specifics of your project. From sketching the concept to calculating dimensions, this stage sets the foundation for a successful woodworking endeavor.
Sketching The Concept
Before you start cutting wood, it’s essential to sketch out your box design. Consider the purpose of the box and how it will be used. Draw a rough outline of the box, including the shape, size, and any intricate details you wish to incorporate. This sketch will serve as a visual guide as you move through the construction process.
Calculating Dimensions
Once you have a rough sketch, the next step is to calculate the dimensions of your box. Measure the length, width, and height based on your design. Take into account the thickness of the wood you plan to use, and remember to add extra length for the joinery. These precise measurements will ensure that your box turns out as envisioned.
Preparing The Wood
When making a box out of wood, preparing the wood is the crucial first step to ensure a successful project.
Cutting To Size
- Measure and mark the wood according to desired dimensions.
- Use a circular saw or table saw for accurate cuts.
- Always wear safety goggles and gloves when cutting wood.
Sanding The Surfaces
- Smooth the wood using coarse, medium, and fine-grit sandpaper.
- Round off sharp edges for a professional finish.
- Remove any splinters or rough patches on the wood.
Assembling The Box
Learn how to make a wooden box by following these simple steps. Assemble the pieces carefully and create a sturdy box for all your storage needs.
Assembling the Box is the final step in creating a wooden box that can be used for storage or decoration. In this step, you will bring together the pieces you have cut and prepare them for gluing and nailing. Follow these simple steps to ensure that your box is sturdy and well-constructed.
Gluing the Pieces
To start assembling the box, apply a small amount of wood glue to the edge of one of the box sides. Press the side firmly against the edge of the bottom piece, making sure the pieces are flush. Hold the pieces together for a few seconds to allow the glue to set. Repeat this process for the other three sides of the box. Once all four sides are glued to the bottom, apply glue to the top edges of the sides and carefully place the top piece on the box. Use clamps to hold the box together while the glue dries.
Securing with Nails
In addition to gluing the pieces, you can also use nails to secure the box together. Using a hammer and nails, attach the sides to the bottom by driving the nails through the sides and into the bottom piece. Be sure to space the nails evenly and make sure they are flush with the wood. Once the box sides are secured to the bottom, attach the top piece by driving nails through the sides and into the top piece. Use a nail set to ensure that the nails are below the surface of the wood.
In conclusion, assembling the box is a simple process that requires only a few tools and a little patience. By following these steps for gluing and nailing the pieces together, you can ensure that your wooden box is sturdy and well-constructed. With a little creativity, you can decorate your box and use it for storage or display in your home.
Finishing Touches
After successfully constructing your wooden box, it’s time to add the finishing touches to enhance its appearance and durability. The following steps will guide you through the process of staining or painting your box and applying a sealant to protect it.
Staining Or Painting
When it comes to adding color to your wooden box, you have two primary options: staining or painting. Both methods offer their own unique benefits and can help you achieve the desired aesthetic. Here’s how you can approach each option:
- Staining: Staining allows you to highlight the natural beauty of the wood while adding a touch of color. Follow these steps to stain your wooden box:
- Choose a stain color that complements your box and the overall aesthetic you wish to achieve.
- Prepare the wood surface by sanding it down gently to create a smooth texture.
- Apply the stain evenly using a brush or cloth, following the manufacturer’s instructions.
- Allow the stain to penetrate the wood for the recommended time, typically 5-15 minutes.
- Wipe off any excess stain with a clean cloth, ensuring an even and consistent finish.
- Let the stain dry completely before moving on to the next step.
- Painting: Painting your wooden box provides endless possibilities for customization. Follow these steps to paint your wooden box:
- Choose a paint color that suits your style and preferences.
- Prepare the wood surface by sanding it down gently to create a smooth texture.
- Apply a primer to create a base for the paint and improve its adhesion.
- Once the primer is dry, apply the paint using a brush or roller, ensuring an even coat.
- Allow the paint to dry between coats, following the manufacturer’s instructions.
- Apply additional coats if necessary, until you achieve the desired color and coverage.
- Let the paint dry completely before proceeding to the next step.
Applying A Sealant
To protect your wooden box from moisture, UV rays, and other potential damage, it’s essential to apply a sealant. This step will help preserve the wood’s integrity and prolong the lifespan of your box. Follow these guidelines to apply a sealant:
- Choosing the right sealant: Select a sealant suitable for your project, such as polyurethane, varnish, or lacquer. Consider factors like the level of protection required and the desired finish.
- Preparing the surface: Ensure the wooden box is clean and free of any dust or debris. Sand the surface lightly to smooth out any imperfections.
- Applying the sealant: Using a brush, apply the sealant evenly and in thin coats. Follow the manufacturer’s instructions regarding drying time and the number of coats required.
- Sanding between coats: After each coat has dried, gently sand the surface with fine-grit sandpaper to create a smooth finish. Remove any dust before applying the next coat.
- Final coat and curing: Apply the final coat of sealant and allow it to cure completely. This process typically takes a few days, but it may vary depending on the specific sealant used.
By following these steps and paying attention to the finishing touches, you can transform your wooden box into a visually appealing and long-lasting piece of craftsmanship. Whether you choose to stain or paint, and whatever sealant you opt for, these final steps will add the perfect touch to your wooden box project.
Adding Decorative Elements
Enhancing your wooden box with decorative elements can elevate its aesthetic appeal. Let’s explore two creative ways to add flair to your project.
Incorporating Engravings
Personalize your wooden box by incorporating intricate engravings. This can include names, dates, or meaningful symbols carved into the wood surface.
Attaching Hardware
Enhance the functionality and appearance of your wooden box by attaching stylish hardware. This can include hinges, clasps, handles, or decorative corners.
Maintenance Tips
Learn how to make a box out of wood with these maintenance tips. Begin by measuring and cutting the wood to size. Then, sand and stain the pieces before assembling them with nails or screws. Finally, add any finishing touches like hardware or decorative elements.
A well-crafted wooden box can last for generations with proper care. Whether you’re using it for storage, decoration, or transportation, it’s important to keep it in good condition. Here are some maintenance tips to help you keep your wooden box looking its best.
Cleaning Your Wooden Box
Regular cleaning is essential to keep your wooden box looking fresh and prevent it from developing mold or mildew. Here’s how you can clean your wooden box:
- Use a soft-bristled brush or cloth to remove any dust or debris from the surface of the box.
- Mix a small amount of mild detergent with warm water and use a soft cloth to wipe down the box.
- Rinse the box with a clean, damp cloth and dry it with a towel.
- For stubborn stains or buildup, you can use a mixture of baking soda and water to scrub the affected area.
Dealing With Wear And Tear
Over time, your wooden box may develop scratches, dents, or other signs of wear and tear. Here’s how you can deal with these issues:
- For small scratches or dents, you can use wood filler to fill in the damaged area. Sand the area smooth once the filler has dried.
- If the damage is more severe, you may need to sand down the affected area and refinish the box.
- Regularly oiling your wooden box can help prevent cracking or splitting.
- Store your wooden box in a cool, dry place to prevent warping or cracking.
By following these maintenance tips, you can ensure that your wooden box stays in great condition for years to come.
Creative Ideas For Your Next Project
Are you looking for creative ideas for your next woodworking project? Making a box out of wood is a great place to start! Not only is it a functional item, but it also allows you to experiment with different woods and advanced decorative techniques. In this post, we’ll explore some of these ideas in more detail.
Experimenting With Different Woods
When it comes to making a box out of wood, the type of wood you choose will have a big impact on the final product. Some woods are harder and more durable, while others are softer and more pliable. Here are some options to consider:
| Wood Type | Pros | Cons |
|---|---|---|
| Oak | Durable, attractive grain pattern | Expensive, can be difficult to work with |
| Pine | Inexpensive, easy to work with | Soft, not as durable |
| Cherry | Beautiful reddish-brown color, durable | Expensive, can darken over time |
Experimenting with different woods is a great way to add unique character to your box. Consider mixing and matching woods, or even incorporating reclaimed wood into your design.
Advanced Decorative Techniques
If you want to take your box-making skills to the next level, try incorporating some advanced decorative techniques. Here are a few ideas:
- Wood burning: Use a wood-burning tool to create intricate designs on the surface of your box.
- Inlay: Add a touch of elegance by inlaying different woods or materials into your box.
- Carving: Use carving tools to create intricate designs or patterns in the wood.
These techniques can take some practice to master, but they can really elevate your box-making game.
By experimenting with different woods and advanced decorative techniques, you can create a truly unique and beautiful box. So why not give it a try on your next woodworking project?

Frequently Asked Questions
How Do I Choose The Right Wood For A Box?
To make a sturdy and durable box, select hardwoods like oak, maple, or cherry. Softwoods like pine and cedar are great for a more rustic look.
What Tools Do I Need To Make A Wooden Box?
You will need basic tools such as a saw, hammer, chisel, and measuring tape. Additionally, a wood glue, clamps, and sandpaper are essential for a smooth finish.
What Are The Key Steps In Making A Wooden Box?
Start by measuring and cutting the wood to size. Then, assemble the pieces using wood glue and secure them with clamps. Finally, sand the box for a smooth surface.
How Can I Personalize And Decorate A Wooden Box?
You can personalize a wooden box by adding wood carvings, engravings, or decorative hardware. Staining or painting the box can also add a unique touch to your creation.
Conclusion
Crafting a wooden box is a rewarding and practical DIY project. By following these steps, you can create a personalized and functional item. Whether for storage or gifting, the satisfaction of making something with your own hands is unparalleled. Embrace the process and enjoy the finished product!