
How to Make a Wood Arch Frame: Easy DIY Guide
To make a wood arch frame, cut wood to desired size and shape. Use wood glue to assemble pieces securely.
Crafting a wood arch frame involves precise measuring, cutting, and gluing techniques. Whether for a window, doorway, or decorative element, a well-constructed wood arch frame can add a touch of elegance to any space. This DIY project requires some woodworking skills but can be a rewarding and cost-effective way to enhance the aesthetic appeal of your home.
By following the steps and using the right materials, you can create a custom wood arch frame that fits your specific needs and design preferences.
Introduction To Wood Arch Frames
Discover the art of crafting wood arch frames with simple techniques. Create a sturdy and elegant wood arch frame effortlessly. Master the skill of making wood arch frames for various projects.
Wooden arch frames have become increasingly popular in the world of home decor and DIY projects. With their unique shape and rustic charm, these frames add character and style to any space. Making your own wood arch frame is not only a fun and rewarding project, but it also allows you to customize the size and style to fit your specific needs. In this article, we will cover the materials and tools you will need to create your own wood arch frame, as well as the appeal of this type of frame.
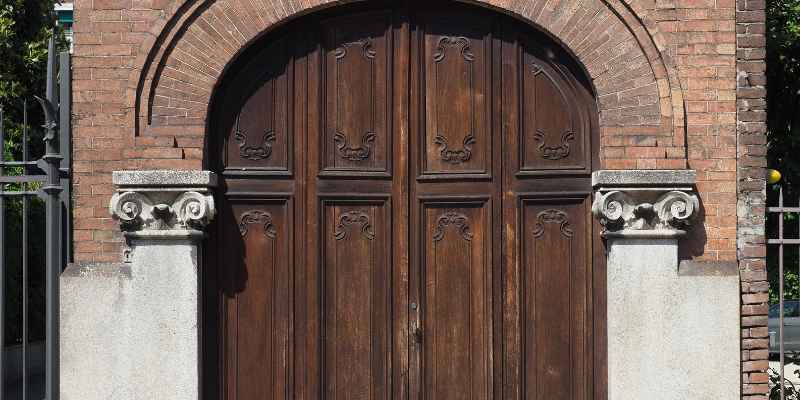
The Appeal Of Arch Frames
Arch frames are a beautiful and unique addition to any room in your home. They offer a soft, subtle curve that adds interest to your wall decor. Whether you choose to hang a family photo or a piece of artwork, an arch frame can provide the perfect backdrop. Arch frames are also a great way to break up the straight lines and sharp angles of traditional rectangular frames. Their curved shape offers a more organic and natural feel to any space.
Materials And Tools Needed
To create your own wood arch frame, you will need the following materials and tools:
| Materials | Tools |
|---|---|
| – 1×6 or 1×8 pine boards | – Miter saw |
| – Wood glue | – Table saw |
| – Wood screws | – Jigsaw |
| – Sandpaper | – Drill |
| – Stain or paint | – Brad nailer (optional) |
Using a miter saw, you will cut the pine boards to the desired length and angle to create the arch shape. A table saw can be used to rip the boards to the desired width. A jigsaw can be used to cut out the arch shape, and a drill can be used to create pilot holes for the wood screws. Sandpaper can be used to smooth the edges and surfaces of the frame. Finally, you can choose to stain or paint the frame to match your decor.
In conclusion, making a wood arch frame is a simple and fun DIY project that can add charm and character to your home. With just a few materials and tools, you can create a beautiful and unique piece of wall decor that will be sure to impress your guests.
Designing Your Arch Frame
Choosing The Right Dimensions
When making a wood arch frame, selecting the right dimensions is crucial. The height and width of the arch will determine its aesthetic appeal and structural integrity. Consider the overall size of the space where the arch will be installed, and ensure that the dimensions complement the surrounding environment. It’s important to prioritize proportions that harmonize with the existing architectural elements.
Sketching Your Design
Sketching your design is an essential step in creating a wood arch frame. Begin by visualizing the desired shape and curvature of the arch. Envision how the frame will interact with the space and enhance its visual appeal. Use a pencil and paper to draw the arch from different angles, ensuring that each view captures the intended design. Consider the structural support and stability while sketching the details of the frame.
Preparing The Wood
When it comes to making a wood arch frame, the first step is preparing the wood. This crucial stage involves selecting the right type of wood and cutting it to the appropriate dimensions. Proper preparation is essential for ensuring the structural integrity and aesthetic appeal of the finished frame.
Selecting The Wood Type
Selecting the right type of wood is crucial for the strength and appearance of the arch frame. Look for straight, knot-free pieces of wood that are resistant to warping. Hardwoods such as oak, maple, or cherry are ideal for their durability, while softwoods like pine or cedar are suitable for a more rustic look. Consider the grain pattern and color of the wood to complement the overall design of the frame.
Cutting The Wood
When cutting the wood, ensure each piece is precisely measured and cut to fit the desired dimensions of the arch frame. Use a miter saw to create clean, accurate cuts at the appropriate angles. It’s essential to maintain consistency in the dimensions of the wood pieces to ensure a uniform and stable frame.
Assembling The Arch Frame
Constructing a wood arch frame involves assembling the pieces methodically for a sturdy structure. Start by placing the base and securing the side pieces, ensuring a snug fit. Then, attach the top piece to complete the arch frame. Sand and finish for a polished look.
Joining The Pieces
To assemble the wood arch frame, the first step is to join the individual pieces together. This ensures that the frame is sturdy and secure. Begin by laying out all the pieces in the desired shape of the arch. Make sure to align the ends and edges properly for a seamless fit.
One way to join the pieces is by using wood glue. Apply a generous amount of glue along the edges of the wood and press them together firmly. Wipe off any excess glue that squeezes out. Allow the glue to dry completely before moving on to the next step.
Another method of joining the pieces is by using screws or nails. Predrill holes into the wood to prevent splitting, then carefully drive in the screws or nails to secure the pieces together. Make sure to countersink the screws or nails so that they are flush with the surface of the wood.
Ensuring Stability
Once the pieces are joined, it is important to ensure that the wood arch frame is stable. This will prevent any wobbling or shifting of the frame when it is in use. There are a few key steps to take to ensure stability.
Firstly, check that all the joints are secure and tight. If there are any loose connections, reinforce them with additional screws or nails. This will provide extra stability and prevent any movement.
Next, consider adding braces or supports to the frame. These can be additional pieces of wood that are attached diagonally across the arch. They help to distribute the weight evenly and provide additional support to the structure.
Additionally, make sure that the base of the frame is level and flat. This can be achieved by adjusting the height of the legs or using shims if needed. A stable base will prevent any rocking or instability.
By following these steps and ensuring stability, you can assemble a wood arch frame that is secure and ready for use. Remember to take your time during the assembly process and double-check all connections for a sturdy and reliable structure.
Adding Support To The Frame
When it comes to making a wood arch frame, adding support to the frame is crucial to ensure its stability and durability. By installing cross supports and reinforcing the structure, you can create a strong and reliable wood arch frame that will stand the test of time.
Installing Cross Supports
To begin adding support to the frame, start by installing cross supports. These supports will help distribute the weight evenly and prevent the frame from sagging over time. Use sturdy and straight pieces of wood for the cross supports to ensure maximum strength.
Reinforcing The Structure
Once the cross supports are in place, it’s important to reinforce the structure to enhance its stability. Consider adding diagonal braces to the frame, as they can effectively strengthen the overall structure and prevent any potential wobbling. Additionally, securing the joints with durable screws or nails will further reinforce the frame.
Finishing Touches
When constructing a wood arch frame, the final steps involve the finishing touches. This is where you bring out the beauty of the wood and ensure the durability of your project.
Sanding The Wood
Start by sanding the wood with fine-grit sandpaper to smooth any rough edges or surfaces.
Applying Finish Or Paint
- Choose a finish or paint that suits your design and protects the wood.
- Apply the finish evenly with a brush or cloth, following the wood grain.
- Allow the finish to dry completely before handling your wood arch frame.
Mounting And Installation
Create a sturdy wood arch frame by following these simple steps: measure and cut the wood pieces, assemble the frame using screws and glue, and secure it in place with brackets or stakes. With proper mounting and installation, you can easily create a beautiful and durable wood arch frame for your project.
Choosing The Right Location
Find a spot with good natural light and minimal distractions.
Consider the arch frame’s size in relation to the space available.
Securing The Frame
Use a level to ensure the frame is straight.
Attach the frame securely to the wall using screws or nails.
Check for stability by gently pushing on the frame.
Ensuring Stability
Apply adhesive pads to prevent scratches on the wall.
Test the frame by hanging a lightweight item before heavy objects.
| Materials Needed | Tools Required |
|---|---|
| Wood arch frame | Level |
| Screws or nails | Screwdriver or hammer |
| Adhesive pads | Tape measure |
Important: Ensure frame is securely mounted before use.
Maintenance And Care
Maintenance and Care are essential for ensuring the longevity of your wood arch frame. Proper upkeep can prevent damage and extend its lifespan.
Routine Cleaning
- Regularly dust the wood arch frame with a soft, dry cloth.
- Use a gentle wood cleaner to remove dirt and stains.
- Avoid harsh chemicals that can damage the wood finish.
Periodic Inspections
- Check for any signs of cracks or warping in the wood.
- Ensure that the frame is securely anchored to the wall.
- Inspect the arch for any loose or missing screws or nails.
Frequently Asked Questions
Q: What Materials Do I Need To Make A Wood Arch Frame?
A: To make a wood arch frame, you will need wood boards, a saw, sandpaper, wood glue, clamps, and a drill.
Q: What Is The Best Type Of Wood To Use For A Wood Arch Frame?
A: The best type of wood to use for a wood arch frame is hardwood, such as oak or cherry. Hardwood is strong, durable, and resistant to warping.
Q: Can I Make A Wood Arch Frame Without A Saw?
A: No, you cannot make a wood arch frame without a saw. A saw is necessary to cut the wood boards into the shape of the arch.
Q: How Do I Shape The Wood Into An Arch For The Frame?
A: To shape the wood into an arch for the frame, you will need to create a template of the desired arch shape, trace the template onto the wood boards, and then use a saw to cut along the traced lines.
Conclusion
To wrap up, creating a wood arch frame is a rewarding and practical project that can elevate the aesthetics of any space. By following the step-by-step instructions outlined in this guide, you can confidently embark on this woodworking endeavor. Remember to choose the right materials, measure accurately, and employ patience and precision throughout the process.
With a little practice, you’ll be able to craft beautiful arch frames that add a touch of elegance to your home or office. Happy woodworking!