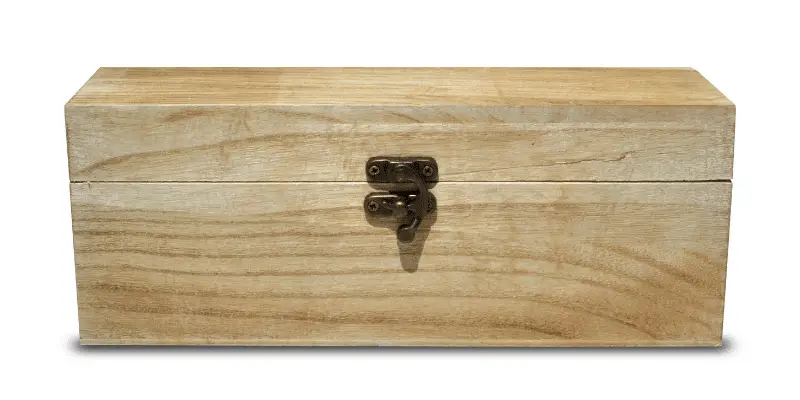
Building new things is a hobby, and when it’s about making a wooden box, this is really fantastic. But what if you don’t know how to make a wooden box? The process of making a wooden box can be a satisfying journey that results in a unique and functional piece that you can enjoy or share with others.
The process of making a wooden box involves careful wood selection, precise measurement, skillful joinery, and a keen eye for detail. Key considerations include wood selection, precise planning, appropriate joinery techniques, and a strong focus on safety.
In this article, I’ll discuss the overall process of making a wooden box and essential tips to make it effortless. Hence, read the whole article to explore more things.
10 Simple Steps To Make A Wooden Box: A Pro Guide
Crafting a wooden box is a gratifying and versatile woodworking project suitable for beginners and experienced woodworkers. This guide presents straightforward steps to create a wooden box.
Step 1: Gather Materials And Tools
Begin by collecting all the necessary materials and tools. Here are some tools and materials for this project.
- wooden boards for the box,
- wood glue,
- screws or nails,
- sandpaper for finishing,
- and a choice of finish such as varnish or paint.
- a saw for cutting the wood,
- a measuring tape,
- Pencil,
- ruler for accurate measurements,
- a hammer or screwdriver for assembly,
- clamps to secure pieces,
- and safety equipment like goggles, ear protection, and a dust mask.
Step 2: Design And Plan
Once you have your materials and tools ready, it’s time to design and plan your wooden box. Decide on the dimensions, considering the length, width, and height. Create a cutting list based on your design, specifying the size of each piece you’ll need. In addition, determine the type of joints you’ll use, whether it’s butt joints, miter joints, or dovetail joints, based on the look and strength you desire for your box.
Step 3: Cut The Wood
With your design and cutting list in hand, measure and mark the wooden pieces according to your plan. Utilize a saw to make precise cuts, ensuring that the pieces fit together as intended. Accuracy in cutting is vital to achieving a well-fitting and sturdy wooden box.
Step 4: Sand The Edges
After cutting the wooden pieces, it’s essential to smooth the edges to prevent splinters and create a professional finish. Use sandpaper to carefully sand the edges of each piece, paying particular attention to sharp corners and rough surfaces, making them safe and aesthetically pleasing.
Step 5: Assemble The Box
To assemble your wooden box, apply a layer of wood glue to the edges of the pieces that need to be joined. Use clamps to hold the pieces together firmly while the glue sets. Secure the joints with screws or nails, making sure they are evenly spaced and not visible on the exterior of the box. Properly aligned joints will provide stability to your box.
Step 6: Allow Glue To Dry
Once the pieces are securely joined, allow the wood glue to dry. Follow the manufacturer’s instructions for the recommended drying time, which is typically several hours or overnight, to ensure a strong bond.
Step 7: Finish The Box
After the glue has dried, sand the entire box to smooth any remaining rough areas, ensuring a consistent and appealing surface. Apply your chosen finish, whether it’s varnish, paint, or a wood stain, according to the manufacturer’s instructions for drying times and recommended coats. A good finish will not only protect your box but also enhance its appearance.
Step 8: Add Hardware (Optional)
Depending on your design and intended use, you may want to attach hardware like hinges for a lid that opens and closes, or a latch or clasp to secure the box, enhancing both functionality and aesthetics.
Step 9: Final Touches
Before considering your project complete, carefully inspect the box for any sharp edges, splinters, or imperfections. If needed, sand and touch up the finish to ensure a polished final product.
Step 10: Enjoy Your Wooden Box
Your wooden box is now ready for use, whether for storage, decoration, or as a thoughtful gift. Embrace the satisfaction of creating a functional and attractive piece of craftsmanship through these step-by-step processes.
Safety Precautions During Building Your Diy Wooden Box:
Safety is of utmost importance when building a DIY wooden box. Here are essential safety precautions to follow during the process:
- Wear Personal Protective Equipment (PPE):
Always wear appropriate PPE, including safety goggles to protect your eyes from dust and debris, hearing protection if you’re using loud machinery, and a dust mask to prevent inhaling harmful particles.
- Work in a Well-Ventilated Area:
If possible, work in a space with good airflow to minimize exposure to dust and fumes. Proper ventilation can also help reduce the risk of breathing in harmful substances.
- Use the Right Tools for the Job:
Ensure that you’re using the correct tools for each task. Improper tool usage can lead to accidents. Keep tools well-maintained and sharp to prevent accidents caused by equipment malfunctions.
- Keep A Clean Workspace:
Maintain a tidy work area by regularly sweeping or vacuuming sawdust and wood shavings. A clutter-free workspace reduces the risk of tripping or falling and can prevent dust buildup.
- Plan Your Cuts And Movements:
Before making any cuts or working with tools, plan your movements and actions to avoid any awkward or unsafe positioning. This includes positioning your body and hands appropriately to prevent accidental contact with moving parts of machinery.
- Secure Workpieces:
Use clamps or other secure methods to hold the workpiece firmly in place. This prevents slipping or unexpected movement while you’re working, reducing the risk of accidents.
- Use Push Sticks And Safety Guards:
When cutting wood on a table saw or other power tools, use push sticks or safety guards provided with the equipment to keep your hands away from the cutting area. Never remove or bypass safety guards.
6 Tips To Make Sustainable Wooden Box Any Size:
Creating a sustainable wooden box involves using environmentally friendly materials, minimizing waste, and ensuring the long-term durability of the box. Here are some tips to make a sustainable wooden box.
Tip 1: Choose Sustainable Wood
When making a sustainable wooden box, start by selecting the right type of wood. Opt for wood that is sourced from sustainable forests, such as those certified by the Forest Stewardship Council (FSC).
These woods are harvested in an environmentally responsible manner, promoting forest regeneration and biodiversity. Avoid using exotic or endangered wood species, and instead, focus on readily available, sustainable options.
Tip 2: Minimize Waste
Plan your wooden box design with efficiency in mind to minimize waste. Calculate your cutting list carefully to maximize the use of the wood material. This approach ensures that you make the most of the wood you have, reducing unnecessary waste. By optimizing the design, you help conserve valuable resources and reduce environmental impact.
Tip 3: Use Eco-friendly Finishes
To make your wooden box sustainable, use eco-friendly finishes for protection and aesthetics. Water-based paints, stains, and varnishes are environmentally friendly alternatives to solvent-based products. They have lower VOC emissions, which means they release fewer harmful chemicals into the environment and indoor air. Choose finishes that have a low environmental impact and are safer for both you and the environment.
Tip 4: Avoid Harmful Adhesives
Select eco-friendly and non-toxic adhesives when assembling your wooden box. Some adhesives can emit harmful fumes or contain formaldehyde, which can harm your health and the environment. Choose adhesives that are specifically designed to be low in harmful emissions and safe for indoor use. This helps reduce the ecological footprint of your project.
Tip 5: Consider Reclaimed Wood
Reclaimed or recycled wood is an excellent choice for a sustainable wooden box. It repurposes wood from old structures or furniture, giving it a new lease on life and reducing the demand for new timber. This practice helps conserve natural resources and reduces the environmental impact associated with new wood production. Also, reclaimed wood often has a unique character and history, adding charm to your project.
Tip 6: Efficient Use Of Resources
Consider designing your wooden box with the goal of efficient resource utilization. This means not only minimizing waste but also designing the box to use the least amount of wood necessary to fulfill its intended function. Efficient designs can reduce the environmental impact of your project.
Related Questions:
What Is The Best Wood To Make A Box Out Of?
The best wood to make a box depends on the intended use and design. For general-purpose and beginner projects, softwoods like pine, cedar, or redwood are excellent choices due to their ease of workability. For more advanced or decorative boxes, hardwoods such as oak, walnut, or cherry provide durability and a beautiful finish.
In addition, exotic woods like mahogany and teak offer unique aesthetics but may be pricier. Ultimately, the choice of wood should align with your project’s requirements and your woodworking skills.

Can You Make A Wooden Box With Plywood?
Plywood is an excellent choice for making a wooden box. It offers stability, strength, and cost-effectiveness. To create a plywood box, follow the standard woodworking steps: gather materials, design cut the plywood to the required dimensions, apply wood glue to edges, secure the pieces with screws or nails, and let the glue dry.
You can then finish the plywood box by sanding, applying a finish, and adding any necessary hardware. Plywood provides a durable and versatile option for crafting various types of wooden boxes, from storage containers to decorative display cases.
What’s The Best Joint For A Wooden Box?
The choice of the best joint for a wooden box depends on the intended use and the desired aesthetics. For simplicity and ease of construction, the butt joint is often a suitable choice, though it may lack the strength of other joints. For increased strength and a cleaner appearance, the dovetail joint is a popular option, known for its durability and visual appeal.
If you seek a compromise between strength and ease of construction, the rabbet joint or the finger joint can be practical choices. The best joint ultimately depends on your project’s requirements and your woodworking skill level.
Can You Make A Wooden Box Without Power Tools?
You can make a wooden box without power tools. Most woodworking tasks can be accomplished with hand tools such as hand saws, chisels, hammers, and planes. While it may require more effort and time, it’s a viable and satisfying approach, especially for those without access to power tools. With patience and precision, you can achieve excellent results by using traditional hand tools, ensuring safety and proper technique throughout the woodworking process.
Conclusion:
Knowing how to make a wooden box any size will give you mental peace and save extra money. Making a wooden box is a craft that combines creativity and practicality. Starting with the right wood and careful planning, the process involves precise measuring, skillful joinery, and safety awareness. The result is a wooden box that reflects your craftsmanship and purpose, whether for storage, decor, or gifting.


2 thoughts on “How To Make A Wooden Box? [Simple Steps To Go]”