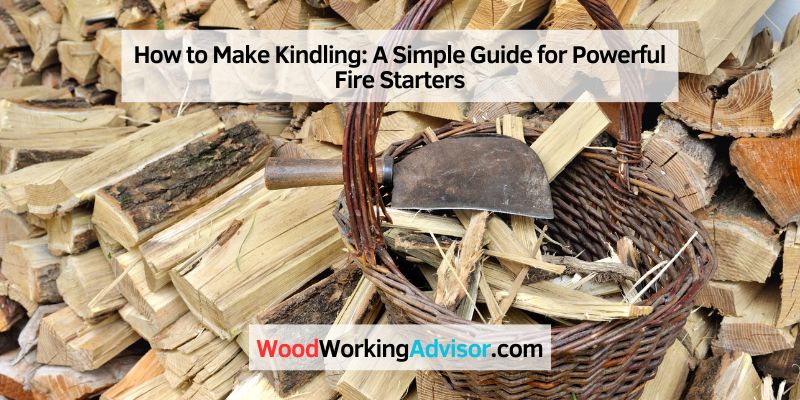
How to Make Kindling: Sizes, Wood Types & Best Tools
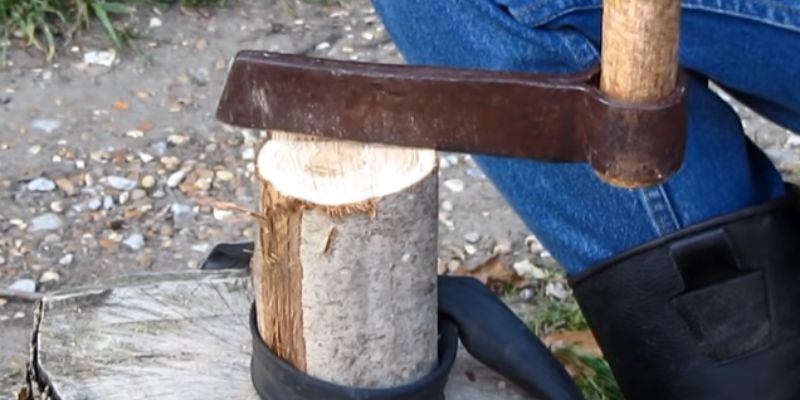
To make kindling, gather dry sticks and arrange them in a stack. Split larger sticks into smaller pieces using a hatchet or axe.
Kindling is an essential element in starting a fire, whether it’s for cooking, heating, or camping purposes. While there are various methods for creating kindling, the most straightforward approach involves gathering dry sticks and breaking them into smaller pieces. We will provide a step-by-step guide on how to make kindling efficiently using a hatchet or axe.
By following these instructions, you can ensure a reliable source of kindling that will ignite easily and help you start your fire quickly. Whether you’re a seasoned outdoor enthusiast or a novice camper, these tips will come in handy when gathering and preparing kindling for your next fireplace or bonfire.
Quick Answer: What Counts as Kindling
Kindling is small, dry wood split thin enough to catch flame quickly — typically 1/4 to 1 inch in diameter and 6 to 16 inches long, with moisture content below 20%. Softwoods like pine, fir, and cedar are preferred because their resin content helps them ignite fast, while thin-split hardwood (oak, birch) burns a bit longer once lit. The single biggest factor in good kindling isn’t species — it’s dryness: wet wood smokes and smolders instead of catching.
- Diameter: 1/4″–1″ (no thicker than your thumb)
- Length: 6″–16″ depending on your fireplace, stove, or fire pit size
- Moisture content: below 20% (EPA-recommended range for firewood generally is 15–20%)
- Best woods: pine, fir, cedar for fast ignition; thin-split oak or birch for a longer-burning secondary layer
Choosing The Right Wood
When it comes to making kindling, selecting the right type of wood can make all the difference. By choosing hardwood or softwood that is properly aged, you can ensure a successful and efficient fire-starting process. Let’s take a closer look at the key factors to consider for choosing the right wood.
Hardwood Vs. Softwood
One important decision to make when selecting wood for making kindling is whether to opt for hardwood or softwood. Hardwood, such as oak or maple, is known for its density and durability, making it burn longer and produce more heat. Softwood, on the other hand, like pine or spruce, is lighter and ignites quickly, making it ideal for starting fires.
While hardwood may seem like the obvious choice, it’s worth noting that softwood kindling can be just as effective, especially if you have a ready supply available. Additionally, softwood tends to be more readily combustible, which can be advantageous when you’re in need of a quick and reliable fire starter.
Properly Aged Wood
Once you’ve decided on the type of wood, proper aging is crucial to ensure optimum fire-starting performance. Wood that is too green or freshly cut contains high levels of moisture, which can make it difficult to ignite and sustain a fire. On the other hand, wood that is overly seasoned or weathered may crumble easily, hindering its effectiveness in the kindling process.
It’s recommended to use wood that has been properly aged for at least six months to a year. This allows the moisture content to decrease to an optimal level, making the wood easier to ignite and burn efficiently. Properly aged wood will have a lower moisture content, resulting in cleaner and more effective flames, making your kindling process quick and hassle-free.
Remember, the key to choosing the right wood for making kindling lies in selecting the appropriate hardwood or softwood and ensuring it is properly aged. By considering these factors, you can be well on your way to creating the perfect kindling for your fires, whether for camping trips or cozy evenings by the fireplace.
Preparing The Work Area
In order to safely and efficiently make kindling, it is important to properly prepare your work area. This involves gathering the necessary tools and supplies and setting up a safe workspace.
Gathering Tools And Supplies
Before you begin making kindling, gather the following tools and supplies:
- A sturdy chopping block or workbench
- A hatchet or small splitting maul
- A saw or chainsaw for cutting larger pieces of wood
- Safety gloves
- Protective eyewear
Setting Up A Safe Work Space
Once you have gathered all the necessary tools and supplies, it’s time to set up a safe workspace. Follow these steps to ensure a safe environment:
- Choose an area that is clear of any debris or obstructions.
- Ensure there is plenty of clearance around your chopping block or workbench.
- If working with a chainsaw, make sure you have enough space to maneuver safely.
- Set up your chopping block or workbench on a stable surface.
- Make sure the area is well-lit, especially if you plan to work at dusk or in the evening.
- Wear appropriate safety gear, including safety gloves and protective eyewear, at all times.
By gathering the necessary tools and supplies and setting up a safe workspace, you are well on your way to successfully making kindling!

Fiskars X7 Small 14″ Hatchet
A compact, one-hand hatchet purpose-built for splitting logs down into kindling-sized pieces.
- Best for: quickly splitting small rounds and branches into kindling
- Why we picked it: low-friction blade coating and shock-absorbing handle make repeated splitting easier on your hands
- Main drawback: too light for splitting full-size firewood rounds — it’s a kindling tool, not a maul
 |
ESTWING Fireside Friend Axe — forged steel one-piece construction, built for years of kindling and small-log splitting | Check Price |
 |
Fiskars 8 lb. Splitting Maul — for splitting full rounds down to kindling-sized starter pieces in one session | Check Price |
As an Amazon Associate, we earn from qualifying purchases.
Using Proper Techniques
When it comes to making kindling, using proper techniques is essential for safety and efficiency. By following the right methods, you can ensure that your kindling is of the highest quality and ready to facilitate smooth and successful fires.
Splitting The Wood
To begin the process of making kindling, it’s crucial to start with the right type of wood. Look for dry, seasoned hardwood such as oak, hickory, or ash, as these woods are easier to split and ignite. Once you have your wood selected, use a sharp axe or maul to split the wood along its natural grain. Make sure to strike the wood at the center to ensure a clean and even split. It’s important to wear safety goggles and gloves while splitting the wood to protect yourself from flying wood chips and potential accidents.
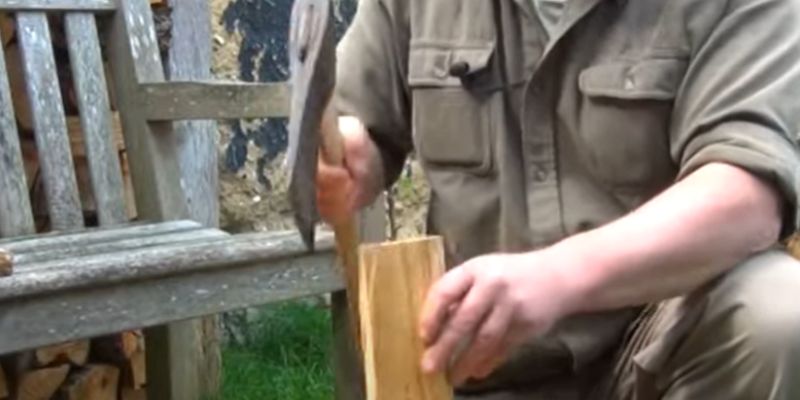
Creating Small, Dry Pieces
After splitting the wood, the next step is to create small, dry pieces that are ideal for kindling. Using a hatchet or a chopping block, carefully further split the larger pieces into smaller sections. Creating pieces of uniform size will ensure even burning and consistent heat. Additionally, arrange the kindling in a loose, airy structure to allow for proper airflow and quicker ignition. Once the kindling is prepared, store it in a dry place to maintain its ideal flammability.
Storing Kindling For Later Use
Knowing how to make kindling is essential for maintaining a steady and reliable source of firewood. But what do you do with all that kindling once you’ve made it? Storing it properly is crucial to ensure that it remains dry and easily accessible whenever you need it. In this post, we’ll discuss two important aspects of storing kindling for later use: utilizing proper containers and keeping the kindling dry and accessible.
Utilizing Proper Containers
When it comes to storing your kindling, choosing the right container is key. Utilizing proper containers not only helps keep the kindling organized but also protects it from moisture and other elements that might compromise its quality. Here are a few container options:
- Metal Bins and Boxes: Metal containers are durable and can withstand harsh weather conditions. Look for bins or boxes with tight-fitting lids to keep the kindling secure and protected.
- Plastic Tubs: Plastic tubs are lightweight and resistant to water. Opt for tubs with snap-on lids or secure handles to make transportation easier.
- Canvas or Mesh Bags: If you prefer a more rustic storage option, consider using canvas or mesh bags. These breathable materials allow for proper airflow, preventing moisture buildup.
Maintaining a dedicated space for your kindling containers is essential for easy access. Keep them in a dry and well-ventilated area away from direct sunlight and extreme temperature fluctuations.
Keeping Kindling Dry And Accessible
Keeping your kindling dry is crucial for its effectiveness as fire-starting material. Moisture can make it difficult to light the kindling and may result in a weaker fire. Here’s how you can keep your kindling dry and accessible:
- Keep it Elevated: Store your containers of kindling off the ground to prevent moisture absorption from the floor or any potential flooding.
- Cover it Up: Always ensure your kindling containers have tightly sealed lids or covers to protect them from rain, snow, and humidity.
- Create Ventilation: If you’re storing your kindling in plastic tubs or similar containers, consider adding small holes or vents to allow for proper airflow, reducing the risk of moisture buildup.
In addition to keeping the kindling dry, it’s important to maintain accessibility. Arrange your containers in a way that allows for easy identification and retrieval. Consider labeling or color-coding them based on the size or type of kindling to enable quick and efficient use.
By utilizing proper containers and implementing techniques to keep your kindling dry and accessible, you’ll be well-prepared to start fires whenever the need arises. Remember, a well-stored kindling collection can make all the difference when it comes to creating a cozy and warm ambiance around your fire pit or fireplace.
Alternative Methods For Kindling
When it comes to starting a fire, kindling is an essential component. While there are traditional methods for creating kindling, alternative methods can offer convenience and resourcefulness. In this section, we will explore some DIY kindling tools and repurposing materials for kindling.
DIY Kindling Tools
If you’re looking for a more hands-on approach, you can create your own DIY kindling tools. These tools can help you efficiently chop and gather kindling for your fire.
- Mallet and Wedge: Using a sturdy mallet and a metal wedge, you can split larger pieces of wood into smaller, more manageable kindling sizes. Simply position the wedge along the grain of the wood and strike it with the mallet to create pieces suitable for starting your fire.
- Kindling Cracker: A kindling cracker is a specialized tool designed specifically for splitting kindling. It features a ring-shaped base with a stationary blade in the center. By placing the wood on the blade and striking it with a mallet, the kindling is split cleanly and efficiently.
- Kindling Splitter Attachment: If you already have a log splitter, you can consider adding a kindling splitter attachment. This attachment allows you to safely and quickly create kindling by positioning the wood on the attachment and activating the log splitter. It is important to follow all safety instructions when using this tool.
Repurposing Materials For Kindling
Instead of purchasing or chopping wood specifically for kindling, you can repurpose materials you already have on hand. Not only does this save money, but it also reduces waste by giving new life to items that would otherwise be discarded.
| Materials | Process |
|---|---|
| Pallet Wood | You can break down old pallets and use the wood pieces as kindling. Ensure that the pallet wood is free from any chemicals or treatments that could be harmful when burned. |
| Newspaper | Twist sheets of newspaper tightly and form them into small bundles. These bundles can be used as kindling to help ignite the larger pieces of wood. |
| Cardboard | Cardboard boxes or packaging can be torn or cut into strips and used as kindling. Make sure to remove any plastic or non-combustible materials before using. |
By utilizing these alternative methods, you can create kindling conveniently and resourcefully. Whether you choose to make your own DIY kindling tools or repurpose materials, each approach offers a unique way to prepare your fire and enjoy the warmth and ambiance it provides.
Frequently Asked Questions On How To Make Kindling
How Do You Make Your Own Kindling?
To make your own kindling, start with small, dry wood pieces. Use a hatchet or kindling splitter to break them into smaller, manageable pieces. Stack the kindling loosely to allow airflow, and ignite the wood with a fire starter or matches.
What Makes For Good Kindling?
Good kindling is dry and lightweight. Twigs, small branches, and pine cones make excellent kindling. It ignites easily and produces a steady flame. Hardwoods like birch and oak are ideal for starting fires as they burn longer and produce more heat.
Avoid wet or chemically treated materials for best results.
What Is The Best Tool For Making Kindling?
The best tool for making kindling is a kindling splitter or an axe. These tools are designed to easily split wood into small, manageable pieces for starting fires. They are efficient and effective, making the process quick and efficient.
What Is The Best Wood To Use For Kindling?
The best wood for kindling is softwood, such as pine, spruce, or fir. It ignites quickly and burns fast, making it ideal for starting fires. Hardwoods like oak or maple can also be used, but softwood is generally preferred for kindling because of its high resin content.
Conclusion
Learning how to do kindling is a valuable skill for anyone who enjoys outdoor activities or wants to be prepared in case of emergencies. By following the simple steps outlined in this post, you can create your own kindling and enhance your outdoor experience.
So, get ready to enjoy cozy campfires and warm outdoor gatherings with your homemade kindling!