How to Make Your Own Wood Flooring From Raw Lumber
To make wood flooring, first select quality lumber, air dry, mill, and install for a cost-effective and rewarding DIY project. Doing it yourself ensures personal satisfaction and cost savings compared to hiring a company for installation.
You can handpick the wood, oversee the drying process, custom mill the planks, and enjoy a beautiful and unique result that adds value to your home. Choosing the right type of wood for your flooring project is crucial, with hardwoods like oak, maple, cherry, walnut, and mahogany being popular choices due to their durability and aesthetic appeal.
Crafting your own hardwood floor allows for customization and a sense of achievement that enhances the overall beauty and value of your space.
Selecting The Right Wood
When it comes to making wood flooring, one of the crucial steps is selecting the right wood. The type of wood you choose can significantly impact the durability, appearance, and eco-friendliness of your flooring. Therefore, it’s essential to consider factors such as the wood species and sustainability options.
Best Wood Species For Flooring
When looking for the best wood species for flooring, oak, maple, and cherry are excellent choices due to their hardness and availability. Additionally, bamboo, although a grass, is also a popular option for its sustainability and durability. Other suitable species include walnut, ash, and mahogany, each offering unique characteristics for a beautiful and sturdy floor.
Sustainability And Eco-friendly Options
It’s important to prioritize sustainability when considering wood flooring. Opting for reclaimed or responsibly sourced wood can significantly reduce the environmental impact of your project. Additionally, bamboo stands out as an eco-friendly choice due to its rapid growth and renewable nature, making it an excellent sustainable option for wood flooring.
Preparing The Wood
Learn how to prepare the wood for making your own wood flooring. From selecting the right type of wood species to milling and installing, this guide will help you save money and achieve a sense of accomplishment in covering your floors.
Create beautiful hardwood floors that are unique to your space.
Hand-selecting Lumber
Hand-selecting lumber is a crucial step in the wood flooring making process. Choose high-quality wood pieces with minimal knots and imperfections. Ensure the boards are straight and free from warping.
Air Drying And Moisture Content
After hand-selecting the lumber, the next step is air drying. Allow the wood to acclimate to the environment to reach ideal moisture content. This helps prevent expansion and contraction post-installation.
Milling The Wood
Create stunning wood flooring with these simple steps: hand-select the lumber, air dry it, mill it, and install it yourself. Not only will you experience a sense of accomplishment, but you’ll also save money by avoiding expensive flooring companies. Choose from a variety of hardwood species, such as oak, maple, cherry, bamboo, walnut, ash, and mahogany, to achieve the perfect look for your space.
Wood flooring adds warmth and character to any space, and making your own wood flooring can be a rewarding and cost-efficient project. One crucial step in this process is milling the wood. Milling involves several subtasks that are essential to create quality wood flooring. In this section, we will explore the steps of rough cutting planks and creating tongue and groove joints, which are integral to the milling process.
Rough Cutting Planks
Rough cutting planks is the first step in milling wood for flooring. It involves cutting the raw timber into individual planks of desired thickness. This can be done using a variety of tools, such as a table saw or a portable sawmill. When rough cutting planks, it is important to consider the desired width and length of the flooring as well as the natural characteristics of the wood, such as knots or grain patterns. This step requires precision and accuracy to ensure uniformity in the size of the planks.
Creating Tongue And Groove
Creating tongue and groove joints is another crucial step in milling wood for flooring. This joint helps to create a seamless and sturdy connection between each plank, ensuring stability and preventing gaps between the boards. The tongue is a protruding strip along one edge of the plank, while the groove is a corresponding groove on the opposite edge.
The tongue of one plank fits perfectly into the groove of the adjacent plank, creating a tight and secure fit. This joint not only adds strength to the flooring but also makes installation easier by allowing the planks to interlock seamlessly.
When creating tongue and groove joints, it is important to ensure accurate measurements, precise cutting, and proper alignment. A router or a specialized tongue and groove cutter can be used to create these joints effectively. Careful attention to detail during this step is crucial to achieve a professional and seamless finish for your wood flooring.
In conclusion, milling the wood for your own wood flooring involves essential steps such as rough cutting planks and creating tongue and groove joints. These tasks require precision, accuracy, and attention to detail to ensure the quality and durability of the finished product. By taking the time to mill the wood properly, you can create beautiful and long-lasting wood flooring that adds value and charm to your space.
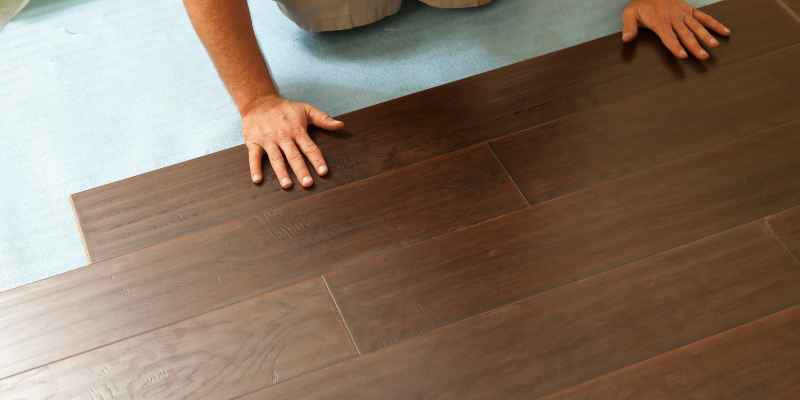
Installation Process
Create your own hardwood floor by hand-selecting lumber, air-drying, milling, and installing – achieving cost savings and a sense of achievement while avoiding high contractor fees. Explore making tongue and groove hardwood floor panels at home for a unique touch.
Enhance your space with oak, maple, cherry, and other hardwood species for durable, stylish flooring.
Layout And Underlayment
Making your own wood flooring is a rewarding and cost-effective way to cover your floors. One of the first steps in the installation process is planning the layout and preparing the underlayment.
Before installing your wood flooring, it’s important to determine the best layout for your space. Consider the direction of the floorboards, the traffic patterns in the room, and any architectural features that may impact the installation. This will help you create a visually pleasing and functional layout for your floor.
Once you’ve decided on the layout, it’s time to prepare the underlayment. Underlayment provides a smooth and stable surface for your wood flooring, reduces noise, and helps to protect against moisture. Depending on your specific needs, you can choose from various types of underlayment, such as foam or cork.
Tips For Seamless Installation
When it comes to installing your wood flooring, a few tips can make the process seamless and successful. Here are some tips to keep in mind:
- Start with properly acclimated wood: Before installation, ensure that your wood flooring has been properly acclimated to the humidity and temperature of the room. This helps prevent issues such as warping or buckling.
- Use a moisture barrier: To protect your wood flooring from moisture, it’s important to use a moisture barrier. This can be a plastic sheet or a vapor barrier underlayment.
- Secure the underlayment: Make sure the underlayment is securely fastened to the subfloor to prevent any movement or shifting of the wood flooring.
- Stagger the seams: When installing the floorboards, stagger the seams to create a more natural and visually appealing look. This also helps to increase the stability of the floor.
- Trim door casings: To ensure a professional-looking installation, carefully trim the door casings to accommodate the height of the wood flooring. This creates a clean and seamless transition between rooms.
By following these tips, you can achieve a seamless and professional-looking installation for your homemade wood flooring.
Adding Finishing Touches
When it comes to making wood flooring, adding finishing touches is a crucial step that enhances the overall look and durability of the floor. Two key aspects of finishing wood flooring are Staining and Sealing and Maintaining Wood Flooring. Let’s dive into how to accomplish these final steps effectively.
Staining And Sealing
Staining wood floors not only adds color but also protects the wood from wear and tear. To stain wood flooring:
- Select a stain color that complements your space
- Prepare the floor by sanding it smoothly
- Apply the stain evenly using a brush
- Allow the stain to dry completely before sealing
Sealing is essential to protect the wood from moisture and stains. Seal your wood flooring by:
- Choosing a high-quality polyurethane sealant
- Applying thin coats, allowing each coat to dry before applying the next
- Buffing the floor after the final coat for a smooth finish
Maintaining Wood Flooring
Maintaining your wood flooring is key to preserving its beauty and longevity. Follow these tips for proper maintenance:
- Regularly sweep or vacuum to remove dirt and debris
- Use a damp mop with a mild cleaner for routine cleaning
- Avoid using harsh chemicals that can damage the finish
- Place felt pads under furniture legs to prevent scratches
By staining and sealing your wood flooring correctly and maintaining it with care, you can enjoy a beautiful and durable floor for years to come.
Challenges And Considerations
Making wood flooring is a challenging task that requires careful consideration. Factors like choosing the right wood species, acclimating the wood, and proper installation techniques are crucial. Ensuring proper moisture levels, precise measurements, and following best practices are key to achieving a durable and visually appealing wood floor.
Precision And Consistency
Ensuring precise measurements and maintaining consistency throughout the process are vital for a successful wood flooring project.
Dealing With Imperfections
Addressing imperfections such as knots and cracks in the wood is crucial for a smooth and visually appealing final result.
Frequently Asked Questions Of How To Make Wood Flooring
Can I Make My Own Wood Flooring?
Yes, you can make your own wood flooring by hand selecting, drying, milling, and installing lumber. It’s a cost-effective way to cover floors and offers a sense of accomplishment. Popular wood options include oak, maple, cherry, bamboo, walnut, ash, and mahogany.
Crafting flooring requires tools like a planer and jointer for precision.
What Type Of Wood Should Be Used For Flooring?
For flooring, choose hardwoods like oak, maple, cherry, bamboo, walnut, ash, or mahogany for durability and availability.
Can You Use Regular Wood For Flooring?
Regular wood can be used for flooring, but it’s important to choose a hardwood species that is readily available and durable, such as oak, maple, or cherry. Making your own wood flooring can be a cost-effective option, as it allows you to hand-select the lumber and save money.
However, it requires precision and the right equipment, like a planer and jointer, to ensure consistent thickness and quality.
How To Manufacture Wood Flooring?
To manufacture wood flooring, follow these steps: 1. Select hardwood species like oak, maple, or cherry. 2. Mill the lumber to desired thickness and width. 3. Use a planer and jointer to ensure consistent thickness. 4. Cut tongue and groove joints for easy installation.
5. Sand the boards to achieve a smooth finish. Remember, precision and attention to detail are key for a professional result.
Conclusion
Crafting your own wood flooring provides a fulfilling sense of achievement, along with cost savings. From selecting quality lumber to milling and installation, the DIY approach offers significant benefits. Avoid steep expenses by taking control of your flooring project and revel in the unique, personal touch it brings.