How to Securely Mount Vise to Workbench: Quick & Easy Guide
To mount a vise to a workbench, position the vise on the desired spot on the bench, secure it with screws or bolts, and tighten them fully for a sturdy hold. Mounting a vise to a workbench is a straightforward process that allows you to create a stable and versatile workstation.
Whether you are a DIY enthusiast or a professional woodworker, having a vise securely attached to your workbench can greatly enhance your efficiency and accuracy in various projects. In this guide, we will walk you through the step-by-step process of mounting a vise to your workbench, ensuring a strong and reliable setup.
By following these simple instructions, you’ll be able to securely attach your vise, providing a solid foundation for your woodworking, metalworking, or other projects. So let’s dive into the details and get your vise firmly mounted to your workbench.
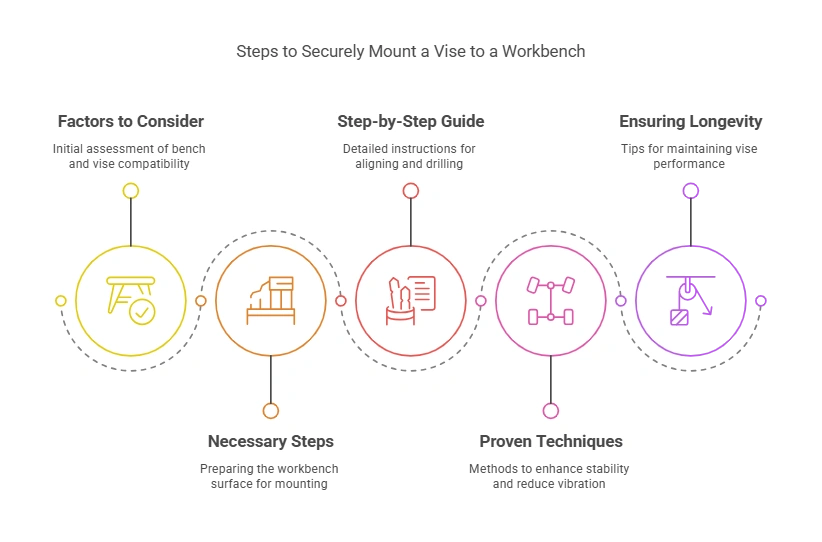
Factors To Consider For A Secure Mounting
The secure mounting of a vise to a workbench involves considering factors such as stability, alignment, and fastening techniques. By ensuring these elements are properly addressed, you can create a safe and functional work area for your projects.
Mounting a vise to a workbench is essential for any woodworking or metalworking enthusiast. A secure mounting ensures stability and safety while working on various projects. Before you begin the installation process, there are a few important factors to consider.
Here, we will discuss the bench material and strength, vise size and weight, and the compatibility between the bench and vise.
Bench Material And Strength
Wood:
The workbench material can significantly impact the stability of the vise. Opt for a solid wood workbench that can withstand the pressure and vibrations generated during heavy-duty tasks. Hardwoods such as maple, beech, or oak are excellent choices due to their durability.
Ensure that the bench has sufficient thickness to ensure stability. A minimum thickness of 2 inches is recommended. This thickness helps to prevent flexing and ensures a strong and secure mounting surface.
Metal:
If you have a metal workbench, ensure it is sturdy enough to handle the weight and pressure exerted on it while operating the vise. Welded steel workbenches are usually suitable for mounting vises due to their strength and stability.
Composite:
Composite workbenches may provide a budget-friendly alternative. However, it is crucial to ensure that the bench material is strong enough to handle the mounting process and the stress caused by heavy-duty work.
Vise Size And Weight
Vise Size:
Consider the size of the vise you intend to mount. Larger vises offer more surface area and clamping capacity, making them ideal for bigger projects. Conversely, smaller vises are suitable for lighter work or if you have limited space.
Measure the width and depth of your workbench to determine the appropriate size of the vise. Ensure that the vise jaws align with the edges of the bench for optimal functionality.
Vise Weight:
The weight of the vise directly affects its stability when mounted to the workbench. Heavier vises generally provide more stability, reducing movement and vibration while working. However, ensure that your workbench can support the weight of the vise without compromising its structural integrity.
Compatibility Between Bench And Vise
Mounting Holes:
Check if the vise and workbench have compatible mounting hole patterns. This ensures a straightforward installation process without the need for modifications or extra drilling.
Measure the distance between the mounting holes on your vise and compare them with the pre-drilled or existing holes on your workbench.
Vice Positioning:
Consider the location of the vise on the workbench. Ideally, it should be positioned in a place that allows for comfortable and efficient access during various tasks. Find a location that minimizes interference with other tools or workbench accessories.
Jaw Alignment:
Make sure the vise jaws align properly with the workbench edges. This alignment guarantees accurate and stable clamping of materials. Ensure that the jaws are level and parallel with the bench surface.
By considering these factors – bench material and strength, vise size and weight, and compatibility between the bench and vise – you can ensure a secure and reliable mounting of your vise to the workbench. Take the time to assess these elements carefully to enhance the overall functionality and efficiency of your workspace.

Credit: www.leevalley.com
Necessary Steps For A Solid Foundation
Learn the necessary steps for mounting a vise to your workbench in order to create a solid foundation. This step-by-step guide will help you achieve a secure and functional setup.
Clearing The Workbench Surface:
Before mounting a vise to your workbench, it is essential to clear the surface of any clutter or debris, providing a clean and organized workspace.
Assessing The Bench’S Structure:
Carefully examine the structure of your workbench to ensure it can safely support the weight and pressure exerted by the vise. Here’s how to assess the bench’s structure:
- Check for any signs of damage or weakness, including cracks, splits, or loose joints.
- Ensure that the workbench is securely anchored to the floor or wall, providing stability during use.
- Evaluate the thickness and quality of the workbench top, as it needs to be strong enough to withstand the pressure and stress applied during vise operations.
- Assess the overall dimensions and layout of the workbench and determine if it provides ample space to accommodate the vise and allow for comfortable maneuverability.
- Consider the height of the workbench, ensuring that it matches your preferred working height to minimize strain and discomfort while operating the vise.
Take note of any existing attachments or fixtures on the workbench that may interfere with the vise installation. These may need to be removed, repositioned, or modified to accommodate the vise securely.
Making Any Necessary Repairs Or Modifications:
If you identify any issues during the assessment of your workbench, it is crucial to address them before proceeding with mounting the vise. Here are the necessary steps to make any repairs or modifications:
- Repair any visible damage, such as cracks or splits, using appropriate tools and materials. Reinforce weakened joints or replace them if necessary.
- Strengthen the workbench top if it is deemed insufficient for vise installation. This may involve adding additional supports or overlaying the top with a more robust material, such as plywood or hardwood.
- Ensure that the workbench is securely anchored to the floor or wall, if not already done, to enhance overall stability.
- If space constraints or obstructions exist, consider rearranging the layout of your workbench or relocating items to create an unobstructed area for vise mounting.
- If the workbench height is not suitable for comfortable operation, adjust it accordingly by modifying the legs or adding a suitable base to achieve an optimal working height.
- Once all necessary repairs or modifications have been completed, ensure that the workbench surface is clean and free from any debris or tools that may interfere with the vise installation.
By following these necessary steps, you can establish a solid foundation for mounting your vise to the workbench. This ensures a secure and stable setup, allowing you to carry out various tasks effectively.

Step-By-Step Guide For A Secure Mount
Looking to mount your vise securely to your workbench? Our step-by-step guide provides you with easy instructions to ensure a stable and reliable attachment. From prepping your workbench to tightening the vise, we’ve got you covered.
Positioning The Vise On The Bench:
- Place the vise on the workbench in the desired location, ensuring there is enough space for the vise to operate efficiently.
- Consider the height of the vise and your own comfort when determining the ideal position.
- To improve stability, position the vise closer to the edge of the workbench rather than in the center.
Aligning The Vise With The Bench’S Surface:
- Use a level to ensure the workbench’s surface is even.
- Adjust the vise until it is parallel to the surface of the workbench.
- Verify the alignment by checking the vise from different angles to ensure it is level and parallel.
Marking And Drilling The Mounting Holes:
- Once the vise is aligned, use a pencil to mark the locations of the mounting holes on the workbench.
- Make sure to mark all the necessary holes for a secure mount.
- For accurate marking, consider using a center punch to create indents at the marked locations before drilling.
Attaching The Vise To The Bench With Appropriate Hardware:
- Select the appropriate hardware, such as lag bolts or wood screws, based on the type of workbench and vise you have.
- Make sure the chosen hardware is sufficient in strength to handle the forces exerted on the vise during use.
- Drill pilot holes at the marked locations, ensuring the hole size matches the diameter of the hardware.
- Attach the vise to the workbench using the chosen hardware, tightening it securely but not excessively.
Remember, a secure mount is crucial for effective use of the vise. Take your time to ensure precise positioning, alignment, and drilling of the mounting holes. By following this step-by-step guide, you’ll be able to securely mount your vise to the workbench, providing you with a sturdy and reliable tool for various projects.
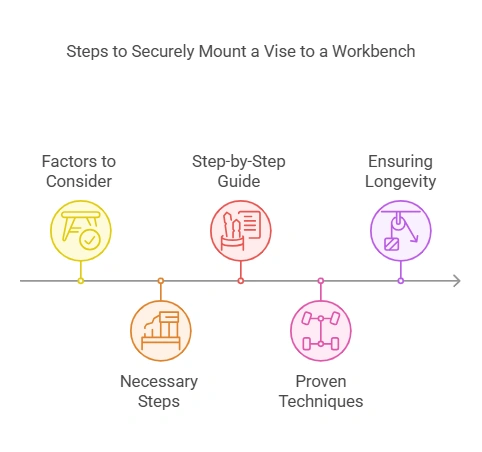
Proven Techniques To Further Secure The Vise
Discover effective techniques to securely mount your vise to your workbench for enhanced stability and reliability. Gain valuable insights on how to ensure a strong and durable attachment, providing a safe and efficient working environment.
If you want to ensure a rock-solid grip and maximize the stability of your vise, there are a few proven techniques you can employ. Reinforcing the bench with additional supports, using anti-vibration pads or dampeners, and adding a wooden mounting plate are all effective methods to enhance the security of your vise.
Reinforcing The Bench With Additional Supports
To reinforce your workbench and provide extra support for your vise, consider the following techniques:
- Install diagonal braces: Attach diagonal braces between the legs of the workbench to prevent wobbling and increase stability.
- Add cross supports: Place additional horizontal supports underneath the workbench to distribute the weight and reinforce the structure.
- Use angle iron brackets: Attach angle iron brackets to the underside of the bench for added strength and rigidity.
By implementing these measures, you’ll significantly enhance the overall stability of your workbench, providing a sturdy foundation for your vise.
Using Anti-Vibration Pads Or Dampeners
Vibration can be a common issue when working with a vise, compromising accuracy and causing discomfort. To mitigate this problem, here are a few techniques using anti-vibration pads or dampeners:
- Anti-vibration pads: Place specially designed anti-vibration pads between the vise and the workbench. These pads absorb and dampen the vibrations, resulting in a steadier and quieter working experience.
- Rubber feet: Attach rubber feet to the bottom of the workbench legs to reduce vibrations transferred from the ground surface.
- Shock-absorbing gel: Apply shock-absorbing gel under the vise mounting points to further minimize vibrations and provide a more stable working environment.
By using these techniques, you’ll significantly reduce the impact of vibrations, ensuring precise and comfortable operation of your vise.
Adding A Wooden Mounting Plate For Extra Stability
Another effective approach to securing your vise is by adding a wooden mounting plate. This provides extra stability and strength to the mounting area. Consider the following steps:
- Choose a suitable wooden plate: Select a sturdy and dense piece of hardwood, such as oak or maple, with a thickness of at least 1 inch.
- Measure and cut: Measure the dimensions of your vise base, and then cut the wooden plate slightly larger to accommodate the vise.
- Drill holes for mounting: Mark and drill corresponding holes in the wooden plate, ensuring they align with the vise mounting holes.
- Attach the wooden plate: Securely fasten the wooden plate to the workbench using appropriate screws or bolts, ensuring a tight and secure fit.
- Mount the vise: Finally, attach the vise to the wooden plate using the provided mounting hardware, following the manufacturer’s instructions.
By adding a wooden mounting plate, you’ll create a solid foundation for your vise, minimizing any potential movement or instability during use.
Implementing these proven techniques to further secure your vise will enhance the overall functionality and stability of your workbench. By reinforcing the bench with additional supports, using anti-vibration pads or dampeners, and adding a wooden mounting plate, you can ensure your vise remains securely mounted, providing you with a reliable and sturdy work surface.
Ensuring Longevity And Optimal Performance
Learn how to mount a vise to your workbench for optimal performance and longevity. Follow these easy steps to securely attach your vise and ensure it stays in place during heavy-duty work.
Regularly inspecting the vise and mounting hardware:
- Check the vise regularly for any signs of damage, such as cracks or dents, that could affect its performance.
- Ensure the mounting hardware and bolts are securely fastened to the workbench, tightening them if necessary.
- Verify that the vise is aligned properly and sits parallel to the workbench surface.
Lubricating moving parts for smooth operation:
- Apply a suitable lubricant to the vise’s moving parts, such as the screw or slide bar, to reduce friction and ensure smooth operation.
- Use a grease or oil specifically designed for tools and machinery, following the manufacturer’s instructions for application.
- Regularly reapply the lubricant to maintain optimal performance.
Addressing any issues or wear promptly:
- If you notice any issues with the vise, such as excessive looseness or difficulty in operation, address them promptly to prevent further damage.
- Inspect for any signs of wear, such as corrosion or rust, and clean the affected areas thoroughly.
- Replace any worn or damaged parts, ensuring that you use compatible replacements recommended by the vise manufacturer.
By regularly inspecting the vise and mounting hardware, lubricating the moving parts for smooth operation, and addressing any issues or wear promptly, you can ensure the longevity and optimal performance of your vise. Proper maintenance not only extends the lifespan of your vise but also ensures that it continues to operate efficiently, providing you with reliable support for your woodworking or metalworking projects.
Achieving A Secure Vise Mount For A Productive Workshop
Mounting a vise to your workbench securely is essential for a productive workshop. Learn how to achieve a secure vise mount with these easy steps.
Mounting a vise securely to your workbench is essential for a productive workshop. A sturdy vise allows you to securely hold your workpieces, providing stability and accuracy during various projects. Whether you’re a professional woodworker or a DIY enthusiast, having a well-mounted vise ensures efficiency and safety.
In this blog post, we will explore the importance of a securely mounted vise, key factors in choosing a workbench and vise, steps for installing the vise correctly, additional techniques for enhancing stability, and maintenance tips for long-lasting performance.
Importance Of A Securely Mounted Vise:
A securely mounted vise is crucial for a productive workshop. Here’s why:
- Stability: A properly mounted vise prevents unnecessary movement, allowing you to work confidently without worrying about the safety of your workpiece.
- Precision: With a secure vise, you can exert the necessary force without the risk of movement or slippage, ensuring accurate and precise work.
- Safety: By securely mounting your vise, you eliminate the potential for accidents caused by workpieces unexpectedly coming loose or shifting during operation.
- Versatility: A well-mounted vise provides stability for a wide range of tasks, from woodworking to metalworking and everything in between.
Key Factors In Choosing A Workbench And Vise:
When choosing a workbench and vise, consider the following factors:
Workbench:
- Material: Opt for a workbench made of sturdy materials like hardwood or steel to provide a solid foundation for your vise.
- Size and weight: Ensure that the workbench is large and heavy enough to support the weight and force applied to the vise.
- Stability: Look for a workbench that has a robust and stable design, minimizing any potential wobbling or vibrations.
Vise:
- Type: Decide on the type of vise that suits your needs, such as a front vise, end vise, or combination vise, based on the tasks you frequently perform.
- Jaw size and opening capacity: Consider the size of the jaws and the maximum opening capacity of the vise to accommodate your workpieces.
- Construction: Look for a vise with sturdy construction and smooth operation, ensuring it can withstand repeated use and provide reliable performance.
Steps For Installing The Vise Correctly:
Follow these steps to install your vise correctly:
- Choose the mounting location: Find a suitable spot on your workbench that allows for comfortable access and provides enough space for your desired work area.
- Mark the locations: Use a measuring tape and pencil to mark the holes on the workbench where the vise will be attached. Ensure proper alignment and clearance for the vise mechanism.
- Drill pilot holes: With a drill bit slightly smaller than the mounting screws, drill pilot holes on the marked locations. This will prevent the workbench from splitting when inserting the screws.
- Attach the vise: Using the provided screws or bolts, attach the vise to the workbench, aligning the holes with the pilot holes. Tighten the screws securely, ensuring a firm grip.
- Test the vise: Apply pressure to the vise jaws and check for any movement or instability. If necessary, readjust and tighten the screws further until the vise feels secure and rigid.
Additional Techniques For Enhancing Stability:
To enhance the stability of your vise mount, consider implementing these techniques:
- Reinforce the workbench: Attach additional supports or braces to the underside of the workbench to strengthen its overall stability and prevent any flexing or wobbling.
- Use a mounting plate: Install a sturdy mounting plate between the vise and the workbench, distributing the force evenly and minimizing stress on the workbench.
- Add wooden jaw liners: Line the jaws of the vise with wooden inserts to provide a softer grip while protecting delicate workpieces from damage.
- Install anti-vibration pads: Place anti-vibration pads beneath the vise or workbench, reducing any excessive movements or vibrations during operation.
Maintenance Tips For Long-Lasting Performance:
To ensure long-lasting performance of your vise, follow these maintenance tips:
- Clean regularly: Remove dust, debris, and any residual materials from the vise jaws and mechanisms, preventing any interference or obstruction.
- Lubricate moving parts: Apply lubricating oil or grease to the vise’s moving parts to maintain smooth operation and prevent rust or corrosion.
- Inspect for wear and damage: Periodically check the vise for any signs of wear, such as loose components or damaged jaws. Replace any worn or damaged parts promptly.
- Tighten mounting screws: Regularly check and tighten the vise’s mounting screws to prevent any loosening over time.
- Store properly: When not in use, protect your vise from dust and moisture by covering it or storing it in a dry area.
By following these tips and techniques, you can achieve a secure vise mount that enhances your workshop productivity while ensuring your safety and the longevity of your vise.

Related Questions Of How To Mount Vise To Workbench
How Do You Attach A Vice To A Bench?
To attach a vice to a bench, follow these steps:
1. Place the vice upside down on the bench.
2. Mark the screw holes with a pencil.
3. Drill pilot holes into the bench at the marked spots.
4. Align the vice with the pilot holes and screw it securely into place.
What Side Of The Workbench Do You Mount A Vise?
Mount the vise on either side of the workbench.
How Do I Fix My Vice To Workbench?
To fix your vice to a workbench, follow these steps:
1. Ensure the workbench is stable and secure.
2. Position the vice on the desired spot on the workbench.
3. Use screws or bolts to attach the vice firmly to the workbench.
4. Test the vice to ensure it is securely and safely fastened.
How Do You Install A Woodworking Vise On A Workbench?
To install a woodworking vise on a workbench:
1. Position the vise on the edge of the workbench where you want it.
2. Mark the mounting holes on the bench and drill pilot holes.
3. Securely attach the vise using screws or bolts.
4. Double-check the installation for stability and adjust as needed. Remember to use the necessary tools and take safety precautions while installing the woodworking vise.
Conclusion
Finally, mounting a vise to your workbench is an essential step in creating a functional and efficient workspace. By following the simple steps outlined in this blog post, you can ensure that your vise is securely attached and ready to handle all your various projects.
Remember to choose the right location, mark and drill the necessary holes, and secure the vise firmly for stability. Additionally, don’t forget to regularly inspect and maintain your vise to ensure it remains in optimal condition. Whether you’re a professional craftsman or a DIY enthusiast, a well-mounted vise will provide you with the support and stability you need to tackle any task.
So go ahead and give it a try – you’ll be amazed at how much more enjoyable and productive your woodworking projects become with the perfect vise setup on your workbench. Happy woodworking!