How to Put Wood on Walls: Step-by-Step Guide
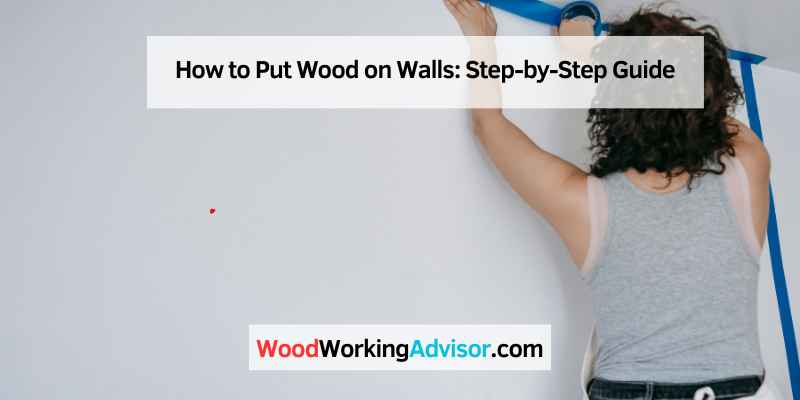
To put wood on walls, first apply adhesive to the board and press it firmly against the wall. If not using adhesive, secure the board with a nail gun on a stud.
Then nail the board into place for a secure fit. A stylish wood accent wall can instantly transform a room, adding warmth and character to the space. Whether you’re a novice or a seasoned DIYer, installing wood on walls is a manageable project that can be completed with the right tools and techniques.
By following a few simple steps, you can create a stunning wood plank wall that enhances the aesthetic appeal of your home. In this guide, we’ll explore the process of putting wood on walls effectively to achieve a professional-looking result.
Gathering Materials
Wood Planks
Wood planks are the key element in creating a stunning wood wall. Make sure to choose high-quality, sturdy planks that align with the desired aesthetic.
Tools Needed
- Miter saw: Essential for cutting precise angles on the wood planks.
- Tape measure: To ensure accurate dimensions for cutting the planks.
- Level: Helps in maintaining a straight alignment while installing.
- Stud finder: Necessary for locating the studs in the wall for secure attachment.
- Safety goggles and gloves: Protect yourself while working with tools.
Preparing The Wood
To put wood on walls, begin by marking the stud locations and cut the boards to size. Apply wood glue or adhesive to secure the boards to the wall, or use nails for a stronger hold. Consider using peel and stick planks for an easy installation without the need for power tools.
Before you begin installing wood on your walls, it is crucial to prepare the wood properly. This step ensures that your wood planks are ready for the installation process and will result in a seamless and long-lasting finish.
Staining The Wood Planks
One way to enhance the aesthetic appeal of your wood walls is by staining the wood planks. Staining not only adds color but also protects the wood from moisture and other forms of damage. Here’s how you can do it:
- Begin by selecting a suitable stain color that complements your interior design.
- Apply a thin layer of stain using a brush or cloth in the direction of the wood grain.
- Allow the stain to penetrate the wood for the recommended amount of time specified by the manufacturer.
- Wipe off any excess stain using a clean cloth.
- Leave the wood planks to dry completely before proceeding with the next step.
Pre-cutting And Sanding
Pre-cutting and sanding the wood planks before installation ensures that they fit perfectly and have a smooth finish. Follow these steps to pre-cut and sand the wood planks:
- Measure the dimensions of the wall and mark the required lengths on the wood planks.
- Use a saw or a miter saw to cut the planks according to the measured lengths.
- Sand the cut edges and surfaces of the wood planks using sandpaper or a sanding block to remove any roughness or splinters.
- Make sure to thoroughly sand each plank, paying attention to the corners and edges.
- Once the planks are cut and sanded, they are ready for installation on the walls.
By following these preparation steps, you can ensure that your wood walls not only look beautiful but also have a professional finish. Stay tuned for the next part of our series, where we will discuss the installation process in detail!
Installing The Wood
Once you have gathered all the necessary materials and prepared the wood planks, it’s time to start the installation process. Follow these steps to ensure a seamless and secure wood installation on your walls.
Drawing A Level Line
Before installing the wood planks, it is crucial to draw a level line on the wall to ensure proper alignment. A level line will guide you throughout the installation process and ensure that the planks are straight and even.
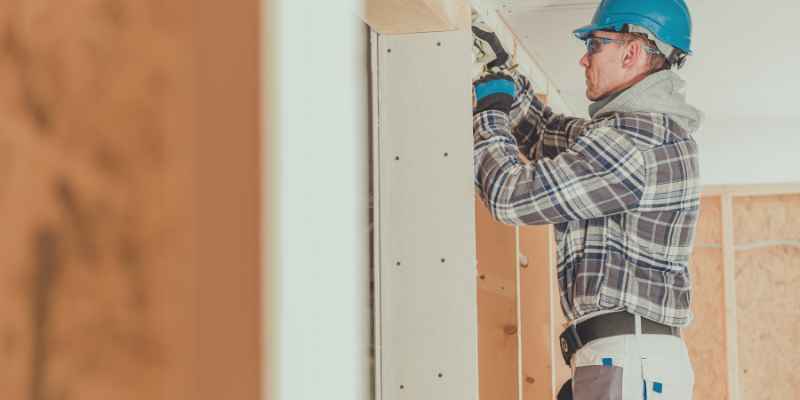
Installing The Boards
To adhere the wood to the walls, there are two methods you can use – adhesive or nails. If using adhesive, apply it evenly on the back of the wood plank, then firmly press it against the wall. Make sure to hold the board tightly in place for a few moments to allow the adhesive to set properly.
If you prefer using nails, start by using a nail gun or hammer to attach the board to the wall. Drive a finishing nail through the middle of each marked stud to ensure a secure hold. Repeat this process for each wood plank, making sure to maintain a consistent pattern and spacing between the boards.
Fixing Warped Boards
Occasionally, you may encounter warped wood boards during the installation process. To fix this issue, you can try using weights or clamps to flatten the boards before installation. If the warp is severe, you may need to replace the board to ensure a smooth and uniform wall appearance.
With the boards securely installed on the wall, you are now one step closer to achieving a stunning wood accent wall. Before finishing up, make sure to inspect the wall for any gaps or uneven areas, and if necessary, make any required adjustments or additional cuts to ensure a seamless and professional look.
Remember, installing wood on walls can be a labor-intensive process, but the end result will be worth it. Follow these steps carefully and take your time to achieve a beautiful and durable wood accent wall that will enhance the aesthetic appeal of any room.
Special Considerations
Marking and Cutting Outlets:
When putting wood on walls, it is crucial to mark and cut outlets accurately to ensure a seamless finish. Utilize a pencil to mark the outlets’ positions on the wood planks before carefully cutting them out using a jigsaw.
Installing Window Trim:
Properly installing window trim can enhance the overall look of the wood walls. Measure and cut the trim pieces to fit around the windows precisely, then secure them in place using a nail gun or finishing nails for a polished appearance.
Attaching Wood to a Wall:
When attaching wood to a wall, consider using construction adhesive for a strong bond. Apply the adhesive to the back of the wood plank and press it firmly against the wall. Alternatively, you can use nails to secure the wood by driving them into the studs for added stability.
Final Touches
Transform any plain wall into a rustic masterpiece with these simple steps for putting wood on walls. Gather materials, stain the wood planks, install and cut the boards, fix any warping, mark and cut outlets for a flawless finish. Add warmth and character to your space effortlessly.
Scribing Lines
Before you start installing wood on your walls, it’s essential to scribe lines to ensure a precise fit. Scribing lines will help you mark the areas where the wood needs to be trimmed or cut to match the uneven edges of your walls. To scribe lines, follow these steps:
- Hold a level against the wall and align it with the top edge of the wood plank.
- Slowly slide the plank horizontally to mark any gaps between the wall and the plank.
- Using a pencil, trace along the level to create a scribed line that follows the contour of your wall.
- Repeat this process for each plank to ensure a seamless and professional-looking installation.
Applying Wood Glue Or Adhesive
One of the best ways to secure wood planks to your walls is by using wood glue or adhesive. This method provides a strong bond and eliminates the need for visible nails. Here’s how you can apply wood glue or adhesive to ensure a secure hold:
- Clean the surface of the wall to remove any dirt, dust, or debris that may prevent proper adhesion.
- Apply a generous amount of wood glue or adhesive onto the back of each plank, covering the entire surface.
- Press the plank firmly against the wall, aligning it with the scribed line.
- Use a roller or a clean cloth to apply firm and even pressure to ensure proper bonding between the wood and the wall.
- Continue this process for each plank, making sure to maintain consistent spacing and alignment.
Avoiding Visible Nails
When installing wood on your walls, you may want to avoid visible nails to achieve a clean and professional finish. Follow these tips to keep the nails hidden:
- Locate the studs in your wall and mark their positions.
- Use a nail gun or hammer to secure the wood planks to the studs.
- Make sure to drive the nails through the inconspicuous areas of the planks, such as the overlapping joints.
- If you need to secure planks where there are no studs, use adhesive along with mounting tape to ensure a secure hold.
- After completing the installation, fill the nail holes with wood filler and sand them for a smooth and seamless appearance.
By scribing lines, applying wood glue or adhesive, and avoiding visible nails, you can achieve a stunning wood accent wall with a professional touch. These final touches will not only enhance the aesthetics of your space but also ensure a long-lasting and secure installation.
Expert Tips And Tricks
When putting wood on walls, it’s crucial to pay attention to the finer details. Here are expert tips and tricks to ensure a successful wood wall installation.
Tips From DIY Enthusiasts
1. Measure twice, cut once to avoid wastage.
2. Use a stud finder to locate wall studs for secure attachment.
3. Pre-stain wood planks before installation for a professional finish.
Difficulties To Look Out For
1. Warped boards may cause alignment issues, flatten before installation.
2. Ensure electrical outlets are properly marked and cut out on wood planks.
3. Adhere the wood firmly to the walls to prevent sagging over time.
When installing wood on walls, apply adhesive evenly for a secure hold without nails. Ensure proper measurements and prepare the wood for a flawless finish.
Frequently Asked Questions For How To Put Wood On Walls
How Do You Attach Wood To A Wall?
To attach wood to a wall, use adhesive to stick the wood firmly to the wall, then secure it with nails on the studs. Alternatively, you can use construction adhesive, wood glue, and mounting tape for a nail-free installation. Position the wood, glue it, and then use the tape to secure it.
How Do You Get Wood To Stay On The Wall?
To attach wood to a wall, use wood glue or adhesive to hold it in place. For added security, use a nail gun to fix the board, ensuring a secure hold on the wall.
How Do You Put Planks On The Wall?
To put planks on the wall, first, apply wood glue or adhesive on the back of the plank and press it firmly against the wall. If needed, use nails or a nail gun to secure the plank on the studs.
You can also use construction adhesive and mounting tape for a nail-free installation.
How Do You Attach Wood To A Wall Without Nails?
To attach wood to a wall without nails, use construction adhesive or wood glue and mounting tape. For a nail-free option, consider peel and stick planks for an easy installation without visible nails or the need for power tools.
Conclusion
For a stunning wood accent wall, ensure proper installation by following these steps diligently. From staining to cutting and attaching, each step contributes to a seamless finish. Remember, precision and patience are key for a flawless outcome that enhances your space beautifully.
Embark on this DIY project confidently!