Do I Need to Sand Before Staining? Grit Guide for Every Wood Type
Yes, you always need to sand before staining — skipping this step causes blotchy, uneven color that no amount of extra stain coats can fix. The exception is pre-finished or factory-sanded surfaces, which may only need a light 220-grit scuff. For bare wood, use 120-grit on softwoods and 150-grit on hardwoods; for previously stained wood, begin at 80-grit to cut through the old finish before refining to 150-grit.
Do You Need to Sand Before Staining?
Yes — sanding before staining is non-negotiable for bare wood. Stain works by penetrating the wood’s open pores and grain fibers. Unsanded wood retains mill glaze, tight surface grain, and micro-roughness that physically blocks stain from soaking in. The result: color sits on the surface unevenly, dries blotchy, and peels faster.
Why sanding matters for stain penetration: Wood cells have tubular pores running along the grain. Sanding opens these pores mechanically. Without sanding, surface oils, mill residue, and compressed grain cells act as a barrier — the stain pools in some areas and skims over others. Even a single pass with 120-grit removes enough surface material to allow uniform absorption.
The grit number determines how deep the stain goes. Coarser grits (80–100) leave wider scratch channels that allow stain to penetrate deeper — useful for dark or rich tones. Finer grits (180+) leave shallower channels that limit penetration, resulting in lighter color and, above 220-grit, a sealed surface that resists stain entirely.
| Scenario | Starting Grit | Final Grit |
|---|---|---|
| Bare softwood (pine, cedar) — see best finish for pine | 100-grit | 120-grit |
| Bare hardwood (oak, maple) | 120-grit | 150-grit |
| Previously stained wood | 80-grit | 150-grit |
| Scuff sanding between coats | — | 220-grit |
| Never exceed for stain prep | — | 180-grit (closes grain) |
Exception — pre-finished surfaces: Factory-sanded boards and pre-finished plywood often need only a 220-grit scuff to remove surface oils and improve adhesion. Do not start with 80 or 100-grit on these — you’ll cut through the veneer. Test a small area: if stain absorbs evenly without heavy sanding, the surface is already open enough.
- Pre-finished factory boards: Already sanded to 180+ grit — a light 220-grit scuff is enough to remove surface oils
- Gel stain over sealed wood: Gel stains sit on the surface rather than penetrating — light scuffing with 220 is sufficient
- Between stain coats (layering): 220-grit scuff only — do not use coarser grits between coats or you’ll cut through the first layer
- Freshly planed hardwood: If the surface is machine-planed to a smooth finish with no mill glaze, a 150-grit scuff pass is enough
How to Sand Stain Finished Wood (Restaining Over Existing Stain)
Re-sanding already-stained wood requires a different approach than sanding bare wood. For the full process after sanding, see our complete guide on how to restain wood. The existing finish creates a hard, sealed layer that resists penetration. Standard 120-grit will skip across this layer without cutting through it, leaving the old stain intact under your new coat.
Step-by-step grit progression for previously stained wood:
- 80-grit — break through the finish: Use a random orbital sander with 80-grit to cut through the old stain and sealer layer. Sand with the grain. You’ll see the old color lifting off as dust. Stop when bare wood is visible across the full surface.
- 120-grit — level the surface: Switch to 120-grit to remove the deep scratch channels left by 80-grit. This is the most important transition — 80-grit scratches show through new stain if not removed at this stage.
- 150-grit — final prep: Finish with 150-grit to achieve a smooth, open-pored surface ready for stain. Do not go finer than 150-grit if you want full stain penetration.
- Tack cloth: Wipe down with a tack cloth to remove all dust. Any remaining sanding dust will seal pores and block the new stain.
When to use chemical stripper instead of sanding: Use a chemical stripper (not sanding) when: (1) the finish is thick polyurethane or lacquer that clogs sandpaper quickly, (2) the piece has carved or routed details where a sander can’t reach, or (3) you’re working with thin veneer where 80-grit risks sanding through. After chemical stripping, you still need a final 150-grit pass to open the grain before staining.
Combined approach for worn or partially stained surfaces: On pieces with mixed areas — some bare wood, some stained — use chemical stripper on the heavily finished sections first, then sand the entire surface with 120 and 150-grit for uniformity. This prevents uneven absorption where old finish patches remain.
Preparing For The Perfect Finish
Before staining wood, it’s crucial to ensure that the surface is properly sanded and prepped. Proper preparation not only enhances the final result but also extends the longevity of the stained wood. By understanding wood grain and types, gathering necessary tools and materials, and adhering to safety measures, you set the stage for a flawless staining process.
Understanding Wood Grain And Types
When sanding wood for staining, it’s crucial to understand the unique characteristics of different wood types and grains. Softwoods like pine and cedar have wider, more open grain — they absorb stain quickly and can look blotchy without a pre-stain conditioner. Hardwoods like oak and maple have tighter grain that requires more sanding pressure and a higher final grit (150) to open properly. Irregular or interlocked grain wood (like elm) should always be sanded with a sanding block rather than a power sander to avoid tear-out.
Gathering The Necessary Tools And Materials
Having the right tools is essential for sanding wood effectively. You’ll need: sandpaper in 80, 100, 120, and 150-grit (plus 220-grit for scuff sanding), a random orbital sander for flat surfaces, a sanding block for edges and details, and a tack cloth for dust removal. A pre-stain wood conditioner is critical for pine, fir, and other porous softwoods that absorb unevenly.
Safety Measures Before Starting
- Wear safety goggles, a dust mask (N95 minimum), and gloves to protect against wood dust and splinters.
- Work in a well-ventilated area — fine sanding dust stays airborne for 30+ minutes and poses a respiratory hazard.
- Keep the work area free of clutter and ensure adequate lighting to spot uneven sanding before applying stain.
How To Sand Wood For Staining — Step By Step
When staining wood, proper sanding is crucial to achieving a smooth, even finish. Sanding opens the wood’s pores, allowing the stain to penetrate more deeply and evenly. Follow the right grit sequence for your wood type — the table above shows the correct starting and final grits for every scenario.
Selecting The Correct Sandpaper Grit
Choosing the right sandpaper grit is the single most important sanding decision. For bare softwood (pine, cedar): start at 100-grit, finish at 120-grit. For bare hardwood (oak, maple): start at 120-grit, finish at 150-grit. Never sand past 180-grit before staining — grits above 180 burnish and close the grain, creating a surface that resists stain penetration and causes uneven absorption. Each subsequent grit should remove the scratches left by the previous one before moving on.
Sanding Along The Grain For Uniformity
Always sand parallel to the wood grain. Cross-grain sanding leaves scratch marks that are invisible dry but show clearly once stain is applied — they appear as dark lines running perpendicular to the grain. On a random orbital sander, move the tool slowly in the grain direction even though the pad orbits. For hand sanding, wrap sandpaper around a flat sanding block for consistent, even pressure.
Steps For Manual Sanding By Hand
When sanding by hand, begin with the coarsest appropriate grit for your scenario (see grit table above) and progress through each finer grit. Use a sanding block for flat surfaces and consistent pressure. Focus on areas with imperfections or uneven surfaces first, then do a full-surface final pass with the finishing grit. Always sand with the grain for an even result.

Tips For Using A Random Orbital Sander Efficiently
A random orbital sander removes material 3–4x faster than hand sanding and leaves fewer visible scratch marks than belt sanders. Start with the correct grit for your wood type, move the sander at roughly 1 inch per second along the grain direction, and apply only light downward pressure — the weight of the sander is sufficient. Change sandpaper discs when cutting slows noticeably; worn discs create heat that glazes the surface and clogs pores.
Best Random Orbital Sander for Wood Staining Prep
Dewalt 5-Inch Random Orbital Sander
The go-to tool for stain prep — variable speed (8,000–12,000 OPM), low vibration, and hook-and-loop pad accepts standard 5-inch sanding discs in 80, 100, 120, and 150-grit. Dust-sealed switch extends tool life when sanding bare wood.
Check Price on AmazonMastering Sanding Techniques
Importance Of Sanding In Stages
Sanding wood in stages is crucial for achieving a smooth and professional finish. Each grit stage removes the scratches left by the previous, coarser grit. Skipping a grit — jumping from 80-grit directly to 150-grit — leaves deep 80-grit scratches that 150-grit can’t fully remove. Those scratches become visible dark lines once stain is applied. Progress through each grit systematically: the extra 5 minutes per stage saves hours of rework.
Dealing With Intricate Wood Details
When working with carved or molded features, use smaller detail sanders, sanding sponges, or folded sandpaper strips to reach recessed areas. A random orbital sander can’t navigate inside routed edges or carvings — power tool contact in tight spaces creates uneven pressure and over-sands high points while missing low ones. Sand intricate details by hand, working the sandpaper in the grain direction even in curved or tight areas.
Avoiding Common Sanding Mistakes
- Sanding too fine before staining: Grits above 180 close the wood grain and prevent stain from penetrating. Stop at 120-grit (softwood) or 150-grit (hardwood).
- Over-sanding in one spot: Excessive sanding creates dips and unevenness that stain highlights. Use uniform pressure and continuous motion across the full surface.
- Skipping grits: Jumping from 80 to 150 leaves deep scratches that 150-grit can’t remove. Progress through each grit in sequence.
- Sanding across the grain: Cross-grain scratches appear as dark lines once stain is applied. Always sand parallel to the wood grain.
Ensuring A Smooth Base
Before staining wood, create a smooth, clean base to achieve a flawless finish. The final steps after sanding are as important as the sanding itself — dust and residue left on the surface will block stain absorption just as effectively as an unsanded surface.
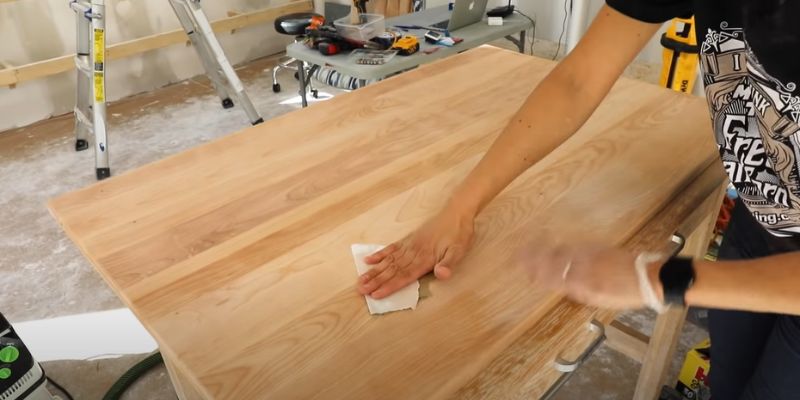
Cleaning The Wood After Sanding
After sanding, use a vacuum to remove the bulk of the dust, then wipe the surface with a clean, lightly damp cloth. Work with the grain to avoid reintroducing cross-grain marks. Allow the wood to dry fully — 15–30 minutes in normal conditions — before staining. Moisture from the damp cloth will raise the wood grain slightly; this is normal and will not affect stain absorption once dry.
Tackling Residual Dust On The Surface
Even after vacuuming and wiping, fine sanding dust remains in the open pores. Use a tack cloth — a sticky, lint-free cloth designed to pick up micro-particles — for the final pass. A single wipe with a tack cloth removes the last layer of dust that a damp cloth misses. Do not use paper towels or regular rags; they leave fibers that contaminate the stain.
Using Wood Conditioner For Even Staining
Applying a pre-stain wood conditioner is essential for porous softwoods — pine, fir, alder, and birch. These woods have alternating soft and hard grain bands that absorb stain at different rates, causing blotchy color. Conditioner pre-fills the soft grain areas to equalize absorption. Apply with a brush or cloth, allow to penetrate for 5–15 minutes (per manufacturer instructions), then wipe off the excess and stain within 2 hours before the conditioner dries and reseals the surface.
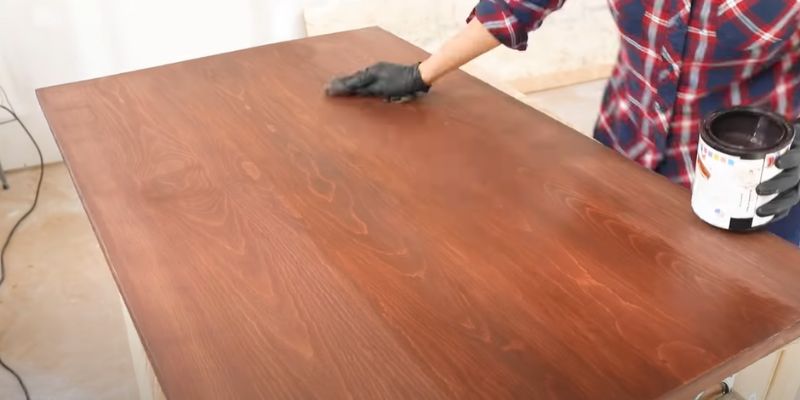
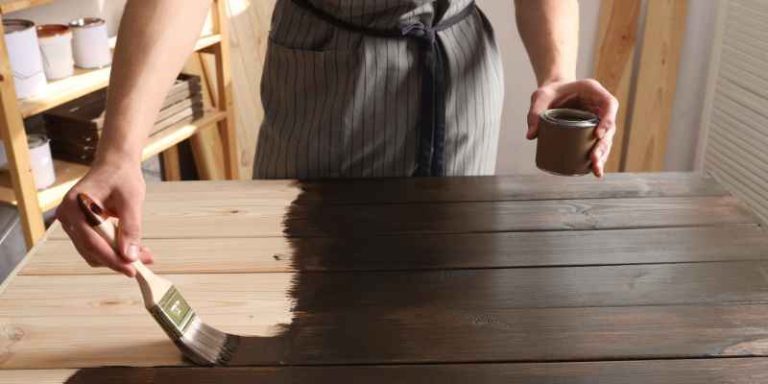
Applying The Stain Flawlessly
After sanding and cleaning, the next step is applying the stain — our full how to stain wood guide covers every technique in depth. A properly sanded surface makes this step straightforward — stain goes on evenly, penetrates uniformly, and dries to a consistent color. The choices you make at this stage determine whether the final result looks professional or amateurish.
Choosing The Right Stain For Your Wood
When selecting a stain, match it to your wood type and desired outcome. Our guide to the best wood stain covers every type in detail. Water-based stains dry faster (2 hours vs. 8 hours for oil-based) and work well on lighter woods like pine and birch. Oil-based stains penetrate more deeply and are better suited to dense hardwoods like walnut and mahogany. Gel stains sit on the surface rather than penetrating — they’re the right choice for woods that resist even absorption, like pine, or for vertical surfaces where liquid stain would run.
Techniques For An Even Stain Application
Apply stain with a high-quality bristle brush or lint-free cloth, working in the direction of the wood grain. On large surfaces, work in manageable sections — 2–3 square feet at a time — to prevent the stain from drying before you can wipe the excess. Wipe off excess stain with a clean cloth within the manufacturer’s recommended time window (typically 5–15 minutes). Leaving excess stain on the surface causes sticky spots and uneven drying.
Adjusting Stain Intensity And Layering
If the initial coat is too light, apply a second coat after the first has dried completely. For pigment-heavy color work, consider dye vs stain — dyes penetrate deeper and layer more predictably — typically 4–8 hours for water-based, 8–24 hours for oil-based. Each additional coat deepens the color by approximately 20–30%. For maximum control over intensity, use a gel stain: apply it, then immediately wipe with varying pressure to control how much pigment stays on the surface. Do not sand between stain coats — sanding breaks the color layer and creates light spots.
Frequently Asked Questions
Do I need to sand before staining?
Yes. Sanding is required before staining bare wood. It opens the wood pores for even stain absorption and removes mill glaze, surface oils, and rough spots that cause blotchy color. The only exception is pre-finished or factory-sanded surfaces, which may only need a 220-grit scuff. Never skip sanding on raw wood.
What grit sandpaper should I use before staining?
Use 120-grit for bare softwood (pine, cedar) and 150-grit for bare hardwood (oak, maple). For previously stained wood, start at 80-grit to break through the finish, then progress to 120 and 150-grit. Never sand past 180-grit before staining — grits above 180 close the wood grain and prevent stain from penetrating.
How do I sand stain finished wood for restaining?
Start with 80-grit to break through the existing stain and finish layer. Progress to 120-grit to remove the 80-grit scratches, then finish with 150-grit to open the grain for the new stain. For thick polyurethane finishes or intricate carved details, use a chemical stripper first, then follow with a 150-grit pass before applying new stain.
How do you clean wood before staining?
After sanding, vacuum the surface, then wipe down with a clean, lightly damp cloth. Allow to dry for 15–30 minutes, then do a final pass with a tack cloth to remove micro-dust from the open pores. Do not use regular rags or paper towels — they leave fibers that contaminate the stain layer.
How long after sanding can I stain?
You can stain as soon as the wood is clean and dry after sanding — typically 15–30 minutes after the final tack cloth wipe. If you used a damp cloth to clean the surface, wait until the wood feels completely dry to the touch. For pre-stain wood conditioner, stain within 2 hours of conditioner application before it reseals the surface.
Can I stain after sanding with 60 grit?
No — 60-grit leaves scratches too deep for stain to fill, and those scratches will appear as dark lines in the finished piece. Always follow 60-grit with 100-grit and then your final grit (120 for softwood, 150 for hardwood) before staining. 60-grit is a material-removal grit for rough shaping, not a stain-prep grit.
When should I use chemical stripper instead of sanding for restaining?
Use chemical stripper when: the existing finish is thick polyurethane or lacquer that clogs sandpaper rapidly; the piece has carved or routed details a sander can’t reach; or you’re working with thin veneer where 80-grit risks sanding through. After chemical stripping, always do a final 150-grit sanding pass to reopen the grain before applying new stain.
Conclusion
Sanding wood for staining is the step that determines whether your final finish looks professional or blotchy. Always sand bare wood to the correct final grit — 120 for softwood, 150 for hardwood — and never exceed 180-grit before staining. For floor-specific prep, see our guide on how much to sand and refinish wood floors. For previously stained wood, start at 80-grit to break through the finish, then progress to 150-grit. Clean thoroughly with a tack cloth, apply pre-stain conditioner on porous softwoods, and stain within the conditioner’s open window. Get the prep right and the stain takes care of itself.