How to Easily Remove Bark from Live Edge: A Step-by-Step Guide
To remove bark from live edge wood, use a chisel or scraper to gently pry it off. In doing so, be cautious not to damage the wood underneath.
Understanding The Importance Of Removing Bark Properly
Properly removing bark from live edge wood is essential to preserve its natural beauty and prevent future issues. Mastering the technique ensures a clean and smooth surface for woodworking projects. Learn the importance of bark removal to enhance the quality and longevity of your creations.
Removing bark from live edge wood is a crucial step in the woodworking process. Not only does it enhance the overall aesthetics of the finished product, but it also serves a functional purpose. In this section, we will delve into the importance of removing bark properly and the potential damages that can arise from leaving it on.
We will also discuss how to prepare for the bark removal process, ensuring that you achieve the desired results.
Bark Removal For Aesthetics And Functionality:
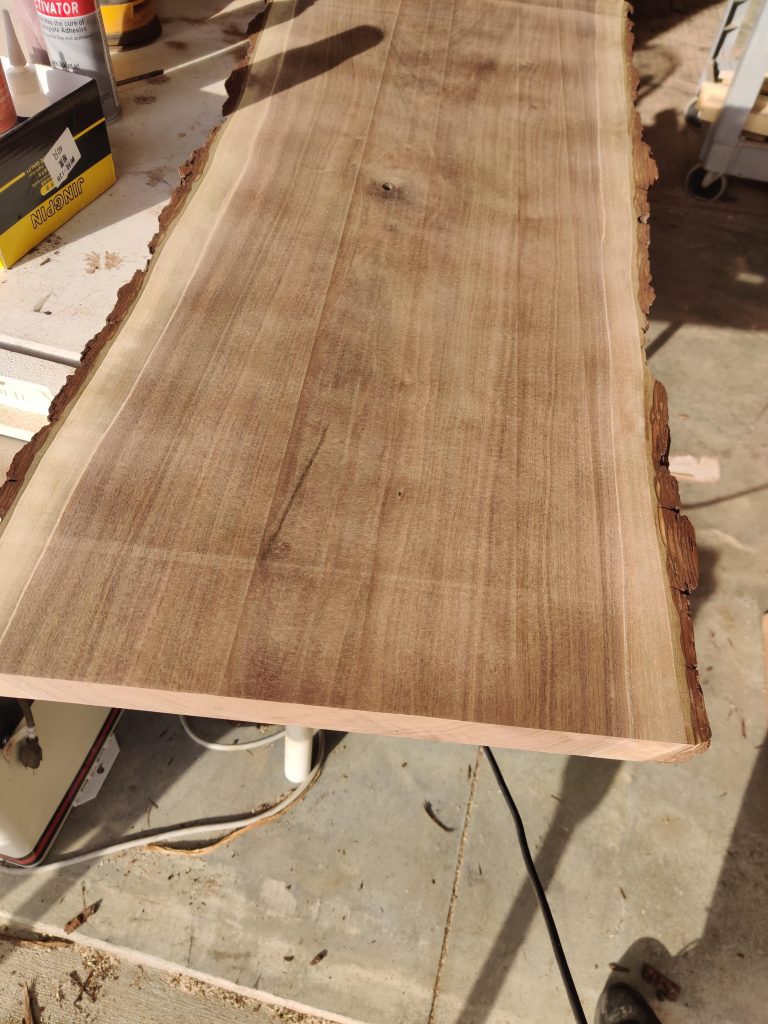
- Enhanced visual appeal: Removing the bark from live edge wood reveals the natural beauty of the grain and creates a clean and polished appearance. This can greatly enhance the overall aesthetics of furniture, tabletops, or any other live edge projects.
- Smooth surface: Bark can be rough and uneven, making it uncomfortable to touch. By eliminating the bark, you create a smooth surface that is pleasant to the touch, adding to the overall appeal and usability of the wood.
Potential Damages Caused By Leaving Bark On:
- Insect infestation: Bark can harbor insects and pests that may eventually cause damage to the wood itself. These pests can burrow into the bark and make their way into the core of the wood, leading to structural weaknesses.
- Decay: Leaving bark on live edge wood can trap moisture against the surface, creating an environment conducive to fungal growth and decay. Over time, this can compromise the strength and integrity of the wood.
- Uneven staining: When applying finishes or stains, leaving bark on can lead to uneven absorption and inconsistent coloring. Removing the bark ensures a uniform surface for staining and finishing, resulting in a more professional-looking end product.
Preparing For The Bark Removal Process:
- Safety first: Before starting the bark removal process, it’s essential to wear appropriate safety gear, including gloves and eye protection. This will prevent any accidents or injuries during the procedure.
- Tools and techniques: Depending on the size and thickness of the bark, different tools and techniques may be required. Common tools used for bark removal include chisels, mallets, and draw knives. Carefully select the appropriate tools and learn the proper techniques to ensure efficient and safe bark removal.
- Protection for the live edge: To prevent any accidental damage during the bark removal, it’s important to protect the live edge. You can use masking tape or painter’s tape to cover the wood surrounding the bark, creating a buffer zone that protects the live edge from accidental scratches or nicks.
- Patience and precision: Removing bark can be a meticulous process that requires patience and precision. Take your time to carefully remove the bark bit by bit, ensuring you don’t injure yourself or damage the wood. Slow and steady wins the race in this case.
By understanding the importance of removing bark properly, you can elevate the quality and durability of your live edge wood projects. Whether it’s for the sake of aesthetics or the overall longevity of the wood, investing time and effort into bark removal is well worth it.
With the right tools, techniques, and a methodical approach, you can achieve a stunning, smooth, and bark-free finish that truly showcases the natural beauty of the wood.
Tools And Materials Needed For Bark Removal
To remove bark from live edge wood, you’ll need a few essential tools and materials. These include a hammer, chisel, scraper, sandpaper, wood glue, and a brush for applying finish. By following the right techniques and using the right tools, you can successfully remove bark and achieve a smooth, clean finish on your piece of live edge wood.
To successfully remove bark from live edge wood, you’ll need to gather a few essential tools and materials. These will help you achieve a clean and professional-looking result while ensuring your safety throughout the process. Here are the necessary items you’ll need:
Selection Of Appropriate Tools:
- Scraper: Using a scraper specifically designed for bark removal will make the task easier. Look for one with a sturdy handle and a sharp edge.
- Chisel: A chisel is useful for carving away stubborn areas of bark. Choose a chisel with a sharp blade and a comfortable grip.
- Mallet: A mallet will come in handy when using the chisel. Opt for a rubber or wooden mallet to avoid damaging the wood.
- Wire brush: A wire brush will help remove any loose bark or debris from the wood surface. Look for a brush with stiff bristles.
- Sandpaper: Sandpaper of various grits will be necessary to smoothen the wood after bark removal. Start with a coarse grit and progressively move to finer grits.
- Safety goggles: Wearing safety goggles is crucial to protect your eyes from flying bark or wood particles.
- Gloves: Choose a pair of gloves that provide a good grip while protecting your hands from sharp edges or splinters.
- Dust mask: To avoid inhaling sawdust or wood particles, wear a dust mask while working on bark removal.
- Workbench or secure workspace: Set up a stable workbench or workspace where you can securely hold the wood piece during the bark removal process.
- Clamp: Use a clamp to secure the wood piece to the workbench, ensuring stability and safety throughout the process.
Gathering The Necessary Materials:
- Live edge wood: Select the desired live edge wood piece that you intend to remove the bark from.
- Drop cloth or tarp: Lay down a drop cloth or tarp to protect your working area from wood chips and debris.
- Vacuum or broom: Have a vacuum or broom ready to clean up the workspace once the bark removal is complete.
- Shop vac: If you have a shop vac, it can be helpful in removing the sawdust and debris more efficiently.
- Container or bag: Prepare a container or bag to collect the removed bark and wood chips for disposal.
- Water and sponge: Keep a bucket of water and a sponge nearby to wipe away any residue or dust from the wood surface.
Remember, safety should always come first. Prioritize using the proper protective equipment and ensure that your work area is well-ventilated.
With the right tools and materials ready, you’re now equipped to embark on the bark removal process.
Step 1: Preparing The Live Edge Surface
To remove bark from a live edge surface, start by carefully preparing the wood. With precise techniques, you can achieve a smooth and clean finish, ready for the next step in your woodworking project.
Before removing the bark from a live edge wood, it is important to properly prepare the surface. This step is crucial in ensuring a successful and smooth removal process. Here are the steps to follow:
Cleaning The Wood Surface:
- Begin by removing any dirt, dust, or debris from the live edge surface.
- Use a soft brush or cloth to gently wipe away loose particles.
- For stubborn dirt, you can use a damp cloth or mild soap and water solution.
- Make sure to thoroughly dry the surface before moving on to the next step.
Filling Any Cracks Or Damages:
- Inspect the live edge surface for any cracks, gaps, or damages.
- If you find any, it is important to fill them before removing the bark.
- Choose an appropriate wood filler that matches the color and texture of the wood.
- Apply the wood filler to the cracks or damages using a putty knife, making sure to fill them completely.
- Allow the filler to dry according to the manufacturer’s instructions and then sand it smooth.
Sanding The Area For Smoothness:
- To achieve a smooth surface, sanding is necessary.
- Use sandpaper with a medium grit to sand the area where the bark will be removed.
- Sand in the direction of the wood grain, applying even pressure.
- Continue sanding until the surface feels smooth to the touch.
- If necessary, switch to a finer grit sandpaper for a smoother finish.
By following these steps, you will have a properly prepared live edge surface ready for the next stage of removing the bark. Remember, taking the time to prepare the surface will result in a more successful and aesthetically pleasing outcome.
Step 2: Applying Moisture To Loosen The Bark
To remove bark from live edge wood, start by applying moisture to loosen the bark. This helps to make the bark easier to peel off and reduces the risk of damaging the wood underneath.
To remove bark from a live edge, you’ll need to apply moisture to make it easier to remove. Here’s how you can do it:
Soaking The Bark With Water
- Start by soaking the bark with water. This will help to loosen it and make it easier to remove.
- Use a spray bottle or hose to evenly wet the bark. Make sure the water reaches all parts of the bark.
- Let the water soak into the bark for a few minutes. This will help to break down the fibers and make the bark more pliable.
Using A Wet Cloth Or Sponge
- Once the bark has been soaked, use a wet cloth or sponge to further loosen it.
- Dampen the cloth or sponge with water and gently rub it on the bark.
- Apply light pressure and move the cloth or sponge in circular motions to help lift the bark away from the wood.
Allowing Time For The Moisture To Penetrate
- After applying moisture, give it some time to penetrate the bark.
- Depending on the thickness and type of bark, it may take anywhere from a couple of hours to a day or two for the moisture to fully penetrate.
- Be patient and check the bark periodically to see if it has become easier to remove.
Remember, the goal is to loosen the bark, not forcefully pull it off. Applying moisture and giving it time to penetrate will make the removal process smoother and help preserve the natural beauty of the live edge.
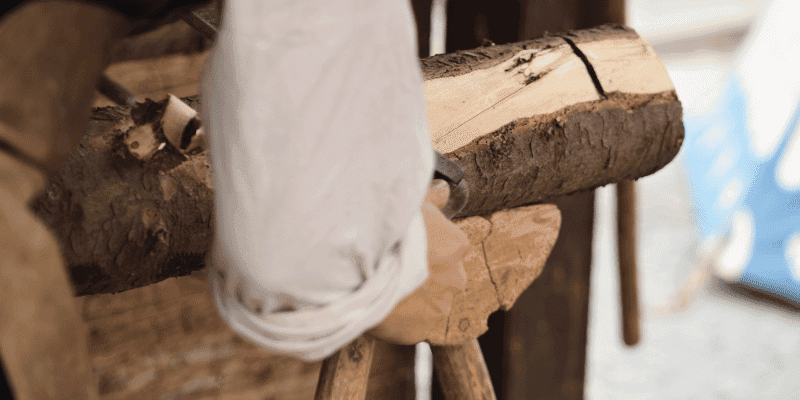
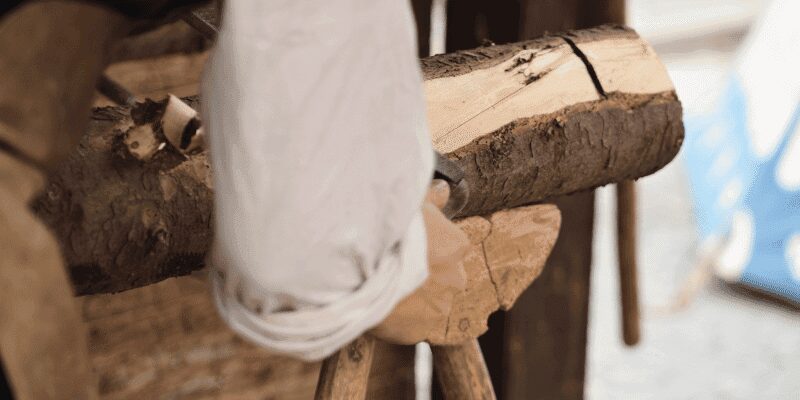
Step 3: Loosening The Bark From The Wood
In Step 3 of removing bark from a live edge, learn how to effectively loosen the bark from the wood. Follow this technique to ensure a clean and smooth surface for your project.
Gentle tapping with a rubber mallet:
- Start by positioning the rubber mallet at the edge of the bark.
- Gently tap the mallet along the circumference of the live edge to loosen the bark.
- Repeat this process along the entire length of the wood, applying light pressure with each tap.
- The purpose of the tapping is to create gradual separation between the bark and the wood.
- Be careful not to hit the wood too hard, as it may cause damage.
Pry the bark using a putty knife:
- Once you have loosened the bark, use a putty knife to carefully pry it away from the wood.
- Insert the putty knife between the bark and the wood, starting at the edge.
- Slowly work your way along the length of the live edge, gently lifting the bark as you go.
- Be cautious not to apply too much force, as you don’t want to damage the wood beneath.
Slowly lifting the bark from the wood surface:
- As you continue to pry the bark with the putty knife, focus on lifting the bark gradually.
- Ensure that you lift the bark from the wood surface slowly and methodically.
- Take your time to avoid any unnecessary tearing or damage.
- Move along the length of the live edge, ensuring that each section of bark is lifted properly.
- Pay attention to any stubborn areas and work on them patiently, ensuring a smooth removal process.
Remember, always take your time and handle the removal process with care to preserve the integrity of the wood.
Step 4: Removing Stubborn Bark Residue
To effectively remove stubborn bark residue from live edge wood, carefully scrape off any remaining pieces using a sharp knife or chisel. Gently sand the surface to achieve a smooth finish.
Scraping Away Remaining Bark Using A Scraper:
- After using a hammer and chisel to remove the majority of the bark, there may still be stubborn residue left on the live edge surface. In this step, we will be using a scraper to get rid of any remaining bits of bark.
- Hold the scraper firmly in your hand and position it at a slight angle against the wood surface. Apply pressure and start scraping off the residual bark. Move the scraper along the grain of the wood, working in small sections to ensure thorough removal.
- Be cautious not to dig too deep into the wood while scraping. The goal is to remove the bark without causing any damage or gouging the surface. Take your time and use controlled, even strokes.
- Periodically check the scraper’s edge for buildup and clean it off to maintain its effectiveness. This will prevent the transferred bark from reattaching to the live edge as you scrape.
- Continue scraping until all the stubborn bark residue has been removed. If necessary, you can switch to a smaller, more precise scraper for harder-to-reach areas. Once complete, you will be left with a clean and smooth live edge, ready for further refinements.
Sanding The Area For A Clean Finish:
- Sanding is an essential step in achieving a clean and refined look on the live edge surface. It helps smoothen out any rough patches and ensures a uniform appearance.
- Start by selecting sandpaper with a medium grit, around 120-180. Wrap the sandpaper around a sanding block or use it with your hand, depending on the comfort and control you prefer.
- Gently sand the area where you removed the bark, moving the sandpaper in long, even strokes along the grain of the wood. Keep the pressure consistent and avoid applying excessive force that could damage the surface.
- As you sand, you will notice the remaining imperfections gradually disappear, and the wood becomes smoother. Stop periodically to assess the texture and adjust your technique if needed.
- Once satisfied with the results obtained using the medium grit sandpaper, move on to a finer grit, such as 220 or higher. Repeat the sanding process, ensuring you cover the entire area thoroughly. This step will further enhance the smoothness and refine the surface.
- After sanding, wipe off any residual dust using a clean cloth or tack cloth. This will ensure a clean base for the next steps in the live edge finishing process.
Remember, the key to success in removing stubborn bark residue from a live edge is taking your time, being meticulous, and utilizing the right tools and techniques. By following these steps, you will achieve a beautifully refined live edge surface, ready to be showcased in your woodworking project.
Step 5: Finishing Touches For A Smooth Live Edge
Discover how to remove bark from a live edge with step 5 of our guide. This essential finishing touch will result in a smooth and polished live edge for your project.
After removing the bark from your live edge wood, it’s time to give it the finishing touches it deserves. This step will not only ensure a smooth and polished surface but also enhance the natural beauty of the wood. Here’s what you need to do:
Filling Any Remaining Gaps Or Cracks:
- Inspect the live edge wood carefully for any gaps or cracks that may still be present.
- Use a wood filler that matches the color of your wood to fill in these imperfections.
- Apply the wood filler with a putty knife, ensuring that you fill the gaps completely.
- Allow the filler to dry according to the manufacturer’s instructions.
Sanding The Entire Surface:
- Start by using a coarse-grit sandpaper to remove any rough spots or uneven areas on the live edge.
- Gradually move to finer grits of sandpaper, ensuring that you sand the entire surface evenly.
- Sand in the direction of the wood grain for the best results.
- Pay close attention to the live edge, as this is the focal point of the piece. Make sure it feels smooth to the touch.
Applying A Protective Finish To Enhance The Natural Beauty:
- Choose a protective finish that suits your preferences and the type of wood you’re working with.
- Apply the finish using a brush or cloth, following the manufacturer’s instructions.
- Make sure to cover both the top and bottom surfaces of the live edge wood.
- Allow the finish to dry completely before handling or using the piece.
By following these finishing touches, you’ll ensure that your live edge wood looks its best. The smooth surface and protective finish will not only enhance its natural beauty but also provide longevity and durability to your piece. Now you’re ready to enjoy your stunning live edge creation!
Tips And Tricks For Successful Bark Removal
Learn the best tips and tricks for successful bark removal from live edge wood. Discover techniques that are easy to follow and effective in achieving a clean and smooth finish on your wooden projects.
Working patiently and carefully:
Removing bark from a live edge requires precision and a gentle touch. Follow these tips and tricks to ensure successful bark removal:
- Use a sharp knife or chisel to score along the edges of the bark before attempting to remove it. This will prevent any accidental damage to the wood underneath.
- Start at one end of the live edge and work your way towards the other, using slow and deliberate motions. Rushing the process may result in bark breakage or wood damage.
- If the bark is firmly attached, gently tap the back of the knife or chisel with a mallet to create a separation between the bark and the wood. This will make it easier to peel the bark off.
- Keep in mind that some barks, such as eucalyptus, may be more stubborn to remove due to their fibrous nature. Exercise extra caution when dealing with these types of barks.
Dealing with stubborn or resistant bark:
Certain barks may be particularly challenging to remove. Here are some techniques to overcome stubborn or resistant bark:
- Soak the live edge in warm water for several hours to soften the bark. This will make it easier to peel off without damaging the wood.
- Apply a mixture of dish soap and water onto the bark and let it sit for a while. This will help break down any adhesive properties and loosen the bark, facilitating its removal.
- Use a heat gun or hairdryer on low heat setting to warm up the bark. The heat will make the bark more pliable, allowing you to peel it off more easily.
Best practices to avoid damaging the wood:
Protect the wood beneath the bark by following these best practices:
- Take extra care when using sharp tools like knives or chisels to avoid accidentally gouging or scratching the wood surface.
- Avoid excessive force when removing the bark, as this can cause splintering or denting of the wood. Apply gentle pressure instead.
- Clean the wood thoroughly after bark removal to remove any residual debris or adhesive. This will help maintain the natural beauty of the live edge.
Remember, removing bark from a live edge requires patience, precision, and caution. By working carefully and following these tips, you can achieve successful bark removal while keeping the wood intact and undamaged.
Frequently Asked Questions On How To Remove Bark From Live Edge
Should You Remove Bark From Live Edge?
It is not necessary to remove the bark from live edge wood.
How Do You Remove Bark From Live Edge Maple?
To remove bark from live edge maple, carefully use a sharp chisel or knife.
How Do You Remove Bark Without Damaging Wood?
To remove bark without causing damage to the wood, gently scrape it off using a blunt tool.
How Do You Clean Live Edge Lumber?
To clean live edge lumber, gently wipe it down with a damp cloth to remove dust and debris.
Conclusion
Removing bark from live edge wood can be a challenging task, but with the right techniques and tools, it is definitely possible. By following the step-by-step process outlined in this blog post, you can achieve a smooth and clean finish on your live edge projects.
Firstly, it’s essential to use a sharp chisel or scraper to carefully remove the outer layers of bark. Taking small, controlled strokes will help prevent any damage to the underlying wood. Next, sand the area with gradually finer grit sandpaper to achieve a polished surface.
Remember to wear protective gear like goggles and gloves throughout the process. Additionally, using a wire brush or soft brass brush can be an effective way to remove stubborn bark remnants. Just make sure to brush in the direction of the wood grain to avoid any scratches or marks.
Removing bark from live edge wood requires patience, precision, and the right tools. By following the steps outlined in this blog post, you can achieve a professional-looking finish on your live edge projects. So, go ahead and unleash your creativity on these stunning pieces of wood!