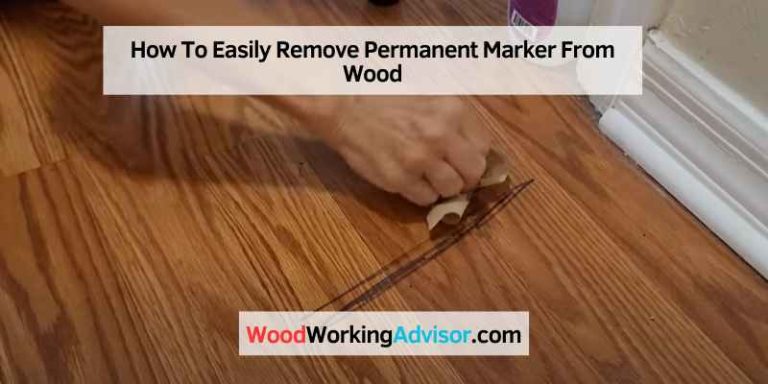
How to Remove Varnish from Wood Easily: Quick Guide
To remove varnish from wood easily, use a paint stripper or sandpaper. Apply the stripper, then scrape off the varnish.
Removing varnish from wood can seem challenging, but it doesn’t have to be. Using the right tools and techniques simplifies the process. Paint strippers are effective and save time. These chemical solutions break down the varnish, making it easy to remove.
Sandpaper offers a more manual approach but works well for smaller areas. Always ensure proper ventilation and safety measures. A well-prepared workspace aids in smooth varnish removal. Clean the wood thoroughly after stripping for best results. This ensures the surface is ready for refinishing or painting. With these steps, your wood surfaces will look refreshed and new.
Introduction To Varnish Removal
Removing varnish from wood can seem like a daunting task. With the right tools and techniques, it becomes simple and straightforward. This guide will help you understand the process.
The Importance Of Stripping Varnish
Stripping varnish from wood is crucial for various reasons. Old varnish can cause wood to look dull and worn out. Removing it brings back the wood’s natural beauty. It also helps in applying a new finish properly.
Safety Measures Before Starting
Safety is paramount when removing varnish. Follow these steps to stay safe:
- Wear protective gloves to avoid skin contact with chemicals.
- Use goggles to protect your eyes from splashes.
- Ensure good ventilation in your workspace.
- Keep a first-aid kit nearby for emergencies.
By understanding the importance and following safety measures, varnish removal becomes easier and safer. This sets the foundation for a successful project.
Identifying The Type Of Varnish
Removing varnish from wood can be daunting. It is crucial to identify the type of varnish first. This helps in selecting the right removal technique. Understanding varnish types will save time and effort.
Different Varnish Formulations
Varnishes come in various formulations. Each has unique properties. Here are some common types:
- Oil-Based Varnish: Known for its durability. Commonly used on floors and furniture.
- Water-Based Varnish: Dries quickly and has low odor. Ideal for indoor projects.
- Polyurethane: Offers excellent protection. Suitable for high-traffic areas.
- Spar Varnish: Designed for outdoor use. Resistant to UV rays and water.
Impact On Removal Techniques
The type of varnish impacts the removal method. For instance, oil-based varnish may need a stronger remover. Water-based varnish can often be removed with mild solutions.
| Varnish Type | Recommended Remover |
|---|---|
| Oil-Based | Solvent-based remover |
| Water-Based | Water and mild detergent |
| Polyurethane | Specialized varnish remover |
| Spar Varnish | Heat gun and scraper |
Before starting, test a small area. This ensures the chosen method works well. Always follow safety guidelines when handling chemicals.
Tools And Materials Needed
Removing varnish from wood can seem tough. But with the right tools, it’s easy. This section covers the tools and materials needed for the job.
List Of Essential Supplies
Here are the main tools you’ll need to remove varnish from wood:
- Safety Gloves: Protect your hands from chemicals.
- Safety Goggles: Keep your eyes safe from splashes.
- Dust Mask: Avoid inhaling harmful dust particles.
- Paint Stripper: Choose one that’s wood-friendly.
- Scraper: Use a plastic or metal scraper to remove varnish.
- Sandpaper: Get different grits, like 80, 120, and 220.
- Brush: Use a natural bristle brush for applying stripper.
- Rags: Clean up the residue with old rags.
Optional Tools For Enhanced Efficiency
These tools can make the varnish removal process faster and easier:
- Heat Gun: Heat softens the varnish for easy scraping.
- Orbital Sander: Speeds up the sanding process.
- Detail Sander: Great for tight corners and edges.
- Steel Wool: Use for fine detailed work.
- Vacuum Cleaner: Clean up dust and debris quickly.
Having the right tools is key. It makes the job easier and safer.
Preparing The Workspace
Before you start removing varnish from wood, setting up your workspace is crucial. A well-prepared workspace ensures safety and efficiency. This section covers how to prepare the workspace for varnish removal.
Setting Up A Ventilated Area
Always work in a well-ventilated area. Proper ventilation helps disperse fumes from varnish removers.
- Open windows and doors to let fresh air in.
- Use fans to circulate air within the room.
- Consider working outdoors if possible.
Good ventilation protects your health. It keeps the air fresh and clean.
Protecting Surrounding Surfaces
Protect the surrounding surfaces to avoid damage. Use drop cloths or plastic sheets.
- Cover floors with drop cloths or old sheets.
- Use painter’s tape to secure the coverings.
- Shield nearby furniture with plastic sheets.
This step prevents varnish remover from spilling on other areas. It keeps your workspace clean and tidy.
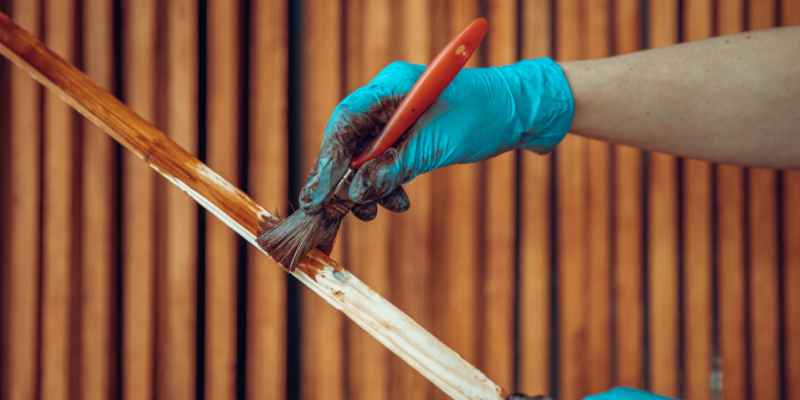
Applying Chemical Strippers
Applying chemical strippers is a popular method for removing varnish from wood. It is efficient and saves time, making it ideal for both beginners and professionals.
Choosing The Right Chemical Stripper
It’s important to choose the right chemical stripper for your project. There are various types available, each suited for different needs. Here are some common options:
- Solvent-based strippers: Fast-acting and effective for tough varnishes.
- Caustic strippers: Effective but can be harsh on wood.
- Biochemical strippers: Eco-friendly and safe for indoor use.
Read the product label carefully. Ensure it is suitable for your wood type and varnish.
Step-by-step Application Process
Follow these steps to apply chemical strippers safely and effectively:
- Prepare the area: Work in a well-ventilated space. Cover the floor with a drop cloth.
- Wear safety gear: Put on gloves, goggles, and a mask. Safety first!
- Apply the stripper: Use a brush to apply a thick layer. Follow the grain of the wood.
- Wait: Allow the stripper to sit. Check the label for the recommended time.
- Scrape off varnish: Use a plastic scraper. Gently remove the softened varnish.
- Clean the wood: Use a damp cloth. Remove any residue and stripper.
- Inspect: Check for any remaining varnish. Repeat the process if needed.
Using chemical strippers is an effective way to remove varnish. Follow these steps for a smooth, clean finish.
Manual Stripping Techniques
Manual stripping techniques can effectively remove varnish from wood. These methods require tools like sandpaper and scrapers. They are great for small projects and detailed work. This section explains two common manual stripping techniques: sanding and using scrapers.
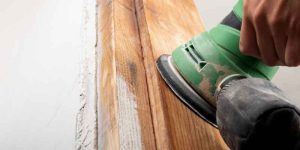
Sanding: Pros And Cons
Sanding is a popular method to remove varnish. It is straightforward and accessible. Here are some pros and cons of sanding:
| Pros | Cons |
|---|---|
| – Affordable | – Time-consuming |
| – Easy to control | – Creates dust |
| – Suitable for small areas | – Requires effort |
Use different grits of sandpaper for best results. Start with coarse grit and finish with fine grit. Always sand in the direction of the wood grain. This prevents scratches.
Using Scrapers Effectively
Scrapers are another effective tool for removing varnish. They work well for flat surfaces and edges. Follow these steps to use scrapers effectively:
- Choose the Right Scraper: Use a scraper with a sharp blade.
- Hold the Scraper Properly: Hold at a 45-degree angle to the wood.
- Apply Even Pressure: Apply steady, even pressure while scraping.
- Work in Small Sections: Scrape small sections at a time for control.
Scrapers can remove varnish without damaging the wood. They produce less dust compared to sanding. Keep the blade sharp for the best results.
Eco-friendly Alternatives
Finding ways to remove varnish from wood without harming the environment is a priority for many. Eco-friendly alternatives help maintain your wood’s beauty and keep the planet safe. Below, discover various methods to achieve this.
Natural Varnish Removers
Natural varnish removers offer a safe way to strip varnish. They are gentle on wood and the environment. Here are some options:
- Vinegar and Baking Soda: Mix equal parts of vinegar and water. Apply to the varnish and sprinkle baking soda on top. Let it sit for a few minutes. Scrub gently with a soft brush.
- Lemon Juice and Olive Oil: Combine lemon juice and olive oil in a 1:1 ratio. Rub the mixture on the varnish. Leave it for a while. Wipe off with a soft cloth.
Heat Guns And Infrared Devices
Heat guns and infrared devices provide an effective way to remove varnish. They use heat to soften the varnish, making it easier to scrape off.
| Method | Description |
|---|---|
| Heat Guns | Heat guns use hot air to soften varnish. Point the gun at the varnish, keep it moving to avoid burns, and scrape off the softened varnish. |
| Infrared Devices | Infrared devices use infrared rays to heat the varnish. Hold the device close to the varnish, wait for it to bubble, then scrape it off. |
Both methods are effective and eco-friendly. They avoid the use of harsh chemicals, keeping your workspace safe and clean.
Cleaning And Preparing The Wood
Before you start, clean and prepare the wood. This step ensures the wood is ready for varnish removal. Follow these steps for best results.
Neutralizing Chemical Residues
After removing varnish, neutralize any chemical residues. Use a clean rag and water for this process.
| Steps | Details |
|---|---|
| 1. Wet the Rag | Soak a clean rag in water. |
| 2. Wipe the Wood | Gently wipe the wood surface. |
| 3. Dry the Wood | Let the wood dry completely. |
Ensure the wood is dry before sanding. This step is crucial to avoid damage.
Sanding For A Smooth Finish
Sanding is essential for a smooth wood finish. Use the right sandpaper grit for best results.
- Start with Coarse Grit: Use 80-grit sandpaper for the first pass.
- Move to Medium Grit: Use 120-grit sandpaper next.
- Finish with Fine Grit: Use 220-grit sandpaper for a smooth surface.
Always sand in the direction of the wood grain. This prevents scratches and keeps the surface smooth.
After sanding, wipe the wood with a clean cloth. Remove any dust and debris before applying new varnish.
Refinishing After Varnish Removal
Removing varnish from wood is the first step to a fresh look. After varnish removal, refinishing adds beauty and protection to your wood. Selecting the right finish and applying it correctly is key.
Selecting A New Finish For Your Wood
Choosing a new finish depends on the wood type and use. Some common finishes include:
- Oil-based finishes: Good for deep, rich color.
- Water-based finishes: Dry quickly and are less toxic.
- Wax finishes: Provide a soft, natural look.
- Polyurethane: Offers strong protection against scratches.
Consider the environment where the wood will be used. For high-traffic areas, durability is crucial. For decorative pieces, focus on aesthetics.
Application Tips For Lasting Results
Proper application ensures your finish lasts longer. Follow these steps:
- Prepare the wood surface: Sand the wood to remove any remaining varnish and smooth out imperfections.
- Clean the wood: Use a tack cloth to wipe away dust and debris.
- Apply the finish: Use a brush or cloth, depending on the finish type. Apply thin, even coats.
- Allow to dry: Let the finish dry completely before applying another coat.
- Sand between coats: Lightly sand with fine-grit sandpaper for a smooth finish.
Repeat the application and sanding steps until you achieve the desired look. Always follow the manufacturer’s instructions for best results.
Troubleshooting Common Issues
Removing varnish from wood can sometimes be tricky. Let’s address common issues you might face during the process. Learn how to deal with stubborn varnish patches and avoid damaging the wood.
Dealing With Stubborn Varnish Patches
Some varnish patches may not come off easily. In such cases, you might need extra steps. Here are some tips to help you.
- Use a stronger stripper: Some varnish may need a stronger chemical. Always test on a small area first.
- Apply heat: Use a heat gun to soften the varnish. This can make it easier to scrape off.
- Sand the area: Sometimes, sanding is the only way. Use fine-grit sandpaper to avoid scratches.
Avoiding Damage To The Wood
It’s important to protect the wood while removing varnish. Follow these steps to keep the wood safe.
- Use gentle tools: Avoid metal scrapers. They can gouge the wood. Opt for plastic or wooden tools.
- Work in small sections: Don’t rush. Focus on one small area at a time to ensure precision.
- Clean as you go: Remove debris and old varnish regularly. This keeps your work area clean and safe.
| Issue | Solution |
|---|---|
| Stubborn patches | Use a stronger stripper or apply heat |
| Scratches on wood | Use fine-grit sandpaper and gentle tools |
Maintenance Tips For Preserved Wood
Maintaining preserved wood ensures it stays beautiful and lasts longer. Proper care keeps the wood looking new. Follow these tips for the best results.
Regular Cleaning And Care
Regular cleaning is crucial for preserved wood. Dust the surface every week. Use a soft, dry cloth to prevent scratches. For deeper cleaning, use a damp cloth. Avoid soaking the wood. Water can damage it.
If there are stubborn stains, use a mild soap solution. Mix a few drops of soap with water. Dip the cloth in this solution and wipe gently. Dry the wood immediately with a clean cloth.
- Dust weekly with a soft cloth.
- Use a damp cloth for deeper cleaning.
- Avoid soaking the wood.
- Use mild soap for stubborn stains.
When To Reapply Finish
Reapplying finish keeps the wood protected. This process depends on the wood’s usage. High-traffic areas need more frequent reapplication. Check the finish every six months. Look for signs of wear and tear.
If the finish looks dull, it’s time to reapply. Follow these steps:
- Clean the wood surface thoroughly.
- Sand the surface lightly to remove old finish.
- Apply a new coat of finish evenly.
- Let it dry completely before using the wood.
Use a quality finish product for the best results. Follow the manufacturer’s instructions carefully.
| Task | Frequency |
|---|---|
| Dusting | Weekly |
| Deep Cleaning | Monthly |
| Reapplying Finish | Every 6 months |
Frequently Asked Questions
How Can I Remove Varnish From Wood?
To remove varnish from wood, use a chemical varnish remover. Apply it with a brush, wait, then scrape off the varnish.
What Tools Do I Need To Remove Varnish?
You’ll need a chemical varnish remover, a paintbrush, a scraper, and safety gear like gloves and goggles.
Is Sanding Necessary After Removing Varnish?
Yes, sanding smoothens the wood surface after varnish removal. It helps prepare the wood for a new finish.
Can I Use Household Items To Remove Varnish?
Yes, items like vinegar and baking soda can remove varnish. However, they are less effective than commercial removers.
Conclusion
Removing varnish from wood can be simple with the right tools and techniques. Follow the steps outlined in this guide for a smooth process. Remember to work in a well-ventilated area and take safety precautions. With patience and care, your wood surfaces will look fresh and new.
Happy refurbishing!