
What Grit Sandpaper to Use on Wood Before Painting
The best grit sandpaper for wood before painting is typically between 120 to 220 grit. Winding up a woodworking project can be truly satisfying.
Before painting, it’s important to prepare the surface properly to achieve a smooth and flawless finish. One of the key steps in this process is sanding the wood using the appropriate grit sandpaper. Using sandpaper with a grit between 120 to 220 helps to remove imperfections, smooth rough spots, and create a surface that promotes better paint adhesion.
We will delve into the importance of using the right grit sandpaper before painting wood, as well as discuss the factors to consider when selecting the suitable grit for your project. By doing so, you can ensure a professional and long-lasting paint job.
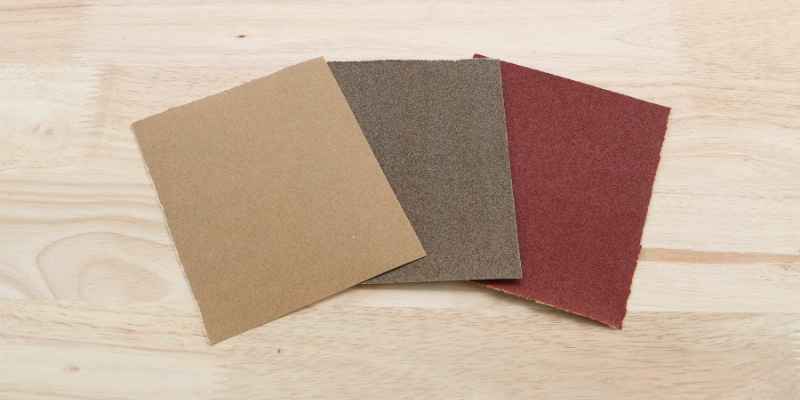
Different Grits Of Sandpaper And Their Uses
Before painting wood, it is crucial to prepare the surface properly to ensure a smooth, professional-looking finish. Sanding plays a crucial role in this preparation process, as it helps remove any imperfections and creates a suitable surface for paint adhesion. Choosing the right grit sandpaper is essential for achieving optimal results. Different grits of sandpaper are designed for different purposes and applications. Let’s explore the various grits available and their specific uses.
Coarse Grit Sandpaper
Coarse grit sandpaper, typically ranging from 40 to 80 grit, is the most aggressive option. It is used for heavy-duty sanding tasks, including the removal of old paint, stubborn stains, and deep scratches. This type of sandpaper is not suitable for creating a smooth finish, but rather for stripping away layers and smoothing rough surfaces. Coarse grit sandpaper should be used with caution to avoid damaging the wood. It is recommended to follow up with a finer grit sandpaper for a refined finish.
Medium Grit Sandpaper
Medium grit sandpaper, with a range of 100 to 150 grit, strikes a balance between aggressiveness and smoothness. It is ideal for general sanding purposes like removing minor imperfections, smoothing uneven surfaces, and preparing the wood for painting. Medium grit sandpaper creates a surface that is ready for a primer or paint to adhere to. It helps to achieve a satisfactory level of smoothness while still efficiently removing roughness and small blemishes.
Fine Grit Sandpaper
Fine grit sandpaper, ranging from 180 to 220 grit, is the go-to choice for achieving a smooth and polished surface. It is used for fine sanding, removing small scratches, and refining surfaces after initial sanding. Fine grit sandpaper is essential for achieving a professional finish when painting wood. It helps to create a surface that is free from any visible imperfections and promotes better paint adhesion. This sandpaper is also suitable for sanding between coats to ensure a smooth finish.
Extra Fine Grit Sandpaper
Extra fine grit sandpaper, typically above 220 grit, is the highest level of sanding refinement. It is used for the final sanding stages to achieve an ultra-smooth and polished surface. Extra fine grit sandpaper is commonly used for delicate projects or when a flawless finish is desired. It helps to eliminate any remaining imperfections, ensuring a surface that is ready for a flawless paint job. Keep in mind that using extra fine grit sandpaper requires a delicate touch to avoid inadvertently sanding away too much material.
Choosing The Right Grit Sandpaper For Wood
When it comes to painting wood, the key to achieving a smooth and flawless finish lies in proper preparation. One essential step in this process is sanding the wood to create a smooth and even surface for paint adhesion. However, with the wide variety of sandpaper grits available, it can be confusing to determine the right one to use. In this article, we will discuss how to choose the right grit sandpaper for wood by considering the condition of the wood surface and the type of paint to be applied.
Determining The Condition Of The Wood Surface
Before you begin sanding, it is important to assess the condition of the wood surface. This will help you determine the initial grit size to start with. Here are a few factors to consider:
- Smoothness: If the wood surface is already relatively smooth, with minimal blemishes and imperfections, you can start with a finer grit sandpaper.
- Roughness: On the other hand, if the wood has rough spots, visible scratches, or old layers of paint or varnish, it is best to start with a coarser grit sandpaper to remove these imperfections.
- Damaged areas: If the wood has deep gouges, cracks, or other damaged areas, it might be necessary to use more aggressive methods like filling, patching, or repairing before sanding. However, sanding can still help smoothen minor imperfections around these areas.
Considering The Type Of Paint To Be Applied
Another important factor to consider is the type of paint you will be applying to the wood surface. Different types of paint have different adhesive properties and require specific preparation. Here are some guidelines to help you select the appropriate grit sandpaper:
| Type of Paint | Recommended Grit Sandpaper |
|---|---|
| Water-based paints and primers | 220-320 grit sandpaper |
| Oil-based paints and primers | 180-220 grit sandpaper |
| High-gloss finishes | 320-400 grit sandpaper |
| Stains and varnishes | 120-180 grit sandpaper |
Note: These are general recommendations and may vary depending on the specific product and manufacturer guidelines. Always refer to the paint manufacturer’s instructions for the recommended sandpaper grit.
By considering the condition of the wood surface and the type of paint to be applied, you can choose the right grit sandpaper that will effectively prepare the wood for painting. Remember, proper sanding is crucial for achieving a professional-looking finish, so don’t rush this step in your project. Take your time and ensure you have the right grit sandpaper for your specific needs.
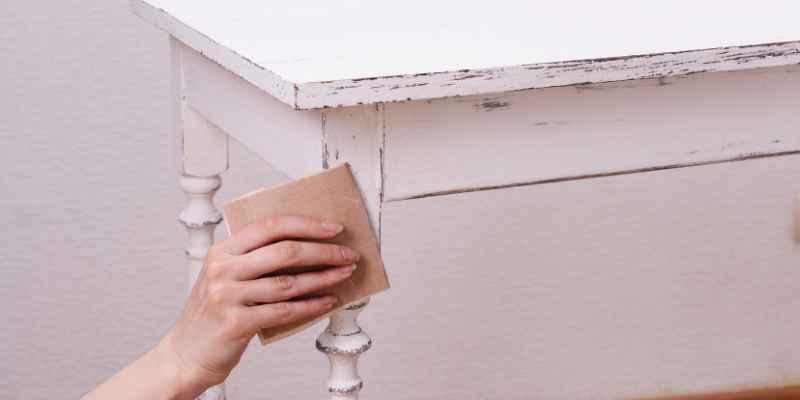
Step-by-step Guide To Prepping Wood With Sandpaper
Properly prepping wood surfaces is essential before painting to ensure a smooth and long-lasting finish. One of the most critical steps in this process is sanding. Sanding helps remove any imperfections, roughness, and old paint or stain, creating a clean and suitable surface for paint adhesion. To achieve the best results, follow this step-by-step guide to prepping wood with sandpaper.
Inspecting The Wood Surface
Before you begin sanding, carefully inspect the wood surface to identify any issues or necessary repairs. Look for cracks, dents, or peeling paint that may require additional attention. It’s important to address these problems before sanding to ensure a smooth and even finish.
Removing Old Paint Or Stain
To start the sanding process, it’s crucial to remove any existing paint or stain from the wood surface. Use a scraper or a paint stripper to strip away the old finish. This step helps create an even and consistent base for the paint to adhere to. Remember to wear protective eyewear and a mask to avoid inhaling any harmful fumes or particles during this process.
Sanding The Surface Smooth
Once the old finish has been removed, it’s time to sand the wood surface. The type of sandpaper you use will depend on the condition of the wood and the desired smoothness. Begin with a coarse-grit sandpaper, such as 80 grit, to remove any remaining imperfections and roughness. Gradually move to finer grits, such as 120 and 220, for a smoother finish. Sand in the direction of the wood grain using long, even strokes, and be sure to sand the entire surface evenly.
Cleaning The Wood
After sanding, it’s crucial to clean the wood surface to remove any sanding dust or debris. Use a vacuum cleaner or a soft brush to remove loose particles before wiping the surface with a damp cloth. This step ensures a clean and dust-free surface, promoting better paint adhesion.
Final Inspection And Touch-ups
Once the wood surface is clean and dry, carefully inspect it for any remaining imperfections or rough areas. If necessary, lightly sand those areas with a fine-grit sandpaper to achieve a uniform and smooth finish. Make sure to wipe away any sanding dust before proceeding with painting. This final inspection and touch-up step ensure that the wood surface is properly prepped and ready for a flawless paint application.
Frequently Asked Questions On What Grit Sandpaper For Wood Before Painting
What Grit Sandpaper Is Best For Prepping For Paint?
The best grit sandpaper for prepping paint is generally 120 to 220 grit. This level of grit helps smooth the surface and remove imperfections, allowing for better paint adhesion.
Should You Sand Wood Before Painting?
Yes, you should sand wood before painting. Sanding helps to smooth the surface and remove imperfections, ensuring better paint adhesion. It creates a clean and uniform base for a professional-looking finish.
What Is The Best Sandpaper For Prepping Wood?
The best sandpaper for prepping wood is typically a medium-grit sandpaper (around 80 to 120 grit) as it efficiently removes imperfections without causing excessive damage. It allows for smooth and even sanding, preparing the wood surface for finishing or painting.
What Grit Sandpaper Between Coats Of Paint On Wood?
Using a fine grit sandpaper, typically around 220 to 320 grit, is recommended between coats of paint on wood. Sanding will create a smooth surface for better paint adhesion and a professional finish.
Conclusion
To ensure a smooth and flawless finish on your wood before painting, selecting the right grit sandpaper is crucial. The appropriate grit depends on the condition of the wood and the desired outcome. Remember, for rough surfaces, start with a lower grit like 60 or 80, gradually moving up to a higher grit like 120 or 150 for a finer finish.
Taking the time to choose the correct grit sandpaper will yield stunning results in your painting project.