How to Easily Repair a Door Frame with Wood Filler
To repair a door frame with wood filler, you will need to carefully clean and prepare the damaged area before applying the filler and sanding it smooth. Introducing a guide on how to repair a door frame using wood filler.
Door frames can often become damaged over time, whether it’s due to general wear and tear or from a specific incident. While replacing the door frame entirely is an option, using wood filler can be a more cost-effective and efficient solution.
Repairing a door frame with wood filler involves a series of steps, starting with thoroughly cleaning and preparing the damaged area. Then, the wood filler is carefully applied and sanded smooth to blend seamlessly with the rest of the door frame. This guide will provide you with a step-by-step approach to repairing your door frame using wood filler, ensuring a professional and durable result.
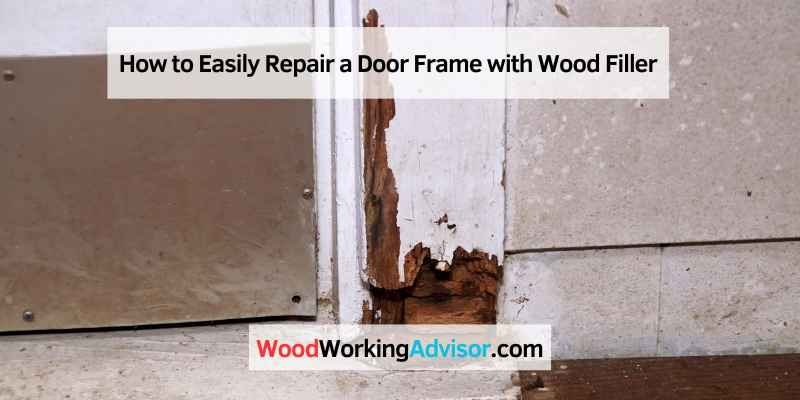
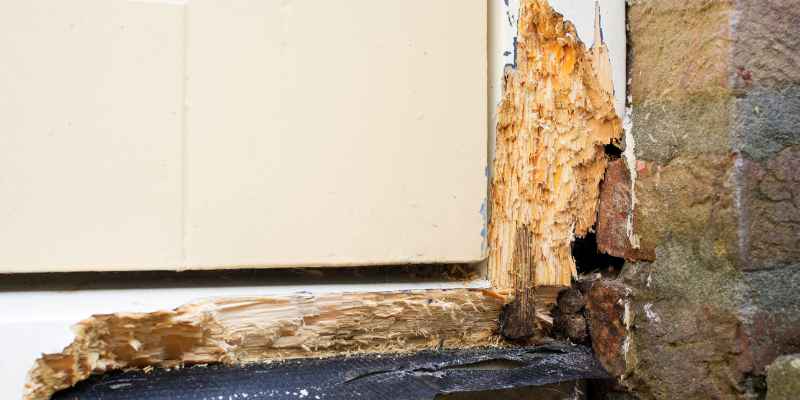
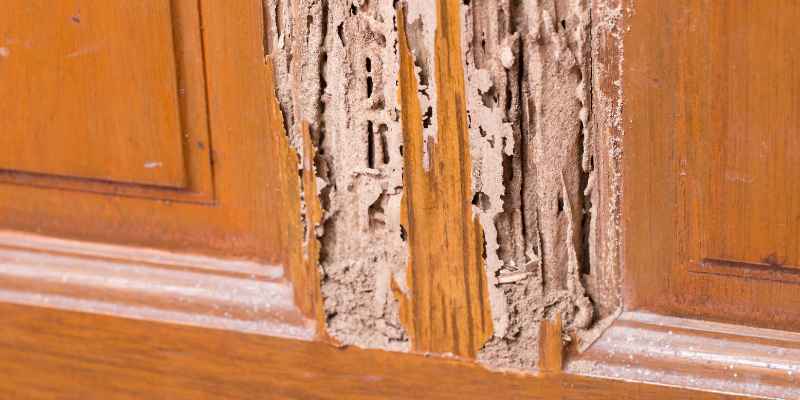
Assessing The Damage
Repairing a damaged door frame is made easy with wood filler. Learn how to assess the damage and seamlessly repair the door frame using this step-by-step guide.
Identifying Cracks And Holes
When assessing a damaged door frame, the first step is to identify any cracks or holes. Cracks can occur due to aging, shifting of the house, or even rough use. While holes can result from screws or nails being inserted or removed from the frame. These imperfections not only compromise the structural integrity of the door frame but also affect the overall appearance of the door. Therefore, it is essential to identify and address them before proceeding with any repairs.
Examining The Stability Of The Frame
Another crucial aspect to consider when assessing the damage is the stability of the door frame. A stable frame ensures that the door operates smoothly and securely. Start by checking if the frame is securely attached to the wall. Look for any loose screws or nails and tighten or replace them as necessary. Next, examine the frame for any signs of warping or twisting. A warped or twisted frame can prevent the door from closing properly. Also, check the corners of the frame for any separations or gaps. These issues can affect the door’s seal and insulation. It is vital to examine the frame thoroughly to determine the extent of the damage and plan the appropriate repairs.
Preparing The Door Frame
Before repairing a door frame with wood filler, it is essential to properly prepare the surface. This process involves removing loose particles and debris, as well as cleaning the surface to ensure a solid foundation for the wood filler. By following these steps, you can effectively prepare your door frame for repair.
Removing Loose Particles And Debris
To begin the preparation process, start by removing any loose particles and debris from the door frame. These unwanted materials can impede the adhesion of the wood filler and compromise the repair. Here’s how you can do it:
- Gently tap the damaged area with a hammer to dislodge any loose pieces of wood or paint.
- Use a putty knife or a chisel to remove any remaining loose particles. Be careful not to damage the surrounding wood.
- Wipe away the removed debris with a clean cloth or brush.
Cleaning The Surface
Once you have removed all the loose particles and debris, the next step is to thoroughly clean the surface of the door frame. This will ensure that the wood filler adheres properly and provides a seamless repair. Follow these steps to clean the surface effectively:
- Wipe the door frame with a damp cloth to remove any dust or dirt.
- If there are any stubborn stains or grease marks, use a mild detergent mixed with water to clean the area.
- Rinse the surface with clean water and allow it to dry completely.
- Inspect the cleaned surface to ensure it is free from any remaining debris or residue.
By thoroughly removing loose particles and debris, as well as cleaning the surface, you are setting the stage for a successful repair. This preparation process will ensure that the wood filler bonds securely to the door frame, restoring its strength and appearance.
Applying The Wood Filler
Repairing a door frame with wood filler is a simple process that can help restore the integrity of the frame. Begin by cleaning the damaged area, then apply the wood filler with a putty knife, smoothing it out for a seamless finish.
Choosing The Right Type Of Wood Filler
Before applying wood filler to repair your door frame, it’s important to choose the right type of wood filler that suits your needs. There are two main types of wood filler: solvent-based and water-based. Solvent-based fillers are durable and moisture-resistant, making them ideal for exterior repairs. They also dry faster, allowing you to continue with the next steps quickly. On the other hand, water-based fillers are non-toxic and have minimal odor, making them suitable for indoor repairs. They are also easier to clean up. Consider the location and type of repair you require, and select the appropriate wood filler.
Mixing The Filler And Hardener
Once you have chosen the right wood filler, it’s time to mix it with the hardener. Follow the instructions provided by the manufacturer on the packaging for the correct mixing ratio. Typically, wood fillers come as a two-part system: the filler itself and a hardener. Use a clean mixing surface, such as a disposable plastic plate or a mixing board, and mix the filler and hardener together using a putty knife or a stirring stick. Stir the mixture thoroughly until it is well-blended and no streaks are visible. Make sure to work quickly, as some wood fillers have a limited working time.
Applying The Filler To Cracks And Holes
Now that the filler is mixed, it’s time to apply it to the cracks and holes on your door frame. Use a putty knife or a filling knife to scoop a small amount of filler from the mixing surface. Press the filler firmly into the crack or hole, ensuring it completely fills the space. For larger gaps, it may be necessary to apply the filler in multiple layers, allowing each layer to dry before applying the next. Smooth the surface of the filler using the putty knife or a damp cloth, removing any excess filler or air bubbles. Once the filler is applied, allow it to dry completely according to the manufacturer’s instructions before sanding or painting over it.
Sanding And Smoothing
Repairing a damaged door frame is made easy with wood filler. Sanding and smoothing the surface before applying the filler ensures a seamless repair.
Using Sandpaper To Smooth The Filled Areas:
After the wood filler has dried completely, it’s time to smooth out the filled areas using sandpaper. This step is essential to ensure a seamless repair and achieve a professional-looking finish.
Begin by selecting a high-grit sandpaper, around 220-grit or higher, to gradually sand down the wood filler. Sanding gently with a back-and-forth motion, across the filled areas, will help level the surface and remove any excess filler.
Blending The Repaired Areas With The Rest Of The Frame:
To create a seamless appearance, it’s important to blend the repaired areas with the rest of the door frame. This will help the repaired sections to seamlessly blend in, making it difficult to detect the repair work.
Start by using a lower-grit sandpaper, around 120-grit, to feather the edges of the filled areas. This will create a gradual transition between the repaired and the original wood, eliminating any sharp edges or noticeable differences in texture.
Be sure to sand in the same direction as the wood grain, using smooth and even strokes. Take care not to sand too aggressively, as this could damage the surrounding frame or create uneven surfaces.
Continue sanding with progressively higher-grit sandpapers, such as 180-grit and 220-grit, to achieve a smooth and polished finish. As you sand, periodically run your hand across the repaired areas to check for smoothness and ensure a consistent texture throughout the frame.
Once the repaired areas are blended smoothly with the surrounding wood, wipe away any dust or debris using a clean cloth or a tack cloth. This will prepare the door frame for the next step, whether it be painting, staining, or applying a protective finish.
Finishing And Painting
Once you have repaired your door frame with wood filler, the next step is to finish and paint it to restore its original appearance. Finishing and painting your door frame will not only make it look brand new but will also protect it from moisture and other elements that could cause damage over time.
Selecting The Appropriate Finish
Before you start painting, it is important to select the appropriate finish for your door frame. Choosing the right finish will ensure that the paint adheres properly and provides long-lasting protection. There are several options to consider:
- Water-based finish: This type of finish is easy to apply, dries quickly, and emits fewer harmful fumes. It is a great choice for indoor door frames.
- Oil-based finish: This finish provides a more durable and water-resistant coating. It is ideal for outdoor door frames that are exposed to harsh weather conditions.
- Semi-gloss or satin finish: These finishes are commonly used for door frames as they provide a smooth and shiny surface that is easy to clean.
Consider the location of your door frame and your personal preferences when selecting the appropriate finish for your project.
Applying Primer And Paint
Before applying the paint, it is crucial to prime your door frame. Primer helps to create a smooth surface and improves the adherence of the paint. Follow these steps:
- Clean the door frame thoroughly and remove any dust or debris.
- Apply a coat of primer to the entire door frame, using a brush or roller.
- Allow the primer to dry completely according to the manufacturer’s instructions.
Once the primer is dry, it’s time to apply the paint. Follow these steps:
- Choose a high-quality paint that is suitable for your door frame and desired finish.
- Stir the paint thoroughly to ensure an even consistency.
- Apply the first coat of paint using a brush or roller, working in smooth and even strokes.
- Allow the first coat to dry completely and then apply a second coat if necessary for full coverage.
- Clean your painting tools promptly after use to prolong their lifespan.
Once the paint is dry, your door frame will look as good as new. Remember to make any necessary touch-ups or repairs as needed to maintain its condition over time.
Conclusion
Repairing a door frame with wood filler is a simple and cost-effective solution that can restore the structural integrity of the frame. By following the step-by-step guide outlined in this blog post, you can easily fix any cracks, gouges, or holes in your door frame.
Whether you’re a seasoned DIY enthusiast or a beginner, this method is accessible to all skill levels. So don’t let a damaged door frame go unaddressed – with wood filler, you can restore your door frame to its former glory in no time.