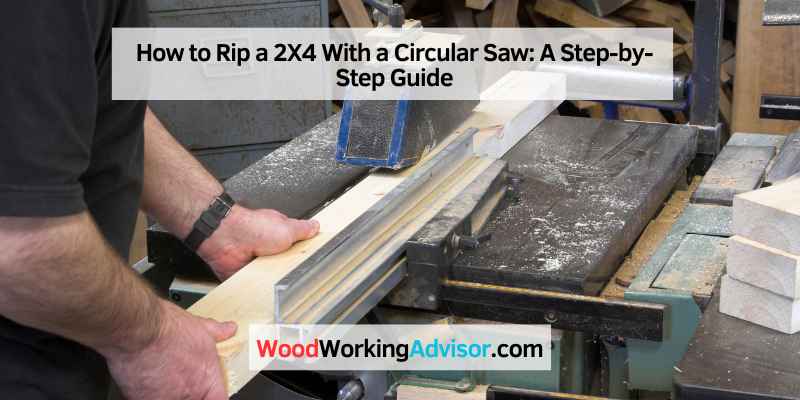
How to Rip a 2X4 With a Circular Saw: A Step-by-Step Guide
To rip a 2×4 with a circular saw, you need to mark a line parallel to the edge you want to cut and clamp a straightedge to guide the saw. Adjust the blade depth to the thickness of the board and make the cut with a slow and steady motion.
Avoid forcing the saw, and make sure to wear eye and ear protection. Ripping a 2×4 with a circular saw may seem intimidating, but it’s a simple process that can be completed with just a few tools and some precautions.
The key is to properly mark the board, clamp a straightedge, adjust the blade, and make a steady cut. With these steps in mind, you can complete this task safely and efficiently. We’ll take a closer look at the tools and techniques needed to rip a 2×4 with a circular saw.
Tools Required
To rip a 2X4 with a circular saw, you will need a saw blade suitable for cutting wood, a speed square, a clamp, and a guide. Start by marking the cutting line, then secure the guide to the wood with the clamp to keep the saw straight.
Use the speed square to ensure the blade is at the right angle.
Circular Saw
To rip a 2×4 with a circular saw, the first tool you need is obviously a circular saw. Ensure the blade is sharp and the right size to cut through the 2×4 completely. The circular saw’s motor should be powerful enough to avoid deviations and vibrations through the lumber, keeping the blade aligned.
Speed Square
While ripping a 2×4, you will need to make straight cuts to avoid damages. A speed square provides a precise guide when aligning the saw for the rip. Place the speed square on the lumber then align the blade on the marked line to stabilize the saw. Ensure the square is aligned throughout the cutting stroke to obtain straight cuts.
A Table
Ensure the lumber is firmly held when slicing. A table provides the much-needed support during the ripping process. Use a flat surface as a table to prevent the 2×4 from wobbling during the process. Combining this with a sawhorse makes the cutting experience smoother and precise.
Rip Fence
To produce significantly straighter cuts, use a rip fence as it guarantees a straight guide line. You can easily adjust the rip fence in relation to the blade of the saw and the length of the cut you plan to make.
Clamps
Clamps help keep the wood steady during the cut. They stabilize the timber against movement as you use the saw which results in more precise and safer cuts. You will require at least two quick grip clamps, one for the front, and the other for the back side of the lumber.
Using the above tools, ripping a 2×4 with a circular saw becomes easier, safer, and less time-consuming. Ensure you are using the appropriate Personal Protective Equipment (PPE) for your safety.
Preparing The Set-up
Preparing the set-up is crucial when it comes to ripping a 2×4 with a circular saw. First, cut a sacrificial sheet and place the narrow board on it. Then, clamp the board and adjust the blade height before making the cut.
Finally, remove the clamp and repeat the process on the other side to get an evenly ripped 2×4.
Lay Down A Sacrificial Sheet
Before starting the process of ripping the 2X4 with a circular saw, lay down a sacrificial sheet. This would serve as a protection to your work surface and prevents the saw blade from cutting into the surface of your work area. The sacrificial sheet can be a piece of plywood or MDF that is larger than the size of the 2X4. It is best to use a sufficient size that can hold the whole 2X4 board.
Place A 2×4 On The Sacrificial Sheet
After laying down the sacrificial sheet, place the 2X4 that you want to rip on top of it. Ensure that the 2X4 lies flat on the sheet, while also providing enough space for the circular saw blade to move along the board.
Marking The Rip Line
Next, make a mark at the desired width of the rip cut on the 2X4. Use a straight edge, such as a straight board or speed square, to draw a line marking the cut. Bear in mind that it is crucial to mark the line accurately, as a deviation could cause an uneven rip cut.
Clamp The Board On The Sheet
After marking the rip line on the 2X4, clamp it onto the sacrificial sheet. This helps to ensure that the 2X4 remains stable during the cut, preventing it from moving and causing a mis-cut or kickback. Use two quick-grip clamps, applying them evenly on opposite sides of the board. Ensure the clamps are tight enough to hold the board firmly in place, but not too tight that they bend the board.
Set The Blade Height
The next step is to set the blade height. Adjust the height of the saw blade according to the thickness of the 2X4 you want to rip. The blade should be set to about 1/8 inch below the thickness of the board. This helps to prevent the kerf from closing as the blade rotates, causing the blade to bind or potentially kick back.
With these set-up steps properly followed, you are ready to begin cutting the 2X4 with a circular saw. Remember to always wear safety gear, such as safety glasses and ear protection, and keep your hands and fingers clear of the blade.
Making The Cut

Learn how to rip a 2X4 with a circular saw using this step-by-step guide. Lay down a sacrificial sheet, place the board to be ripped on it, mark the ripping line, clamp it, set the blade height, and rip the board.
Ripping a 2×4 with a circular saw can be a daunting task for beginners, but it is an essential skill to have when undertaking woodworking projects. With the right technique and knowledge, you can make straight and precise cuts effortlessly. This section will walk you through the steps of making the cut while focusing on important subheadings.
Guiding the saw through the cut
Once you have securely clamped down the 2×4, it’s time to guide the saw through the cut. Make sure the saw blade is at the right depth and set at an appropriate angle. The next step is to place the saw on the edge of the board, keeping the blade aligned with the cut line. Start the saw and allow it to reach full speed before slowly pushing it forward. Keep your eyes on the saw blade as you move it along the cut line to ensure it remains aligned.
Removing the clamps and completing the cut
Once you have completed the first part of the cut with the circular saw, it is time to remove the clamps and finish making the cut. Make sure that the saw has completely stopped before you remove the clamps. Gently pull the clamps off, starting with the one closest to the end of the board where you started the cut. This will prevent the saw from getting stuck on the clamps while you complete the cut.
Next, guide the saw along the remaining part of the cut line to complete the cut. Be sure to follow the same process as before, starting with aligning the saw blade with the cut line. Once you have finished cutting, double-check your work to ensure your cut is straight and free of splinters.
In conclusion, ripping a 2×4 with a circular saw is a simple process that requires precision, patience, and practice. Guiding the saw through the cut and carefully removing the clamps are crucial steps in achieving a perfect rip. Remember to practice safety measures such as wearing protective gear and using a sharp blade to prevent accidents. With this guide, you can confidently make a straight and precise cut with a circular saw every time.
Safety Tips
To safely rip a 2X4 with a circular saw, make sure to follow these steps: use a straightedge guide and clamp it to the board, set the blade height and align the blade to the cut line, wear eye and ear protection, keep your hands and body away from the blade, and use a push stick to move the board through the cut.
Wear Eye And Ear Protection
Before starting the process of ripping a 2X4 with a circular saw, it’s crucial to ensure that you are wearing the right protective gear. Safety goggles, earplugs or earmuffs are essential to protect your eyes and ears from flying debris and loud noise. Protective glasses must be impact-resistant and should fit securely over your eyes to avoid any eye injury. Plastic earplugs or earmuffs can help protect your ears from loud noises.
Ensure The Saw Is Unplugged When Changing The Blade
If you need to change the blade of your circular saw, make sure that the saw is unplugged from the socket. This safety measure would prevent any accidental start-up of the saw, which can cause severe injuries. Additionally, turning off the saw and pulling the plug out of the socket is indispensable when adjusting the saw, adding any new accessories or changing the blade.
Keep Fingers Away From The Blade
Be cautious and careful when using a circular saw. Ensure that you keep your fingers away from the blade while cutting the 2X4 lumber into halves. The blade is exceptionally sharp, and can easily cut through flesh; in rare cases, it can even lead to the amputation of the fingers. It’s advisable to use a rip fence while cutting 2X4 lumber. A rip fence, attached parallel to the blade, can help guide the saw and prevent any accidental contact with the blade.
Alternative Methods For Ripping
Learn how to rip a 2×4 with a circular saw by following a step-by-step guide using a straightedge guide and clamp. This method is easy to follow and can be done safely with the right tools and precautions in place.
Using A Table Saw
If you have access to a table saw, ripping a 2×4 would be much easier compared to using a circular or jigsaw. A table saw is designed to make rip cuts, and it has a fence that you can adjust for the desired width of your cut. Here’s how you can rip a 2×4 with a table saw:
- Set the fence at the desired width of your cut.
- Adjust the height of the blade to 1/4 inch above the thickness of the board.
- Place the board onto the saw table, and adjust the fence to align the board.
- Turn on the saw and guide the board through the saw blade.
Make sure to wear safety goggles and gloves when using a table saw.
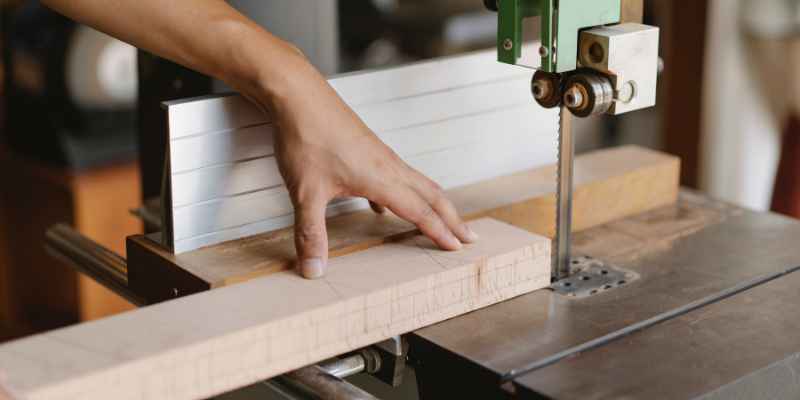
Using A Jigsaw
While a circular saw is the preferred tool for ripping 2x4s, a jigsaw can be used as an alternative. Here’s how to rip a 2×4 using a jigsaw:
- Measure and mark the board where you want to make the rip cut.
- Secure the board onto a workbench to prevent it from moving while sawing.
- Choose a fine-tooth blade and insert it into the jigsaw.
- Start the jigsaw and slowly guide it along the marked line.
- Hold the board tightly to prevent it from vibrating or wandering.
It’s important to note that jigsaws are not designed for making rip cuts, so the edges may not be as straight or smooth as those cut with a circular saw or table saw.
Frequently Asked Questions For How To Rip A 2×4 With A Circular Saw
What Is The Best Blade To Rip A 2×4 With A Circular Saw?
The best blade to rip a 2×4 with a circular saw is a ripping blade with at least 24 teeth and a 7 1/4 inch diameter. Make sure the blade is sharp, the saw is properly adjusted, and use a rip fence to guide the cut for accuracy.
How Do You Rip A 2×4 Without A Table Saw?
To rip a 2×4 without a table saw, you can use a circular saw. Lay the 2×4 on a flat surface and mark where you want to cut it. Secure a straightedge on the line and adjust the blade to the appropriate depth.
Cut along the straightedge while keeping the saw steady and following the line. Use caution and wear safety gear.
How Do You Rip A Board With A Circular Saw?
To rip a board with a circular saw, follow these steps:
(1) Lay the board on a sacrificial sheet.
(2) Mark the line where you want to rip the board.
(3) Clamp the board onto the sacrificial sheet.
(4) Adjust the circular saw blade height.
(5) Hold the saw with both hands and start cutting the board. It is safe to rip a board with a circular saw if you follow safety measures.
What Is The Measurement To Rip A 2×4 In Half?
To rip a 2×4 in half, you can use a circular saw with a rip fence and a blade suitable for cutting through wood. Set the blade at the depth required to cut through the 2×4 and adjust the rip fence to position the blade at the precise location for cutting.
Clamp the 2×4 securely to the table, turn on the saw, and make the cut along the guided path.
Conclusion
To sum up, learning how to rip a 2×4 with a circular saw is not only important for any woodworking project, but it can also save you time and money if you need customized boards. By following these step-by-step instructions and safety guidelines, you can safely and efficiently make precise cuts.
Remember to choose the right blade, secure your workpiece, adjust your saw, and use a guide to achieve the best results. With a little practice, you can easily master this fundamental woodworking skill and take on more complex projects with confidence.