How to Root Japanese Maple Cuttings in Water Fast
Trying to start new Japanese maple trees from cuttings can seem tricky at first. Many people wonder How to Root Japanese Maple Cuttings in Water Fast because they want to see quick results. It’s a common question for gardeners looking to expand their collection or share these beautiful trees.
The good news is that it doesn’t have to be complicated. We’ll show you a simple way to get those cuttings to grow roots successfully. Follow these steps, and you’ll be well on your way.
Getting Started With Japanese Maple Cuttings
Starting new plants from cuttings is a rewarding way to grow more of the trees you love. Japanese maples, with their delicate leaves and vibrant colors, are particularly sought after. Many gardeners dream of propagating these beauties.
Learning How to Root Japanese Maple Cuttings in Water Fast allows you to clone your favorite specimens and share them with friends. This section will cover the essential first steps, from selecting the right cuttings to preparing them for the rooting process. We’ll ensure you have a strong foundation for success before moving on to the actual rooting.
Selecting the Best Cuttings
Choosing healthy cuttings is the most important step for successful rooting. Look for stems that are neither too young and soft nor too old and woody. The best time to take cuttings is typically in late spring or early summer, when the plant is actively growing.
These are often called semi-hardwood cuttings.
- Choose semi-hardwood cuttings. These are stems that have started to harden but are still somewhat flexible. They have a good balance of flexibility and firmness, making them ideal for rooting. Avoid very soft, new growth or old, thick wood.
- Look for a stem that is about pencil-thick. This size is manageable and has enough stored energy to encourage root development. Thicker stems might take longer to root, while thinner ones may dry out too quickly.
- Select a stem that has at least two or three sets of leaves. Ensure there are no flowers or flower buds on the cutting. Flowers and buds divert the plant’s energy away from root formation. Remove any if you find them.
- Make sure the cutting is at least 4 to 6 inches long. This length provides enough material to work with and offers multiple nodes where roots can emerge. A longer cutting also allows for some loss during the preparation process.
Preparing Your Cuttings
Once you have selected the perfect stems, it’s time to prepare them for rooting. Proper preparation helps the cutting absorb water and nutrients efficiently and encourages root growth. This involves making clean cuts and removing unnecessary foliage.
- Make a clean cut just below a leaf node. A leaf node is where a leaf attaches to the stem. This is a prime spot for root development to begin. Use a sharp, clean knife or pruning shears to make a cut at a 45-degree angle.
- Remove the lower leaves. Strip off any leaves from the bottom two-thirds of the cutting. This area will be submerged in water, and removing leaves prevents them from rotting. Leave a few leaves at the top to help the cutting photosynthesize.
- You can optionally use rooting hormone. While not always necessary for water rooting, a rooting hormone can sometimes speed up the process and improve the success rate. Dip the cut end into the hormone powder or gel.
The Water Rooting Method Explained
Water rooting is a simple and popular technique for propagating many types of plants, including Japanese maples. It’s accessible for beginners because it requires minimal specialized equipment. Seeing the roots grow in clear water is also very satisfying.
This section will guide you through the specifics of setting up your cuttings in water and what to expect. We will cover the best containers, water changes, and the ideal environment for root development.
Choosing the Right Container
The container you choose plays a role in the success of your water rooting. It needs to hold water securely and allow you to keep the cuttings upright. The material and shape can influence how well the roots develop and how easy it is to monitor their progress.
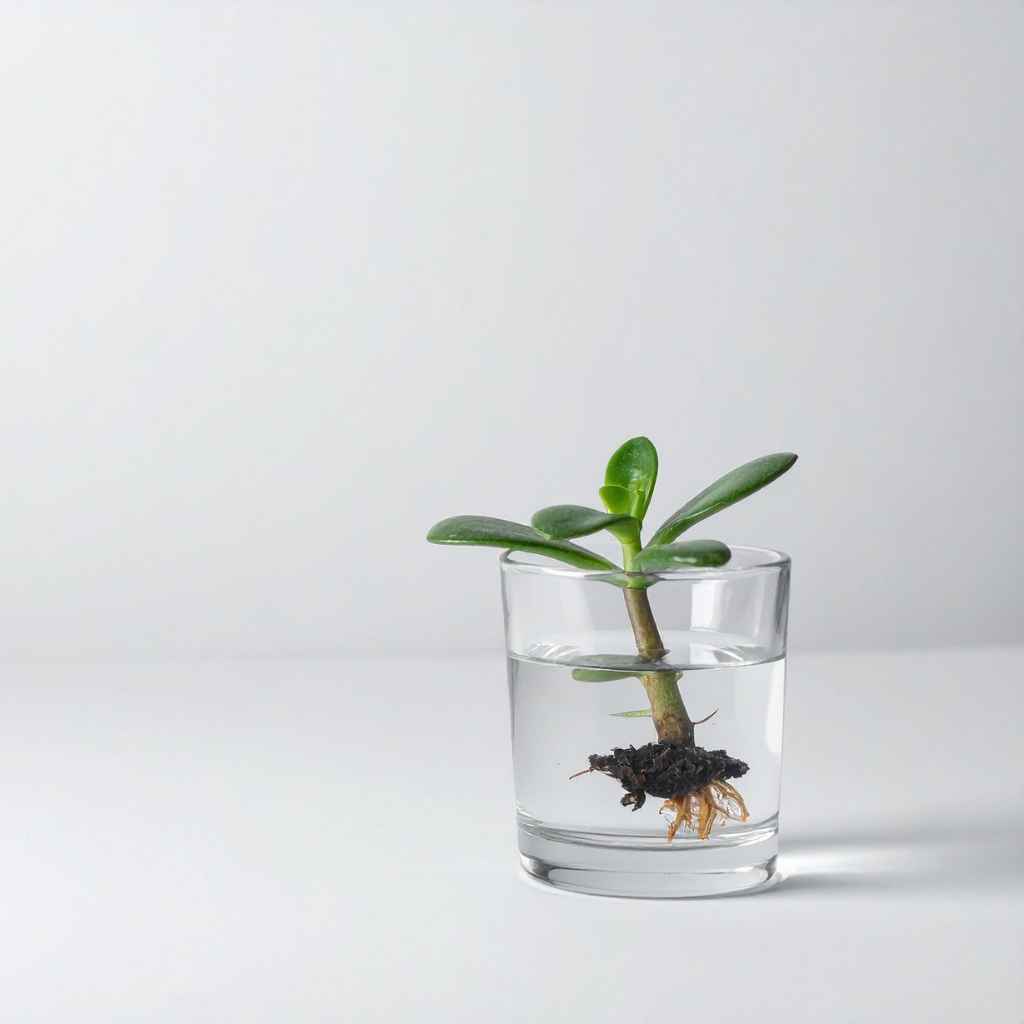
- Use a clear glass jar or vase. Clear containers let you easily see the water level and, more importantly, observe the root development as it happens. This visual feedback is encouraging.
- Ensure the container is tall enough to support the cuttings. They should stand upright without tipping over. The water level should be deep enough to cover at least two to three leaf nodes on each cutting.
- Cleanliness is key. Make sure the container is thoroughly washed before use to prevent any bacteria or mold from affecting the cuttings. A clean environment promotes healthy root growth.
Water Quality and Changes
The quality of the water and how often you change it are vital for preventing rot and providing a healthy environment for roots to form. Stagnant water can quickly become a breeding ground for harmful microorganisms.
- Use filtered or distilled water. Tap water can sometimes contain chlorine or other chemicals that might inhibit root growth. Using filtered or distilled water provides a cleaner start.
- Change the water every 2-3 days. This is crucial to keep the water fresh and oxygenated. Remove any cloudy or foul-smelling water immediately. Fresh water helps prevent bacterial infections and provides a consistent supply of oxygen.
- Maintain a consistent water level. As water evaporates, top it up with fresh water. This ensures the nodes remain submerged and can continue to develop roots. Do not let the cuttings dry out.
Ideal Conditions for Rooting
Japanese maple cuttings need specific conditions to encourage root development. Light, temperature, and air circulation all play a part in their success. Providing these ideal conditions will significantly increase your chances of seeing roots form quickly.
- Place cuttings in indirect light. A bright spot that doesn’t receive direct sunlight is best. Too much direct sun can scorch the leaves or overheat the water, stressing the cutting. A windowsill that faces east or north is often ideal.
- Maintain a consistent room temperature. Cuttings root best in temperatures between 65-75°F (18-24°C). Avoid placing them near drafts or heating vents, which can cause temperature fluctuations.
- Ensure good air circulation. While you want to protect them from harsh drafts, some airflow is beneficial. This helps prevent mold and disease. Do not cover the cuttings tightly, as this can trap moisture and promote rot.
Signs of Rooting and Transplanting
Watching for the first signs of roots is an exciting part of the process. Patience is key, as rooting times can vary. Once roots have developed sufficiently, the next step is to transplant them into soil.
This section will help you identify when your cuttings are ready and how to transition them successfully.
Recognizing Root Development
It takes time to see roots emerge from your cuttings. You’ll need to keep an eye on the submerged ends of the stems. The appearance of tiny white roots is the primary indicator that your cutting is on its way to becoming a new plant.
- Look for small white nubs or roots. These will typically appear from the submerged leaf nodes. They might start as small bumps that gradually lengthen into visible roots.
- Patience is essential. Depending on the variety of Japanese maple and the conditions, it can take anywhere from 3 to 8 weeks to see significant root growth. Some may even take longer.
- Avoid disturbing the cuttings too much. While you want to check for roots, frequent removal from the water can shock the cutting and hinder development. Try to check every few days without fully removing them unless necessary.
When to Transplant to Soil
The decision of when to move your rooted cutting from water to soil is critical. Transplanting too early or too late can both cause problems. You want to ensure the roots are robust enough to survive in a terrestrial environment.
- Wait for roots to be at least 1-2 inches long. Ideally, you want to see a good network of roots, not just a few wispy ones. Longer roots are stronger and more likely to establish themselves in soil.
- Ensure the roots have started to branch. This indicates a healthy root system that can absorb water and nutrients effectively from soil.
- Prepare the potting mix before transplanting. Have your potting soil ready and moist. This minimizes the time the roots are exposed to air, which can cause them to dry out.
The Transplanting Process
Moving your rooted cutting from water to soil requires a gentle hand and careful attention. The goal is to cause as little stress as possible to the developing root system.
- Use a well-draining potting mix. A blend of peat moss, perlite, and compost works well. This provides moisture retention while allowing excess water to drain away, preventing root rot.
- Gently place the cutting into a small pot. Make a small hole in the soil large enough to accommodate the roots without bending them. Carefully lower the cutting into the hole.
- Backfill around the roots with soil. Gently firm the soil around the base of the cutting to provide support and ensure good contact between the roots and the soil.
- Water thoroughly after planting. Water the soil until it is moist but not waterlogged. This helps settle the soil around the roots and reduces air pockets.
- Provide initial care. Keep the newly potted cutting in a humid environment, perhaps under a plastic dome or in a clear plastic bag (with ventilation holes). Place it in bright, indirect light and continue to keep the soil consistently moist but not soggy. Gradually introduce it to less humid conditions over a few weeks.
Troubleshooting Common Issues
Even with the best care, sometimes problems can arise when rooting Japanese maple cuttings in water. Understanding these common issues and how to address them will help you overcome challenges and achieve success. This section offers solutions for common setbacks, ensuring you can get your project back on track.
Cuttings Not Rooting
If weeks go by and you see no signs of root development, it can be disheartening. Several factors could be at play, from the quality of the cutting to the environmental conditions.
- Check the cutting’s viability. Ensure the stem is still firm and green. If it has become soft, mushy, or black, it has likely rotted and will not root. This could be due to poor water quality or prolonged submersion of leaves.
- Verify environmental conditions. Are the cuttings in a location with consistent, moderate temperatures and indirect light? Fluctuations in temperature or too much direct sun can prevent rooting. Ensure the water is changed regularly.
- Consider the time of year. Japanese maples are best propagated from cuttings taken during their active growing season. Cuttings taken too late in the year may not have enough energy reserves to root.
Rotting Cuttings
Rotting is a common problem, often caused by bacteria or fungi in stagnant water. It’s characterized by soft, dark, mushy stems at the water line.
- Increase water change frequency. Change the water every day if you notice any cloudiness or smell. This is the most critical step to prevent rot.
- Ensure proper leaf removal. Make sure no leaves are submerged in the water. Any leaves below the waterline will decay and introduce pathogens.
- Use an anti-rot agent. Some gardeners add a tiny drop of hydrogen peroxide (3%) to the water. This can help kill bacteria and fungi without harming the cutting. Use sparingly, as too much can damage the cutting.
Yellowing Leaves
If the leaves on your cutting begin to yellow, it can signal stress. This might be due to insufficient light, nutrient deficiency, or shock from environmental changes.
- Adjust the light exposure. Ensure the cutting is receiving bright, indirect light. If it’s in a very dim spot, move it to a brighter location. If it’s in direct sun, move it to a shadier spot.
- Check the water. If you have been using plain water for a very long time without any signs of rooting, the cutting may lack essential nutrients. However, for short-term water rooting, this is less common. Focus on freshness.
- Ensure consistent conditions. Sudden changes in temperature or humidity can shock the cutting, leading to yellowing leaves. Try to keep the environment as stable as possible.
Advanced Tips for Faster Rooting
While the basic water rooting method is effective, a few advanced techniques can help speed up the process and improve your success rates. These methods involve optimizing the cutting’s environment and providing it with the best possible start for root formation.
Using a Heat Mat
Rooting often happens faster when the cuttings have slightly warmer temperatures at the root zone. A gentle warmth can stimulate root development.
- Benefits of warmth. Roots grow best when the temperature at the base of the cutting is consistently 70-75°F (21-24°C). A heated propagation mat provides this gentle warmth from below, encouraging faster root emergence.
- How to use it. Place your jar or container of cuttings on top of a propagation mat. Ensure the mat is set to a low or medium heat setting. Avoid overheating, as this can dry out the cuttings or cook the developing roots.
- Monitor temperature. Use a thermometer placed near the base of the cuttings to ensure the temperature remains within the ideal range. Adjust the mat’s setting as needed.
Air Layering Alternative
Air layering is another method for propagating woody plants, often used when cuttings are difficult to root. While it’s not strictly water rooting, it can be an effective alternative if water methods fail or if you want to try a different approach.
- What is air layering? This technique involves encouraging roots to form on a stem while it is still attached to the parent plant. A section of the stem is wounded, treated with rooting hormone, and then wrapped in moist sphagnum moss and plastic wrap.
- Advantages. It often has a higher success rate for difficult-to-root plants because the developing roots receive nutrients and water from the parent plant. Once roots have formed, the air-layered stem can be cut and planted.
- Process overview. Select a healthy branch, make a small incision or remove a ring of bark, apply rooting hormone, wrap the area with moist moss, and seal it with plastic. Roots will form within the moss, visible through the plastic.
Using a Rooting Stimulant Solution
Beyond simple rooting hormone powder, specialized liquid rooting stimulants can be beneficial. These often contain a mix of hormones and nutrients designed to promote vigorous root growth.
- Types of solutions. These products typically contain auxins, which are plant hormones that stimulate root formation. Some may also include vitamins, minerals, or beneficial fungi.
- Application. Cuttings are usually soaked in the solution for a specified time, or the solution can be used to keep the base of the cutting submerged, similar to water rooting. Follow the product’s instructions carefully.
- Benefits. Liquid stimulants can provide a more even distribution of hormones and nutrients to the entire cut surface, potentially leading to faster and more robust root development compared to powder.
Frequently Asked Questions
Question: How long does it usually take for Japanese maple cuttings to root in water
Answer: It can take anywhere from 3 to 8 weeks, and sometimes longer, for Japanese maple cuttings to develop visible roots in water. Patience is key during this process.
Question: Can I use tap water for rooting Japanese maple cuttings
Answer: It’s best to use filtered or distilled water. Tap water may contain chemicals like chlorine that can sometimes inhibit root development. If you must use tap water, let it sit out for 24 hours to allow some of the chlorine to dissipate.
Question: What should I do if my Japanese maple cuttings start to rot
Answer: If your cuttings are rotting, increase the frequency of water changes to every day. Ensure no leaves are submerged in the water. You can also try adding a tiny drop of 3% hydrogen peroxide to the water to help combat bacteria.
Question: How many leaves should I leave on a Japanese maple cutting
Answer: Leave 2-3 sets of leaves at the top of the cutting. These leaves are necessary for photosynthesis, which provides the energy the cutting needs to develop roots. Remove all leaves from the lower two-thirds of the stem.
Question: When is the best time to take cuttings from a Japanese maple for rooting
Answer: The best time is usually late spring or early summer when the plant is actively growing. These are often referred to as semi-hardwood cuttings, which have a good balance of flexibility and firmness for rooting.
Conclusion
Successfully rooting Japanese maple cuttings in water is achievable with careful attention to detail. You now know how to select the right stems, prepare them properly, and create the ideal conditions for root growth. By following these steps, you can confidently propagate your beloved Japanese maples.
Watch for those roots, and don’t be afraid to transplant them when they are ready. Enjoy growing new trees from your own cuttings.