How to Finish Maple for a Flawless Wood Project
To finish maple, sand the surface with fine-grit sandpaper, then apply a clear wood finish or stain for protection. Allow each coat to dry thoroughly for the best results.
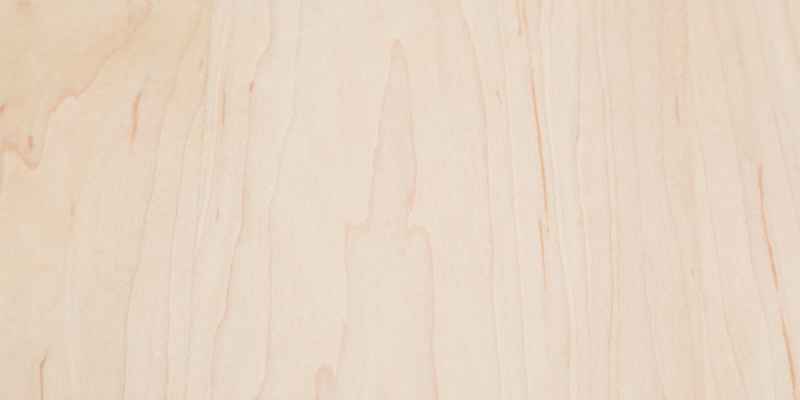
Maple is a beautiful hardwood known for its durability and fine grain. Whether you’re crafting furniture, cabinets, or decorative items, achieving a smooth finish is essential. Proper finishing enhances maple’s natural beauty and protects it from wear and tear. Various products, like oils and varnishes, can be used to achieve the desired look.
The finishing process also helps to highlight the wood’s rich tones. Understanding the right techniques and materials can significantly elevate your woodworking projects. This guide will walk you through the steps to ensure your maple pieces look stunning and last for years.
Introduction To Finishing Maple
Finishing maple wood enhances its beauty and durability. Maple is popular for furniture and cabinetry. Proper finishing brings out its natural grain and color. This guide covers why maple is special and the challenges faced when finishing it.
Why Maple?
Maple wood is known for its strength and versatility. Here are some reasons to choose maple:
- Hardness: Maple is a dense hardwood.
- Stability: It resists warping and shrinking.
- Appearance: Maple has a fine, uniform grain.
- Versatility: It suits various styles and finishes.
These qualities make maple ideal for many projects. It stands out in furniture, cabinets, and flooring.
Challenges With Maple
Finishing maple comes with unique challenges:
- Blotching: Maple absorbs stain unevenly.
- Color Matching: Achieving a consistent color can be hard.
- Scratch Resistance: Maple can show scratches easily.
Understanding these challenges helps achieve a better finish. Proper preparation and techniques minimize issues.
Consider using these tips:
- Use a pre-stain conditioner.
- Test stains on scrap pieces.
- Choose a durable topcoat.
Preparing Maple For Finishing
Preparing maple for finishing is essential for a beautiful result. Proper preparation ensures smooth surfaces and enhances the wood’s natural beauty. Follow these steps for the best finish.
Sanding Techniques
Sanding is a crucial step. It smooths the surface and opens the wood’s pores. Here are some effective sanding techniques:
- Start with coarse grit: Use 80 or 100 grit sandpaper.
- Progress to finer grits: Move to 120, then 220 grit.
- Sand with the grain: Avoid sanding against the grain.
- Use a sanding block: This keeps the surface even.
Always sand until the surface feels smooth. Avoid leaving scratches or rough spots.
Cleaning The Surface
After sanding, clean the surface thoroughly. Dust and debris can ruin the finish. Follow these steps:
- Use a vacuum: Remove loose dust from the surface.
- Wipe with a damp cloth: This picks up fine dust.
- Allow to dry: Ensure the wood is completely dry before finishing.
Cleaning prepares the wood for the finish. A clean surface helps the finish adhere better and look great.
Choosing The Right Finish
Choosing the right finish for maple wood enhances its beauty and durability. Different finishes provide various looks and levels of protection. Understanding your options helps you make the best choice.
Types Of Finishes
| Finish Type | Description | Pros | Cons |
|---|---|---|---|
| Oil Finish | Penetrates wood, enhances grain. |
|
|
| Polyurethane | Forms a protective coat on the surface. |
|
|
| Shellac | Natural resin finish. |
|
|
| Lacquer | Fast-drying finish with a hard surface. |
|
|
What Works Best For Maple?
Maple wood has a fine, even grain. It benefits from finishes that highlight this feature. Here are some recommended finishes:
- Oil Finish – Best for a natural look.
- Polyurethane – Ideal for high-traffic areas.
- Shellac – Great for quick projects.
- Lacquer – Excellent for a glossy finish.
Consider your needs and environment. Each finish offers unique benefits. Choose one that suits your maple project best.
Recommended Maple Finishing Products
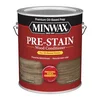
Minwax Pre-Stain Wood Conditioner
Applied before staining, this conditions maple’s tight grain so it absorbs color evenly instead of blotching.
Best for: Anyone planning to stain (not just topcoat) maple
Why we picked it: The standard fix woodworking sources recommend for maple’s well-known blotching problem
Main drawback: Adds an extra step and drying time before staining


As an Amazon Associate, Woodworking Advisor earns from qualifying purchases.
Applying A Sanding Sealer
A sanding sealer protects and enhances the beauty of maple wood. It fills the wood’s pores and provides a smooth surface. This step is crucial for achieving a professional finish.
Benefits
- Seals the Surface: Prevents moisture and damage.
- Enhances Grain: Brings out the natural beauty of maple.
- Improves Adhesion: Helps topcoats adhere better.
- Saves Time: Reduces sanding and finishing steps.
How To Apply
- Prepare the Wood: Ensure the surface is clean and dry.
- Choose the Right Sealer: Use a compatible sanding sealer.
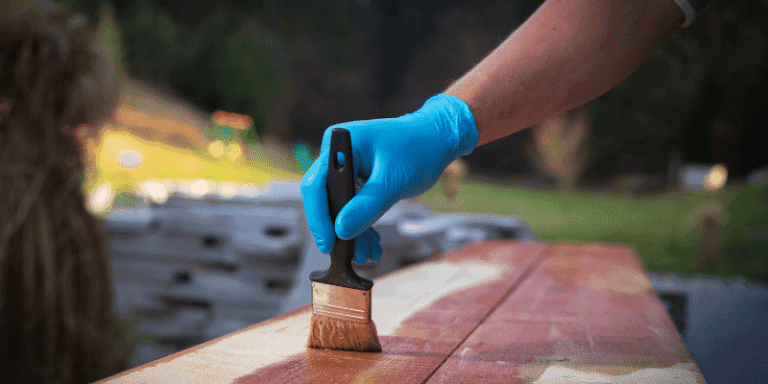
- Apply with a Brush: Use a high-quality brush for even coverage.
- Work in Sections: Apply the sealer to small areas at a time.
- Let it Dry: Follow the manufacturer’s drying time instructions.
- Sand Lightly: Use fine-grit sandpaper after drying.
- Repeat if Necessary: Apply a second coat for better results.
Using a sanding sealer is easy and effective. It ensures the best finish for your maple projects.
Staining Maple For Color
Staining maple wood enhances its natural beauty. It brings out rich colors and unique grain patterns. This process adds depth and character to your projects. Choosing the right stain is crucial for achieving your desired look.
Selecting A Stain
Choosing the perfect stain for maple is essential. Maple has a fine, even grain. This means it absorbs stain differently than other woods. Here are some tips for selecting the right stain:
- Type of Stain:
- Water-based: Dries quickly, easy to clean.
- Oil-based: Offers richer colors, longer drying time.
- Color Choices: Consider shades that complement maple’s natural tone.
- Test First: Always test the stain on a scrap piece of maple.
Why maple often stains blotchy: Maple has a tight, diffuse-porous grain — the same trait that gives it a smooth, even color also makes it absorb liquid stain unevenly, leading to dark blotches (woodworkers report the same issue with pine and birch). The standard fix is to apply a pre-stain wood conditioner first, or skip penetrating stain altogether and use a gel stain, which sits on the surface instead of soaking in unevenly.
Application Tips
Applying stain to maple requires care. Follow these steps for the best results:
- Prepare the Surface: Sand the maple surface smooth.
- Clean Thoroughly: Remove dust and debris.
- Apply Stain: Use a brush or cloth for even coverage.
- Work in Sections: This prevents overlap marks.
- Wipe Off Excess: Allow the stain to sit briefly, then wipe.
Monitor the stain’s drying time. Maple can dry unevenly, especially with oil-based stains. A second coat may enhance color depth. Always follow the manufacturer’s instructions for the best outcome.
Applying The Top Coat
Applying the top coat is essential for finishing your maple project. A good top coat protects the wood and enhances its beauty. This step will ensure your piece looks great and lasts longer.
Types Of Top Coats
Choosing the right top coat is crucial. Here are the most common types:
| Type | Description | Pros | Cons |
|---|---|---|---|
| Polyurethane | A strong, durable finish. |
|
|
| Varnish | A traditional wood finish. |
|
|
| Shellac | A natural resin finish. |
|
|
Application Techniques
Proper application ensures a smooth finish. Follow these steps:
- Prepare the Surface: Sand the maple wood lightly.
- Clean the Surface: Remove dust with a damp cloth.
- Choose the Right Brush: Use a high-quality brush or foam applicator.
- Apply the Top Coat: Use long, even strokes.
- Let it Dry: Follow the manufacturer’s drying time.
- Sand Between Coats: Lightly sand with fine-grit sandpaper.
- Apply Additional Coats: Repeat until desired finish is achieved.
Following these techniques ensures a professional look. Enjoy your beautiful maple finish!
Curing And Aftercare
Curing and aftercare are vital for finishing maple wood. Proper methods enhance durability and appearance. Follow these tips for the best results.
Curing Time
Curing time is essential for the finish to harden properly. Here’s a simple table showing recommended curing times:
| Finish Type | Curing Time |
|---|---|
| Oil-based Finish | 24-48 hours |
| Water-based Finish | 4-6 hours |
| Lacquer | 1-2 hours |
Ensure the wood is in a dry area. Avoid direct sunlight during curing. This helps maintain the finish quality.
Maintenance Tips
- Clean with a soft, damp cloth.
- Avoid harsh chemicals that may damage the finish.
- Apply a wax finish every few months for extra protection.
- Inspect the surface regularly for scratches.
- Repair any damages immediately to prevent further issues.
- Store in a stable environment to avoid warping.
Proper care will keep your maple finish looking great. Invest time in maintenance for long-lasting beauty.
Common Mistakes To Avoid
Finishing maple can be tricky. Avoiding common mistakes helps achieve great results. Here are two major pitfalls to watch out for.
Over-sanding
Over-sanding can ruin your maple finish. It creates uneven surfaces. Follow these tips:
- Use fine-grit sandpaper (220 grit or higher).
- Sand lightly in the direction of the grain.
- Check for smoothness often.
Remember, too much sanding can dull the wood’s natural beauty. Stop sanding when the surface feels smooth to the touch.
Applying Too Much Finish
Applying excessive finish leads to drips and uneven layers. This makes the wood look messy. Here’s how to avoid this mistake:
- Use a clean brush or cloth for application.
- Apply thin, even coats.
- Allow each coat to dry completely before adding more.
For best results, aim for three to four thin coats. This enhances the shine without overwhelming the wood.
Frequently Asked Questions
How Do You Prepare Maple Wood For Finishing?
Preparing maple wood involves sanding and cleaning. Start with coarse sandpaper, then move to finer grits. Ensure the surface is free of dust and debris. You can use a damp cloth to raise the grain. This step enhances the finish by allowing better absorption of stains and sealants.
What Finish Is Best For Maple Wood?
Oil-based polyurethane is often recommended for maple. It provides durability and enhances the wood’s natural grain. Water-based finishes are another option, offering a clearer appearance. Choose based on your project needs and desired look. Always test on a scrap piece first to see how it interacts with the wood.
Can You Stain Maple Wood Effectively?
Yes, you can stain maple wood effectively with proper preparation. Maple is dense, making it challenging for stain absorption. Pre-conditioning the wood helps the stain apply evenly. Choose high-quality stains designed for hardwoods. This will ensure a more uniform color and a professional-looking finish.
How Long Does Maple Finish Take To Dry?
Drying time for maple finishes varies by product used. Oil-based finishes typically take 24 hours to dry. Water-based finishes may dry in 2 to 4 hours. Always follow the manufacturer’s instructions for best results. Factors like humidity and temperature can also affect drying times significantly.
Conclusion
Finishing maple can enhance its natural beauty and durability. Use high-quality finishes to protect the wood while showcasing its rich grain. Regular maintenance is key to preserving its appearance. With the right techniques, your maple projects will shine for years.
Enjoy the process and let your creativity flourish!