How to Rust Metal With Vinegar and Salt (+ Fast H₂O₂ Method)
Vinegar and salt accelerate rust on iron and steel by creating an acidic, electrolyte-rich environment — but without hydrogen peroxide, visible rust takes 8–24 hours. Adding 2 cups of hydrogen peroxide to the mix produces rust in under 10 minutes. This guide covers the exact recipe ratios, a 6-step process, how to get a decorative patina look, and how to seal the rust so it stops spreading.
For more, see our woodworking calculators guide.
Quick Answer
To rust metal fast, mix 2 cups hydrogen peroxide, 4 tablespoons white vinegar, and 1.5 teaspoons salt in a spray bottle. Spray onto bare iron or mild steel and rust forms within minutes. For a slower, more controlled finish, use vinegar and salt only — expect 8–24 hours for visible rust. Always work in a ventilated area and wear gloves.
What You Need to Rust Metal With Vinegar and Salt
Oxidation is a chemical reaction in which iron loses electrons when exposed to oxygen and moisture, forming iron oxide (rust). Vinegar provides the acetic acid that etches the metal surface, salt acts as an electrolyte that speeds electron transfer, and hydrogen peroxide acts as an oxidizer that accelerates the reaction dramatically. Only ferrous metals — iron and steel — rust this way. Stainless steel, aluminum, and copper do not rust using this method.
Gather these materials before starting:
- Iron or mild steel object (clean, bare metal — no paint or galvanizing)
- White distilled vinegar
- Table salt or coarse sea salt
- Hydrogen peroxide (3% standard drugstore formula works)
- Plastic spray bottle
- 120-grit sandpaper (for smooth surfaces)
- Gloves and safety goggles
- Paper towels or clean rags
How to Rust Metal With Vinegar and Salt: Step-by-Step
This method uses vinegar and salt only — no hydrogen peroxide — for a slower, more controllable rust finish. Results appear in 8–24 hours depending on temperature and humidity. Work outdoors or in a well-ventilated space.
- Clean the metal surface: Wash the object with soap and water to remove oil, grease, and dirt. Any coating prevents the acid from reaching bare metal.
- Sand smooth surfaces: Lightly sand with 120-grit sandpaper. The micro-scratches give the acid more surface area to react with and hold moisture longer.
- Mix the rusting solution: Combine white vinegar and 1 tablespoon of salt per cup of vinegar. Stir until the salt fully dissolves. Pour into a spray bottle.
- Apply the solution: Spray or brush the vinegar-salt mixture evenly over the entire metal surface. Ensure full coverage — dry spots will not rust.
- Let it react: Leave the metal in open air (outdoors in sunlight is ideal). Check after 8 hours. Reapply the solution and allow another dry cycle for deeper, more even rust. Repeat 3–4 times for a full patina.
- Stop and seal when done: Once you reach the desired rust level, rinse with clean water, pat dry, and apply a clear protective sealant within 24 hours to lock in the finish.
Pro tip: Leaving the metal outside in high humidity or wrapping it in a damp cloth overnight between cycles significantly speeds up the process and produces a more even rust layer.
How to Rust Metal Fast: The 3-Ingredient Formula
Adding hydrogen peroxide to the vinegar-salt mix produces rust in minutes rather than hours. Hydrogen peroxide (H₂O₂) is a strong oxidizer — it supplies the oxygen needed for the rusting reaction directly onto the metal surface, bypassing the slower atmospheric process. This is the fastest DIY method for intentional rusting without commercial rust accelerators.
| Ingredient | Amount | Role |
|---|---|---|
| Hydrogen peroxide (3%) | 2 cups | Oxidizer — supplies oxygen directly to the reaction |
| White distilled vinegar | 4 tablespoons | Acid — etches the metal surface for faster reaction |
| Table salt | 1.5 teaspoons | Electrolyte — accelerates electron transfer |
Application: Combine all three ingredients in a plastic spray bottle. Swirl gently to mix — do not shake vigorously. Spray generously over bare iron or steel. The peroxide will start bubbling on contact and rust begins forming within 5–10 minutes. Let air-dry in the sun. Reapply every 10–15 minutes for a heavier, more layered rust patina. A full patina takes 1–2 hours of repeated applications.
Important: Hydrogen peroxide accelerates rust on iron and mild steel only. It will not rust stainless steel, aluminum, copper, or galvanized metal. If your object has any of these materials, test on a small area first.
How to Speed Up the Rusting Process
- Increase salt concentration: Use 2–3 tablespoons of salt per cup of vinegar instead of 1. Higher salt concentration intensifies the electrolytic reaction and produces faster rusting.
- Use wet/dry cycles: Apply the solution, let the metal dry in the sun, then reapply. Alternating between wet and dry accelerates oxidation more than keeping the metal continuously wet. Allow 6–10 application cycles for a full even patina.
- Apply heat: Place the treated metal near a heat source (low-temperature oven at 150°F, or outdoors in direct sunlight). Heat speeds the chemical reaction — avoid temperatures above 200°F to prevent the solution from evaporating too quickly.
- Add a damp enclosure: After applying the solution, seal the metal in a plastic bag or wrap in a damp cloth. The trapped humidity keeps the surface wet longer and produces faster, more even rust coverage.
- Use coarser salt: Coarse sea salt or kosher salt leaves physical pits on the surface as it dissolves, creating an interesting texture and giving the rust more surface area to develop on.
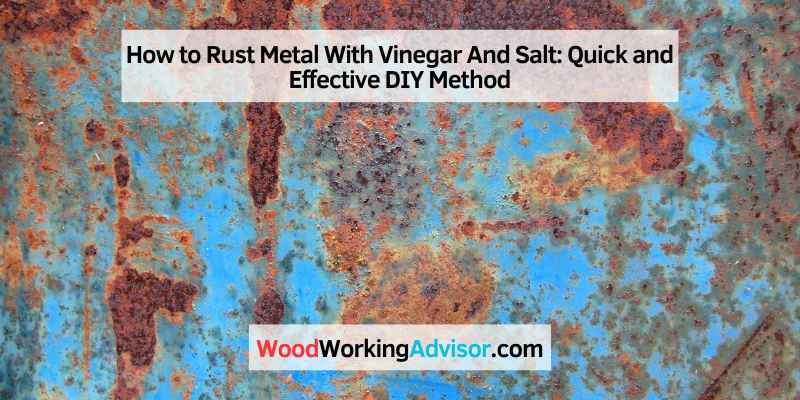
How to Get a Rust Patina Look on Metal
A rust patina is a decorative, controlled layer of iron oxide that adds an aged, weathered appearance to metal surfaces. Unlike structural rust (which weakens metal), a sealed decorative patina is stable and does not continue to spread once properly coated. This look is widely used in farmhouse and industrial interior design — on hardware, furniture legs, candleholders, garden sculpture, and wall art.
Best metals for a decorative patina: Mild steel produces the classic red-orange patina. Cast iron develops a deep, almost black-red texture. Wrought iron creates a fine-grained finish. Rebar gives an industrial, heavily textured look. All four work well with the vinegar-salt and H₂O₂ methods.
Controlling the patina depth: Light patina (2–3 spray cycles) gives a subtle aged finish with the base metal still partially visible. Heavy patina (8–10 cycles over several hours) creates a fully orange-red textured surface. Sprinkle dry coarse salt onto the wet solution after application to create irregular blotchy texture patterns — this is a popular technique for furniture hardware and decorative items.
Patina on galvanized metal: Galvanized steel has a zinc coating that resists vinegar rusting. To rust galvanized metal, strip the zinc layer first with a muriatic acid wash or heavy sanding down to bare steel, then apply the vinegar-salt solution. This step is necessary — the vinegar will not penetrate the zinc coating without prior preparation.
★ Recommended product
3% Hydrogen Peroxide (Large Bottle)
Standard drugstore-grade 3% hydrogen peroxide is all you need for the fast-rust formula. A larger bottle gives you enough for multiple projects and repeated application cycles.
- 3% concentration — safe to handle, strong enough for rust activation
- Works in minutes when combined with vinegar and salt
- Ideal for patina projects, furniture hardware, garden decor
As an Amazon Associate we earn from qualifying purchases.
What Metals Can You Rust With Vinegar and Salt?
| Metal | Rusts With Vinegar + Salt? | Speed | Notes |
|---|---|---|---|
| Mild steel | ✅ Yes | Fast | Best results — produces classic red-orange patina |
| Cast iron | ✅ Yes | Moderate | Deep, dark-red patina; good for decorative pieces |
| Wrought iron | ✅ Yes | Moderate | Fine-grained texture; used in hardware and gates |
| Rebar | ✅ Yes | Fast | Industrial look; high carbon content speeds rusting |
| Stainless steel | ❌ No | — | Chromium oxide layer resists acid etching |
| Aluminum | ❌ No | — | Does not form iron oxide; forms white aluminum oxide instead |
| Galvanized steel | ❌ Without prep | — | Zinc coating must be removed first (sand or acid wash) |
| Copper | ❌ No | — | Forms green patina (verdigris), not rust |
Finishing and Sealing the Rust
Once the metal reaches the desired rust level, sealing it is critical. Unsealed rust continues to react, produces orange stains on surfaces it contacts, and will eventually compromise the metal structurally. Sealing locks the patina in place and stops the oxidation process.
Rinsing and Drying the Metal
Rinse the metal thoroughly with clean water to neutralize the remaining acid from the vinegar. Dry completely with a clean cloth or compressed air — any residual moisture under the sealant will cause the rust to continue spreading underneath the coating. Allow at least 30 minutes of air-drying before applying the sealant.
Applying a Protective Sealant
Clear acrylic spray is the most common sealant for decorative rust finishes. Hold the can 8–12 inches from the surface and apply 2–3 thin coats, allowing full drying time between each coat. For outdoor pieces, use a polyurethane sealant or a dedicated rust patina preserver such as Everbrite ProtectaClear — these provide better UV and moisture resistance than standard acrylic spray.
Wax is also an option for indoor decorative pieces: apply a neutral furniture wax over the dried rust and buff lightly. This gives a subtle sheen and prevents the rust from transferring to hands or other surfaces. It does not provide outdoor weatherproofing. You can also protect metal from rust with a clear oil finish for lighter indoor applications.
★ Recommended product
Rust-Oleum Clear Acrylic Sealer Spray
A clear acrylic topcoat locks in your rust patina and prevents orange staining. Dries fast, available in matte or gloss, and works on both indoor and lightly weathered outdoor pieces.
- Seals rust without changing the color or texture
- Dries in 15 minutes; full cure in 24 hours
- Available in matte finish to preserve the natural rust look
As an Amazon Associate we earn from qualifying purchases.
Frequently Asked Questions
Can vinegar and salt rust any metal?
No — vinegar and salt only rust ferrous metals, meaning metals that contain iron. Mild steel, cast iron, and wrought iron all rust readily with this method. Stainless steel contains chromium, which forms a protective oxide layer that resists acid etching. Aluminum forms white aluminum oxide (not rust). Copper forms green verdigris. Galvanized steel has a zinc coating that must be removed before the method works.
How long does it take to rust metal with vinegar and salt?
With vinegar and salt alone, visible rust typically appears in 8–24 hours depending on temperature, humidity, and metal thickness. Higher humidity and warmer temperatures accelerate the process. Adding hydrogen peroxide reduces this to 5–15 minutes for initial rust formation and 1–2 hours for a full patina. Multiple application cycles (spray, dry, reapply) produce a thicker, more even rust layer regardless of method.
Does hydrogen peroxide make metal rust faster?
Yes. Hydrogen peroxide is an oxidizer that supplies oxygen directly to the metal surface, bypassing the slower atmospheric process. When combined with vinegar (which etches the metal) and salt (which accelerates electron transfer), rust forms within minutes rather than hours. Standard 3% hydrogen peroxide from a drugstore is sufficient — higher concentrations are not necessary and require additional safety precautions.
How do you seal rust patina on metal to stop it spreading?
Rinse the metal with clean water to neutralize the acid, dry completely, then apply 2–3 thin coats of clear acrylic spray sealant, allowing drying time between coats. For outdoor pieces, use polyurethane or a specialized product like Everbrite ProtectaClear for better UV and moisture resistance. Wax works for indoor decorative pieces but does not provide outdoor protection. Sealing within 24 hours of the final rust application gives the best results.
Can you rust stainless steel with vinegar and salt?
Generally no. Stainless steel contains 10.5% or more chromium, which forms a passive chromium oxide layer that resists acids and prevents iron oxide (rust) from forming. Prolonged exposure to concentrated acids can eventually degrade this layer, but for practical DIY purposes, vinegar and salt will not produce visible rust on stainless steel in a reasonable timeframe. Use mild steel or cast iron for intentional rusting projects.
What is the difference between rust and patina?
Rust is specifically iron oxide — the red-orange corrosion that forms when iron or steel reacts with oxygen and moisture. Patina is a broader term for any surface change caused by oxidation or aging, including the green verdigris on copper, the dark tarnish on silver, and the black oxide on bronze. In DIY metalwork, “rust patina” refers to a decorative, controlled rust finish that has been sealed to stop further corrosion — distinguishing it from uncontrolled structural rust that weakens the metal.
Conclusion
For the fastest results, use the 3-ingredient formula: 2 cups hydrogen peroxide, 4 tablespoons white vinegar, and 1.5 teaspoons salt — rust forms in minutes on iron and mild steel. For a more controlled, gradual finish, vinegar and salt alone works well with multiple wet/dry cycles over 8–24 hours. Whichever method you use, seal the finished rust within 24 hours with clear acrylic or polyurethane to stop the oxidation and preserve the patina.