How to Sand Holes in Wood: Quick & Easy Fixes
To sand holes in wood, start by selecting the appropriate grit sandpaper for the job. Then, use a sanding block or sandpaper wrapped around a block to sand the holes in a circular motion until they are smooth and level with the surrounding wood.
Woodworking projects often require sanding to achieve a smooth, finished surface. Whether you’re working on a furniture restoration or a DIY project, sanding holes in wood is a crucial step to ensure a professional-looking result. By following a few simple steps, you can easily sand holes in wood and achieve a seamless finish.
In this blog post, we will guide you through the process of sanding holes in wood, providing you with the necessary techniques and tools to get the job done right. Let’s dive in and learn how to achieve a flawless finish on your woodwork.
Introduction To Sanding Wood
Sanding wood is an essential part of woodworking, whether you are a DIY enthusiast or a professional carpenter. It involves the process of smoothing the surface of wood by using abrasion. Sanding is crucial for achieving a flawless finish and preparing the wood for painting, staining, or varnishing.
The Importance Of Smooth Surfaces
Smooth surfaces are essential for any woodworking project as they provide a flawless base for finishes such as paint or varnish. Sanding helps to remove imperfections and uneven surfaces, ensuring that the final product looks professional and well-crafted.
Common Challenges With Wood Holes
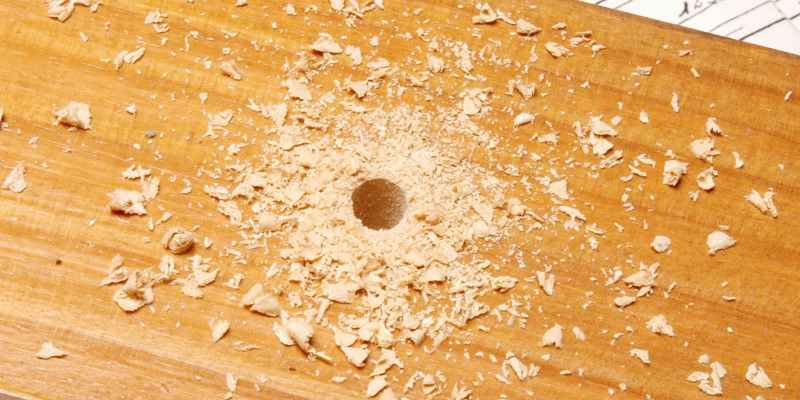
Wooden surfaces often have holes, cracks, or imperfections that can detract from the overall appearance of the finished product. Sanding these areas can be challenging, as it requires precision and care to ensure that the holes are completely smoothed out without causing damage to the surrounding wood.
Types Of Wood Holes
When working with wood, it’s important to understand the types of holes you may encounter. Whether they are natural or result from accidental damage, knowing how to address different types of wood holes is essential for creating a smooth and flawless finish. Let’s explore the various types of wood holes and how to effectively sand them down to achieve a professional look.
Natural Knots And Cracks
Natural knots and cracks are common occurrences in wood, adding character and uniqueness to each piece. These imperfections can be challenging to sand due to their uneven surfaces and varying densities. When sanding natural knots and cracks, it’s important to use gentle and consistent pressure to avoid further damaging the wood.
Accidental Damage And Wear
Accidental damage and wear, such as dents, scratches, or gouges, can detract from the beauty of wood surfaces. These types of wood holes require careful attention and a precise sanding technique to restore the smoothness and integrity of the wood. Identifying the depth and severity of the damage is crucial in determining the appropriate sanding method.
Tools And Materials Needed
When sanding holes in wood, having the right tools and materials is crucial to achieving a smooth and professional finish. Selecting the right sandpaper grit and using essential sanding tools are essential for this task. Below, we’ll explore the tools and materials needed to sand holes in wood effectively.
Selecting The Right Sandpaper Grit
Choosing the correct sandpaper grit is vital for achieving a smooth and even finish when sanding holes in wood. Use the following guidelines to select the right sandpaper grit:
- Coarse Grit (40-80): Ideal for removing rough surfaces and shaping the wood.
- Medium Grit (100-150): Use for smoothing and removing scratches left by the coarse grit sandpaper.
- Fine Grit (180-240): Provides a smooth finish and prepares the wood for staining or painting.
Essential Sanding Tools
Having the essential sanding tools is crucial for achieving a professional result when sanding holes in wood. The following tools are necessary for this task:
- Sandpaper: Different grits for initial sanding, smoothing, and finishing.
- Sanding Block: Provides a flat and even sanding surface for consistent results.
- Power Sander: Optional for larger projects to save time and effort.
- Dust Mask: Protects against inhaling wood particles and dust during sanding.
- Safety Glasses: Ensures eye protection from wood particles and debris.
Preparing The Surface
To prepare the surface for sanding wood holes, ensure the area is clean and smooth. Use sandpaper in circular motions to remove imperfections. Finish by wiping away dust particles for a flawless surface ready for further treatment.
Cleaning The Wood
Before sanding holes in wood, clean the surface thoroughly.
Assessing The Depth And Size Of Holes
Measure the depth and size of holes accurately.
Start by ensuring the wood surface is clean and free of any debris. This will help the sandpaper to work effectively.
Next, carefully assess the depth and size of the holes you need to sand. Use a measuring tool to get precise measurements.
Sanding Techniques For Small Holes
To sand small holes in wood, start by sanding the area around the hole with a fine-grit sandpaper. Then, use a putty knife to apply a wood filler to the hole, let it dry, and sand it smooth with progressively finer sandpapers.
Finish with a final sanding using a very fine-grit sandpaper for a polished finish.
If you’re working on a woodworking project, small holes are inevitable. But, don’t let them get in the way of achieving a smooth and polished finish. Sanding is the solution, and it’s essential to know the right techniques to sand small holes in wood without damaging the surrounding area. In this post, we’ll discuss manual sanding methods and using power tools for efficiency.
Manual Sanding Methods
When it comes to sanding small holes manually, there are a few techniques to keep in mind. First, use a sanding block or a piece of sandpaper wrapped around a dowel or pencil to sand the inside of the hole. This will ensure that you’re only sanding the hole and not the surrounding area.
Second, for shallow holes, use a finger or a small piece of sandpaper to sand the surface gently. You can also use a sanding sponge for more control and precision.
Using Power Tools For Efficiency
Power tools can make sanding small holes in wood quicker and more efficient. A rotary tool with a sanding attachment is an excellent option for sanding small holes. It allows you to reach tight spaces and sand at different angles.
Another power tool that’s great for sanding small holes is an orbital sander. However, be cautious when using an orbital sander as it can quickly remove too much material if you’re not careful.
Sanding small holes in wood is a crucial step in achieving a polished finish. By following these techniques, you can ensure that your woodworking project looks professional and smooth. Whether you choose manual sanding methods or power tools, be careful not to remove too much material, and take your time to achieve the desired result.
Addressing Larger Holes
Smooth out wood surfaces by sanding larger holes to create a seamless finish. Use coarse-grit sandpaper followed by fine-grit for a polished look. Sand in circular motions to blend the edges evenly for a professional result.
Filling Holes Before Sanding
Addressing Larger Holes in wood requires filling them before sanding. Wood filler can effectively fill larger holes in wood surfaces. The process involves applying the filler generously into the hole and allowing it to dry completely.
Sanding After Applying Wood Filler
Sanding after applying wood filler is essential for a smooth finish. Use fine-grit sandpaper to sand the filled holes gently. Gradually sand the surface until it is level with the surrounding wood.
Finishing Touches
Smooth out any imperfections in wood by sanding holes with a fine-grit sandpaper. Begin with a coarser grit and progressively move to finer grits for a polished finish. Sand in the direction of the wood grain to achieve the best results.
After sanding the holes in the wood, it is important to give them a few finishing touches to enhance their appearance and protect them from damage. Here are some important steps to follow:
Smoothing The Edges
To make the edges of the holes smoother, use a sandpaper with a finer grit. Wrap it around a small sanding block to make it easier to use and hold. Sand the edges of the holes in a circular motion until they are smooth and even with the surface of the wood. Use a vacuum or brush to remove any dust or debris.
Applying Finish For Protection
Once the edges are smooth, it’s time to apply a finish to protect the wood from damage. There are various finishes available, such as varnish, lacquer, or oil. Before applying the finish, make sure the surface of the wood is clean and free of dust and debris.
Apply the finish according to the manufacturer’s instructions, using a brush or cloth. Make sure to apply the finish evenly and in thin coats. Allow the first coat to dry completely before applying a second one. Repeat this process until you achieve the desired finish.
By following these simple steps, you can sand holes in wood and give them a professional finish. Remember to take your time and be patient, as rushing the process can result in uneven or rough edges. With a little bit of effort and the right tools, your woodwork project will look stunning and last for years to come.
Maintenance And Prevention
To sand holes in wood, start by cleaning the area and filling the holes with wood filler. Once dried, sand the surface using fine-grit sandpaper in a circular motion. Finish by wiping off the dust and applying a wood finish for a smooth, polished look.
Regular maintenance can prevent future damage and preserve the wood’s quality.
Regular Wood Care Tips
Maintaining your wood furniture is crucial for its longevity. Regular cleaning, dusting, and polishing are essential. Always use a soft cloth to clean the surface, and avoid harsh chemicals that can cause damage. If you have a wooden dining table, use placemats and coasters to prevent stains, scratches, and water damage. Trim the plants near the furniture to avoid scratches and dents.
Preventing Future Damage
Preventing damage is better than repairing it. Here are some tips to avoid future damage to your wood furniture. First, avoid exposing it to direct sunlight and extreme temperatures. Second, avoid placing heavy objects on the furniture, as it can cause dents and scratches. Third, use felt pads under the legs of your furniture to avoid scratches on the floor. Fourth, avoid dragging the furniture, as it can cause scratches on the surface.
Repairing Holes In Wood
If you have holes in your wood furniture, sanding is the best way to repair it. First, clean the area around the hole with a soft cloth and sandpaper. Then, fill the hole with wood filler and let it dry. Sand the area again until it is smooth and even. Finally, apply a coat of stain or paint to match the color of the furniture.
Maintaining and preventing damage to your wood furniture is essential for its longevity. Regular cleaning, polishing, and avoiding direct sunlight and extreme temperatures can help prevent future damage. If you do have holes in your wood furniture, sanding is the best way to repair it. By following these tips, you can keep your wood furniture looking new for years to come.

Frequently Asked Questions
How Can I Effectively Sand Holes In Wood?
To effectively sand holes in wood, start with coarse sandpaper to remove any rough edges, then switch to finer grits for a smooth finish. Use a sanding block or sanding sponge to reach into crevices and ensure even sanding. Finish with a final light sanding for a polished look.
What Are The Best Tools For Sanding Wood Holes?
The best tools for sanding wood holes include sandpaper in various grits, sanding blocks, sanding sponges, and detail sanders. These tools help reach into tight spaces and ensure a uniform finish. Choose the tool that best fits the size and depth of the hole for optimal results.
Should I Use A Wood Filler Before Sanding Holes?
Yes, it’s recommended to use a wood filler before sanding holes in wood. Apply the wood filler to fill any gaps or imperfections, let it dry completely, then sand it smooth. This helps create a seamless surface for sanding and ensures a professional-looking finish.
Can I Use A Power Sander To Sand Wood Holes?
Yes, you can use a power sander to sand wood holes, but be cautious not to over-sand and damage the surrounding wood. Use a detail sander or a small attachment for precision. Additionally, hand sanding may be necessary for intricate details or hard-to-reach areas for a perfect result.
Conclusion
To sum it up, sanding holes in wood is a crucial step in achieving a smooth and flawless finish. By following the right techniques and using the appropriate tools, you can effectively remove imperfections and create a seamless surface. Remember to start with coarse-grit sandpaper and gradually work your way up to finer grits for optimal results.
With patience and attention to detail, you can transform your wooden projects into professional-looking masterpieces. Happy sanding!