What Is the Best Finish for Cedar Wood? (Oil vs Stain vs Sealer)
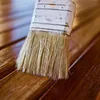
Penetrating oil or an oil-based semi-transparent stain is the best finish for cedar wood outdoors, reapplied every 1 to 2 years — but a clear film finish like varnish or shellac only works indoors, since UV light makes it crack and peel outside. Pick the wrong type and you’ll be stripping and refinishing within a season. This guide covers oil vs. stain vs. sealer vs. clear coat, indoor vs. outdoor rules, and how to stain cedar without blotching.
Quick Answer
For outdoor cedar (fences, siding, decking), use a penetrating oil or oil-based semi-transparent stain — both flex with the wood and won’t crack. For indoor cedar (chests, paneling, furniture), a clear water-based polyurethane or shellac is fine since there’s no UV exposure to break it down. Never use a film-forming clear finish (varnish, lacquer, polyurethane) outdoors on cedar — it traps UV damage under the surface and fails within one to two seasons.
Why Cedar Wood Needs the Right Finish
Cedar’s natural oils already make it resistant to rot and insects — the same oils that give it that recognizable aroma also repel moths and carpenter ants. That natural resistance is exactly why the wrong finish is such a waste: a film-forming coat that traps moisture underneath can undo cedar’s built-in protection faster than leaving it bare would.
Durability Without a Finish
Untreated cedar left outdoors will weather to a silvery gray but won’t rot the way pine or fir would — western red cedar’s heartwood contains natural preservative compounds (thujaplicins) that resist decay fungi for decades. A finish isn’t required for survival; it’s for color retention and moisture control.

Aromatic and Insect-Repellent Qualities
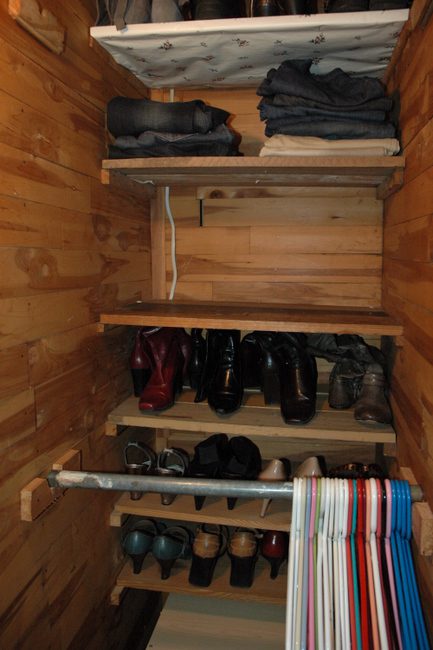
The same aromatic oils that make cedar closets and chests smell distinct also repel clothes moths and, to a lesser degree, other pests. A film-forming finish (varnish, polyurethane, paint) seals that aroma in permanently, which is a reason many woodworkers leave interior cedar chests and closet linings unfinished or oiled only rather than varnished.
Oil vs. Stain vs. Sealer vs. Clear Coat: Full Comparison
Every cedar finish falls into one of five categories, and each behaves differently outdoors versus indoors. The table below combines real reapplication intervals, relative cost, and blotching risk — the three factors that actually decide whether a finish is worth using.
| Finish Type | Indoor / Outdoor | Reapply Every | Cost | Blotch/Lap-Mark Risk | Best For |
|---|---|---|---|---|---|
| Penetrating oil | Both | 1–2 yrs outdoor | $$ | Low (if back-brushed) | Furniture, natural grain look |
| Semi-transparent oil stain | Outdoor | ~2 yrs | $$ | Medium (if sprayed, not back-brushed) | Fences, siding, decks |
| Water-repellent sealer | Outdoor (bare wood only) | 1–2 yrs | $ | Low | Quick low-cost protection, pre-paint prep |
| Solid-color stain | Outdoor | Several yrs (primed) | $$$ | Medium | Hiding weathered or discolored wood |
| Clear film finish (varnish/poly/shellac) | Indoor ONLY | Several yrs indoor | $$ | N/A indoor | Indoor furniture, cedar chests, paneling |
| Bleaching / driftwood-gray stain | Outdoor | 4–5 yrs | $$ | Low | Uniform weathered-gray look on demand |
Sealers and clear film finishes are different products, even though both are often described as “clear.” A water-repellent sealer soaks into the wood and lets it breathe; a clear film finish (varnish, polyurethane, lacquer) forms a hard surface layer. Outdoors, that surface layer is the problem — UV degrades it from underneath while it looks fine on top, then it cracks all at once.
“Transparent, non-flexible, film-forming finishes such as lacquer, shellac, urethane, and varnish are not recommended for exterior use on cedar. Ultraviolet radiation can penetrate the transparent film and degrade the wood, and the finish will eventually become brittle, develop severe cracks, and then fail.”
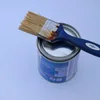
Best Cedar Stain & Sealer Pick

Ready Seal Natural Cedar Stain & Sealer, 1 Gallon
An oil-based, semi-transparent stain and sealer in one, tinted to match cedar’s natural tone — applies with no back-brushing required.
- Best for: Fences, decks, and siding where you want color and protection in a single coat
- Why we picked it: Combines the stain and sealer step covered in our comparison table above, cutting reapplication labor in half
- Main drawback: Oil-based formula has a strong odor during application and needs good ventilation
Compare more cedar finish options
 Option 1 Penofin Blue Label Penetrating Oil, Western Red Cedar
|
 Option 2 Thompson’s WaterSeal Clear Wood Sealer, 1 Gallon
|
 Option 3 Minwax Polycrylic Clear Satin, 1 Quart (Indoor Use)
|
As an Amazon Associate we earn from qualifying purchases.
📊 Water-repellent preservatives on bare cedar typically last only 1 to 2 years outdoors before reapplication, and less on smooth-sawn boards than textured ones. — Source: Western Red Cedar Lumber Association
Choosing a Finish for Indoor vs. Outdoor Cedar
The single biggest mistake in cedar finishing is treating indoor and outdoor cedar the same way. Indoor cedar never sees UV or standing water, so the rules that protect a deck don’t apply to a closet lining — and vice versa.
Best Finish for Indoor Cedar
Indoor cedar (paneling, chests, sauna benches, furniture) can use clear finishes safely because there’s no UV to break them down. A wipe-on penetrating oil keeps the aroma and natural color; a water-based polyurethane or blonde shellac adds a harder, more durable surface if the piece gets handled often — both are fine choices indoors. Avoid dark solid stains on cedar meant to stay aromatic, since heavier films mute the scent.
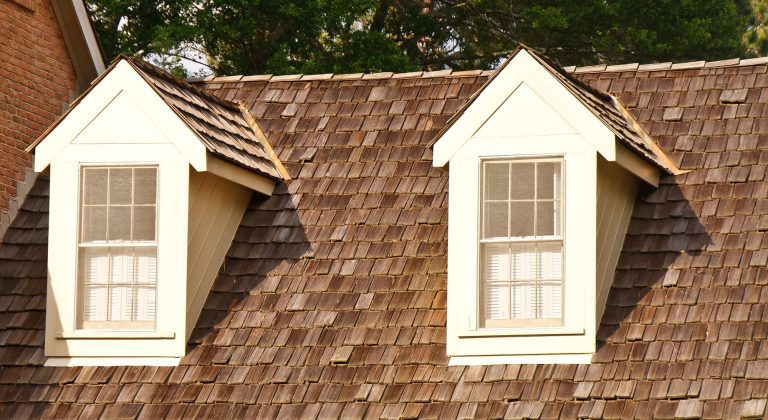
Best Finish for Outdoor Cedar
Outdoor cedar (fencing, decking, siding) needs a finish that flexes as the wood expands and contracts with humidity. Penetrating oils and semi-transparent oil-based stains do this; film-forming clear coats don’t, which is why they fail outdoors within a season or two. If you want the most protection with the least maintenance, a 100%-acrylic solid-color stain over a primer outperforms clear products — at the cost of hiding the grain entirely.

See our dedicated guide on finishing cedar for outdoor use for step-by-step application if you’re working on a deck or fence specifically.
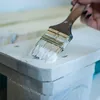
How to Stain Cedar Without Blotching
Cedar is a softwood with uneven grain density, which is exactly why it blotches when stained carelessly — some areas absorb far more stain than others. Getting even color isn’t about the stain brand; it’s about prep and application order.
- Sand with 150–220 grit: Cedar sands fast — don’t over-sand or you’ll burnish the surface and it will refuse to take stain evenly.
- Apply a pre-stain conditioner: A sanding sealer or wood conditioner evens out how the softer and harder grain bands absorb stain, which is the single biggest blotching fix.
- Use oil-based stain, not water-based: Water-based stain reactivates cedar’s natural tannins and causes uneven discoloration; oil-based stain doesn’t.
- Work in the shade, in mild, low-humidity weather: Direct sun and heat dry the leading edge before you can blend it, causing lap marks.
- Apply with a pad or brush, then back-brush immediately: Feathering the wet edge before it sets is what prevents the blotchy, patchy look that shows up as the finish weathers.
- Stain full-length boards in one pass: Stopping mid-board lets the front edge dry before you return, creating a visible line.
“In our shop, the pre-stain conditioner step is the one people skip most often on cedar — and it’s the one that actually stops the blotching, not the brand of stain used afterward.”
For a full walkthrough with product-specific timing, see staining cedar wood or our guide on whether you can stain cedar at all if you’re working with reclaimed or previously-finished boards.
How to Preserve and Protect Cedar Wood Long-Term
Even the right finish needs upkeep. Cedar’s natural rot resistance buys you time, but the finish on top of it degrades on its own schedule — and most of the discoloration people blame on “bad cedar” is actually a fixable finish problem.
Routine Cleaning and Recoating
A mild detergent wash once or twice a year removes the dirt and surface mildew that dull a finish long before the coating itself fails. Recoat penetrating oils and semi-transparent stains on the schedule in the comparison table above — waiting until the old coat has fully worn through means starting over on bare wood instead of a quick refresh coat.
Common Discoloration Problems (and Fixes)
- Mildew: Shows as black or gray staining on the finish itself. Clean with a commercial mildew remover, then refinish with a product that contains a mildewcide — restaining over active mildew just seals it in.
- Iron stains: Reddish-brown or blue-black marks near fasteners come from metal reacting with cedar’s natural extractives. Prevent it by using hot-dipped galvanized, aluminum, or stainless steel fasteners only.
- Extractive bleed: Brownish streaking caused by moisture pulling natural compounds out of the wood. Often fades with a season of rain; if it doesn’t, a wood-safe cleaner will lift it.
- Chalking: A powdery surface on painted or solid-stained cedar — this is the paint degrading, not the wood. Wash it off and recoat once it appears.
If you’d rather skip finishing altogether, see our notes on tung oil vs. linseed oil for the lowest-maintenance penetrating options, or check the cost of cedar wood planks if you’re still pricing out the project.
Frequently Asked Questions About the Best Finish for Cedar Wood
What Is the Best Finish for Cedar Wood?
A penetrating oil or oil-based semi-transparent stain is best outdoors because both flex as cedar expands and contracts with humidity. Indoors, a clear water-based polyurethane or shellac works fine since there’s no UV exposure to break the film down. The wrong pick — a film-forming clear coat used outdoors — cracks and fails within one to two seasons.
Is It Better to Oil or Stain Cedar?
Oil is better for indoor furniture and pieces where you want the natural grain to show with minimal color change. Semi-transparent stain is better for outdoor fences, decks, and siding, since the added pigment blocks more UV than unpigmented oil alone, extending the time between recoats.
Does Cedar Need to Be Stained or Sealed?
No — cedar’s natural oils resist rot and insects even left bare, and it will simply weather to a silvery gray outdoors without structural damage. Staining or sealing is about controlling color and moisture uptake, not survival. Skip it entirely if you want the natural weathered look and don’t mind the graying process.
What Is the Best Sealant for Cedar Wood?
A water-repellent preservative sealer is the best choice for bare or freshly restored cedar that you plan to leave unstained, since it reduces water absorption without adding color. It typically needs reapplication every 1 to 2 years outdoors. If you also want color, a stain-and-sealer combination product does both jobs in one coat.
How Often Should You Reseal or Restain Cedar Wood?
Penetrating oils and water-repellent sealers need reapplication every 1 to 2 years outdoors. Semi-transparent oil stains last about 2 years. Solid-color stains over a primer can last several years. Bleaching or driftwood-gray stains last 4 to 5 years. Indoor clear finishes last several years regardless of type since there’s no UV or weather exposure to break them down.
Can You Leave Cedar Wood Unfinished?
Yes. Cedar’s natural preservative oils make it one of the few woods that performs well outdoors with no finish at all — it will weather to gray but resists rot for decades. The tradeoff is losing the reddish-brown color; if you want to keep that tone, you’ll need to reapply a UV-blocking oil or stain, since the graying process itself can’t be reversed without sanding.
Conclusion
The best finish for cedar wood comes down to one question: indoor or outdoor? Outdoors, use a penetrating oil or oil-based semi-transparent stain and plan to recoat every 1 to 2 years — never a film-forming clear coat. Indoors, a clear water-based polyurethane, shellac, or oil is safe since there’s no UV to fight. Sand to 150–220 grit, condition before staining, and back-brush immediately to avoid the blotching cedar is known for.