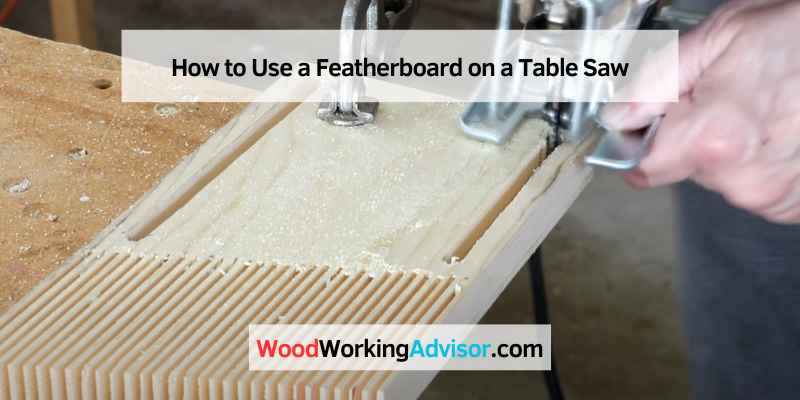
How to Use a Featherboard on a Table Saw
If you’re using a table or saw, a weatherboard is one of the most important safety devices you can use. A feather board is a device that firmly holds your workpiece against the table saw fence while cutting. This helps to prevent kickbacks, which can be dangerous.
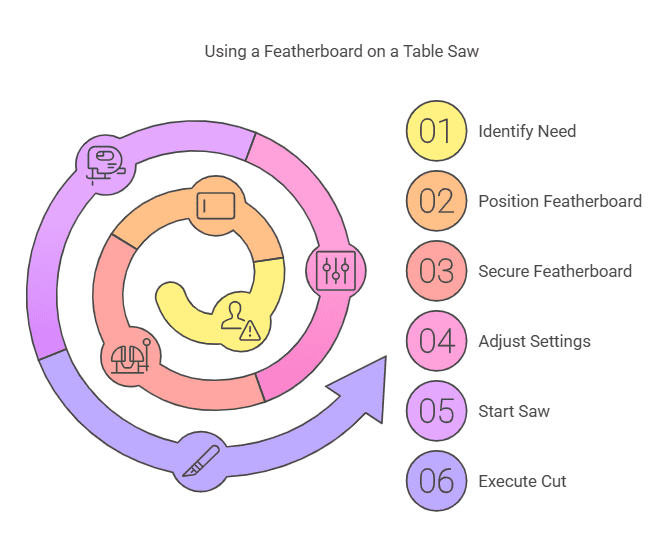
Here’s how to use a feather board on a table saw.
How to Use a Featherboard when Rip Cutting Wood on a Tablesaw
- Attach the feather board to the table saw fence
- Make sure that the feathers are pointing toward the Blade
- Adjust the tension on the screws so that the board is snug against the fence without putting too much pressure on it
- Position the board so that it will deflect any kickbacks toward you and not back into the Blade
- Feed your workpiece into the edge, using a push stick if necessary to keep your hands away from the Blade
- The featherboard will help guide your workpiece as it passes through

How to Use a Featherboard on a Router Table
A feather board is a perfect solution if you’re looking for a way to add stability and safety to your routing projection. A feather board is a simple device that attaches to your router table and holds your workpiece securely in place while you work. In this article, we’ll show you how to use a feather board on a router table so you can get the most out of this handy tool.
First, look at how to attach a feather board to your router table. There are two methods for doing this: using T-nuts or mounting screws. If your router table has T-nuts installed, line up the holes in the weatherboard with the T-nuts and tighten it down.
If your router table doesn’t have T-nuts, you can use mounting screws instead. Just drill some pilot holes in the tabletop and screw the feather board into place. Once your feather board is attached, it’s time to start routing!
To do this, feed your workpiece through the board and against the fence of your router table. The feathers on the board will hold it firmly in place while you work, giving you more control over your cuts and helping to prevent kickback accidents. When you’re finished routing, remove your workpiece from the weatherboard before turning off your router.
This will help prevent damage to both your workpiece and the feathers on the board. And that’s all there is to use a feather board on a router table! With this simple tool, you’ll be able to route safely and with greater precision than ever before.
Table Saw Featherboard
If you’re a woodworker, you know that one of the essential tools in your shop is the table saw. And if you want to get the most out of your table noticed, you need to use a feather board. A feather board is a simple tool that attaches to your table saw and helps to keep your workpiece steady as you cut it.
It’s beneficial when cutting narrow or delicate pieces of wood. Many types of weatherboards are available on the market, but they all serve the same primary purpose. To choose the right one for your needs, consider the size and weight of your table saw and the type of cuts you’ll be making most often.
Once you have a feather board in place, it’s essential to use it correctly. Always position it, so the pressure is against the fence rather than against the Blade. This will help prevent kickback and ensure a cleaner, safer cut.
What is a Featherboard
When it comes to woodworking, a feather board is an incredibly versatile tool that can be used in various ways. A feather board is a board with a series of evenly spaced slots or “feathers” that can hold wood or metal in place while you work on it. One of the most common uses for a feather board is to secure wood pieces when working with them on a table saw.
By attaching the feather board to the table saw fence and running your wood piece through the slots, you can ensure that your piece stays put while you make your cuts. This is particularly useful when working with long or narrow pieces of wood that tend to move around more easily. Featherboards can also be used as standalone clamps for holding parts together while you glue or nail them.
Simply position the two pieces of wood where you want them, and then use one or more feather boards to clamp them. The pressure from the feathers will keep your details securely in place until the glue dries or the nails are set. Finally, feather boards can also come in handy when sanding or routing edges on pieces of wood.
By attaching a Featherboard to your router table or belt sander, you can create lovely, even edges without worrying about your piece slipping out of place. As you can see, there are all sorts of uses for Featherboards in the world of woodworking. If you’re not already using one (or more) in your shop, we highly recommend giving them a try – we think you’ll be surprised at just how useful they can be!
DIY Featherboard
If you’re looking for a unique and exciting way to add some personality to your home, look no further than DIY weatherboards! These easy-to-make wall hangings are made from colorful feathers and can be customized to fit any style. To make your feather board, start by gathering supplies.
You’ll need a piece of wood (we used a 1×4), feathers in various colors, hot glue, and scissors. The first step is to cut the wood into the desired shape. We went with a simple rectangle, but you could get creative and try different shapes or sizes.
Next, it’s time to start attaching the feathers. Begin by first gluing down the longest feathers, working your way around the board’s perimeter. Continue adding feathers until the entire surface is covered.
Be sure to overlap the feathers so that no wood is showing through. Once the feathers are in place, let the glue dry completely before hanging up your new weatherboard!
Featherboard for Dewalt Table Saw
If you’re looking for a feather board for your Dewalt table, saw, you’ve come to the right place. This blog post will provide detailed information about the different types of feather boards available and how to choose the right one for your needs. Two main kinds of feather boards are available: mount directly to the table saw fence and clamp onto the table saw top.
Table saw fences are typically T-shaped or L-shaped, so check which type of fence your Dewalt has before purchasing a feather board. When choosing a feather board, it’s essential to consider its function and form. Functionally, you’ll want to ensure that the feathers are adequately spaced to grip the workpiece firmly without putting too much pressure on it.
The form factor is also essential – some feather boards are designed for specific tasks such as mitering or dadoing, while others are more general purpose. Choose the one that best suits your needs. Once you’ve selected the perfect feather board for your Dewalt table, and saw, follow these tips for using it:
– Always use gloves when handling feathers to avoid injury. – Be careful not to over-tighten the screws when mounting the feather board – snug them up enough, so it’s secure without being overly tight. – To get optimal results, use two or more featherboards at once – this will help keep your workpiece stable and prevent kickback.

Credit: www.finehomebuilding.com
What is the Purpose of a Featherboard on a Table Saw?
A feather board is a safety device attached to the table saw fence. It is used to help keep the workpiece from being pushed into the Blade by the user’s hands. The weatherboard has a series of “fingers” that extend down toward the edge.
These fingers help to grip the workpiece and prevent it from moving forward.
Where Do You Place a Featherboard on a Table Saw?
A feather board is a vital safety accessory for a table saw, and it is essential to know where to place it for optimum results. There are three central positions for a feather board on a table saw: in front of the Blade, behind the edge, and mounted on the fence. Each has advantages and disadvantages that you should consider when deciding where to position your feather board.
In front of the Blade, a weatherboard supports the workpiece as it enters the edge. This can help prevent kickback by keeping the workpiece from becoming jammed in the border. However, this position does not offer much protection if the workpiece kicks back after entering the edge.
Behind the Blade, a feather board offers protection in case of kickback. It catches the workpiece as it is ejected from the edge, preventing it from flying back at you. However, this position makes it more challenging to feed stock into the Blade smoothly.
You may also find that your cuts are not as precise when using this method because the Feather board can deflect The amount slightly as it exits The Blade. The most common position for a feather board is mounted on The Fence. This allows you To use both hands To feed The stock Into The Blade while still having complete control And visibility over what you’re doing.
It also offers maximum protection against kickback since The Feather board will catch The Workpiece no matter where It Is ejected from The Blade. However, one downside To This method Is That It Can Be Hard To keep The Feather board tight Against The Fence As You’re cutting, which can lead To vibration And noise. No matter which position you choose for your feather board, always ensure that it is securely attached and will not move during use.
A loose or improperly positioned featherboard can do more harm than good by becoming entangled in the spinning blade or deflecting off-course cuts.
How Do You Use a Featherboard in Woodworking?
A feather board is an essential tool in your arsenal when working with wood. A feather board evenly distributes pressure along a workpiece when cutting or shaping it. This ensures that your cuts are clean and precise.
There are many different ways to use a feather board. One common practice is to attach it to your workbench at the desired height. Then, you can place your workpiece against the weatherboard and use it as a guide while cutting or shaping it.
This is especially helpful when using power tools, as it helps keep your fingers safe from the blades. Another way to use a feather board is by attaching it to the fence of your table saw or another power tool. This allows you to make rip cuts without worrying about the blade binding on the workpiece.
It also keeps your hands away from the Blade, which is always good! No matter how you use it, a feather board is an essential tool for any woodworker. If you don’t have one yet, be sure to pick one up soon – you’ll wonder how you ever got along without it!
How Do You Set Up a Featherboard?
Setting up a feather board is a relatively simple process that can be done in just a few minutes. A feather board is a device that helps keep your workpiece secure while working on it, and it is beneficial for preventing kickbacks when using power tools. There are two main types of feather boards – clamp onto your workbench or table and attach to your power tool itself.
You can also purchase ready-made feather boards or make your own using simple woodworking techniques. To set up a clamping feather board, determine where to position it on your workbench or table. Then, use a drill to create two pilot holes through the base of the feather board and into the surface below.
Next, insert some screws into the pilot holes and tighten them down so that the feather board is securely attached. Finally, position your workpiece against the board’s feathers and tighten the clamps, so it is firmly in place. If you are using a tool-mounted weatherboard, the process is similar, but a few additional steps are involved.
First, you will need to attach the mounting plate to your power tool using screws or bolts (depending on what type of attachment method is compatible with your particular device). Next, slide the feather board onto the mounting plate and secure it with screws or bolts. Finally, adjust the positioning of the feathers so that they will provide firm support for your workpiece as you move it past them during operation.
Conclusion
If you’re looking for a way to increase the safety and accuracy of your cuts, then using a feather board on your table saw is a great option. A feather board is simply a board with evenly spaced fingers that grip the workpiece and hold it firmly against the saw blade. This prevents the workpiece from being thrown back at you or becoming misaligned.
To use a feather board, start by attaching it to the fence of your table saw. Then, feed the workpiece into the Blade while holding it against the weatherboard fingers. Use both hands to guide the workpiece and keep it pressed against the weatherboard for best results.