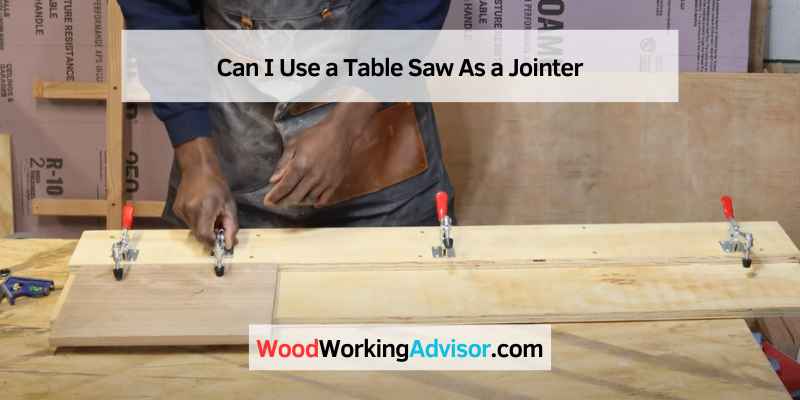
Can I Use a Table Saw As a Jointer
If you’re new to woodworking, you might wonder if a table saw can double as a jointer. The short answer is yes, but there are a few things to remember. First, you’ll need to ensure that the table saw is set up correctly.
The blade should be perpendicular to the table, and the fence should be square to the edge. Secondly, you’ll need to use a special jig or sled to steady the workpiece as you feed it through the blade. Finally, take care not to overheat the wood, as this can cause it to warp or split.
With these considerations in mind, using a table saw as a joiner can be a great way to save money and space in your workshop.
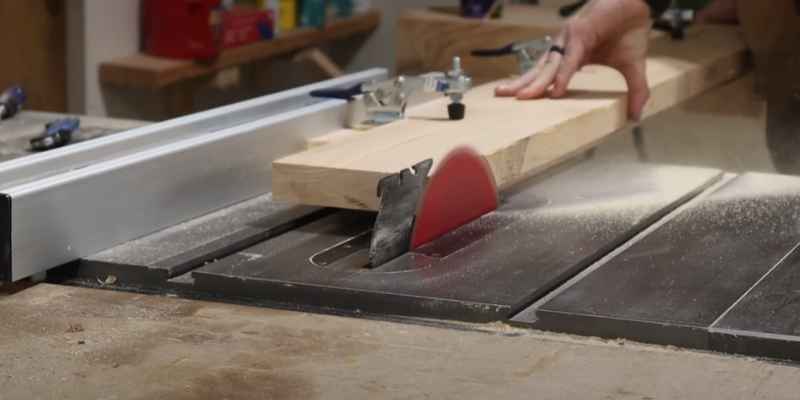
- To use a table saw as a jointer, you must attach a fence to the saw.
- Next, you will need to adjust the fence so that it is flush with the blade
- Once the fence is in place, you can start running your wood through the saw, making sure to keep it tight against the fence
- As you run the wood through, keep even pressure on both sides, so you get a clean cut.
What Can I Use If I Don’t Have a Jointer?
If you don’t have a jointer, there are a few different options that you can use to get the same effect. One option is using a straight bit router to create a jointing edge. Another option is to use a hand plane to create a jointing edge.
Finally, you can use a belt sander to create a jointing edge.
How Do You Join a Board With a Table Saw?
If you’re looking to join a board with a table, saw, there are a few things you’ll need to do first. First, you’ll need to ensure that the blade on your table saw is sharp and in good condition. You can either sharpen it yourself or replace it if it’s not.
Second, you’ll need to set the depth of cut for your blade. You’ll want to ensure that the cut depth is just enough to remove any high spots on the board without taking too much off. To join the board, start by running it through the table saw with the blade set at full height.
Then, lower the blade incrementally until you’ve reached the desired depth of cut. Make sure to run the board through evenly and slowly so that you don’t end up with an uneven joint line. Once you’re done, sand down rough edges and enjoy your perfectly flat board!
What is the Difference between a Joiner And a Table Saw?
A joiner is a woodworking tool used to create precise, linear joints between two pieces of wood. A table saw is a power tool that can make many different cuts in wood, including rip cuts, cross cuts, and miter cuts. Joiners are typically more expensive than table saws and are not as widely available.
Can You Use a Table Saw As a Planer?
If you’re looking to do some woodworking at home, you might be wondering if you can use a table saw as a planer. The answer is yes, but there are a few things you need to keep in mind. First, when using a table saw as a planer, you’ll need to ensure the blade is sharp and that the teeth are pointing up.
This will help ensure that the blade cuts through the wood smoothly. Second, you’ll need to adjust the depth of the cut so that the blade doesn’t cut too deeply into the wood. If you miss too deeply, you could damage the table saw or even injure yourself.
Finally, when feeding the wood into the blade, go slowly and evenly. The edge could kick back and cause serious injury if you go too fast. With these tips in mind, using a table saw as a planner can be a great way to save money on your next project.
Just be sure to take your time and work safely.
Credit: mellowpine.com
Use Table Saw As Planer
If you’re looking for a way to get those big, bulky boards down to size without investing in a separate planer, you might want to consider using your table saw as a planer. It’s not the ideal solution – and it’s definitely not for everyone – but if you have the proper setup and know what you’re doing, it can be a viable option. Here’s what you need to know about using your table saw as a planer.
The first thing to remember is that you’ll need a sturdy table saw – one that isn’t wobble or move around when you’re trying to run boards through it. You also need a sound fence system that will allow you to make precise cuts without the boards slipping or moving around. And finally, you’ll need some infeed and outfeed support system so that the panels don’t get jammed up against the blade or each other.
Assuming you have all of that in place, using your table saw as a planer is pretty straightforward. The key is to take very light passes with the blade at a high elevation – around 1/8″ should do the trick. Slowly feed the board into the blade, letting it cut just a few thousand of an inch off with each pass.
Keep going until the board is down to its desired thickness, and then sand or plane off any remaining roughness on either side. Just keep in mind that this is not an operation for beginners – if you’re not confident in your ability to use your table saw safely and effectively, stick with using it as intended and leave this technique to the experts. But if you’ve got experience under your belt and are looking for a way to save some money on equipment costs, give it a try – just be careful!
Table Saw Jointer Combo
There are many different ways to join wood together, and each has its own advantages and disadvantages. One popular way is to use a table saw jointer combo. This method combines a table saw’s speed and accuracy with a jointer’s strength and durability.
The most significant advantage of using a table saw jointer combo is that it’s swift. You can quickly make long, straight cuts with a table saw and then use the jointer to create solid and precise joints. This is ideal for large projects where you must get things done quickly.
Another advantage is that this method produces solid joints. The pressure from the table saw combined with the precision of the jointer creates powerful connections between pieces of wood. This makes it an ideal choice for furniture or other items that require a lot of wear and tear.
Disadvantages include the fact that this method requires two tools (a table saw and jointer), which can be expensive if you don’t already have them. In addition, it takes some practice to get good at using a table saw jointer combo – you need to learn how to control both tools simultaneously to produce precise cuts and joints.
Jointer Vs. Table Saw
If you’re a woodworker, you know that two of the most essential tools in your shop are the jointer and the table saw. But what’s the difference between these two essential pieces of equipment? The jointer is primarily used for creating flat surfaces on boards.
It removes material from the edges and faces of boards until they are perfectly flat. A jointer also has a built-in fence that allows you to make precise cuts. On the other hand, the table saw is mainly used for making rip cuts (cuts along the grain of the wood) and cross cuts (cuts across the grain).
It can also be used for making miter cuts and dadoes. However, because a table saw doesn’t have a built-in fence, it’s not as accurate as a jointer when making straight cuts. So, which tool should you use for which job?
If you need to create a flat surface or make precision cuts, use a jointer. For rip cuts and cross cuts, use a table saw.
Table Saw Jointer Jig Plans
A table saw a jointer jig is a handy tool that allows you to quickly and accurately join two pieces of wood together. While there are many different ways to create a table, saw jointer jig, the most important thing is to ensure that the jig is sturdy and can handle the weight of the wood you’re working with. When creating a table saw jointer jig, there are a few things to keep in mind.
First, you need to ensure that the jig will fit snugly against the blade of your table saw. You also want to ensure that the jig is level so that your cuts are as accurate as possible. Finally, you’ll want to consider how easy it will be to use the jig – you don’t want something so complicated that it’s more trouble than it’s worth!
Once you have all these factors in mind, you’re ready to start planning your table saw jointer jig. Plenty of plans are available online or in woodworking books – just do some research and find one that looks like it will work well for your needs. With a bit of time and effort, you can easily create a great-looking, and functional table saw jointer jig!
Jointer Table
Most woodworkers know that a jointer is an essential tool for creating flat, square stock. But did you know that a jointer table can be just as helpful? A jointer table is simply a flat surface that you can use to support your workpiece while jointing it.
This can be especially helpful when working with larger pieces of wood. There are a few things to remember when using a jointer table. First, make sure the surface is clean and free of any debris.
Second, use clamps or other means to secure your workpiece, so it doesn’t move while you’re working on it. And finally, take care not to damage the table’s surface with your tools. A little sandpaper can go a long way toward keeping your table in good condition.
With these tips in mind, you’ll be able to get the most out of your jointer table and create beautiful, flat stock for all of your projects!
Do I Need a Jointer
Most woodworkers will eventually ask themselves, “Do I need a jointer?” Jointers are one of the most essential tools in a woodshop, but they can also be one of the most expensive. In this article, we’ll look at what jointers do and whether or not you need one in your shop.
Jointers are used to create flat, 90-degree surfaces on boards. This is accomplished by running the board over a spinning cutter head that has sharp knives mounted on it. The blades remove small amounts of material from the board as it passes over them, resulting in a flat surface.
While you can accomplish similar results with a hand plane or even a belt sander, nothing beats a jointer for accuracy and efficiency. If you’re serious about woodworking and want to produce high-quality work, you’ll need a joiner in your shop. Of course, jointers are not cheap tools.
A decent quality machine can easily set you back $1000 or more. So if you’re just starting woodworking, you may want to wait before investing in one. But if you see yourself doing lots of projects requiring flat surfaces, then add a jointer to your shop sooner rather than later.
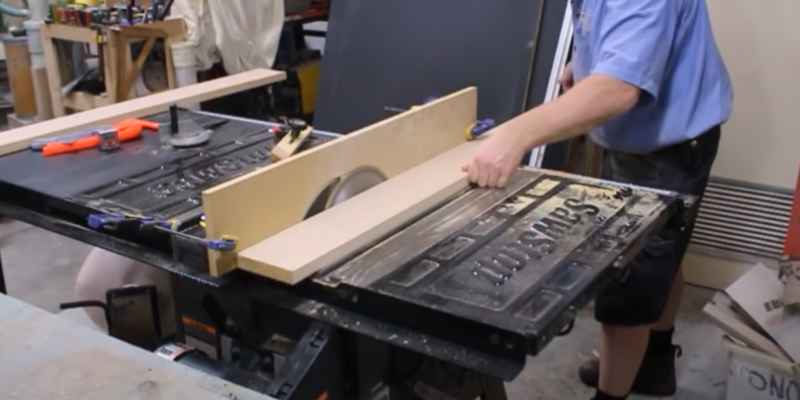
Table Saw Jointer Jig for Sale
Are you looking for an easy and affordable way to join edges on your woodworking projects? Check out this table saw jointer jig for sale! This jig is designed to fit most standard table saws and allows you to quickly and easily join the edges of your boards.
Simply clamp the jig in place, align your board, and run it through your saw. You’ll get perfectly straight, clean joints every time!
Face Jointing Without a Jointer
If you’re new to woodworking or don’t have access to a jointer, face jointing can seem daunting. But with the right tools and techniques, it’s relatively easy! Here’s everything you need to know about face jointing without a jointer.
The first step is to select the straightest boards possible. You’ll also want to make sure they are of equal thickness. Once you have your boards, set them up on your work surface so that the edges that will be joined are facing up.
Next, use a sharp hand plane or power planer to remove any irregularities from the edges of the boards. You want to create a smooth, even surface before proceeding. If one of your boards has a cupped advantage, start planning that side down until it’s flat.
Then flip the board over and finish flattening the other edge. Once your advantages are nice and flat, it’s time to start cutting them at a 45-degree angle. This can be done with a handheld power saw or circular saw outfitted with a special blade designed for cutting tips (called an “angle finder”).
Just cut slowly and carefully, so you don’t accidentally veer off course! Once all your cuts are made, it’s time to test-fit the pieces together. You may need to fine-tune with your hand plane or power planer before everything fits perfectly together – but that’s normal!
Just take your time and adjust as needed until everything lines up flush when clamped together. Now, all that’s left is gluing and clamping the joints together until dry – then you’re ready for assembly!
Conclusion
If you’re looking to save some money and have a little bit of experience with woodworking, you might be wondering if you can use a table saw as a joiner. The answer is yes, but there are some things you need to know first. Table saws are designed to cut boards along their length (ripping), while jointers are intended to cut boards along their width (crosscutting).
However, both machines can be used for the other operation with a few adjustments. When using a table saw as a jointer, you’ll need to adjust the blade height to level with the tabletop. You’ll also want to use a fence or guide rail to ensure that your cuts are straight.
And finally, be sure to make light passes with the blade to avoid tear-out.