How to Use a Sawhorse: Spacing, Clamping and Safe Cutoffs
To use a sawhorse safely, set two on level ground, put each about one-third of the board’s length in from the ends, clamp the work down, and keep the cut in the gap between supports. The cutoff is where most trouble starts: an unsupported end can pinch a saw blade or drop the piece on your foot. Below: spacing, clamping, safe cutoffs, and how to read load ratings.
Pick a Sawhorse Rated for the Load, Not Just the Look
Best Folding Sawhorse Pick | |
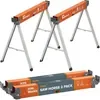 | BORA Workhorse X Saw Horses, 2 Pack Folding Metal Sawhorse A steel folding pair with a listed 1,350 lb rating per sawhorse and pre-drilled 2×4 brackets, so the pair can also carry a plywood sheet or become a small bench.
|
As an Amazon Associate we earn from qualifying purchases. | |
Load ratings look comparable on a listing but often are not. Some brands state the rating per sawhorse, others state it for the pair, and a few give a single number with no explanation. The table below converts three real listings (as displayed on Amazon when this page was updated) to a per-sawhorse figure so you can compare them fairly.
| Model (listing) | Rating as stated | Per sawhorse (if shared evenly) |
|---|---|---|
| BORA Workhorse X, steel folding | 1,350 lb per sawhorse (2,700 lb per pair) | 1,350 lb |
| WORKPRO folding metal pair | 1,800 lb per pair | 900 lb |
| ZYJOYY folding plastic pair | 700 lb per pair | 350 lb |
To put those numbers in context, a full 3/4 inch sheet of plywood weighs roughly 70 pounds, so even the plastic pair has a wide static margin. The real limits are different: how much flex the top beam has, how wide the top is, and whether the legs are locked. If you would rather build your own, our guide to making wooden sawhorses covers dimensions, and the Stanley adjustable sawhorse breakdown looks at how one manufacturer rating can mislead.
The Three Types and When Each Makes Sense
| Type | Best use | Watch out for |
|---|---|---|
| Fixed wooden or steel A-frame | Heavy, repeated cutting and bench-top work | Bulky to store and move |
| Folding metal or plastic pair | Garage, driveway and job-site cuts | Narrow top; add a 2×4 across a pair for sheets |
| Adjustable-height or clamping horse | Uneven ground and holding small stock | Each moving joint is a place for play or wobble |
How Far Apart to Place Sawhorses
The goal is support at both ends with the cut falling in open space between them. For a board or piece of framing lumber, place the two horses about one-third of the length in from each end. That keeps both ends from sagging without putting a support under the blade path.
| Workpiece | Supports | Where the cut goes |
|---|---|---|
| Short board (under 3 ft) | Two sawhorses close together | Between the horses, or just past one |
| 8 ft 2×4 or 1×6 | Two horses, roughly one-third in from each end | In the middle gap, or off one end |
| 4×8 plywood sheet | Two horses with 2x4s laid across the tops, plus a third support under the cut | Over the gap, with both sheet halves supported |
Set the Ground First
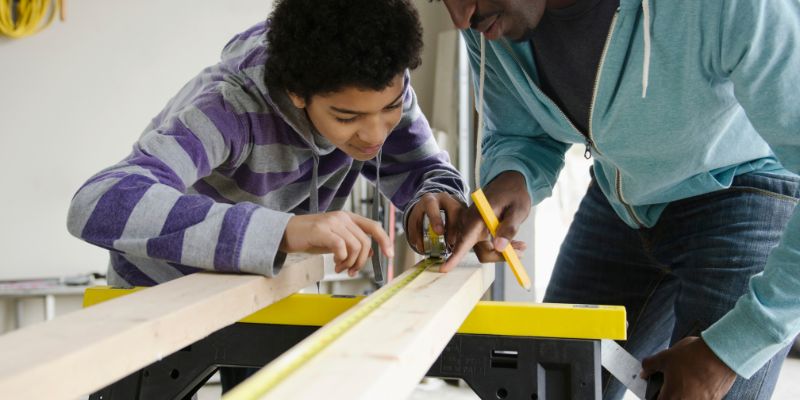
A rocking sawhorse causes more bad cuts than a dull blade. Before anything goes on top:
- Clear the floor of offcuts, cords and sawdust so you can move around the cut.
- Stand each horse on flat ground and press down on the top beam; if it rocks, shim the short leg with a scrap rather than letting it flex during the cut.
- Lock the legs fully. Folding designs are only rated with the legs latched.
- Place the two horses parallel and square, with their tops at the same height.
Clamping the Workpiece to the Sawhorse
Weight alone does not hold a board still. A saw pushes the wood sideways and pulls it up as the teeth exit, so clamp any piece you are cutting with a circular saw or jigsaw. Use at least two clamps, place them on the side of the piece away from the blade path, and keep the clamp heads clear of the saw’s travel.
- Lay the board across both horses with the good face up.
- Clamp near one end so the board cannot slide or twist.
- Make sure the saw’s shoe will ride on a flat, supported surface.
- Check that the kerf, the slot the blade cuts, will fall in the gap and not into a sawhorse beam.
- Recheck the clamps after the first inch of the cut if the wood shifts.
For small stock a quick-release bar clamp on the top beam is enough. For heavy stock, keep the clamps where you can remove them quickly if the blade binds. If you need a way to cut without power tools, see how to cut wood without a saw.
Cutting Off the End Without Pinching or Dropping the Piece
The last few inches of a cut decide whether the piece drops cleanly or the blade binds. Two things can go wrong: the offcut sags and pinches the blade, or it falls suddenly and swings the board.
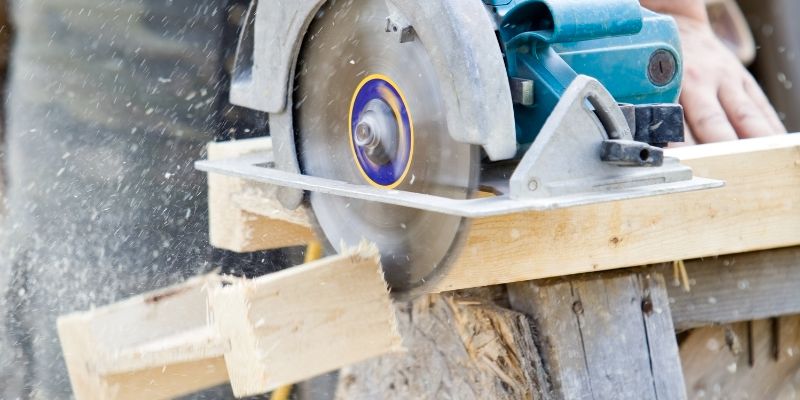
- Keep the saw on the supported piece. The shoe should ride on the side that stays flat and clamped, and the falling side should be the smaller offcut.
- Let a small offcut fall, but support a big one. A short scrap can drop away safely. A long or heavy offcut should be held or supported until the blade is fully through, because a sagging piece closes the kerf.
- Stay out of the drop zone. Keep your feet and non-cutting hand away from the line beneath the cut.
- Do not cut into the sawhorse. If the blade reaches the beam it can kick back and damage the horse. Move the cut line into the gap, or lay a sacrificial 2×4 on top.
- Set the depth. With a circular saw, set the blade so it just clears the underside of the board, so less blade is exposed below the work.
For sheet goods, our plywood cut to size guide and the circular saw roundup go deeper on blade choice and accuracy. If you are cutting by hand, cutting plywood with a hand saw covers technique.
Other Jobs a Sawhorse Pair Handles
A cutting stand is only one use. Two horses with a sheet of plywood or a couple of 2x4s across the tops make a temporary work surface for sanding, gluing up small panels, or painting doors and trim off the floor. The same setup rules apply: level ground, both horses locked, and the load spread across both beams rather than hanging off one end.
- Painting and finishing: raise doors or boards off the floor so you can reach the edges, and keep the horses out of the wet zone so drips do not glue them down.
- Assembly and glue-ups: lay a flat panel across both horses and check it with a straightedge before clamping.
- Sanding: clamp the piece so it does not creep, since sanding pushes it in one direction.
- Temporary bench: connect two horses with 2x4s or a plywood top, but do not exceed the manufacturer’s rating and never treat it as a permanent scaffold.
Storing and Maintaining Sawhorses
Wipe sawdust and glue off the top beam so the workpiece sits flat, and check latches and hinges for play before each big job. Store folding pairs flat and dry; for wooden horses, check that joints and screws are tight, since a loosened leg is a common cause of wobble.
Common Sawhorse Mistakes That Cause Wobble and Bad Cuts
- Putting a support directly under the cut so the blade runs into it.
- Trusting a rating that is for the pair as if it were per horse.
- Skipping clamps because the board feels heavy enough.
- Using one horse for a long board and holding the far end by hand.
- Using a folding horse with the legs only half latched.
- Storing the horses outdoors where rust or UV weakens the joints and latches.
Fixing those handles most of the problems. For general sawing technique on any support, our best way to cut wood guide covers splinter-free cuts.
Frequently Asked Questions
How far apart should sawhorses be?
For boards and framing lumber, set the two sawhorses about one-third of the board’s length in from each end, so the cut falls in the gap between them and neither end sags. Longer stock needs a third support in the middle. Never place a horse directly under the cut line.
How many sawhorses do you need to cut plywood?
Two sawhorses are enough if you lay 2x4s across them and rest the sheet on top, so the whole sheet is supported on both sides of the cut. With only two bare sawhorse beams under an 8-foot sheet, the ends can sag and pinch the blade. A third support under the cut line prevents that.
How do you keep the cutoff piece from pinching the blade or dropping?
Support the piece your saw’s shoe rides on so it stays flat, and leave the cut in the gap between supports. A small offcut can fall away freely. A large or heavy offcut should stay supported until the cut finishes, because a sagging piece closes the kerf and pinches the blade.
What weight can a sawhorse hold?
It depends on the model, and manufacturers state it differently: some rate each sawhorse, others rate the pair. A listing of 1,800 lb per pair means 900 lb per horse if the load is shared evenly. Check the label on your exact model and treat the figure as a static load, not a rating for jumping or standing on it.
Conclusion
A sawhorse only works as well as its setup: level ground, support about one-third of the way in from each end, clamped work, and a cut line that falls in open space. Read the load rating for your exact model, remember whether it is per horse or per pair, and keep the offcut supported until the cut is done.
Sponsored / affiliate links. As an Amazon Associate I earn from qualifying purchases. I may earn additional commission from eligible campaigns.