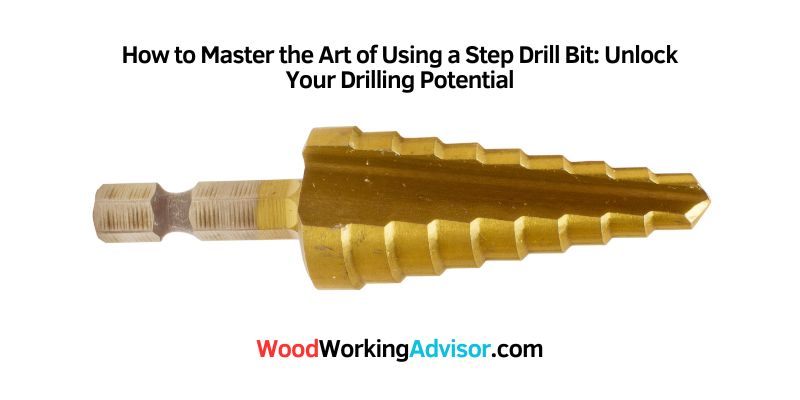
How to Master the Art of Using a Step Drill Bit: Unlock Your Drilling Potential
To use a step drill bit, start by securing the workpiece and ensuring it won’t move. Then, carefully position the tip of the bit on the material surface and apply light pressure while drilling, gradually increasing the pressure as needed.
Choosing The Right Step Drill Bit
When using a step drill bit, consider the material you are working with and the desired hole size. Ensure the bit is suitable for the job, and start with a smaller step before gradually widening the hole. Maintain a steady pace and use lubrication for smoother drilling.
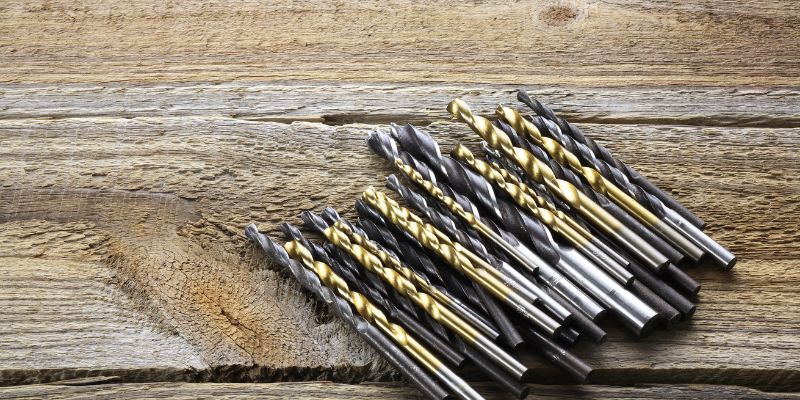
When it comes to using a step drill bit, choosing the right one for the job is crucial. Using a step drill bit that is not appropriate for the material or size of the hole can result in damaged tools, inaccurate holes, or even safety hazards. In this section, we will discuss two important factors to consider when choosing the right step drill bit: the material you’re working with and selecting the appropriate size.
Consider The Material You’re Working With
Before selecting a step drill bit, it’s important to consider the material you’ll be working with. Different materials require different cutting properties, so choosing a bit with the right characteristics can make a significant difference in your results.
Here are some common materials and the recommended step drill bit:
| Material | Recommended Bit |
|---|---|
| Wood or plastic | High-speed steel (HSS) step drill bit |
| Metal or stainless steel | Cobalt or titanium-coated HSS step drill bit |
| Sheet metal | Unibit or step drill bit specifically designed for sheet metal |
Choosing the right material-specific bit ensures efficient drilling, extends the tool’s lifespan, and provides cleaner and more precise results.
Selecting The Appropriate Size
Once you’ve determined the material you’re working with, selecting the appropriate size of the step drill bit is the next important factor to consider. The size of the hole you need to create will depend on your specific project requirements.
Here are some tips to help you select the right size:
- Measurements: Take accurate measurements of the hole diameter you need before selecting a step drill bit.
- Incremental Sizes: Step drill bits usually have multiple sizes in one bit, with each step increasing the hole size. Consider the incremental sizes available and choose a bit that matches the exact hole size needed.
- Project Requirements: Consider the specific requirements of your project, such as the size of fasteners or fittings that will be used, and select a step drill bit that accommodates those requirements.
By selecting the appropriate size, you can ensure the hole is the perfect fit for your project, avoiding any issues with loose fittings or fasteners.
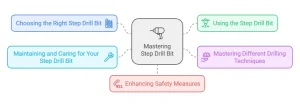
Using The Step Drill Bit
When it comes to drilling holes of various sizes, a step drill bit is a versatile tool that can make the job easier and more efficient. Whether you are a DIY enthusiast or a professional, knowing how to use a step drill bit correctly is essential for achieving accurate and clean results. In this article, we will guide you through the process of using a step drill bit effectively, from securing the workpiece to applying the correct pressure and speed.
Securing The Workpiece
Before you start drilling, it is crucial to secure the workpiece properly to prevent any accidents or damage. Here are some steps to follow:
- Place the workpiece on a stable surface, such as a workbench or a clamp.
- Ensure that the workpiece is firmly held in place and will not move during the drilling process. This can be done by using clamps or securing it with a vice.
- If the workpiece is thin or prone to splitting, consider using a scrap piece of wood underneath it to provide support and prevent any tear-out.
Applying The Correct Pressure And Speed
Applying the correct pressure and speed while using a step drill bit is essential to achieve clean and precise holes. Here are some tips to help you:
- Begin by placing the tip of the step drill bit at the desired starting point on your workpiece.
- Hold the drill firmly with both hands, ensuring a stable grip.
- Apply moderate and consistent pressure while drilling. Avoid using excessive force, as it can lead to overheating and damage to the bit or workpiece. Let the cutting edges of the step drill bit do the work.
- While drilling, maintain a steady speed. Too high of a speed can cause the bit to overheat or break, while too slow of a speed can result in an uneven hole.
- Periodically withdraw the step drill bit to clear any chips or debris that may accumulate in the flutes. This will ensure a smooth drilling process.
By following the steps above and using a step drill bit correctly, you can achieve precise and clean holes in various materials. Remember to always wear appropriate safety gear, such as safety glasses, when using power tools. Practice on scrap pieces of material before working on your actual project to familiarize yourself with the process and gain confidence. Happy drilling!
Mastering Different Drilling Techniques
Creating Clean And Precise Holes
When using a step drill bit, it is essential to master the technique of creating clean and precise holes. Start by marking the spot where you want to drill with a pencil to ensure accuracy. Secure the material firmly in place before drilling to avoid slippage. Apply steady and even pressure so that the bit can work through the material smoothly. Make sure to remove the bit periodically to clear away any debris and prevent overheating.
Drilling Through Various Materials
Step drill bits are versatile and can be used for drilling through various materials. For metal, use a lubricant such as oil to reduce friction and heat buildup. When drilling through wood, adjust the drill speed for optimal results. In harder materials like plastic or fiberglass, start with a smaller pilot hole before using the step drill bit for a smoother process.
Maintaining And Caring For Your Step Drill Bit
Proper maintenance and care are essential for prolonging the life of your step drill bit. By following a few simple steps, such as cleaning after each use and storing correctly, you can ensure that your step drill bit remains in top condition for future use.
Proper Cleaning And Storage
Maintaining and caring for your step drill bit is crucial for its longevity and optimal performance. By following simple cleaning and storage practices, you can ensure that your step drill bit remains sharp and ready for use whenever you need it. Proper cleaning removes debris from the bit, preventing clogs and enhancing its cutting abilities. Storing the drill bit correctly safeguards it from damage and ensures it stays in top shape for future projects. Let’s explore how to clean and store your step drill bit effectively.
Cleaning The Drill Bit
To clean your step drill bit, you’ll need a few items: a wire brush, lubricant, and a clean rag. Here’s a step-by-step guide to proper cleaning:
- Start by removing the bit from your drill and unplugging the power source to prevent any accidents.
- Use a wire brush to gently scrub away any debris or metal shavings that have accumulated on the bit. Pay extra attention to the flutes and cutting edges, as these are the areas that come into contact with the material you’re drilling.
- Once the bit is free from debris, wipe it down with a clean rag to remove any remaining dirt or grime.
- If your step drill bit is coated with a protective substance, such as titanium or cobalt, apply a thin layer of lubricant to help maintain its coating and prevent rust.
- After cleaning, allow the bit to dry completely before storing it.
Storing The Drill Bit
Proper storage is essential for preserving the lifespan of your step drill bit. Follow these tips to ensure your bit remains in excellent condition:
- Always store the drill bit in its original case or a sturdy container to protect it from dust, moisture, and other potential sources of damage.
- Keep the container in a cool, dry place away from direct sunlight to prevent heat damage or warping.
- Avoid stacking or placing heavy items on top of the container to prevent any unnecessary pressure on the drill bit.
- If your bit didn’t come with a dedicated case, consider using a foam-lined drawer or a DIY storage solution that keeps each bit separated for added protection.
By following these cleaning and storage practices, you can extend the life of your step drill bit and ensure it remains in excellent working condition for years to come. Regular maintenance is key to keeping your tools in optimal shape and ready for every drilling task that comes your way. Take the time to clean and store your step drill bit properly, and you’ll reap the benefits of its efficiency and longevity on all your projects.
Enhancing Safety Measures
When using a step drill bit, it is essential to prioritize safety measures to prevent any accidents or injuries from occurring. By following these guidelines and wearing the appropriate protective equipment, you can ensure a safe and successful drilling experience.
Wearing Personal Protective Equipment
Protecting yourself is crucial when using a step drill bit. Make sure to wear the following personal protective equipment:
- Safety goggles: These will shield your eyes from flying debris and prevent any potential eye injuries.
- Ear protection: Using earplugs or earmuffs will help minimize the noise level generated during the drilling process, protecting your hearing.
- Gloves: Wearing gloves will provide a good grip on the drill and protect your hands from any sharp edges on the workpiece.
- Dust mask: If you are drilling materials that produce dust or particles, wearing a dust mask will prevent you from inhaling any harmful substances.
Preventing Workpiece Damage
While using a step drill bit, it’s important to take measures to protect the workpiece and avoid any damage. Here’s how you can prevent workpiece damage:
- Secure the workpiece: Ensure that the workpiece is locked securely in place before starting the drilling process. This will prevent it from moving or vibrating during drilling.
- Use a pilot hole: For thicker or harder materials, it is recommended to create a pilot hole. This will guide the step drill bit and reduce the likelihood of the workpiece cracking or splitting.
- Apply moderate pressure: Applying excessive force can cause the bit to dig into the material aggressively, increasing the chances of the workpiece getting damaged. Use consistent, controlled pressure to maintain stability.
- Regularly remove chips: Chips and debris can accumulate in the drilled hole, causing the bit to work inefficiently and potentially damaging the workpiece. Periodically remove the chips to ensure smooth and effective drilling.
By adhering to these safety measures, you can confidently use a step drill bit while ensuring your personal safety and preventing any harm to your workpiece. Prioritizing safety is vital for a successful and incident-free drilling experience.
Frequently Asked Questions Of How To Use A Step Drill Bit
What Do You Do With A Step Drill Bit?
A step drill bit is used to create smooth, precise holes in materials like metal or plastic. It has multiple cutting edges that gradually enlarge the hole as you drill, making it ideal for tasks like installing rivets or creating holes of different sizes in one go.
Do I Need A Pilot Hole For the Step Drill Bit?
Yes, a pilot hole is not required for a step drill bit. It can start drilling on a flat surface without a previous hole. Step drill bits can create different-sized holes in materials such as metal and plastic.
What Are The Disadvantages Of Step Drill Bits?
The disadvantages of step drill bits include limited hole size options, more prone to dullness, and higher cost compared to regular drill bits. They may also cause chattering and require extra care to prevent overheating and breakage.
How Do You Use A Drill Step By Step?
To use a drill step by step, follow these guidelines:
1. Choose the appropriate drill bit for your task.
2. Attach the bit securely to the drill.
3. Position the drill over the material to be drilled.
4. Firmly grip the drill and turn it on.
5. Apply gentle pressure and steadily drill into the material.
Conclusion
Incorporating a step drill bit can enhance your precision and efficiency when drilling various materials. By following the proper techniques and safety precautions, you can maximize the benefits of this versatile tool. Whether you are a DIY enthusiast or a professional, understanding the usage of a step drill bit can significantly improve your drilling experience.
Embrace the endless possibilities of this tool and elevate your projects to new heights.