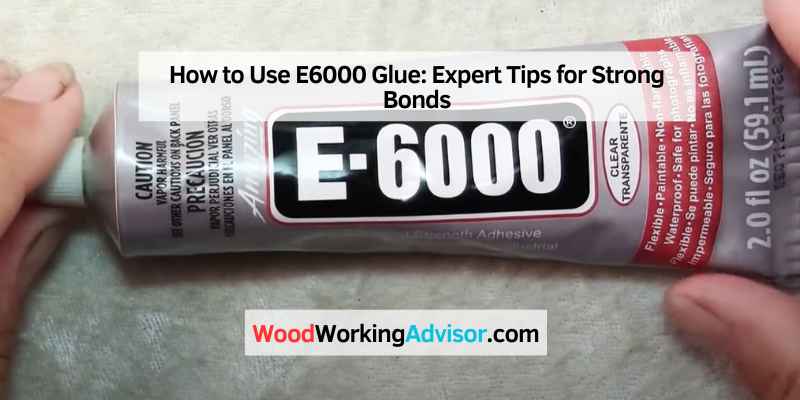
How to Use E6000 Glue: Steps, Dry Time & Safety Warnings
E6000 industrial-strength adhesive bonds metal, wood, glass, and fabric in four steps: clean, apply, press, cure 24-72 hours. But the clear LV formula is SDS-rated Flammable Category 2, and no E6000 version is food-safe or child-safe. Curing near open flame, or using it on a toy or food-contact surface, risks fire or solvent exposure. This guide covers surface prep, application, cure times, and these safety limits.
See our full wood glue and adhesive guides for how E6000 compares to wood glue, epoxy, and contact cement on other project types.
Introduction To E6000 Glue
E6000 Glue is a versatile adhesive that is widely used in various DIY and craft projects. Whether you are a beginner or an experienced crafter, this glue is a must-have in your toolbox. Its strong bonding properties make it suitable for a wide range of materials, including wood, metal, glass, fabric, ceramic, and more. In this blog post, we will explore what E6000 Glue is, its benefits for DIY and craft projects, and how to use it effectively.
What Is E6000 Glue?
E6000 Glue is a popular adhesive that is known for its industrial-strength bonding capabilities. It is a clear, viscous liquid that dries to a flexible and waterproof finish. This glue is resistant to chemicals and temperature changes, making it suitable for both indoor and outdoor applications. It is commonly used in crafts, jewelry making, home decor, and even for repairing shoes and other accessories.
Benefits For Diy And Craft Projects
E6000 glue offers several benefits that make it a preferred choice for DIY enthusiasts and crafters (see also how to remove dried Krazy Glue if you need cleanup help):
- Strong Bond: E6000 Glue provides a strong and durable bond, ensuring that your projects stay intact for a long time.
- Versatility: This glue works well with a wide range of materials, including metal, glass, wood, fabric, plastic, and more, making it ideal for various DIY and craft projects.
- Waterproof: Once cured, E6000 Glue creates a waterproof seal, making it suitable for projects that may come in contact with moisture or water.
- Flexibility: The glue dries to a flexible finish, allowing your projects to withstand movement and stress without cracking or breaking.
- Chemical Resistance: E6000 Glue is resistant to chemicals, making it suitable for projects that may be exposed to solvents, oils, and other substances.
- Temperature Resistance: This adhesive can withstand temperature changes, making it suitable for both indoor and outdoor projects.
With these benefits, E6000 Glue is a reliable adhesive that can enhance the durability and quality of your DIY and craft projects.

Best E6000 Pick For Craft & Repair Bonds
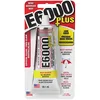
E6000 Plus Multi-Purpose Clear Craft Adhesive
A reformulated, lower-odor version of original E6000 — same waterproof, paintable bond on wood, glass, fabric, ceramic, and metal.
- Best for: indoor crafting and repairs where strong fumes from the original formula are a concern
- Why we picked it: lower VOC odor than classic E6000 while keeping the same flexible, waterproof cure
- Main drawback: still not food-safe or child/toy-safe, and still needs a well-ventilated space away from heat
Compare more E6000 application options
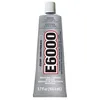 Option 1 E6000 Craft Adhesive, 3.7 fl oz (Original)
|
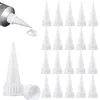 Option 2 Snip-Tip Precision Applicator Tips (20-pack)
|
 Option 3 Nitrile Disposable Gloves, 5 mil (100-pack)
|
As an Amazon Associate we earn from qualifying purchases.
Safety First: Preparing To Use E6000
Before using E6000 glue, it’s crucial to take the necessary safety measures to protect yourself and your work environment. By following these guidelines, you can ensure a safe and successful experience with this adhesive.
Ventilation And Protection
When working with E6000, always ensure proper ventilation in the workspace. Ventilation helps to dissipate any potentially harmful fumes from the adhesive. Additionally, it’s important to wear protective gear such as gloves and a mask to prevent direct contact with the skin and inhalation of fumes.
Material Compatibility
Before applying E6000, consider the material compatibility. This versatile adhesive is suitable for bonding a wide range of materials, including wood, metal, glass, and fabric. However, it’s essential to test the compatibility of the adhesive with the specific materials you intend to use to ensure optimal adhesion.
Flammability and Fire Risk
According to the manufacturer’s Safety Data Sheet, the clear LV formula of E6000 is classified as a Flammable Liquid, Category 2 — labeled “highly flammable liquid and vapor.” Never use, pour, or cure E6000 near an open flame, a lit cigarette, a space heater, a pilot light, or any other heat or ignition source, and don’t use power tools that can spark nearby while the adhesive is wet. Store the tube tightly sealed in a cool, dry, well-ventilated area away from heat and direct sunlight — if the container is heated or involved in a fire, internal pressure can build and cause it to burst. (Note: some E6000 variants, such as the water-based spray adhesive and certain black industrial formulas, are labeled non-flammable — always check the SDS for your specific tube.)
Not Food-Safe or Child-Safe
E6000 is not FDA-approved for food contact and is not rated safe for children’s items. The solvents in the formula, including toluene and naphtha, are not intended to touch food, drinking water, or anything that goes in a mouth, and the product carries a warning that it contains a chemical known to the State of California to cause cancer. Never use E6000 on a mug, cutting board, water bottle, or utensil that will touch food or drink, and never use it on toys or items a young child might chew, suck, or mouth. Keep the tube itself out of reach of children and pets, and choose an FDA food-contact-safe or non-toxic child-safe adhesive instead for those projects.
Getting Started: Surface Preparation
Proper surface preparation is crucial when using E6000 glue. Start by cleaning the surfaces thoroughly with alcohol or acetone to remove any dirt, oil or residue. Sanding the surfaces lightly can also enhance adhesion.
Cleaning The Surfaces
Wipe surfaces with rubbing alcohol for optimal adhesion.
Dry Fit Before Applying Glue
Ensure pieces fit together before adding E6000 glue.
Application Techniques For E6000
Discover effective application techniques for using E6000 glue. Ensure a strong bond by applying a thin, even layer and allowing proper drying time for optimal results. Master the art of precision with this versatile adhesive for all your crafting needs.
E6000 glue is a versatile adhesive that can be used to bond a variety of surfaces, including metal, wood, plastic, glass, and ceramics. However, to achieve the best results, it is essential to understand how to apply the glue correctly. Here are some application techniques for E6000 that you should keep in mind:
Amount To Use
When using E6000 glue, it is important to apply the right amount. Using too much glue can cause it to overflow or create a messy bond, while using too little can result in a weak bond. As a general rule of thumb, apply a pea-sized amount of glue for every square inch of surface area. This will ensure that the glue spreads evenly and creates a strong bond.
Applying To Surfaces
Before applying E6000 glue, make sure that the surfaces you want to bond are clean and dry. Any dirt or moisture on the surfaces can weaken the bond. Once you have cleaned the surfaces, apply the glue to one of them in a thin, even layer. Avoid applying too much pressure, as this can cause the glue to spread unevenly. Then, press the surfaces together firmly and hold them in place for a few minutes to allow the glue to set.
Drying Time
E6000 glue takes around 24 hours to dry completely, although it will start to set within 10-20 minutes. During this time, it is important to avoid moving or disturbing the surfaces you have bonded. If you need to reposition the surfaces, do so within the first few minutes of applying the glue. Once the glue has set, it will create a strong, durable bond that can withstand a range of temperatures and environmental conditions.
By following these application techniques for E6000, you can ensure that your projects are strong, durable, and long-lasting. Whether you are bonding metal, wood, plastic, glass, or ceramics, E6000 glue is the perfect adhesive for the job. So why not give it a try today and see the difference it can make to your DIY projects?
Clamping And Curing: Ensuring A Strong Bond
When it comes to using E6000 glue for your crafting or DIY projects, it’s important to understand the key steps for achieving a strong and durable bond. One of the crucial aspects of this process is the clamping and curing stage. By properly clamping the pieces together and allowing the glue to cure under the right conditions, you can ensure that your project will hold up over time.
Clamping The Pieces
Clamping the pieces together is essential to create a tight bond and prevent any shifting or movement while the glue cures. It’s important to choose the right clamping method based on the size and shape of your project.
If you’re working with smaller pieces, you can use a simple spring clamp or a rubber band to hold them together. For larger or more complex projects, consider using heavy-duty clamps or even applying pressure by placing weights on top. The goal is to exert enough pressure to keep the pieces firmly in place without causing any damage.
Cure Time And Conditions
The cure time of E6000 glue can vary depending on several factors, including the materials being bonded and the ambient temperature. It’s crucial to follow the manufacturer’s instructions for the specific product you are using, as they will provide the most accurate guidelines.
Generally, E6000 glue will set within 10 to 20 minutes, but it’s important to note that full cure can take up to 24 to 72 hours. During this curing period, it’s essential to ensure that the glued pieces are not disturbed or subjected to any stress. This will allow the glue to fully bond and reach its maximum strength.
Additionally, the curing conditions can also impact the bond’s strength. Ideally, the temperature should be between 70°F and 85°F (21°C and 29°C) for optimal curing. Avoid exposing the glued pieces to extreme temperatures or moisture during the curing process, as this can weaken the bond.
In conclusion, proper clamping and curing are vital for achieving a strong bond when using E6000 glue. By following the right clamping techniques and allowing sufficient cure time under suitable conditions, you can ensure the longevity and durability of your projects. So, take the time to clamp your pieces securely and provide the right curing environment, and you’ll be rewarded with a reliable and sturdy bond.
Tips For Maximum Adhesion
For maximum adhesion when using E6000 glue, ensure the surfaces are clean and dry before applying the adhesive. Apply a thin, even coat to both surfaces and firmly press them together. Allow the bond to set for at least 24 hours for optimal results.
Temperature And Humidity Factors
To ensure maximum adhesion, it is crucial to consider temperature and humidity factors when using E6000 glue. The ideal temperature for using E6000 glue is between 70 and 85 degrees Fahrenheit. If the temperature is below 50 degrees Fahrenheit, the glue will not work properly. On the other hand, if the temperature is above 90 degrees Fahrenheit, the glue may become too runny, making it difficult to apply. Moreover, humidity can affect the glue’s performance. High humidity can cause the glue to take longer to dry, while low humidity can cause the glue to dry too quickly, leading to weak adhesion.
When To Apply Pressure
After applying E6000 glue, it is essential to apply pressure to the surfaces being glued together. The pressure helps the glue to spread evenly and makes the bond stronger. It is advisable to apply pressure for at least 24 hours to ensure maximum adhesion. However, if the surfaces being glued together are heavy or have a rough texture, it may require more pressure or clamping for the glue to set correctly.
To sum up, temperature and humidity are significant factors to consider when using E6000 glue. The right temperature and humidity will enhance the glue’s performance, while the wrong conditions can lead to weak adhesion. Additionally, applying pressure after gluing the surfaces together is vital for maximum adhesion. By following these tips, you can achieve a strong and long-lasting bond with E6000 glue.
Cleaning Up: Post-application Steps
Removing Excess Glue
Scrape off any excess glue using a razor blade.
Cleaning Tools And Surfaces
Use acetone to clean tools and surfaces post-application.
Advanced Uses And Techniques
Discover advanced uses and techniques for utilizing E6000 glue effectively. Learn how to apply this powerful adhesive for various projects, from crafts to repairs, with step-by-step instructions and tips to achieve professional results.
Mixing With Other Materials
E6000 glue can be mixed with acrylic paint for custom colors.
Incorporate glitter or beads into the glue for unique projects.
Repairing Household Items
Fix broken ceramic, glass, or plastic items with E6000 glue.
Seal leaks in pipes or gutters temporarily until permanent repair.
Save money by repairing instead of replacing household items.
Use E6000 glue for advanced crafting and repair tasks.
Troubleshooting Common Issues
Facing issues with using E6000 glue? Learn how to troubleshoot common problems to ensure successful adhesive application. From proper surface preparation to ideal application techniques, master the art of using E6000 glue for your projects.
Weak Bonds
If you find that your E6000 glue is not creating a strong bond, there could be a few reasons why. Firstly, ensure that you are using the correct amount of glue for the surface area you are working on. Too little glue can result in a weak bond, while too much can cause the glue to take longer to dry and weaken the bond over time. Another factor to consider is the surface preparation. Make sure the surface is clean, dry, and free from any debris that could prevent the glue from adhering properly.
Failures
If you experience a complete failure of the bond, it could be due to the same reasons as weak bonds. However, if you have followed all the necessary precautions and still experience failures, it could be due to the age of the glue. E6000 glue has a shelf life of approximately two years, so if your glue is older than that, it may not be as effective. Another factor to consider is the temperature and humidity of your workspace. High humidity or extreme temperatures can affect the curing process and weaken the bond.
Removing Dried Glue
If you accidentally get E6000 glue on a surface that you didn’t intend to, or if you need to remove a previously glued item, there are a few methods to try. Firstly, try using a scraper or a razor blade to gently scrape away the dried glue. Another option is to use rubbing alcohol or acetone to dissolve the glue. However, be cautious when using these chemicals as they can damage some surfaces.
In conclusion, by ensuring that you are using the correct amount of glue, preparing your surfaces properly, and taking into account the age of your glue and workspace conditions, you can avoid weak bonds and failures. And if you do make a mistake, there are ways to remove dried glue without causing damage. With these tips, you can effectively use E6000 glue for all your crafting needs.
Conclusion: Mastering E6000 For Creative Projects
Mastering E6000 for creative projects is essential for anyone looking to use E6000 glue effectively. By following the proper application techniques and safety precautions, you can ensure strong and durable bonds for your artistic endeavors. Understanding the versatility and strength of E6000 will elevate your crafting and DIY projects to new heights.
Recap Of Key Points
E6000 glue is a versatile adhesive that can be used for a wide range of creative projects. It provides a strong bond and is suitable for various materials such as metal, wood, glass, fabric, and more.
To use E6000 glue effectively, it is important to follow these key points:
- Clean the surfaces you plan to glue for optimal adhesion.
- Apply a thin, even layer of E6000 glue to both surfaces.
- Allow the glue to set for a few minutes to become tacky.
- Press the surfaces together firmly and hold them in place for at least 24 hours for a secure bond.
Inspiration For Future Projects
Now that you have mastered the art of using E6000 glue, let your creativity soar with these inspiring project ideas:
- Create unique jewelry pieces by gluing gemstones or beads onto metal settings.
- Personalize home decor items by attaching decorative accents to vases, frames, or candle holders.
- Revamp old furniture by securely bonding new handles or embellishments.
- Design custom phone cases by gluing fabric, rhinestones, or other materials onto a plain case.
- Construct intricate models or dioramas by bonding small components together.
With E6000 glue as your trusty adhesive, the possibilities are endless. Let your imagination run wild and create one-of-a-kind masterpieces.

Frequently Asked Questions
What Surfaces Can E6000 Glue Be Used On?
E6000 glue can be used on a variety of materials including metal, wood, fabric, glass, ceramics, and more. It is a versatile adhesive that provides strong and durable bonds on different surfaces.
How Long Does It Take For E6000 Glue To Dry?
E6000 glue typically dries within 24 to 72 hours, depending on the materials being bonded and environmental conditions. It is important to allow sufficient time for the glue to cure and create a strong, lasting bond.
Is E6000 Glue Waterproof And Heat Resistant?
Yes, E6000 glue is waterproof once fully cured, making it suitable for both indoor and outdoor projects. It is also heat resistant, making it a reliable choice for applications that may be exposed to high temperatures.
Can E6000 Glue Be Used For Jewelry Making?
E6000 glue is commonly used in jewelry making due to its strong bond and versatility. It can be used to secure various components of jewelry, such as metal findings, beads, and gemstones, providing a durable and lasting hold.
Is E6000 Glue Flammable?
Yes — the clear LV formula of E6000 is SDS-classified as a Flammable Liquid, Category 2, and labeled “highly flammable liquid and vapor.” Keep it away from open flame, sparks, and other heat or ignition sources, and store it in a cool, well-ventilated area. Some other E6000 variants, like the water-based spray version, are labeled non-flammable, so always check the SDS for your specific product.
Is E6000 Glue Food-Safe Or Safe For Kids’ Toys?
No. E6000 is not FDA-approved for food contact and is not rated safe for children’s items. Never use it on dishes, cutting boards, water bottles, or anything that touches food, and never use it on toys or objects a young child might chew or mouth. Keep the tube out of reach of children and pets.
Conclusion
E6000 glue is a versatile and reliable adhesive that can be used for various DIY and crafting projects. Its strong bond and flexibility make it a go-to choice for many creative endeavors. Follow the application steps above and respect the flammability and food/child-safety limits, and you can get the full benefit of E6000 in your projects safely.