How to Use O-Cedar for a Sparkling Clean Home
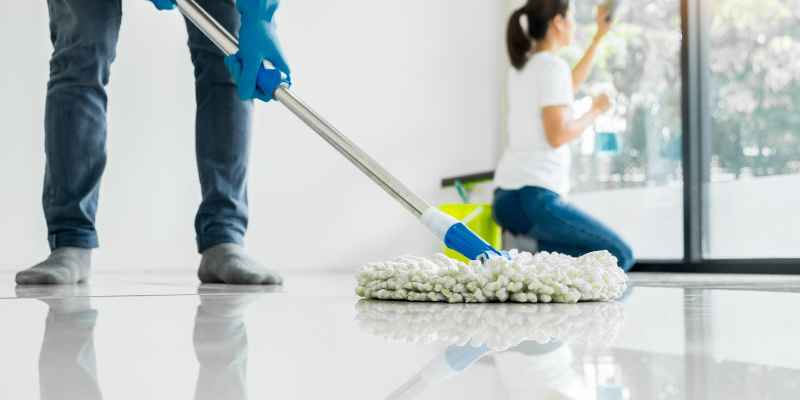
To use O-Cedar, assemble according to instructions, adjust height, and mop in a back-and-forth motion. O-Cedar is a versatile cleaning tool that simplifies your cleaning routine.
From kitchens to bathrooms, this mop is designed to efficiently clean various surfaces, leaving your floors sparkling clean. Whether you are dealing with spills or routine cleaning, O-Cedar is your go-to solution for a quick and effective clean-up. Say goodbye to traditional mops and say hello to a hassle-free cleaning experience with O-Cedar.
Let’s delve deeper into the features and benefits of using O-Cedar for your everyday cleaning needs.
Introduction To O-cedar Cleaning Tools
The O-cedar Range
O-Cedar offers a comprehensive range of cleaning tools designed to make your cleaning routine efficient and effective. From mops and brooms to scrub brushes and dusters, O-Cedar has the perfect tool for every cleaning task. The O-Cedar range is crafted with innovative features to ensure superior performance, durability, and ease of use.
Why Choose O-cedar?
When it comes to selecting cleaning tools, O-Cedar stands out as a trusted choice for several reasons. Quality, innovation, and durability are at the core of O-Cedar’s products. The brand’s commitment to providing top-notch cleaning solutions has earned it a reputation for excellence. O-Cedar’s tools are also designed with user convenience in mind, making them the ideal choice for both residential and commercial cleaning needs.
Prepping Your Home For Cleaning
Before you start cleaning with O-Cedar, it’s essential to prep your home properly.
Gathering Supplies
Make sure you have all the necessary supplies before you begin cleaning.
- Vacuum cleaner
- Mop and bucket
- All-purpose cleaner
- Microfiber cloths
- Gloves
Setting A Cleaning Schedule
Create a cleaning schedule to ensure all areas of your home are regularly cleaned.
- Daily: Quick tidying up and surface cleaning
- Weekly: Deep cleaning of floors and surfaces
- Monthly: Cleaning tasks like windows and appliances
Floor Cleaning Mastery With O-cedar
When it comes to keeping your home or office floors clean, O-Cedar mops are a reliable and effective choice. With a range of different mops available, choosing the right one can be the key to achieving floor cleaning mastery. In this post, we’ll cover everything you need to know about using O-Cedar mops to achieve a spotless finish every time.
Choosing The Right Mop
Choosing the right O-Cedar mop for your needs is crucial to achieving the best results. Here are some things to consider:
| Mop Type | Best For |
|---|---|
| Microfiber mop | General cleaning and dusting |
| Sponge mop | Spills and stains |
| String mop | Heavy-duty cleaning |
Make sure to choose the right mop type for your flooring material too. Microfiber mops are suitable for most surfaces, while string mops are better suited to rougher surfaces like concrete.
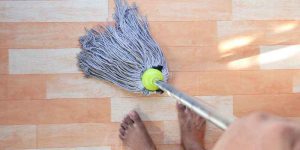
Effective Mopping Techniques
Now that you’ve chosen the right mop, it’s time to master your mopping technique. Follow these steps for a flawless finish:
- Start by sweeping or vacuuming your floors to remove any loose debris.
- Fill a bucket with hot water and add your cleaning solution. Be sure to follow the instructions on the cleaning product and use the recommended amount.
- Dip your mop into the bucket and wring it out until it’s damp, not soaking wet.
- Start mopping in the farthest corner of the room and work your way towards the door. Use a figure-eight motion to cover the entire floor surface.
- Rinse your mop frequently in the bucket to avoid spreading dirt and grime around.
- Change the water and cleaning solution if it becomes too dirty.
- Once you’ve finished mopping, let the floor air dry or use a clean, dry mop to soak up any excess water.
By following these simple steps and using the right O-Cedar mop for your needs, you’ll be able to achieve floor cleaning mastery in no time. Happy mopping!
Dusting Like A Pro
Discover the art of dusting like a pro with O-Cedar tools. Effortlessly clean every nook and cranny for a sparkling home.
Selecting Dusting Tools
When it comes to dusting like a pro, selecting the right tools is key. O-Cedar offers a wide range of dusting tools that are designed to make your cleaning routine more efficient and effective. Here are a few options to consider:
1. Microfiber Dusting Cloth: This versatile tool is perfect for dusting a variety of surfaces, from furniture to electronics. The microfiber material is designed to attract and trap dust, leaving your surfaces clean and shiny.
2. Duster with Extendable Handle: For hard-to-reach areas such as ceiling fans and high shelves, an extendable duster is essential. Look for one with a flexible head that can bend and reach tight spaces with ease.
3. Electrostatic Dusting Wand: This innovative tool uses static electricity to attract and hold onto dust particles. It’s great for dusting delicate items like picture frames, ornaments, and blinds.
Dusting Tips For Hard-to-reach Areas
Dusting those pesky, hard-to-reach areas can be a challenge, but with O-Cedar’s dusting tools, it’s a breeze. Here are some tips to help you tackle those tricky spots:
1. Use an Extendable Duster: With an extendable duster, you can easily reach high ceilings, corners, and behind furniture. Extend the handle to the desired length and gently sweep away the dust.
2. Wrap a Microfiber Cloth: For narrow spaces like window sills and baseboards, wrap a microfiber cloth around a ruler or a thin piece of cardboard. Slide it along the surface to capture dust and dirt.
3. Try a Flexible Duster: O-Cedar’s flexible dusters are perfect for getting into tight spaces. The bendable head can be shaped to fit around objects, ensuring no dust is left behind.
Remember, regular dusting not only keeps your home looking clean but also helps to improve indoor air quality. With O-Cedar’s dusting tools and these handy tips, you can dust like a pro and enjoy a dust-free home.
Sparkling Windows And Mirrors
When it comes to achieving sparkling windows and mirrors, using the right cleaning solutions and tools is essential. O-Cedar provides streak-free cleaning solutions and the right tools for the job to make your windows and mirrors shine.
Streak-free Cleaning Solutions
O-Cedar offers streak-free cleaning solutions that ensure your windows and mirrors are left sparkling without any residue. These solutions are formulated to cut through dirt and grime, leaving surfaces crystal clear and free of streaks.
The Right Tools For The Job
Using the right tools is crucial for achieving spotless windows and mirrors. O-Cedar provides a range of high-quality squeegees, microfiber cloths, and window cleaning kits that are designed to make the task effortless and effective. These tools are durable, efficient, and ensure a streak-free finish.
Bathroom Cleaning Hacks
When it’s time to tackle bathroom cleaning, O-Cedar is your ultimate ally. From combating mold and mildew to achieving shiny faucets and fixtures, these hacks will make your bathroom sparkle.
Combatting Mold And Mildew
- Use O-Cedar’s powerful bathroom cleaner to remove mold and mildew.
- Scrub tile grout with a brush soaked in the cleaner for best results.
- Rinse thoroughly to reveal a mold-free, fresh-smelling bathroom.
Shiny Faucets And Fixtures
- Apply a small amount of O-Cedar cleaner on faucets and fixtures.
- Buff with a microfiber cloth to achieve a streak-free shine.
- Admire the gleaming surfaces that look as good as new.
Maintaining Your O-cedar Tools
To maintain your O-Cedar tools, start by cleaning them regularly to remove dirt and debris. Use a mild soap and water to wash the tools and ensure they are completely dry before storing them. Additionally, inspect the tools for any signs of wear and tear and replace any worn-out parts as needed.
Regular maintenance will help prolong the life of your O-Cedar tools and keep them in good working condition.
Cleaning and storing your O-Cedar tools properly is key to keeping them in great condition and ensuring they last for a long time. Here are some tips on how to maintain your O-Cedar tools:
Cleaning Your Cleaning Tools
It might sound counterintuitive, but your cleaning tools need to be cleaned as well. After each use, rinse your O-Cedar mop or brush with warm water to remove any dirt or debris. If it’s particularly dirty, you can use a mild detergent to clean it thoroughly. Once you’ve cleaned it, make sure to rinse it well and let it air dry completely before storing it.
Storage Solutions
Storing your O-Cedar tools properly is important to prevent damage and prolong their lifespan. Make sure to store your mop or brush in a dry area to prevent any moisture from causing damage. If you have a mop with a removable head, make sure to remove the head and store it separately from the handle. This will prevent the fibers from becoming misshapen or damaged.
If you have multiple O-Cedar tools, consider investing in a storage solution to keep them organized. There are many options available, from simple hooks to wall-mounted organizers. Whatever you choose, make sure it’s easily accessible and keeps your tools in good condition.
In conclusion, maintaining your O-Cedar tools is important to keep them in good condition and ensure they last for a long time. By cleaning and storing them properly, you’ll be able to get the most out of your investment and keep your home clean and tidy.
Advanced Tips And Tricks
Discover advanced tips and tricks for using the O-Cedar cleaning system effectively. Learn how to maximize its features and get the most out of your cleaning routine. Say goodbye to dirt and grime with these expert techniques.
If you’re looking for ways to make your cleaning routine more efficient and effective, then you’ve come to the right place. In this section, we’ll cover some advanced tips and tricks for using your O-Cedar mop to get the most out of your cleaning experience.
Efficient Cleaning Routines
To get the most out of your O-Cedar mop, it’s important to establish an efficient cleaning routine. Here are some tips to help you get started:
- Start by sweeping or vacuuming the floors to remove any loose debris.
- Fill your O-Cedar mop bucket with hot water and a cleaning solution of your choice.
- Dip your mop into the bucket and wring out excess water.
- Begin mopping the floors in a back-and-forth motion, working your way from one end of the room to the other.
- As you mop, periodically rinse your mop in the bucket and wring out excess water.
- Once you’ve finished mopping, rinse your mop thoroughly and hang it up to dry.
Dealing With Stubborn Stains
Sometimes, even the most diligent cleaning routine isn’t enough to tackle stubborn stains. Here are some tips for dealing with those pesky spots:
- For tough stains like grease or oil, try using a mixture of baking soda and water to create a paste. Apply the paste to the stain and let it sit for a few minutes before scrubbing with your O-Cedar mop.
- If you’re dealing with a particularly stubborn stain, try using a steam cleaner to loosen the dirt before mopping with your O-Cedar mop.
- For stains on hardwood floors, try using a mixture of vinegar and water to gently scrub the area with your O-Cedar mop.
With these advanced tips and tricks, you’ll be able to make the most out of your O-Cedar mop and keep your floors looking their best.
Frequently Asked Questions
How To Use O-cedar Effectively?
O-Cedar can be used effectively by following these simple steps:
1. Start by assembling the mop according to the instructions provided.
2. Fill a bucket with water and add your preferred cleaning solution.
3. Dip the mop head into the bucket and wring out any excess water.
4. Begin mopping the floor, making sure to cover the entire surface area.
5. Rinse the mop head regularly to prevent dirt from spreading.
6. Once you’re done, remove the mop head and clean it thoroughly before storing.
What Surfaces Can I Use O-cedar On?
O-Cedar is suitable for a variety of surfaces, including hardwood floors, tile, laminate, and linoleum. It is designed to effectively clean and remove dirt from these surfaces without causing any damage. However, it’s always a good idea to check the manufacturer’s recommendations for your specific flooring type before using O-Cedar.
How Often Should I Replace The Mop Head?
The frequency of replacing the O-Cedar mop head depends on several factors, such as the frequency of use, the type of surface being cleaned, and the amount of dirt being encountered. As a general guideline, it is recommended to replace the mop head every 3-6 months or sooner if it shows signs of wear and tear.
Regularly inspecting the mop head for any damage or excessive fraying will help ensure optimal cleaning performance.
Conclusion
Incorporating O-Cedar into your cleaning routine can greatly simplify your life and ensure a sparkling clean home. With its versatile and efficient design, O-Cedar offers a practical solution for all your cleaning needs. Whether it’s sweeping, mopping, or dusting, O-Cedar provides the tools to achieve a pristine living environment effortlessly.
So, make O-Cedar a part of your cleaning arsenal and experience the difference for yourself.