How to Use Weldwood Contact Cement: A Step-by-Step Guide
To use Weldwood Contact Cement, apply a thin, even coat to both surfaces to be joined, let it dry until it becomes tacky, and then press the surfaces firmly together. Weldwood Contact Cement is a versatile adhesive that provides a strong and durable bond for various materials such as wood, metal, and laminates.
Whether you are working on a DIY project or a professional job, this contact cement is easy to use and delivers reliable results. In this blog post, we will explore the step-by-step process of using Weldwood Contact Cement, along with some tips and tricks to ensure a successful bond.
So, let’s dive in and discover how to make the most of this powerful adhesive.
Introduction To Weldwood Contact Cement
Weldwood Contact Cement is a versatile adhesive that creates a strong, durable bond between two surfaces. To use it, apply a thin, even coat to both surfaces, allow it to dry until it’s no longer tacky, then press the surfaces together firmly.
This method ensures a secure and long-lasting bond.
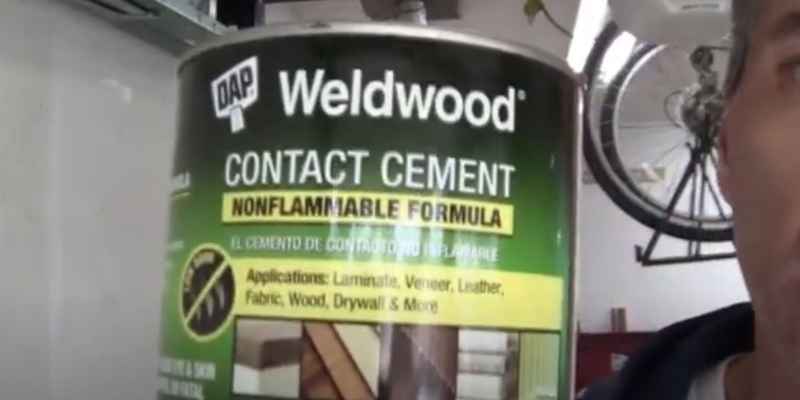
Weldwood Contact Cement is a versatile adhesive known for its strong bonding capabilities.
Essential Properties
- Fast-drying
- Water-resistant
- Durable
Common Applications
- Woodworking projects
- Laminate surfaces
- Leatherwork
Safety First: Preparing Your Workspace
Before using Weldwood Contact Cement, it’s important to prepare your workspace for safety. Clear the area of any flammable materials, wear protective gear, and ensure proper ventilation. Following these steps can prevent accidents and ensure a successful project.
When it comes to using Weldwood Contact Cement, prioritizing safety is crucial. Preparing your workspace properly ensures a safe and efficient application process. In this section, we will discuss two key aspects of workspace preparation: adequate ventilation and personal protective equipment.
Adequate Ventilation
Proper ventilation is essential when working with Weldwood Contact Cement. This adhesive contains solvents that can release harmful fumes, so it’s important to work in a well-ventilated area. Here are a few tips to ensure adequate ventilation:
– Open windows and doors: Increase the airflow by opening windows and doors to allow fresh air to circulate.
– Use fans or exhaust systems: If natural ventilation is insufficient, consider using fans or exhaust systems to improve air circulation. This helps to reduce the concentration of fumes.
– Avoid confined spaces: When using contact cement, avoid working in enclosed spaces that lack proper ventilation. Instead, choose a location with sufficient air exchange.
Personal Protective Equipment
Wearing the appropriate personal protective equipment (PPE) is vital to ensure your safety while using Weldwood Contact Cement. Here are the essential PPE items to consider:
– Eye protection: Protect your eyes from potential splashes or fumes by wearing safety goggles or a face shield.
– Respiratory protection: To prevent inhalation of harmful fumes, use a respirator mask with organic vapor cartridges. This will help filter out the solvent vapors.
– Gloves: Wear chemical-resistant gloves, such as nitrile or neoprene gloves, to protect your hands from direct contact with the adhesive.
– Protective clothing: Consider wearing long-sleeved shirts and pants to minimize skin exposure. Avoid wearing loose-fitting clothing that may come in contact with the adhesive.
Remember, safety should always be your top priority when using Weldwood Contact Cement. By ensuring adequate ventilation and wearing the appropriate personal protective equipment, you can create a safer and more productive workspace. Stay tuned for the next section, where we will discuss the proper application technique for Weldwood Contact Cement.
Materials And Tools Required
When it comes to bonding surfaces together, Weldwood contact cement is a reliable and popular choice. It’s commonly used in woodworking, construction, automotive, and other industries. However, using contact cement requires some preparation and attention to detail. In this guide, we’ll show you how to use Weldwood contact cement effectively. Let’s start with the materials and tools required.
List Of Necessary Items
Before you start using Weldwood contact cement, you’ll need to gather the following items:
- Weldwood contact cement
- Clean rags or towels
- Paintbrush or roller
- Masking tape or painter’s tape
- Measuring cup or scale (optional)
- Scissors or utility knife (optional)
Make sure you have all these items ready before you begin. Having everything within reach will make the process smoother and more efficient.
Selecting The Right Brush Or Roller
The type of brush or roller you use can affect the quality of your bond. Here are some tips on selecting the right brush or roller:
- For small projects or detailed work, use a small paintbrush with natural bristles. This will allow you to apply the cement precisely and evenly.
- For larger surfaces, use a foam or synthetic roller. This will help you cover the surface faster and more evenly.
- Make sure your brush or roller is clean and dry before using it. Any dirt or moisture can affect the bond.
By selecting the right brush or roller, you can ensure that the contact cement is applied correctly and the bond is strong.
Surface Preparation: The Key To A Strong Bond
Surface preparation is crucial when it comes to achieving a strong bond with Weldwood contact cement. Properly preparing the surface ensures that the adhesive forms a durable and reliable connection, providing the best results for your project.
Cleaning And Drying
Thoroughly clean the surfaces that will be bonded using a rag dampened with a suitable solvent. Allow the solvent to completely evaporate before applying the contact cement. This ensures the removal of any contaminants that could hinder the bonding process.
Sanding For Better Adhesion
Lightly sanding the surfaces to be bonded can help promote adhesion by creating a slightly rough texture. This provides the contact cement with a better surface to grip, resulting in a stronger and more reliable bond.
Mixing Weldwood Contact Cement Properly
When it comes to working with Weldwood contact cement, achieving the right consistency is crucial for a successful application. Mixing Weldwood contact cement properly ensures a strong and durable bond between surfaces. Here, we’ll delve into the essential steps for achieving the ideal mixture, providing you with the know-how to tackle your next bonding project with confidence.
Stirring Vs. Shaking
Stirring the Weldwood contact cement is recommended to ensure uniform distribution of the adhesive components. Avoid shaking the container vigorously, as this may introduce air bubbles and affect the consistency of the cement.
Checking For The Right Consistency
After stirring, it’s important to check for the right consistency. The cement should have a smooth, creamy texture, resembling that of mayonnaise. If it’s too thick, gradually add small amounts of solvent and continue stirring until the desired consistency is achieved.
Applying The Cement: Techniques For Even Spreading
When it comes to using Weldwood Contact Cement, applying it evenly is crucial for a successful and professional-looking result. In this section, we will explore two popular techniques for applying the cement: the brush method and the roller method. We will also discuss common mistakes to avoid and how to fix them, ensuring a smooth application process.
Brush Method
The brush method is a common technique used to apply contact cement. It is best suited for smaller projects or areas that require more precision. Here’s how you can use the brush method effectively:
- Start by ensuring that the surfaces you plan to bond are clean, dry, and free from any dust or debris.
- Using a clean brush, dip it into the Weldwood Contact Cement. Make sure to load the brush with an adequate amount of cement.
- Apply a thin, even coat of cement to both surfaces that you want to bond. It’s important to spread the cement evenly to ensure a strong bond.
- Allow the cement to dry for the recommended time mentioned on the product label. This drying time may vary depending on the temperature and humidity of your environment.
- Once the cement is dry to the touch, carefully align the two surfaces and press them firmly together. Apply even pressure to ensure a strong bond.
- After bonding the surfaces, use a roller or a block of wood to apply additional pressure, ensuring a secure and even adhesion.
Roller Method
The roller method is suitable for larger surfaces or projects that require a quicker application. This technique allows for faster coverage and can help achieve a more consistent spread of the contact cement. Here’s how you can apply the cement using the roller method:
- Prepare the surfaces you plan to bond by cleaning them thoroughly and ensuring they are dry and free from any debris.
- Pour an appropriate amount of Weldwood Contact Cement onto a clean paint tray or container.
- Dip a foam roller into the cement, making sure it is evenly coated but not overloaded.
- Starting from one end of the surface, roll the foam roller in a back-and-forth motion to spread the cement evenly. Keep a consistent pressure and avoid applying too much cement in one area.
- Allow the cement to dry for the recommended time mentioned on the product label.
- Once the cement is dry to the touch, carefully align the surfaces and press them firmly together, ensuring a strong bond.
- Apply additional pressure using a roller or a block of wood to secure the bond and ensure even adhesion.
Avoiding And Fixing Common Mistakes
While using Weldwood Contact Cement, it’s important to be aware of common mistakes that can occur during the application process. Here are a few tips to help you avoid and fix these mistakes:
- Avoid overloading: Apply the cement in thin, even coats to prevent excess buildup and potential bonding issues.
- Check for bubbles: After applying the cement, inspect the surface for any bubbles. If bubbles are present, use a needle or a small pin to gently puncture and release the trapped air.
- Fixing uneven spread: If you notice an uneven spread of the cement, gently lift the bonded surfaces apart and reapply a thin, even coat of cement. Allow it to dry before bonding them again.
- Removing excess cement: If you accidentally apply too much cement, use a clean cloth or sponge to wipe away the excess before it dries. This will help prevent unwanted buildup.
By following these techniques for even spreading and keeping these common mistakes in mind, you can achieve a successful bond when using Weldwood Contact Cement. Remember to always read and follow the instructions provided by the manufacturer for the best results.
The Bonding Process: Pressing Surfaces Together
In the bonding process, Weldwood Contact Cement is a reliable solution for pressing surfaces together. This versatile adhesive ensures a strong and durable bond, making it easy to use for various projects. Trust Weldwood Contact Cement for effective surface bonding.
Alignment And Adjustment
Before pressing surfaces together, ensure proper alignment and adjustment.
Applying Pressure Evenly
Apply pressure evenly across the surfaces for a strong bond.
Curing Time: Maximizing The Strength Of The Bond
To maximize the strength of the bond, ensure proper curing time when using Weldwood Contact Cement. Allow adequate time for the adhesive to set and bond effectively, enhancing the durability of your project. Following recommended curing guidelines will optimize the adhesive’s performance and ensure a strong, lasting bond.
Recommended Waiting Period
When using Weldwood Contact Cement, follow the recommended waiting period to enhance bond strength.
Factors Affecting Curing Time
Various factors influence the curing time of Weldwood Contact Cement:
- Ambient temperature
- Humidity levels
- Thickness of adhesive layer
- Surface porosity
To optimize the bond strength when using Weldwood Contact Cement, it is crucial to adhere to the recommended waiting period and consider the factors affecting the curing time. Maintaining an optimal environment during the curing process ensures a strong and lasting bond.
Recommended Waiting Period
– Allow 15-20 minutes for the adhesive to set before joining the surfaces.
– Wait 72 hours for the bond to reach full strength.
Factors Affecting Curing Time
– Ambient temperature: Higher temperatures accelerate curing.
– Humidity levels: Lower humidity speeds up the process.
– Thickness of adhesive layer: Thicker layers require more time to cure.
– Surface porosity: Porous surfaces may absorb the adhesive, affecting curing time.
Finishing Touches And Cleanup
To achieve a polished look after using Weldwood Contact Cement, finishing touches and cleanup are crucial. Use a clean cloth and acetone to remove any excess cement, and allow time for it to dry completely before handling the bonded surfaces.
Trimming Excess
Use a sharp utility knife to trim excess contact cement carefully.
Cleaning Tools And Surfaces
Wipe tools with acetone to clean surfaces effectively.
Troubleshooting Common Issues
To troubleshoot common issues when using Weldwood Contact Cement, start by ensuring the surfaces are clean and dry. Apply a thin, even coat to both surfaces, and allow it to dry before joining them. If you encounter any sticking problems, apply pressure and use a roller to ensure a secure bond.
Weak Bonds And How To Strengthen Them
If you notice weak bonds, reapply cement and ensure surfaces are clean.
Use more cement for better adhesion and press firmly for a secure bond.
Dealing With Bubbles And Wrinkles
To prevent bubbles, apply cement evenly and avoid excessive spreading.
Smooth out wrinkles by repositioning the materials before cement sets.

Maintenance And Repairs
Learn how to effectively use Weldwood Contact Cement for maintenance and repairs. This versatile adhesive provides strong bonding for various materials, making it ideal for a wide range of projects. Discover the proper techniques and tips to achieve professional results.
Regular maintenance and timely repairs are essential for ensuring the longevity and effectiveness of any adhesive, including Weldwood Contact Cement. By properly inspecting the bond regularly and addressing any damaged areas promptly, you can keep your projects in excellent condition. In this section, we will discuss two crucial aspects of maintaining and repairing your projects: inspecting the bond regularly and repairing damaged areas.
Inspecting The Bond Regularly
Regularly inspecting the bond created by Weldwood Contact Cement is crucial to identify any potential issues early on. By conducting routine inspections, you can catch any signs of weakening or damage and take appropriate action. Here are a few steps to follow when inspecting the bond:
- Check the bond for any visible signs of wear or damage, such as cracks, peeling, or separation.
- Ensure that the bond is still secure and holding the materials firmly in place.
- Look for any areas where the bond may have deteriorated due to external factors like heat or moisture.
- If necessary, test the bond’s strength by applying gentle pressure or pulling on the materials.
- Inspect the bond from different angles and lighting conditions to ensure a thorough examination.
By inspecting the bond regularly, you can catch any potential issues before they worsen and take appropriate action to maintain the integrity of your project.
Repairing Damaged Areas
In the event that you notice any damage or weakening of the bond, it is crucial to address it promptly to prevent further deterioration. Here are some steps to follow when repairing damaged areas:
- Clean the damaged area by removing any debris or loose particles.
- If necessary, lightly sand the area to create a smooth surface for the repair.
- Apply a thin layer of Weldwood Contact Cement to both the damaged area and the corresponding surface of the material.
- Allow the cement to dry for the recommended amount of time.
- Press the materials together firmly, ensuring a strong bond.
- Apply pressure to the repaired area for the recommended duration to ensure proper adhesion.
- Allow the repaired area to cure fully before subjecting it to any stress or strain.
By following these steps, you can effectively repair any damaged areas and restore the bond created by Weldwood Contact Cement. Prompt repairs will help maintain the integrity of your project and ensure its longevity.
Remember, regular inspections and timely repairs are key to maintaining the effectiveness of Weldwood Contact Cement. By investing a little time and effort into maintenance and repairs, you can enjoy the benefits of a strong and durable bond in all your projects.
Conclusion: Mastering The Use Of Weldwood Contact Cement
Recap Of Key Tips
Before you start using Weldwood Contact Cement, ensure the surfaces are clean and free of any dust or debris. Apply the adhesive to both surfaces, allow it to dry, and then carefully align and press the surfaces together. Remember to work in a well-ventilated area and use appropriate safety gear.
Further Learning And Practice
As with any skill, mastering the use of Weldwood Contact Cement comes with practice. Experiment with different materials and surface types to become more proficient. Additionally, consider exploring online tutorials and community forums to learn from the experiences of others.
Frequently Asked Questions
How Do I Apply Weldwood Contact Cement?
To apply Weldwood Contact Cement, first make sure the surfaces to be bonded are clean and dry. Apply a thin, even coat of cement to both surfaces and let it dry for 15-20 minutes. Then, carefully align the surfaces and press them firmly together.
Can Weldwood Contact Cement Be Used On Plastic?
Weldwood Contact Cement is not recommended for use on plastic, as it may melt or warp certain types of plastic. It is best used on wood, metal, leather, and other porous materials.
How Long Does It Take For Weldwood Contact Cement To Dry?
Weldwood Contact Cement typically dries within 15-20 minutes after application. However, the drying time may vary depending on the temperature and humidity of the environment.
How Do I Remove Weldwood Contact Cement?
To remove Weldwood Contact Cement, use a solvent such as acetone or mineral spirits. Apply the solvent to the cement and let it sit for a few minutes. Then, use a scraper or brush to remove the softened cement. Repeat if necessary.
Conclusion
Weldwood Contact Cement is a versatile adhesive for various projects. Its strong bond and easy application make it ideal for woodworking, laminating, and other applications. By following the recommended usage and safety guidelines, you can achieve professional results. Explore the possibilities of Weldwood Contact Cement for your next project!