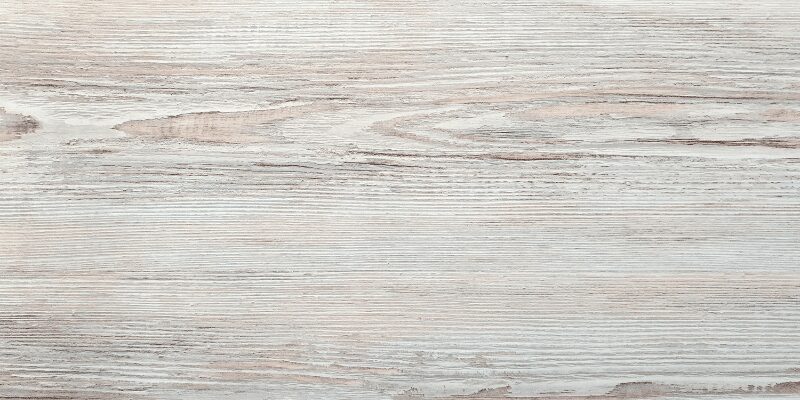
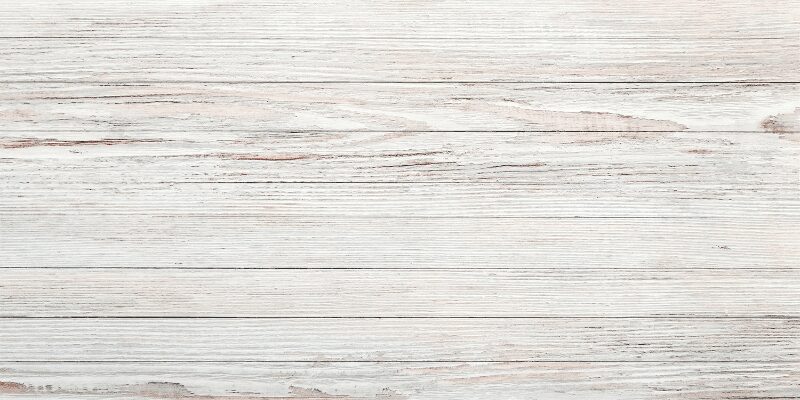
How To Whitewash Wood? [A Step-by-Step Guide]
For wood whitewashing, sand the wood until it is smooth. Mix equal parts water and white latex paint in a container. Apply the mixture using a brush, roller, or rag, following the wood grain. Allow it to dry for a few hours. Lastly, seal with a clear coat or wax for added protection.
How to Whitewash Barn Wood: A Step-by-Step Guide
Whitewashing barn wood gives it a rustic, weathered look. To achieve the best look, you must follow the right method and steps. Here’s a step-by-step guide to help you go through the process:
Step 1: Gather Supplies:
- Barn wood
- Sandpaper (medium-grit)
- Tack cloth
- White latex paint
- Water
- Paintbrush, roller, or rag
- Plastic sheet or drop cloth
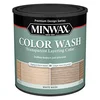
Minwax White Wash Pickling Stain
A ready-made whitewash pickling stain, so you can skip mixing your own water-and-paint ratio and get a consistent result.
Best for: a translucent, grain-showing whitewash finish without mixing your own
Why we picked it: formulated specifically for pickling/whitewashing rather than a general latex paint
Main drawback: less control over exact opacity than mixing your own paint-and-water ratio
Check Price on Amazon


As an Amazon Associate we earn from qualifying purchases.
Step 2: Prepare the Wood:
- Sand the wood to remove dirt, debris, and rough edges.
- Wipe off dust with a tack cloth.
Step 3: Mix the Whitewash:
- In a container, mix white latex paint and water (typically a 1:1 ratio).
Step 4: Test the Mixture:
- Apply a small amount on a spare piece of wood to check the color and opacity.
Step 5: Apply the Whitewash:
- Brush, roll, or rag on the whitewash mixture, following the wood’s grain.
- Let it sit for a minute.
Step 6: Wipe Off Excess:
- Use a clean rag to wipe away excess whitewash, revealing the wood grain.
Step 7: Repeat if Desired:
- Apply additional coats for more coverage, allowing each coat to dry in between.
Step 8: Dry and Seal:
- Allow the wood to dry completely.
- Optionally, seal with a clear coat or wax for protection.

Tips to Choose White Wash Wood Stain: For Color Effect
A white-wash wood stain adds color to the wood, often done to complement the interior and decor of the space. However, choosing a white-wash wood stain involves considering factors like style, wood type, and application. Here are tips to help:
- Wood Type: Select a stain suitable for your wood type, as some stains work better on hardwood, while others are ideal for softwood or engineered wood.
- Transparency: Determine the level of opacity you want. Some stains offer a more translucent look, allowing the wood’s natural grain to show through, while others provide more coverage.
- Base Color: Consider whether you want a warm or cool undertone. Whitewash stains can have various undertones like gray, blue, or beige. Pick one that complements your decor.
- Sample Testing: Always test the stain on a small, inconspicuous area of your wood to see how it will look once applied.
- Compatibility: Ensure the stain is compatible with your chosen finish or sealer for a consistent final appearance.
- Application Method: Different stains work better with certain application methods (brushing, wiping, spraying). Check the stain’s instructions for recommended techniques.
- Environment: Consider the location and conditions where the wood will be used. Some stains offer better durability and UV protection for outdoor applications.
- Brand and Reviews: Research brands and read product reviews to ensure you’re getting a high-quality, reliable stain.
Pros and Cons of Painting Wood White Wash: Is It A Good Idea?
Many people consider painting a white-washed wooden piece to add charm and color to it. Unlike staining, painting gives you the liberty to add any color you want. But before you decide, you must learn the pros and cons to decide wisely. Here is a table to guide you.
| Pros of White Washing Wood | Cons of White Washing Wood |
| 1. Enhances Wood’s Natural Beauty | 1. Less Durable than Solid Paint |
| 2. Creates a Rustic, Aged Look | 2. May Require Multiple Coats |
| 3. Allows Wood Grain to Show Through | 3. Limited Color Options |
| 4. Versatile for Different Wood Types | 4. Can Be Challenging for Beginners |
| 5. Easier to Touch Up and Refinish | 5. Not Ideal for High-Traffic Areas |
| 6. Provides a Soft, Subtle Finish | 6. May Need Additional Sealing |
| 7. Can Camouflage Imperfections | 7. May Not Suit All Decor Styles |
| 8. Environmentally Friendly Option | 8. Requires Proper Surface Preparation |
| 9. Customizable Opacity Levels | 9. Limited UV and Stain Resistance |
Benefits of White-Washed Wood Nightstand: Why Consider It?
Thinking of installing a white-washed wooden nightstand in your bedroom? Quite an appealing idea! For a chic and antique look, this option is favorable. To be more precise, here are some benefits you get if you have a white-washed nightstand.
- Aesthetic Appeal: The subtle white wash finish softens the wood’s appearance while preserving its natural grain. This creates a sense of warmth and tranquility, making your bedroom a cozy haven.
- Versatility: White-washed nightstands effortlessly blend with various color schemes and decor styles. They serve as a neutral canvas, allowing you to play with different accents and linens.
- Texture and Character: The white-washed finish enhances the texture of the wood, adding character and depth to the piece. It’s an ideal choice for those who appreciate the beauty of imperfections.
- Easy Maintenance: Unlike solid white paint, white-washed wood conceals minor scuffs and wear, making it easier to maintain the nightstand’s pristine appearance.
- Timeless Elegance: White-washed wood possesses a classic and enduring charm that won’t go out of style. It complements both vintage and contemporary design trends.
10 Maintenance Tips for White-Washed Wooden Furniture: For Durability and Aesthetics
Maintaining white-washed wooden furniture is essential to preserve its appearance and durability. Here are some maintenance tips from my expertise that you can follow.
- Regular Dusting: Dust your furniture with a soft, lint-free cloth or a microfiber duster to prevent the buildup of dirt and debris.
- Gentle Cleaning: Use a mild detergent diluted in water to clean stains and dirt. Test the solution in an inconspicuous area first to ensure it doesn’t affect the finish.
- Avoid Harsh Chemicals: Avoid abrasive or chemical cleaning agents as they can damage the white-washed finish.
- Blot Spills Immediately: If a spill occurs, blot it gently with a clean, dry cloth to prevent the liquid from penetrating the wood.
- Wax or Sealant: Consider applying a clear wax or sealant to protect the finish and prevent stains. Follow the product instructions for the best results.
- Touch-Up as Needed: Keep a touch-up kit that matches the white-washed finish to address any minor scratches or blemishes.
- Protect from Sunlight: Position your furniture away from direct sunlight to prevent fading or discoloration.
- Use Coasters and Placemats: Place coasters or placemats under drinks, hot dishes, or sharp objects to prevent damage to the surface.
- Regular Inspection: Periodically inspect your furniture for any signs of wear, loose joints, or damage. Address any issues promptly to prevent further deterioration.
- Store Carefully: If you need to store the furniture, do so in a cool, dry place, and cover it to protect it from dust and moisture.
FAQ
Can You Stain White-Washed Wood?
Staining white-washed wood is challenging because the whitewash creates a sealed surface. To stain it, you’ll likely need to remove the whitewash first, then apply the desired stain.
Can Water Paint Be Used To White-Wash Wood?
Yes, water-based paint can be used to white-wash wood. Mix it with water for a translucent finish that retains the wood’s natural grain. It’s an eco-friendly and versatile option for achieving a rustic, aged look on wooden surfaces.
Can You Whitewash the Wood Paneling?
Yes, you can whitewash wood paneling to create a lighter, rustic look. This technique involves applying a mixture of water and white paint to the paneling, allowing the wood grain to show through for a stylish and refreshed appearance.
Conclusion
Whitewashing wood is a simple yet effective way to enhance the natural beauty of wood while adding a touch of rustic charm to any space. By following the steps on how to whitewash wood, you can achieve a stylish and timeless finish that complements a variety of decor styles.
Follow the method above and transform the look of your wooden pieces to an outstanding whitewashed appearance!