Painting Plywood Floors: 7 Pattern Ideas and Paint Picks
Painting plywood floors costs $0.50 to $1.50 per square foot — a fraction of hardwood, LVP, or laminate — and a properly sealed painted floor can last 10 or more years with minimal upkeep. Skip floor-grade paint and use regular wall paint instead, and the finish peels within months. This guide covers 7 specific pattern and color ideas, the best paint picks by room type, how to hide seams, and what sealant holds up to real foot traffic.
Quick Answer
Plywood floors take paint well when primed and sealed correctly. Use a porch-and-floor enamel — not standard wall paint — apply two coats, then finish with two coats of water-based polyurethane. Cost runs $0.50 to $1.50 per square foot, and a sealed floor can last 10 or more years in low- to moderate-traffic rooms.
7 Ideas for Painting Plywood Floors
Best Plywood Floor Paint Pick
KILZ Porch & Patio Latex Floor Paint, 1 Gallon
A trusted, widely available floor enamel that bonds well to primed plywood and resists scuffing, moisture, and cleaning products. Available in multiple colors and dries in under 2 hours.
- Best for: All painted plywood floor projects, indoor and covered outdoor use
- Why we picked it: Proven durability with easy water-based cleanup; available at most hardware stores
- Main drawback: Slate Gray and limited palette; tinting custom colors is not always available in-store
Compare more plywood floor paint options
 Option 1 EVOLVE Porch & Floor Paint – 1 Gallon
|
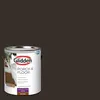 Option 2 Glidden Grab-N-Go Porch and Floor Paint, 1 Gallon
|
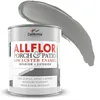 Option 3 California Paints Allflor Porch Floor Enamel, 1 Quart
|
As an Amazon Associate we earn from qualifying purchases.
The pattern you choose matters as much as the paint. Some designs naturally hide the seams between plywood sheets — a real advantage over patterns that run parallel to seams and make them stand out. Here are seven proven options, from beginner-friendly to more involved.
1. Checkerboard Pattern
The checkerboard is the most popular choice for painted plywood floors because it is forgiving to lay out, hides seams diagonally, and suits kitchens, mudrooms, and laundry rooms. Use two contrasting colors — classic black and white, navy and cream, or sage and off-white. Standard square size: 12 inches per square for most rooms; go up to 18 inches in larger spaces. Apply the base color to the entire floor first, let it cure fully, then tape and paint the second color.
2. Diamond (Rotated Checkerboard)
Set the same checkerboard grid at 45 degrees and you get a diamond pattern that reads more formal and does an even better job of crossing over sheet seams. It requires careful chalk-line snapping from the room’s center point, but the result looks like professionally installed tile for a fraction of the cost. Works especially well in entryways and hallways where the diagonal draws the eye down the length of the space.
3. Stenciled All-Over Pattern
A repeating stencil across the whole floor — Moroccan tile, geometric hex, or damask — is the easiest way to completely cover plywood seams and imperfections. Paint the floor one solid color first, let it fully dry, then work the stencil across in rows using a dense foam roller. Tape the stencil lightly at each position to prevent shifting. Once done, apply at least two coats of water-based polyurethane so the stencil ink does not lift.
4. Stenciled Border with Solid Center
Paint the main floor area a solid color and use a decorative border stencil around the perimeter. This adds a finished, room-scale look without the full-room stenciling effort. It works well in bedrooms and reading rooms where you want visual interest without a bold pattern underfoot in the middle of the space. Keep the border color within two shades of the main floor color for a cohesive look, or contrast it sharply for a more graphic effect.
5. Faux Wood Plank Look
Use painter’s tape to lay out plank-width strips (typically 4 to 6 inches wide) across the floor, then paint alternating strips in two close wood-tone shades. While the paint is still wet, drag a dry brush or wood-graining rocker tool through it to add subtle texture. The result mimics painted hardwood without expensive flooring. This technique works best when the plywood surface is well-sanded and primed, since any roughness shows through the multi-tone contrast.
6. Ombre Gradient
An ombre blends one color into another — or from full color to white — across the floor’s length or width. Start with the darker shade at one wall and gradually blend toward the lighter shade at the opposite wall, mixing the two colors wet into wet at the transition zone. A sea-foam to white gradient works well in bathrooms; gray to charcoal suits modern bedrooms. Ombre floors are best suited to rooms with simple furniture that lets the floor be the focal point.
7. Solid Color with Painted “Rug”
Paint the floor a solid neutral — pale gray, warm white, or light taupe — then tape out a rectangle in the center that mimics an area rug. Fill the rectangle with a different color, pattern, or border design. This is especially effective in rental situations or rooms where you eventually plan to add a real rug: the painted version holds up well in the meantime and costs almost nothing. Adding a simple geometric border inside the “rug” rectangle brings in visual depth without complex stenciling.
Best Paint for Plywood Floors
Regular wall paint will peel from plywood floors within months under foot traffic. You need a paint formulated for floors — specifically, porch-and-floor enamel or floor-grade latex. These contain harder resins that hold up to abrasion, moisture, and daily cleaning. Oil-based formulas last longest but take 24 hours between coats; water-based formulas dry in 1 to 2 hours and clean up with soap and water.
For most DIY painted plywood floors, water-based porch-and-floor enamel is the right call: faster dry time, low fumes, and modern formulas are nearly as durable as oil-based. Apply at least two coats, sanding lightly between coats with 220-grit sandpaper for the best adhesion.
How to Prepare Plywood Floors for Painting
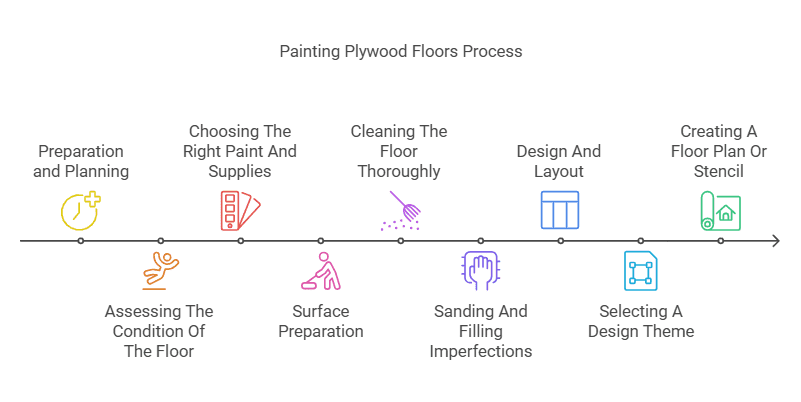
Surface prep is the difference between a painted plywood floor that lasts a decade and one that peels inside a year. Plywood absorbs primer and paint quickly, so thin application over a poorly prepped surface leads to uneven color and adhesion failure. Follow these six steps in order before touching a brush or roller to the floor.
- Assess the floor condition: Pull up carpet tack strips with a pry bar and set them aside. Inspect every sheet for soft spots, rot, or delamination. Replace any damaged sheet before proceeding — painting over structural damage does not fix it.
- Clean the floor thoroughly: Sweep and vacuum twice to remove all sawdust, grit, and debris. Wipe down with a damp cloth and a mild detergent. Allow the floor to dry completely — at least 24 hours — before moving to sanding.
- Sand and fill gaps: Sand rough areas with 80-grit sandpaper and follow with 120-grit across the full surface for uniform adhesion. Fill any gaps, cracks, or nail holes with wood filler. Let the filler cure per the manufacturer’s time, then sand flush.
- Apply a floor primer: Brush or roll an oil-based primer across the entire surface. Oil-based primers seal plywood grain and prevent nail-head rust bleed-through — use them even if you plan to finish with a water-based paint. Let the primer dry fully (usually 4 to 6 hours) before painting.
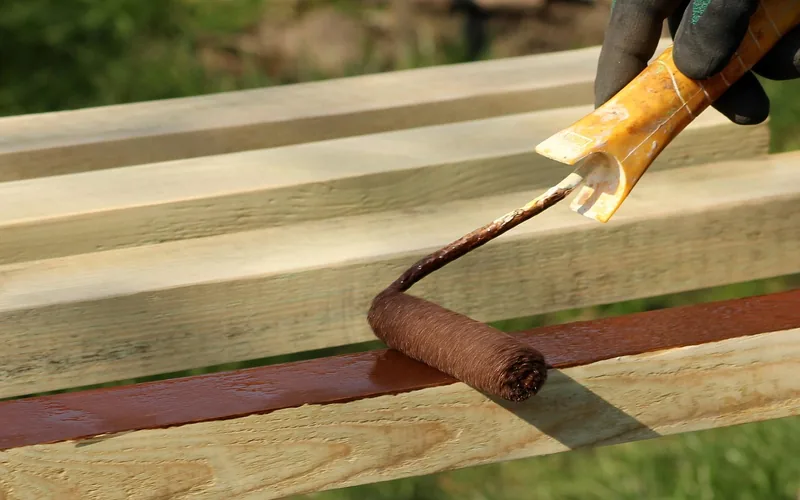
- Paint with 2 coats of floor-grade paint: Apply the first coat with a short-nap roller in W-shaped strokes to avoid lap marks. Let it dry 2 hours minimum. Lightly sand with 220-grit, remove dust, and apply the second coat. Let the second coat cure for 24 hours before light foot traffic.
- Seal with 2 coats of polyurethane: Apply two coats of water-based polyurethane as the topcoat. This is the most critical durability step — the paint alone is not wear-resistant enough for floor use without a sealer. Let the sealer cure for 48 hours before returning furniture to the room.
What Does It Cost to Paint Plywood Floors?
Painting a plywood subfloor is one of the most budget-friendly flooring solutions available. The table below compares the cost of a painted plywood floor against common flooring alternatives for a 200-square-foot room.
| Flooring Option | Cost per Sq Ft | 200 Sq Ft Estimate |
|---|---|---|
| Painted plywood floor | $0.50 – $1.50 | $100 – $300 |
| Laminate flooring | $2.00 – $4.00 | $400 – $800 |
| Luxury vinyl plank (LVP) | $3.00 – $7.00 | $600 – $1,400 |
| Solid hardwood | $8.00 – $15.00 | $1,600 – $3,000 |
Total project cost typically includes primer ($15-25), paint ($35-45 per gallon), polyurethane sealer ($25-35), and basic supplies (tape, rollers, sandpaper — $20-30). A 200-square-foot room uses about one gallon of primer, one to two gallons of paint, and one gallon of sealer. For pattern work (stencils, checkerboard), add $10-30 for a stencil or extra painter’s tape.
How to Hide Plywood Seams When Painting
The gaps between plywood sheets are the biggest visual challenge. There are two approaches: fill them, or design around them.
Filling seams: Use a flexible floor-patching compound (not rigid wood filler, which cracks as the floor moves seasonally). Apply it with a putty knife, feather the edges flat, sand smooth, and re-prime before painting. Even with careful filling, seams can reappear as the plywood expands and contracts with humidity changes.
Designing around seams: The easier and more durable option. A checkerboard, diamond, or all-over stencil pattern draws the eye across the floor in a way that makes seams all but invisible. The lines of a geometric pattern cross the seam gaps at angles rather than running along them — the diagonal breaks up the seam line. This approach has been confirmed to hold up for 10-plus years without the seams re-emerging as a visible issue.
How to Seal Painted Plywood Floors
Sealing is not optional. Even the best floor paint is not hard enough on its own to survive daily foot traffic without a topcoat. Two coats of sealer applied over fully cured paint adds a hard, protective layer that resists scratches, scuffing, and moisture. For most rooms, water-based polyurethane is the right choice: it dries clear without yellowing, cleans up with water, and can be reapplied easily when it shows wear.
Sealant Types for Painted Plywood Floors
Water-based polyurethane dries in 2 hours, allows recoating the same day, and does not amber over light colors. It is the best all-around option for painted floors in bedrooms, living rooms, and hallways. Apply with a synthetic-bristle brush or a short-nap foam roller.
Oil-based polyurethane is more durable but takes 8 to 10 hours between coats and adds a warm amber tint over time. Use it in very high-traffic areas like mudrooms and rental kitchens where maximum hardness matters more than color fidelity.
Epoxy coating creates the hardest finish available for a plywood floor — it is what you see in commercial garages and workshops. It requires meticulous surface prep (the plywood must be very smooth and fully sealed before epoxy) and a two-part mixing process, but it can last 15-plus years in high-traffic areas.
Reapply sealer every 2 to 3 years in high-traffic zones, or whenever the finish looks dull or scratched. A fresh coat of polyurethane takes about one hour to apply and revives the whole floor without repainting.
How Long Do Painted Plywood Floors Last?
A properly primed, painted, and sealed plywood floor can last 10 to 15 years in low- to moderate-traffic areas before needing a full repaint. In higher-traffic areas — kitchens, mudrooms, entry halls — expect to touch up or reapply sealer every 2 to 3 years and repaint every 5 to 8 years.
“We painted our farmhouse plywood subfloors with Sherwin-Williams Porch and Floor enamel in Sandbar and they lasted 11 years with no full repaint — just one sealer reapplication in high-traffic areas around year five.”
The biggest enemies of a painted plywood floor are standing water, steam mops, and dragging furniture without felt pads. Keep water off the floor (wipe up spills immediately), use a damp mop only (never steam), and protect heavy furniture legs. With those three habits, a painted plywood floor can outlast laminate in comparable conditions.
| Traffic Level | Expected Lifespan | Maintenance Schedule |
|---|---|---|
| Low (bedroom, closet) | 12 – 15+ years | Reapply sealer every 3 years |
| Moderate (living room, hallway) | 8 – 12 years | Reapply sealer every 2 years |
| High (kitchen, mudroom) | 5 – 8 years | Touch-up annually, full sealer every 2 years |
Frequently Asked Questions About Painting Plywood Floors
Can you paint plywood floors?
Yes. Plywood subfloors take paint well when properly prepped and sealed. The key requirements are: a sound, non-soft floor surface, an oil-based primer to seal the grain, a floor-grade paint rated for foot traffic, and a polyurethane topcoat. Skip any of these steps and the finish will fail within months rather than lasting years.
What is the best paint for plywood floors?
Porch-and-floor enamel is the correct paint type — not wall paint, and not standard latex. Top picks include KILZ Porch and Patio Latex Floor Paint, Sherwin-Williams Porch and Floor Enamel (SW 7547 Sandbar is a popular color choice), and EVOLVE Porch and Floor Paint. All are formulated with harder resins that resist scuffing and moisture better than standard interior latex.
How do I hide plywood seams when painting?
The most effective approach is to design around seams with a pattern that crosses them diagonally — checkerboard, diamond, or an all-over stencil. Geometric patterns that run at 45 degrees to the seam lines make gaps nearly invisible. If you prefer a solid-color floor, fill seams with a flexible floor-patching compound, not rigid wood filler, and be prepared for seams to re-emerge slightly as the plywood moves with seasonal humidity changes.
How long do painted plywood floors last?
With proper prep and sealing, 10 to 15 years in low-traffic rooms and 5 to 8 years in high-traffic areas before a full repaint is needed. Applying a fresh coat of water-based polyurethane every 2 to 3 years significantly extends that lifespan. One documented farmhouse case logged 11 years of continuous use with no full repaint and only a single sealer refresh in the fifth year.
Can you mop painted plywood floors?
Yes, with a damp mop only. Never use a steam mop — the heat and moisture will lift the sealer and cause the paint to peel. Use a mop that is damp, not wet, with a gentle pH-neutral floor cleaner. Wipe up spills immediately. Avoid letting any standing water sit on a painted plywood floor, especially at seams where water can wick into the layers below the paint.
Conclusion
Painting plywood floors is one of the most cost-effective DIY flooring projects available. At $0.50 to $1.50 per square foot, a properly sealed painted plywood floor can last well over a decade and look genuinely finished — not like a stopgap. The pattern you choose does more than set the aesthetic: it can also hide seams, change the perceived size of a room, and make the whole project look intentional rather than improvised. Use floor-grade paint, prime with oil-based primer, and always seal with two coats of polyurethane. For more options on plywood surface finishing and how to seal painted wood for long-term durability, see the related guides.
Sponsored / affiliate links. As an Amazon Associate I earn from qualifying purchases. I may earn additional commission from eligible campaigns.