Interior Door Paneling: 6 Panel Styles + Real 2026 Costs
Interior door paneling means the raised or flat rectangles framed by a door’s stiles and rails, and you can get the look two ways: buy a panel door, or glue molding onto a flat one. Molding is the cheaper route when the slab is straight. This guide gives six layouts with panel sizes for a 30 x 80 inch door, molding footage, and a cost table for each route.
Interior Door Paneling Options: Add Molding or Replace the Door
|
Best Peel-and-Stick Door Panel Kit
|
As an Amazon Associate we earn from qualifying purchases.
There are only two real routes. Either you add applied molding to the flat door you already have, or you replace it with a door that has the panels built in. Applied molding fakes the panel look with trim frames, so the surface stays flat underneath. A built-in panel door has real recessed or raised panels sitting in a frame.
The molding route wins when the existing door is straight, sound and the right size. Fix any damage first: a hole needs the repair in our guide to fixing a hole in a door, and a damaged jamb is covered in the door frame wood filler repair. Replacement makes sense when the door is warped, or when you also want better sound blocking (see the core comparison below) and plan to buy a prehung interior door.
Stile, Rail and Panel: The Terms That Run the Layout
Every panel door follows the same frame. Stiles are the vertical pieces that run the length of the door, and rails are the horizontal pieces that run its width. The panel is the biggest part and gets no joinery: Woodworkers Journal explains it sits in grooves along the inside edges of the stiles and rails so it can float and move.
That is the reason real stiles and rails are narrow strips: wood moves much less along the grain than across it, so a wide solid slab would swell and split, while a narrow frame with a floating center stays stable. It also explains the design problem for applied molding. You are copying the look of a frame, so the border you leave around each panel should read like real stiles and rails, wide enough to look structural.
Six Panel Layouts With Sizes for a 30 x 80 Inch Door
Here is the information most guides skip: the actual size of each panel opening. The numbers below are our own design arithmetic, not a manufacturer standard. We assumed a 30 x 80 inch slab (measure yours) and borrowed the margins from the Pretty Handy Girl tutorial: 5 inches in from the top and both sides, 6 inches up from the bottom, and 5 inches between panels.
| Layout | Panels | Opening size (width x height) | Molding per door face | With 15% waste |
|---|---|---|---|---|
| 1-panel | 1 | 20 x 69 in | 14.8 ft | 17.1 ft |
| 2-panel (stacked) | 2 | 20 x 32 in | 17.3 ft | 19.9 ft |
| 3-panel (stacked) | 3 | 20 x 19.7 in | 19.8 ft | 22.8 ft |
| 4-panel (2 across, 2 down) | 4 | 7.5 x 32 in | 26.3 ft | 30.3 ft |
| 5-panel (horizontal stack) | 5 | 20 x 9.8 in | 24.8 ft | 28.6 ft |
| 6-panel (2 across, 3 down) | 6 | 7.5 x 19.7 in | 27.2 ft | 31.2 ft |
The formulas, so you can run your own door: panel width = (door width – 2 x side margin – gaps between columns) / columns, and panel height = (door height – top margin – bottom margin – gaps between rows) / rows. Molding length per panel is 2 x (width + height). The 15% waste figure is our allowance for miter offcuts, not a sourced number, and the footage is measured to the outer edge of each frame, so it rises if your molding is wide. Double everything if you panel both faces.

Two layout rules come out of the table. Tall, narrow openings such as the 7.5 x 19.7 inch panels on the 6-panel layout look busy on a narrow closet door, so drop to 4 or 2 panels there. And keep the same margins on every door in a hallway, or the doors read as different styles even when the panel count matches.
Style, Material and Cost: Which Route Fits Your Door
Prices below are what the sources reported or what is listed today; they move, so confirm before you buy.
| Route | Material | Reported cost | Tools | Best for |
|---|---|---|---|---|
| Peel-and-stick kit | Premade polystyrene frames, paintable | $29.99 for the kit above (3 frames, listed today) | Tape measure, level, paint | Rentals, closets, first-timers |
| Poplar molding, glued and nailed | Poplar nose-and-cove, 1 1/8 x 1 3/4 in | About $50 for the door, per This Old House | Miter saw, finish nailer, clamps | Crisp shadow lines, a lasting result |
| Flat trim or beadboard panels | Cut beadboard plus finish nails and construction glue | About $25 per door before paint, per Pretty Handy Girl | Saw, finish nailer, caulk gun | Cottage and shaker looks on a budget |
| New panel door | Molded skin or solid wood, hollow or solid core | Varies by core and wood; check current store pricing | Hinge and bore work, or buy prehung | Warped doors, better sound blocking |
For molding material, paint-grade poplar is what the This Old House project used, and MDF trim is the lower-cost alternative, but MDF swells if water reaches a cut edge, so seal the ends. Our MDF versus solid wood comparison covers that trade-off. The same logic applies to the raised panel door calculator if you ever build a true frame-and-panel door, and our solid wood door build shows the full joinery route.
Hollow-core versus solid-core: what matters for panels
A hollow-core door uses a honeycomb or similar light core under thin faces, and a solid-core door is filled edge to edge with a dense material. Masonite describes solid-core as having more material than its standard hollow-core doors, with sound and durability benefits. For applied molding this means a hollow-core slab holds nails only in its thin skin, so glue does most of the holding. A solid-core slab takes nails better, but weighs more on the hinges.
How to Add Molding Panels to a Flat Door
This is the process the tutorials above share, written as one sequence. It works with the door hanging, though taking it down makes painting easier.
- Repair and sand: fill chips with wood filler, sand smooth, and wipe off dust so the glue grips.
- Mark the layout: pencil your panel openings from the table above, and tape the molding on first to judge the look before committing.
- Cut the frames: miter each piece at 45 degrees and dry-fit every frame on a flat surface. Our guide to cutting molding corners covers tight miters.
- Glue and fasten: run wood or construction glue on the back of each piece, press it to your lines, and add finish nails every 2 to 3 inches, per the This Old House project. On hollow-core, angle the nails slightly and keep them short.
- Caulk and fill: paintable caulk in the seams and wood putty in the nail holes. Caulk stays flexible as the door swells and shrinks, and unfilled seams show as dark lines after painting.
- Prime and paint: latex primer over the whole door, then finish paint, and let it dry fully before the door swings.
Time and difficulty are modest. This Old House rated the project 1 out of 5 for difficulty and about four hours spread over two days, mostly paint drying time.
Painting and Finishing a Paneled Door
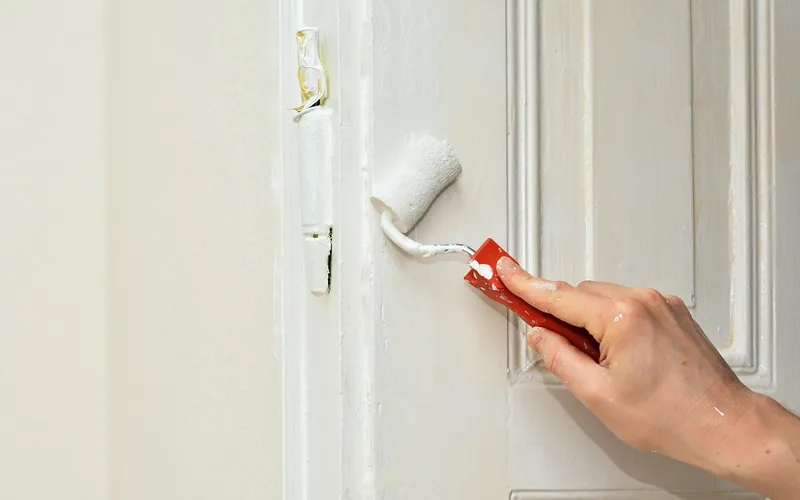
Paint the panels and inside edges of the frames first with a brush, then roll the flat stiles and rails, so the brush marks sit under the roller finish. A hard-wearing enamel is a better match for a door than wall paint, because hands, hinges and latches rub it every day. Pretty Handy Girl names Benjamin Moore Advance and Sherwin-Williams ProClassic for durability, which is her pick, not a test result of ours.
If you are paneling walls to match, our wainscoting calculator does the same layout arithmetic for wall frames, and cheap interior wall paneling from 4×8 sheets covers the sheet-goods route.
Safety Checks Before You Start
- Lead paint: sanding old paint in a house built before 1978 can release lead dust. The EPA renovation rule applies to paid work in those homes and generally does not cover homeowners working on their own home, but the dust is just as harmful, so test the paint before you sand.
- Nail gun: keep your free hand clear of the nose, disconnect the air or battery between jobs, and never fire into a door while someone holds the other side.
- Miter saw: clamp short molding pieces instead of holding them by hand near the blade, and wear eye and ear protection.
Frequently Asked Questions About Interior Door Paneling
How many panels does a standard interior door have?
There is no single standard. Door makers sell 1-panel, 2-panel, 3-panel, 5-panel and 6-panel styles, plus flat flush doors with no panels at all. The count is a style choice, so match it to the doors already in your house and the trim around them.
What are the stile, rail and panel on a door?
Stiles are the vertical frame pieces that run the full height of the door. Rails are the horizontal pieces between them. The panel is the center piece that sits in a groove along the inside edges of the stiles and rails, so it can move as wood expands and shrinks.
Is it cheaper to buy a panel door or add molding to a flat door?
Adding molding is usually cheaper if the existing door is straight and sound. Two published tutorials put the molding materials at about $25 and about $50 per door, before paint, while a peel-and-stick kit lists at $29.99 today. A new door adds the price of the slab, hinges and drilling.
Can you add panels to a hollow-core door?
Yes. Hollow-core doors only need surface-level molding, so the usual method is wood glue plus short finish nails driven at slight angles for hold. Stay at shallow depth and do not use long nails, because there is only a thin skin over the hollow center.
Pick the layout from the table, run the footage, and choose the route from the cost table. A flat but straight door plus a weekend of molding gets you a panel door for about the price of a kit, and that is the answer for most rooms.
Sponsored / affiliate links. As an Amazon Associate I earn from qualifying purchases. I may earn additional commission from eligible campaigns.